
Popular categories
Looking for a yarn?


Comments / Questions (49)
![]() Monica wrote:
Monica wrote:
Buongiorno, ho molte difficoltà a seguire il sistema con Ferri circolari, potreste spiegarlo con ferri dritti per favore. Grazie
31.05.2020 - 10:59DROPS Design answered:
Buongiorno Monica, purtroppo non ci è possibile ridisegnare il modello per la lavorazione in piano, ma può seguire i tutorial dedicati alla lavorazione in tondo o rivolgersi al suo rivenditore DROPS di fiducia per un'assistenza più personalizzata. Buon lavoro!
31.05.2020 - 11:06
![]() Gudrun Karlsson wrote:
Gudrun Karlsson wrote:
Hej igen! Nästa fråga. Ökningarna på ärmen med 2 maskor skall de göras före och efter de 4 maskorna eller sticka en öka en osv? Synd att det inte stod lite tydligare att raglanökningarna ingick i ökningarna på fram-och bakstycket. Då hade det varit tydligare. Mvh Gudrun Karlsson
12.05.2020 - 11:33DROPS Design answered:
Hej. Ökningarna till raglan gör du på sidorna av A.1 (A.1 är raglanlinjen och består av 6 m). Mvh DROPS Design
13.05.2020 - 09:22
![]() Gudrun Karlsson wrote:
Gudrun Karlsson wrote:
Min fråga gick inte att skicka som en fråga hur jag än försökte. Hoppas jag får snabbt svar angående raglanökningarna? Mvh Gudrun Karlsson
12.05.2020 - 07:59
![]() Gudrun Karlsson wrote:
Gudrun Karlsson wrote:
Hej! Jag tror att förstått det mesta, men hur ofta skall jag göra raglanökningarna? Enligt vad jag har räknat mig till, så blir det inte mer än 6 gånger om jag skall få ihop till 244 maskor, när alla ökningar är gjorda. Stämmer detta, vart 6:e varv, eller är jag helt ute och cyklar? Mönstret är fruktansvärt otydligt, tycker jag. Mvh Gudrun Karlsson
12.05.2020 - 07:57DROPS Design answered:
Hej Du börjar med 84 m innan raglan i storlek L. Sedan ökar du på fram och bakstycke på vartannat varv totalt 21 gånger och på ärmarna på vartannat varv 16 gånger och sedan på vart 4e varv 3 gånger. Kom ihåg att i storlek L börjar ökningarna till ärmar på första varvet, men på fram- och bakstycket stickas det 2 varv innan ökningarna börjar. 84+ (21x4)+(16x4)+(3x4)= 244 m. Mvh DROPS Design
12.05.2020 - 08:40
![]() Rozalia wrote:
Rozalia wrote:
A kötéspróba valószínüleg hibás. Kisebb tüvel kevesebb szem és sor nem lehet ugyanakkora, mint nagyobb tüvel több sor és szem. Mi a helyes kötéspróba?
29.02.2020 - 21:46DROPS Design answered:
Kedves Rozália! Köszönjük, hogy felhívta a figyelmünket a hibára, ami javításra került. Most már a helyes kötéspróbák szerepelnek a leírásban. Sikeres kézimunkázást kívánunk!
29.02.2020 - 22:43
![]() Berit Skogmo wrote:
Berit Skogmo wrote:
Menar inte att verka arg, men jag är såååå frustrerad. Blir nog inte tröja för jag orkar inte repa upp och börja om. God natt 🙄 Har också en fråga om ett garn som hade flera knytar, men det kanske jag tar nåt annat ställe.?
16.12.2019 - 06:47
![]() Berit Skogmo wrote:
Berit Skogmo wrote:
Står ju vid uttag att man på nästa rad stickar vriden rm. Så det fortsatte jag med, men ser nu att det inte alls var bra. Så jag kastar mig på mönstret och läser och läser, med hittar inte nåt. Jo tecknen vid diagrammen står det hur man gör, men borde det inte stå dår att man stickar omslaget som vanlig rm på nästa rad? För det är väl rätt? Eller anses det kanske som baskundskap man bör ha reda på.?
16.12.2019 - 06:45
![]() Berit Skogmo wrote:
Berit Skogmo wrote:
Hej, Har gett mig fasiken att för en gångs skull att sticka nåt till mig. Händer inte precis ofta. Tycker toppen är så himla fin. Men detta mönster har krånglat och jag höll på att nöta ut garnet med alla upprepningar. Skam den som ger och jag var helt säker på att jag hade kontrollen, jobbade på med stor förväntning. Ja…. Sen blev jag under natten här klar med oket och ser nu att hålen inte blir bra - Kommer mera
16.12.2019 - 06:43
![]() Berit Skogmo wrote:
Berit Skogmo wrote:
Hej, Har gett mig fasiken att för en gångs skull att sticka nåt till mig. Händer inte precis ofta. Tycker toppen är så himla fin. Men detta mönster har krånglat och jag höll på att nöta ut garnet med alla upprepningar. ..... Kommer mera
16.12.2019 - 06:19
![]() Ann Christin wrote:
Ann Christin wrote:
Raglan økning og ermer, skal man øke på hver side av A1 og så på hver side av de fire maskene på ermet? Tror ikke jeg skjønte dette,for da blir jeg ferdig med økninger lenge før jeg skal.. jeg får en del glattstrikk mellom raglan og ermet
12.02.2019 - 21:08DROPS Design answered:
Hei Ann Christin. Du øker på hver side av A.1. På ermet strikker du altså A.1, øk 1 maske, 4 masker A.2, øk 1 maske, A.1 osv. Du øker altså 2 masker på hver erme hver gang du øker (1 maske i hver side av ermet, etter/før A.1 i hver side) Du øker også 2 masker på for og bakstykkene hver gang du øker her (1 maske i hver side, etter/før A.1 i hver side). God fornøyelse
13.02.2019 - 13:49
|
|||||||||||||
Summer Foam#summerfoamtop |
|||||||||||||
 |
 |
||||||||||||
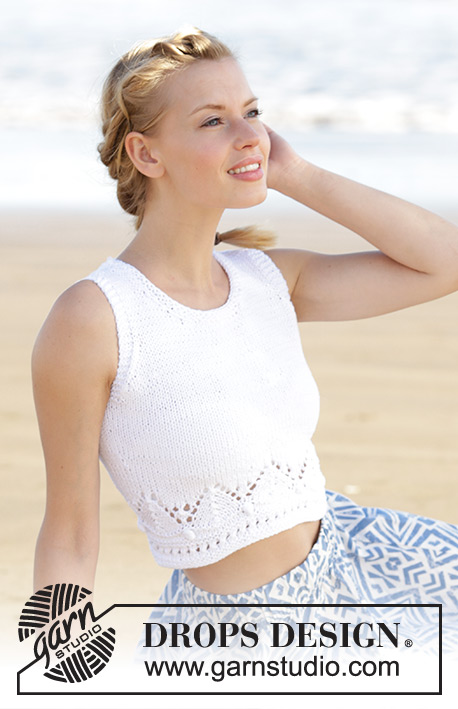
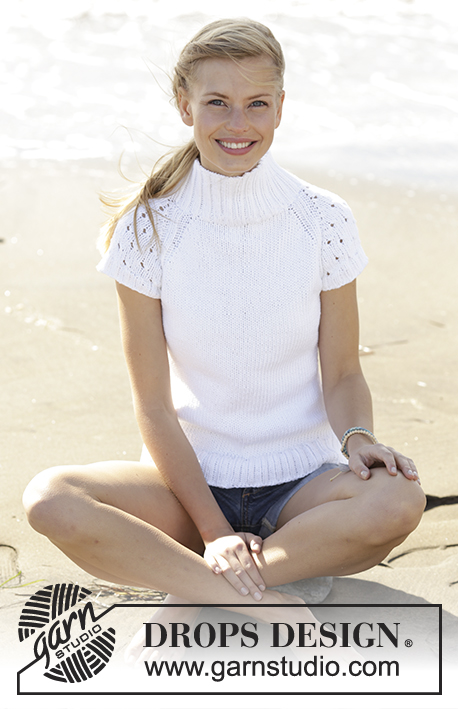
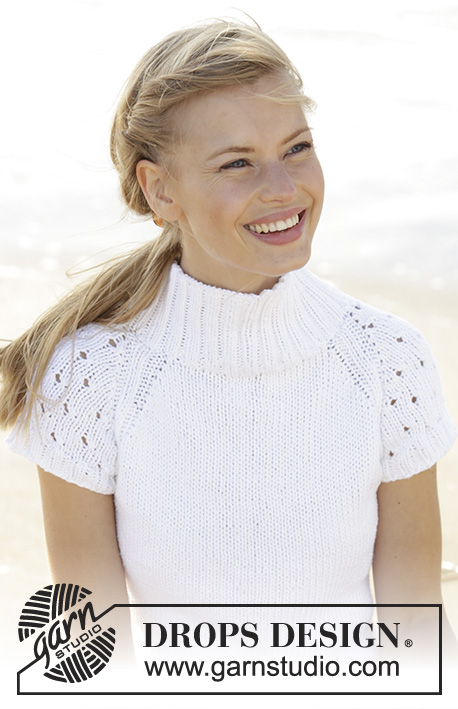
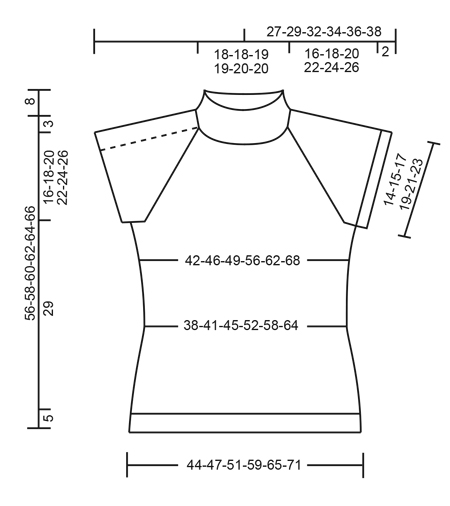
Fitted top with high neck, raglan and lace pattern on the sleeves, worked top down in DROPS Paris. Sizes S - XXXL.
DROPS 178-46 |
|||||||||||||
|
RIDGE/GARTER STITCH (worked in the round): 1 ridge = 2 rounds. Knit 1 round and purl 1 round. ELEVATION: Start from the right side and work rib until you have worked 7-7-11-11-11-11 stitches past the marker, turn, tighten the strand and work 14-14-22-22-22-22 stitches rib back again. Turn, tighten the strand and work 22-22-30-30-30-30 stitches rib, turn, tighten the strand and work 30-30-38-38-38-38 stitches rib back again. Turn, tighten the strand and work 38-38-46-46-46-46 stitches rib, turn, tighten the strand and work 46-46-54-54-54-54 stitches rib back again. Turn and work rib towards mid back. PATTERN: See diagrams A.1 to A.3. The diagrams show all the rows in the pattern seen from the right side. A.2 is shown in size S – A.2 is worked in the same way in the other sizes, i.e. the holes continue outwards in the same way, but make sure you do not make a hole close into the raglan line. 1 repeat with holes in width and height is shown in A.2A. DECREASE/INCREASE TIP (evenly spaced): To work out how to decrease/increase evenly, count the total number of stitches on the needle (e.g. 112 stitches) and divide by the number of decreases/increases to be made (e.g. 32) = 3.5. In this example, you work alternately approx. every 2nd and 3rd stitch together and every 3rd and 4th stitch together (if you are increasing make 1 yarn over after alternately approx. every 3rd and 4th stitch). RAGLAN: Increase to raglan on each side of A.1 in each transition between body and sleeves. Increase 1 stitch by making 1 yarn over, on the next round, knit the yarn overs twisted to prevent holes. The increased stitches are worked in stocking stitch on the body and in A.2 on the sleeves. NOTE: Increases are different on body and sleeves as explained in the text. DECREASE TIP (for the sides of the body): Decrease 1 stitch on each side of the 6-6-10-10-10-10 rib stitches in each side. Decrease as follows before the 6-6-10-10-10-10 rib stitches: Knit 2 together (= 1 stitch decreased). Decrease as follows after the 6-6-10-10-10-10 rib stitches: Slip 1 stitch as if to knit, knit 1, pass the slipped stitch over the knitted stitch (= 1 stitch decreased). INCREASE TIP (for the sides of the body): Increase 1 stitch on each side of the 6-6-10-10-10-10 rib stitches in each side. Increase 1 stitch by making 1 yarn over, on the next round knit the yarn overs twisted to prevent holes. ---------------------------------------------------------- TOP: The piece is worked in the round with circular needle and worked top down. NECK: Cast on 112-112-120-120-128-128 stitches on short circular needle size 4 mm and Paris. Knit 1 round. Insert 1 marker at the beginning of the round = mid back. The next round is worked as follows: * Knit 1, purl 2, knit 1 *, repeat from *-* the whole round. Continue with rib in this way for 8 cm. For a better fit you can now work an ELEVATION in the back of the neck – see description above. After the elevation knit 1 round where you decrease 32-32-36-36-40-40 stitches evenly spaced along the round – READ DECREASE/INCREASE TIP = 80-80-84-84-88-88 stitches. Change to short circular needle size 5 mm and work the next round as follows: 12-12-13-13-14-14 stitches stocking stitch (= ½ the back piece), A.1 (= 6 stitches in the raglan line), A.2 (= 4 stitches on the sleeve), A.1 (= 6 stitches in the raglan line), 24-24-26-26-28-28 stitches stocking stitch (= front piece), A.1 (= 6 stitches in the raglan line), A.2 (= 4 stitches on the sleeve), A.1 (= 6 stitches in the raglan line) and 12-12-13-13-14-14 stitches stocking stitch (= ½ the back piece). READ THE WHOLE OF THE NEXT SECTION BEFORE CONTINUING! Continue with stocking stitch on the front and back pieces, A.1 in each transition between body and sleeves and A.2 on each sleeve (see the description of A.2 under PATTERN). REMEMBER THE KNITTING TENSION! AT THE SAME TIME on the first round start the increases to RAGLAN – see description above. The increases are different on the front/back pieces and the sleeves - NOTE: In size L start the increases for the sleeves on the first round, but for the front and back pieces, work 2 rounds before starting the increases: FRONT AND BACK PIECE: Increase every round a total of 0-2-0-5-9-14 times, then every 2nd round a total of 18-19-21-22-22-22 times. SLEEVES: Increase every 2nd round a total of 12-14-16-20-26-29 times and then every 4th round a total of 3-3-3-2-0-0 times. After all the increases to raglan, there are 212-232-244-280-316-348 stitches on the needle and the piece measures approx. 16-18-20-22-24-26 cm (measured mid front after the rib in the neck). The next round is worked as follows: Work the first 33-36-37-43-48-53 stitches as before (= ½ the back piece), place the next 40-44-48-54-62-68 stitches on 1 thread (= left sleeve), cast on 6-6-10-10-10-10 new stitches on the needle (= in the side mid under sleeve), work the next 66-72-74-86-96-106 stitches as before (= front piece), place the next 40-44-48-54-62-68 stitches on 1 thread (= right sleeve), cast on 6-6-10-10-10-10 new stitches on the needle (= in the side under the sleeve) and work the remaining 33-36-37-43-48-53 stitches as before (= ½ the back piece). BODY: = 144-156-168-192-212-232 stitches. Insert 1 marker in the side – THE PIECE IS NOW MEASURED FROM HERE! Work stocking stitch in the round, but over the 6-6-10-10-10-10 stitches in each side work 2 RIDGES – see description above. When2 ridges have been worked in each side work rib over these 6-6-10-10-10-10 stitches in each side as follows: S + M: Work A.1 (= 6 stitches), L + XL + XXL + XXXL: Work A.3 (= 10 stitches) – the other stitches are continued in stocking stitch. When the piece measures 2 cm from the marker decrease 1 stitch on each side of the rib section in each side – READ DECREASE TIP (= 4 stitches decreased). Decrease in this way every 6th round a total of 4 times in each side = 128-140-152-176-196-216 stitches. When the piece measures 17 cm from the marker increase 1 stitch on each side of the rib section in each side – READ INCREASE TIP (= 4 stitches increased). Increase in this way every 6th-6th-6th-5th-5th-5th round a total of 5-5-5-6-6-6 times in each side = 148-160-172-200-220-240 stitches. When the piece measures 29 cm from the marker, knit 1 round where you increase 36-36-36-40-44-48 stitches evenly along the round – READ DECREASE/INCREASE TIP = 184-196-208-240-264-288 stitches. Change to circular needle size 4 mm and work rib in the round (= knit 2 / purl 2). When the rib measures 5 cm (or desired length) change back to circular needle size 5 mm before casting off with knit over knit and purl over purl. SLEEVE EDGE: Place the 40-44-48-54-62-68 stitches from the one thread in one side of the piece on double pointed needles size 4 mm, in addition, knit up 1 stitch in each of the 6-6-10-10-10-10 stitches mid under the sleeve = 46-50-58-64-72-78 stitches on the needles. Knit 1 round where you increase 10-10-10-12-12-14 stitches evenly along the round = 56-60-68-76-84-92 stitches. Continue by working rib (= knit 2 / purl 2). When the sleeve edge measures 2 cm, LOOSELY cast off with knit over knit and purl over purl. Work sleeve edge around the other armhole in the same way. |
|||||||||||||
Diagram explanations |
|||||||||||||
|
|||||||||||||
 |
|||||||||||||
 |
|||||||||||||
 |
|||||||||||||
Have you finished this pattern?Tag your pictures with #dropspattern #summerfoamtop or submit them to the #dropsfan gallery. Do you need help with this pattern?You'll find 29 tutorial videos, a Comments/Questions area and more by visiting the pattern on garnstudio.com. © 1982-2026 DROPS Design A/S. We reserve all rights. This document, including all its sub-sections, has copyrights. Read more about what you can do with our patterns at the bottom of each pattern on our site. |
|||||||||||||


With over 40 years in knitting and crochet design, DROPS Design offers one of the most extensive collections of free patterns on the internet - translated to 17 languages. As of today we count 324 catalogues and 12290 patterns translated into English (UK/cm). 12290
We work hard to bring you the best knitting and crochet have to offer, inspiration and advice as well as great quality yarns at incredible prices! Would you like to use our patterns for other than personal use? You can read what you are allowed to do in the Copyright text at the bottom of all our patterns. Happy crafting!
Post a comment to pattern DROPS 178-46
We would love to hear what you have to say about this pattern!
If you want to leave a question, please make sure you select the correct category in the form below, to speed up the answering process. Required fields are marked *.