
Popular categories
Looking for a yarn?


Comments / Questions (102)
![]() Loronda wrote:
Loronda wrote:
I am trying to follow the chart but it results in decreases in the total stitches. It is also confusing. Do the YO go in A,B, or C when they are on the line. Also, as noted there does not seem to be enough YO stitches to compensate for the K2tog etc. Do you have this chart written out? That would be helpful.
24.06.2024 - 21:59DROPS Design answered:
Dear Loronda, in this video we show how to work such a lace pattern (symbols are a bit different but pattern is the same). It should help you reading diagrams and yarn overs (you will just have to repeat the B part of diagrams). Do not hesitate to add markers between each repeat in width so that you can always check your number of stitches. Happy knitting!
25.06.2024 - 08:53
![]() Susanne wrote:
Susanne wrote:
Hej! Hur ska jag få ihop 2 m slätst, 1 am, och slätst över de nästa 26-28-27-27-26-24 m (= framkant), sticka A.1A (= 4 m), A.1B (= 6 m) totalt 20-22-24-28-31-34 ggr, A.1C (= 3 m), sticka slätst över de nästa 26-28-27-27-26-24 m, 1 am och 2 m slätst (= framkant) 28 upprepningar på varvet med tot 201 m i M? Fattar inte. A1a+ A1b är 10 m ihop...
19.06.2024 - 14:11
![]() Sonja Van Straten wrote:
Sonja Van Straten wrote:
Bij de voorbodes staat 2 st tricotsteek, 1 averecht, dan 28 st tricot. Hoe wordt de 1 st averecht in de teruggaande naald gebreid?
01.04.2024 - 19:47DROPS Design answered:
Dag Sonja,
Deze averechte steken worden op de verkeerde kant recht gebreid.
03.04.2024 - 20:48
![]() Hanna wrote:
Hanna wrote:
Kummasta langasta kuvan jakku on neulottu?
20.07.2023 - 17:16DROPS Design answered:
Kuvan jakku on neulottu DROPS Bomull-Lin -langasta.
21.07.2023 - 14:14
![]() MARIANNE BOIDIN wrote:
MARIANNE BOIDIN wrote:
Bonjour je dois faire le dos et devant j'ai mis 202 mailles en calculant le nombre de maille pour faire le dessin il me reste des mailles ! Continuer avec l'aiguille circulaire 5.5 et tricoter le rang suivant (= sur l'endroit) ainsi: 2 m jersey, 1 m env, 26-28-27-27-26-24 m jersey (= bordure devant), tricoter A.1A (= 4 m), 20-22-24-28-31-34 fois A.1B (= 6 m) au total, A.1C (= 3 m), 26-28-27-27-26-24 m jersey, 1 m env et 2 m jersey (= bordure devant). le A1 doit pas être plus que 22 fois?
25.02.2022 - 13:25DROPS Design answered:
Bonjour Mme Boidin, les 22 fois concernent A.1B pas A.1A, autrement dit, tricotez les 201 mailles en taille M ainsi: 2 m jersey, 1 m env, 28 m jersey (= bordure devant), tricoter A.1A (= 4 m), 22 fois A.1B (= 6 m x 22 = 132mailles en suivant A.1B) , A.1C (= 3 m), 28 m jersey, 1 m env et 2 m jersey soit = 2+1+28+ 4+132+3+28+1+2=201 mailles. A.1A = début du motif ajouré; A.1B = partie à répéter en largeur, A.1C = fin du motif ajouré. Bon tricot!
25.02.2022 - 14:11
![]() Pat wrote:
Pat wrote:
Hi, the pattern says A.1A, A.1B (6x22), A.1C (M size). Does it mean the pattern is mainly A.1B? If so, how do I do the last row of pattern when A.1A integrates into A.1B and A.1B integrates into A.1C? Are A.1A and A.1C not part of the pattern? Thank you
25.10.2021 - 13:15DROPS Design answered:
Dear Pat, yes, A.1A is repeated once to start the pattern, A.1B is the main part and A.1C is repeated once to finish the pattern (in the row). The number of stitches is always the same. In the last row of the pattern, you need to work the last 2 stitches of A.1A with in one stitch in A.1B and the last 2 stitches of A.1B with one stitch in A.1C. Happy knitting!
01.11.2021 - 12:29
![]() Raimunda Arribas wrote:
Raimunda Arribas wrote:
El modelo ya lleva centímetros de positividad o hay que calcular los?
07.10.2021 - 13:41DROPS Design answered:
Hola Raimunda, el patrón ya incluye los puntos orillo necesarios para la costura y la prenda ya incluye todas las medidas necesarias para el tamaño de la chaqueta indicado en el diagrama bajo el patrón. En el caso de necesitar una chaqueta más amplia, habría que trabajar la siguiente talla.
10.10.2021 - 23:08
![]() Elisabeth wrote:
Elisabeth wrote:
Vielen lieben Dank ich bin wie man bei uns sagt auf der Leitung gestanden! Danke für die Hilfe
02.08.2021 - 23:21
![]() Elisabeth wrote:
Elisabeth wrote:
Wenn ich das Muster a +b=10M 34 mal Stricken soll sind das alleine 340 Maschen ich denke da stimmt etwas nicht mit den Zahlen ! Gglg Elisabeth
24.07.2021 - 22:11DROPS Design answered:
Liebe Elisabeth, die Diagramme stricken Sie beim Rumpfteil so: 4 Maschen A.1A, dann wiederholen Sie die 6 Maschen A.1B je nach der Größe 20 bis 34 Mal und Lochmuster enden Sie mit den 3 Maschen A.1C. Viel Spaß beim stricken!
26.07.2021 - 08:41
![]() Gabriela wrote:
Gabriela wrote:
Hola, estoy terminando los hombros de la espalda (talla M) , pero tengo un par de dudas: después de rematar los 23 puntos centrales, quedan 27 puntos a cada lado. las instrucciones dicen que hay que seguir rematando 1 punto la siguiente vuelta. Ese remate es siempre por el lado derecho, no? y solo se remata 1 punto más o se sigue rematando 1 punto cada vuelta hasta que el largo mida 64 cm? Saludos y gracias
21.12.2020 - 00:21DROPS Design answered:
Hola Gabriela, hay que disminuir 1 punto al comienzo de la fila siguiente desde el escote (solo una vez en cada hombro). Entonces en una hombro haces esto por el lado derecho, y en otra hombro por el lado izqierdo. Trabajar de la misma manera (pero sin disminuir) cuando la labor mida 62-64-66-68-70-72 cm. Enconces rematar todos los puntos. Buen trabajo!
21.12.2020 - 10:50
|
||||||||||||||||
Lace Affair#laceaffairjacket |
||||||||||||||||
 |
 |
|||||||||||||||
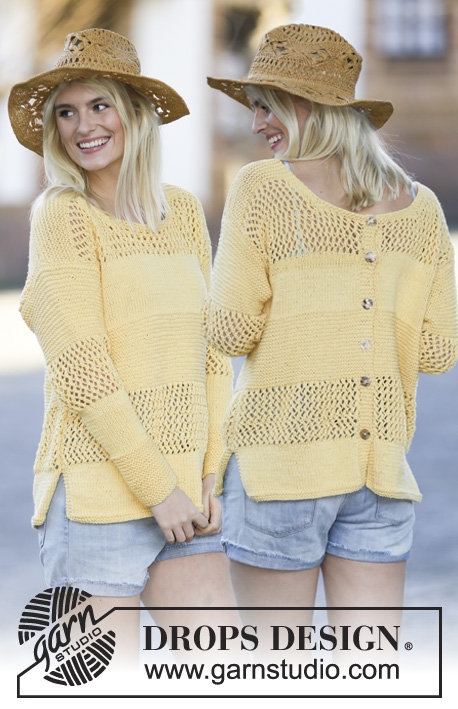
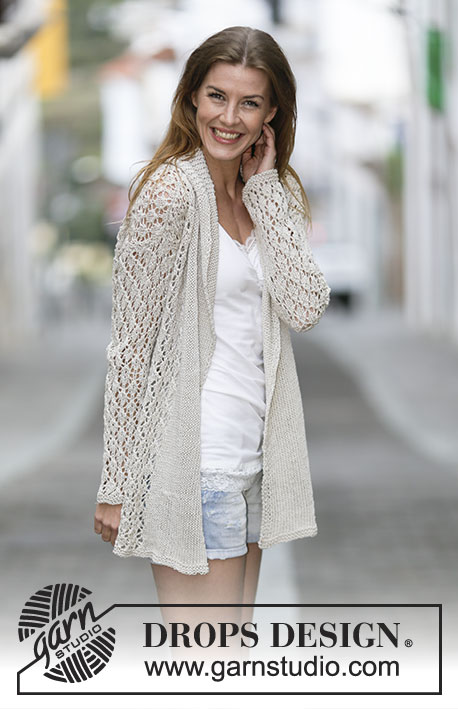
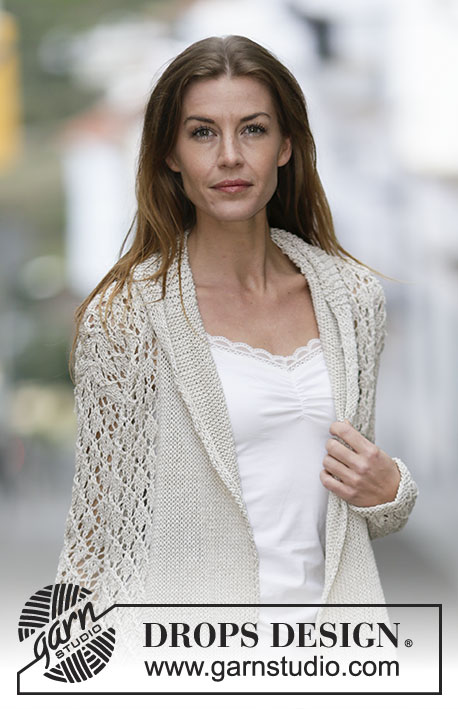
Knitted DROPS jacket with lace pattern and shawl collar in "Bomull-Lin" or "Paris". Size: S - XXXL.
DROPS 159-2 |
||||||||||||||||
|
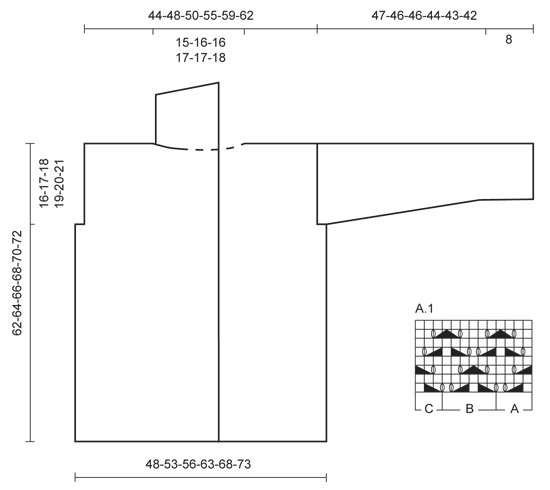
GARTER ST (back and forth): K all rows. 1 ridge = 2 rows K. PATTERN: See diagram A.1. The diagram show all rows in pattern seen from RS. KNITTING TIP: Band sts will wrinkle inwards when working but lay flat after assembly. INCREASE TIP: Inc 1 st by making 1 YO, on next row work YO twisted (i.e. work in the back loop of st instead front) to avoid holes. ---------------------------------------------------------- BODY: Worked back and forth on circular needle from mid front. Loosely cast on 185-201-211-235-251-265 sts on circular needle size 4.5 mm with Bomull-Lin or Paris. Work 2 ridges in GARTER ST - see explanation above. Switch to circular needle size 5.5 mm, work next row (= RS) as follows: 2 sts in stocking st, P 1, and stocking st over the next 26-28-27-27-26-24 sts (= band), work A.1A (= 4 sts), A.1B (= 6 sts) 20-22-24-28-31-34 times in total, A.1C (= 3 sts), work in stocking st over the next 26-28-27-27-26-24 sts, P 1 and 2 sts in stocking st (= band). Continue like this - READ KNITTING TIP AND REMEMBER THE KNITTING TENSION. When piece measures approx. 46-47-48-49-50-51 cm, insert 2 markers; 54-58-60-67-71-75 sts in from each side (= 77-85-91-101-109-115 sts between markers on back piece). On next row cast off 3-4-5-6-7-8 sts for armholes on each side of both markers (= 6-8-10-12-14-16 cast off sts in each side). Now divide the piece and finish each part separately. BACK PIECE: = 71-77-81-89-95-99 sts. Continue pattern as before with 1 edge st in garter st in each side until piece measures 60-62-64-66-68-70 cm. Then cast off the middle 21-23-23-25-25-27 sts for neck and finish each shoulder separately. Continue to dec 1 st on next row from neck = 24-26-28-31-34-35 sts remain on the shoulder. Cast off when piece measures 62-64-66-68-70-72 cm. LEFT FRONT PIECE: = 51-54-55-61-64-67 sts. Work 1 edge st in garter st towards the armhole and continue with pattern as before, and finish with 26-27-27-27-27-24 sts in stocking st, P 1 and 2 sts in stocking st (= band sts) towards mid front until piece measures 62-64-66-68-70-72 cm. At beg of next row from RS cast off the first 24-26-28-31-34-36 sts for shoulder = 27-28-27-30-30-31 sts remain for collar. Work in garter st over these sts - AT THE SAME TIME work short rows, beg from WS as follows: * Work 1 ridge over all sts. On next row from WS K 21-22-21-24-24-25, turn and K back *, repeat from *-* until piece measures approx. 9-10-10-10½-10½-11 cm from cast off for shoulder (short side). Loosely cast off all sts. RIGHT FRONT PIECE: Work as left front piece but reversed. Beg short rows on collar from RS. SLEEVE: Worked back and forth on needle. Loosely cast on 35-37-39-39-41-43 sts (incl 1 edge st each side) on circular needle size 4.5 mm with Bomull-Lin or Paris. Work 2 ridges. Switch to circular needle size 5.5 mm, work next row (= RS) as follows: 1 edge st in garter st, 1-2-0-0-1-2 sts in stocking st, work A.1A (= 4 sts), A.1B over the next 24-24-30-30-30-30 sts (= 4-4-5-5-5-5 times), A.1C (= 3 sts), 1-2-0-0-1-2 sts in stocking st, finish with 1 edge st in garter st. When piece measures 8 cm, inc 1 st inside 1 edge st in each side - READ INCREASE TIP above, work the inc sts in pattern. Repeat inc every 4½-4-3½-3-2½-2½ cm 8-9-10-11-12-13 more times = 53-57-61-63-67-71 sts. When piece measures 45-44-43-40-39-37 cm, insert 1 marker in each side of sleeve (for assembly). When piece measures 47-46-46-44-43-42 cm (shorter measurements in the larger sizes because of wider shoulders), cast off all sts. ASSEMBLY: Sew shoulder seams and sew in sleeves in outer loops of edge sts. Sew the sleeve seams in one inside 1 edge st - NOTE: Section worked after marker at the top of sleeve should fit the cast off for armhole. Sew band tog mid back and sew band to the neck egde - NOTE! Seam should be at the back so that is is not visible when collar is folded down. Lightly steam the band with iron, it will then be flat. |
||||||||||||||||
Diagram explanations |
||||||||||||||||
|
||||||||||||||||
 |
||||||||||||||||
Have you finished this pattern?Tag your pictures with #dropspattern #laceaffairjacket or submit them to the #dropsfan gallery. Do you need help with this pattern?You'll find 21 tutorial videos, a Comments/Questions area and more by visiting the pattern on garnstudio.com. © 1982-2026 DROPS Design A/S. We reserve all rights. This document, including all its sub-sections, has copyrights. Read more about what you can do with our patterns at the bottom of each pattern on our site. |
||||||||||||||||


With over 40 years in knitting and crochet design, DROPS Design offers one of the most extensive collections of free patterns on the internet - translated to 17 languages. As of today we count 324 catalogues and 12290 patterns translated into English (UK/cm). 12290
We work hard to bring you the best knitting and crochet have to offer, inspiration and advice as well as great quality yarns at incredible prices! Would you like to use our patterns for other than personal use? You can read what you are allowed to do in the Copyright text at the bottom of all our patterns. Happy crafting!
Post a comment to pattern DROPS 159-2
We would love to hear what you have to say about this pattern!
If you want to leave a question, please make sure you select the correct category in the form below, to speed up the answering process. Required fields are marked *.