
Popular categories
Looking for a yarn?


Comments / Questions (25)
![]() Kelsey K wrote:
Kelsey K wrote:
I'm currently working on the wrap. I've followed the instructions and have 25 stitches on my circular needles (RS: 3 garter, P and K repeated ending with P, then 3 garter). How does A.3 fit? I've seen the video and the video starts A.3 with a K and P rib, not a P and K rib that I have. Where did I go wrong?
13.12.2017 - 04:12DROPS Design answered:
Dear Mrs Kelsey K, before A.3 you work: 3 sts in garter st, rib K1/P1 until 3 sts remain, 3 sts in garter st. When working A.3, work 3 sts in garter st, repeat A.3 until 4 sts remain, then work the 1st st in A.3 (= row 1: 1 YO, slip 1 st as if to P - row2: P tog YO from previous row and st, do not make the YO after this st), 3 sts in garter st. Happy knitting!
13.12.2017 - 10:37Martyna Cupriak wrote:
I have trouble with diagram A.1. Why in the video there are YO on every row when the 2nd one is all knit? Also, is there somewhere an explaation on this 1 YO between 2 sts stich?
18.12.2016 - 14:46DROPS Design answered:
Witaj Martyno. Na filmie narzuty są wykonywane co 2 rzędy, tj. w rzędzie na prawej stronie robótki. Na lewej stronie oczka powstałe z narzutów są przekręcone i przerobione na prawo lub na lewo, zgodnie ze schematem. Właściwe video znajdziesz TUTAJ. Jak wykonać narzut znajdziesz TUTAJ. POWODZENIA!
18.12.2016 - 19:08
![]() Guillot wrote:
Guillot wrote:
Merci beaucoup donc ce n'est pas les côtes anglaises mais ce que nous appelons les fausses côtes anglaises, je vais m'y mettre, merci encore.
26.11.2014 - 18:33
![]() Guillot wrote:
Guillot wrote:
Je ne comprends rien aux explications, je ne comprends pas 1 jeté, glisser maille à l'envers, puis au rang suivant tricoter ensemble le jeté et la maille, je suppose que c'esr la maille glissée, si on fait ça on n'augmente pas, 3eme rang: 1 jeté, glisser une maille env 1 jeté, mais ça ne fait pas de côtes comme sur le modèle, je voulais l'offrir pour Noël, mais j'ai bien peur de ne pas réussir à le faire, pas de vidéo, sauf pour le bandeau.
22.11.2014 - 20:49DROPS Design answered:
Bonjour Mme Guillot, au rang 3 de A.3, vous devez faire 1 jeté pour augmenter, en plus du jeté par-dessus la m glissée, procédez ainsi : Fil devant l'ouvrage, glissez 1 m à l'end, faites passer le fil autour de l'aig droite pour qu'il "double" la m glissée (=1 jeté pour la m en côte anglaise), puis faites 1 nouveau jeté (enroulez le fil encore 1 fois autour de l'aig droite), 1 m env. Au rang suivant, tricotez le 1er jeté (l'augm) torse à l'end, et tricotez le jeté qui recouvre la m glissée et la m glissée ens à l'env. Bon tricot!
24.11.2014 - 10:26
![]() Rebecca Grant wrote:
Rebecca Grant wrote:
The square with the dot inside in the diagram explanations says "1YO, slip 1 st as if to P" - does that mean bring the yarn in front and slip the stitch purl wise rather than a standard Yarnover where you are adding a stitch?
02.10.2014 - 01:06DROPS Design answered:
Dear Mrs Grant, you are correct, the yo should "cover" the slipped st when you have worked the next st. Happy knnitting!
02.10.2014 - 10:07
![]() Rebecca Grant wrote:
Rebecca Grant wrote:
Would love to make this - the diagram looks like it's cutting out many of the definitions, e.g. work 3 std tog into 1 st as follows: Slip first st as if to k, slip 2nd st on 1 needle in front of.....and it ends there. Please advise.
21.09.2014 - 03:33DROPS Design answered:
Dear Mrs Grant, you will find there some informations about how to read diagrams, relevant videos to that pattern are listed on the right side of the picture under tab "video" and you will find more in the video index. Please not that a new diagram A.2 has been added. Happy knitting!
22.09.2014 - 09:22
![]() Michelle wrote:
Michelle wrote:
L' ensemble est génial et très original. On le veut !!!!
22.06.2014 - 00:01
![]() RuthBodil wrote:
RuthBodil wrote:
En Sann Favorit Till! jag vet i vilket garn jag önskar mej göra den: CLOUD-
18.06.2014 - 01:15
![]() Violette B. wrote:
Violette B. wrote:
Ce châle est très joli et original.
09.06.2014 - 17:08
![]() Véronique wrote:
Véronique wrote:
Formes différentes et seyantes . Merci pour l'originalité .
05.06.2014 - 21:41
|
|||||||||||||||||||||||||
Raquel#raquelset |
|||||||||||||||||||||||||
 |
 |
||||||||||||||||||||||||
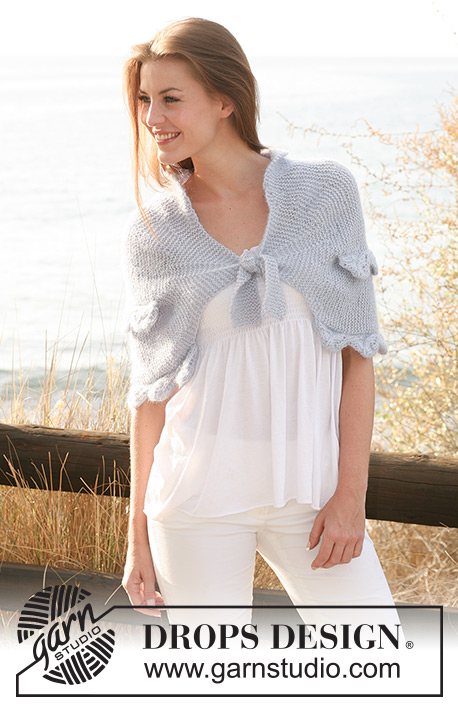
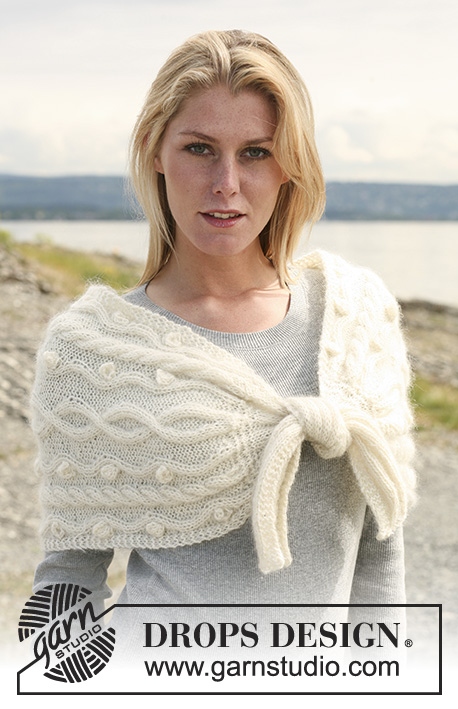
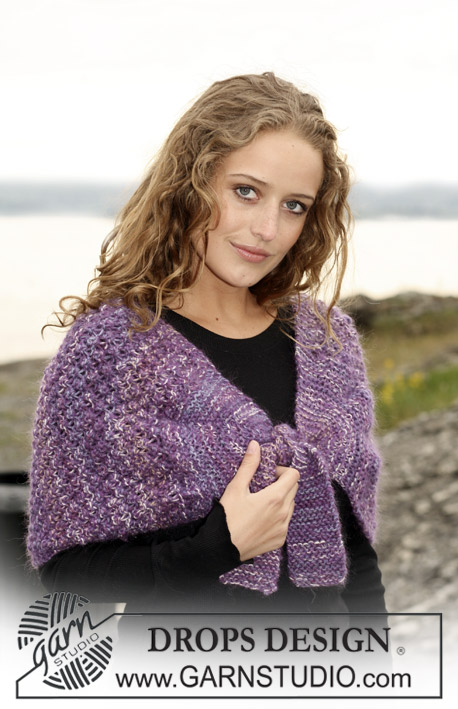
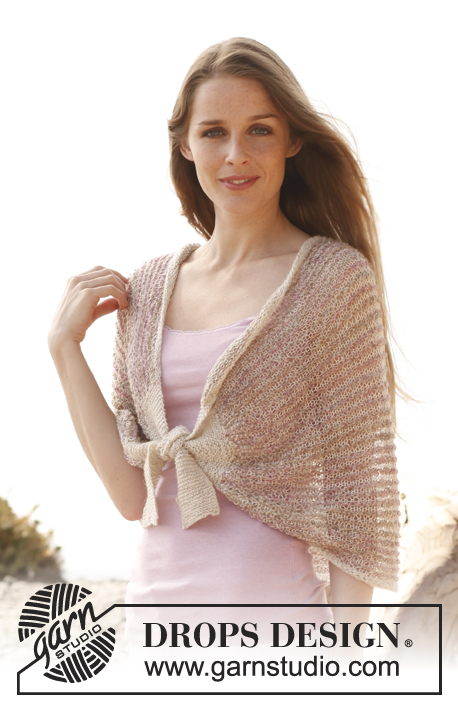
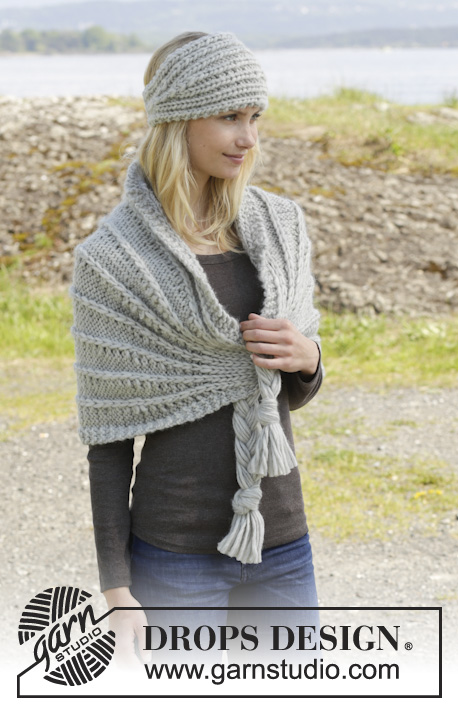
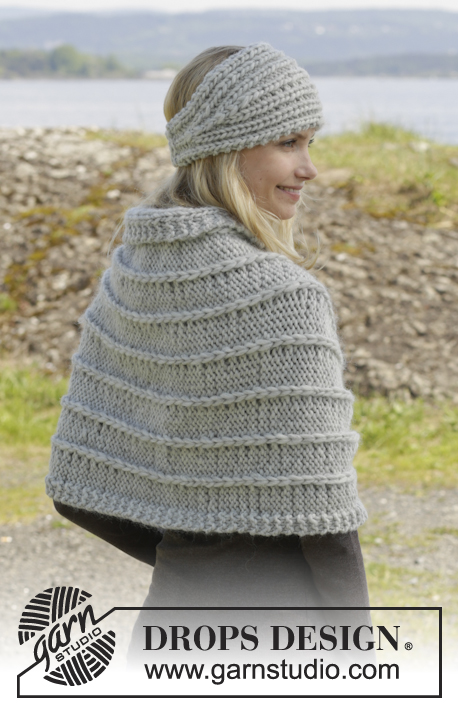
Knitted DROPS head band and shoulder piece in "Snow".
DROPS 156-30 |
|||||||||||||||||||||||||
|
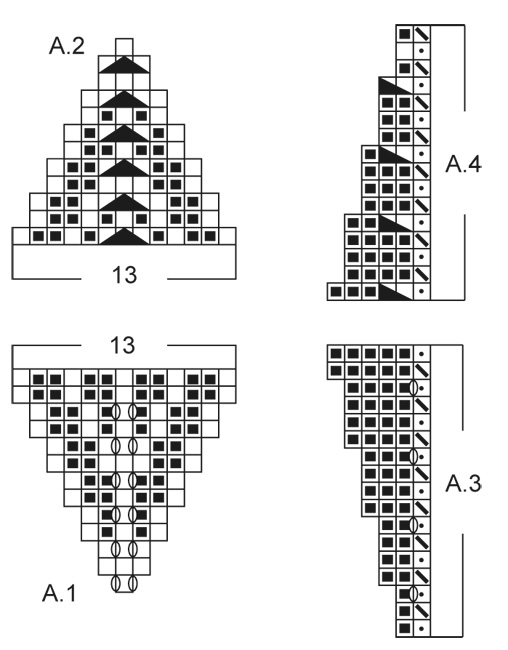
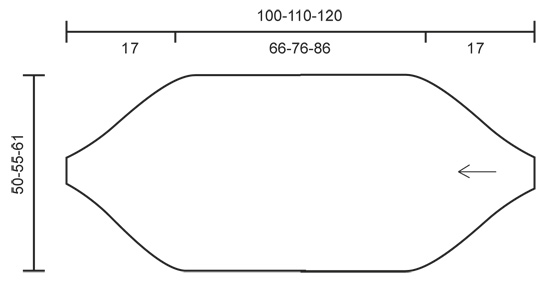
GARTER ST (back and forth on needle): K all rows. 1 ridge = 2 rows K. PATTERN: See diagrams A.1 to A.4. Diagrams show pattern seen from RS (1st row = RS). EDGE ST: Row 1 (beg of row): 1 st in GARTER ST - see explanation above, K 1, P 2. Row 1 (end of row): P 2, K 1, 1 st in garter st. Row 2: Garter st over garter st, K over K and P over P. INCREASE TIP: Inc 1 st by making 1 YO, on next round work YO twisted (i.e. work in back loop of st instead front) to avoid holes. ---------------------------------------------------------- HEAD BAND: Worked back and forth on needle. Cast on 9 sts on needle size 8 mm with Snow. Work as follows from RS: 4 EDGE STS - see explanation above, 1 st in stocking st, 4 edge sts. When piece measures 8 cm, work as follows from RS: 4 edge sts, A.1, 4 edge sts. REMEMBER THE KNITTING TENSION! When A.1 has been worked 1 time vertically, there are 21 sts on needle. Then repeat the last 2 rows in A.1 with 4 edge sts in each side of piece. When piece measures 33-35-37 cm, work as follows from RS: 4 edge sts, A.2, 4 edge sts. When A.2 has been worked 1 time vertically, there are 9 sts on needle. Then work as follows from RS: 4 edge sts, 1 st in stocking st, 4 edge sts. When piece measures 49-51-53 cm, cast off with K over K and P over P. Cut the yarn, leave approx. 20 cm - this is used for assembly. ASSEMBLY: Sew tog cast-off and cast-on edge, edge to edge in outer loops of edge sts to avoid a chunky seam. ---------------------------------------------------------- SHOULDER PIECE: Worked back and forth on circular needle to make room for all the sts. Cast on 6 sts on circular needle size 8 mm with Snow. Work 1st row (= RS) as follows: * K 1, 1 YO *, repeat from *-* until 1 st remains, K 1 = 11 sts. P 1 row where 1st, 3rd and 5th YO is worked P (to make holes to fasten fringes), while 2nd and 4th YO is worked P twisted (to avoid holes). K 1 row while inc 6-7-8 sts evenly - READ INCREASE TIP. = 17-18-19 sts. P 1 row. K 1 row while inc 6-7-8 sts evenly = 23-25-27 sts. Work 5 rows rib (= K 1, P 1), finish with K 1, with 3 sts in GARTER ST – see explanation above, in each side of piece. Now work as follows from RS: 3 sts in garter st, A.3 (8-9-10 times in total), finish with first st in A.3 (without YO between 2 sts) and 3 sts in garter st. REMEMBER THE KNITTING TENSION! When A.3 has been worked 1 time vertically, there are 55-61-67 sts on needle. Repeat the last 2 rows until piece measures 83-93-103 cm. Now work as follows from RS: 3 sts in garter st, A.4 (8-9-10 times in total), finish with first st in A.4 and 3 sts in garter st. When A.4 has been worked 1 time vertically, there are 23-25-27 sts on needle. Work 5 rows rib (= K 1, P 1), finish with K 1, with 3 sts in garter st in each side of piece. P 1 row while dec 6-7-8 sts evenly by P 2 tog = 17-18-19 sts. K 1 row. P 1 row while dec 6-7-8 sts evenly = 11 sts. Work next row as follows: * K 3 tog, 1 YO *, repeat from *-* 3 times in total, K 2 tog = 7 sts. P 1 row and work YOs P (to make holes to fasten fringes), cast off. Piece measures approx. 100-110-120 cm. FRINGES: 1 fringe: Cut 3 strands of 2 meters, cut in 2 (= 6 strands), thread strands through one of the holes in the end (do not tie). Make 2 fringes more the same way, and thread through the other 2 holes. Make 1 LOOSE plait of the 3 fringes, then make 1 loose knot at the end (leave approx. 8 cm strands at the end). Repeat on the other side of shoulder piece. |
|||||||||||||||||||||||||
Diagram explanations |
|||||||||||||||||||||||||
|
|||||||||||||||||||||||||
 |
|||||||||||||||||||||||||
 |
|||||||||||||||||||||||||
Have you finished this pattern?Tag your pictures with #dropspattern #raquelset or submit them to the #dropsfan gallery. Do you need help with this pattern?You'll find 20 tutorial videos, a Comments/Questions area and more by visiting the pattern on garnstudio.com. © 1982-2026 DROPS Design A/S. We reserve all rights. This document, including all its sub-sections, has copyrights. Read more about what you can do with our patterns at the bottom of each pattern on our site. |
|||||||||||||||||||||||||


With over 40 years in knitting and crochet design, DROPS Design offers one of the most extensive collections of free patterns on the internet - translated to 17 languages. As of today we count 324 catalogues and 12290 patterns translated into English (UK/cm). 12290
We work hard to bring you the best knitting and crochet have to offer, inspiration and advice as well as great quality yarns at incredible prices! Would you like to use our patterns for other than personal use? You can read what you are allowed to do in the Copyright text at the bottom of all our patterns. Happy crafting!
Post a comment to pattern DROPS 156-30
We would love to hear what you have to say about this pattern!
If you want to leave a question, please make sure you select the correct category in the form below, to speed up the answering process. Required fields are marked *.