
Popular categories
Looking for a yarn?


Comments / Questions (25)
![]() Marie Champagne wrote:
Marie Champagne wrote:
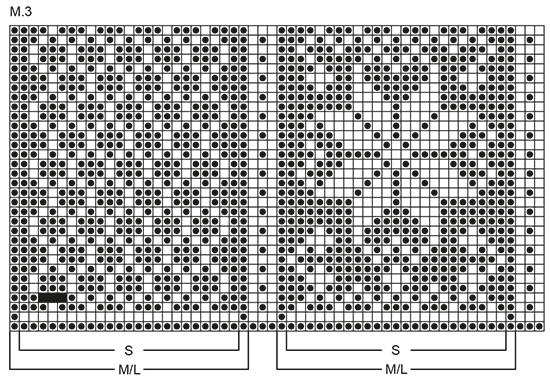
Bonjour, J'ai remarqué que sur le diagramme M.3 au 21 ème rg , que la 26 ème maille à partir de la droite doit être blanche. Merci
04.08.2024 - 15:06
![]() Hanne Pedersen wrote:
Hanne Pedersen wrote:
Tommelfingerens kile ender med 11m. Og det er åbenbart korrekt, kan jeg se af svaret til Felecia Rodnick herunder! hvorfor skriver I det ikke ind i opskriften, at man skal medtage 1m på hver side af kilen, for at få de ønskede 13m? Mvh Hanne
14.12.2023 - 05:59DROPS Design answered:
Hej Hanne, vi skriver at du starter med 3 masker og tager 5 masker ud i hver side = 13 masker, det stemmer også med diagrammet. Vi skal tjekke den kommentar du refererer til!
14.12.2023 - 08:37
![]() Felecia Rodnick wrote:
Felecia Rodnick wrote:
Very confused on the thumb—I followed the chart but only have 11 st in the gusset—there is no sound on your video and I am not sure what knit behind means? Very very frustrated and I have done many glove patterns
27.12.2022 - 18:43DROPS Design answered:
Dear Mrs Rodnick, there are 13 sts for the thumb when 5x2 increases are done, slip these 13 sts in total on a thread. Happy knitting!
02.01.2023 - 10:15
![]() Sanna wrote:
Sanna wrote:
The instructions say to cast on 8 new stitches for the little finger, but then for the ring finger you're only supposed to pick up 5 of those stitches? Won't that leave holes between the little and ring fingers, or am I misunderstanding something?
18.12.2022 - 20:01DROPS Design answered:
Dear Sanna, after casting on these 8 new stitches, you work for the little finger. Usually, we will cast on more stitches for the edges of the gloves (the little finger and the thumb) to get more ease. But you will normally be working with less stitches between the fingers (5 in this case). There may remain a small hole but that's very typical in gloves; you just need to sew it with a yarn needle to close it off. Happy knitting!
18.12.2022 - 23:00
![]() Aarnaudina wrote:
Aarnaudina wrote:
Ik mis de regel van de hand als de pink klaar is moet je alle st opnemen enzv
16.12.2021 - 22:07
![]() Joya wrote:
Joya wrote:
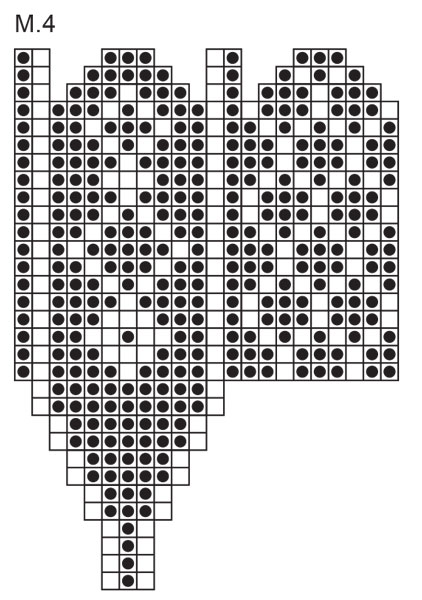
The three black boxes on M3 are very confusing. It should continue up surely for the M4 to slow in and not just for one line? Thanks for your help in advance.
06.08.2019 - 15:39DROPS Design answered:
Dear Joya, when you come to the 3 black boxes in M.3, work first row in M.4 over these 3 stitches. See also our video. Happy knitting!
07.08.2019 - 12:00
![]() Lydia wrote:
Lydia wrote:
Having trouble with starting the fingers for the right hand. I do not undetstand the last paragraph on the pattern. I am reading the pattern from the left now for the right hand. Do i start with the index finger for the right hand or the little finger?
20.01.2018 - 18:47DROPS Design answered:
Dear Lydia, diagram is worked the same way for both hands, just sts for thumb will be different on both hands, ie for left hand as in diagram and for right hand, work thumb in the 32nd to 34th st in size S/M and 35th to 37th in size M/L. Happy knitting!
22.01.2018 - 09:28
![]() Rebecca Reid wrote:
Rebecca Reid wrote:
What are the sizes for these gloves? The pattern says S-M/L but what are the dimensions for these sizes?
28.11.2016 - 15:02DROPS Design answered:
Dear Mrs Reid, with a tension of 23 sts = 10 cm gloves will be approx. 22-24 cm around hand. Happy knitting!
28.11.2016 - 15:22
![]() Christel Peters wrote:
Christel Peters wrote:
Guten Tag. Ich habe ein Problem mit dem Daumenkeil. Laut Anleitung die gekennzeichneten Maschen mit M4 stricken, den Rest wieder mit M3. Heißt dass, die 3 Maschen müssen auf eine extra Nadel? Wie stricke ich denn sonst in der nächsten Runde M3 weiter? Danke für die Hilfe, Christel
25.06.2016 - 08:40DROPS Design answered:
Hallo Christel, der Daumenkeil wird nicht auf eine extra Nadel genommen (erst wenn die Daumenmaschen stillgelegt werden). Sie stricken einfach über die Maschen des Daumenkeils M4 und über die anderen Maschen M3.
06.07.2016 - 10:03Mariola wrote:
Can I please to translate the pattent to polish language?
28.11.2014 - 21:22
|
|||||||||||||
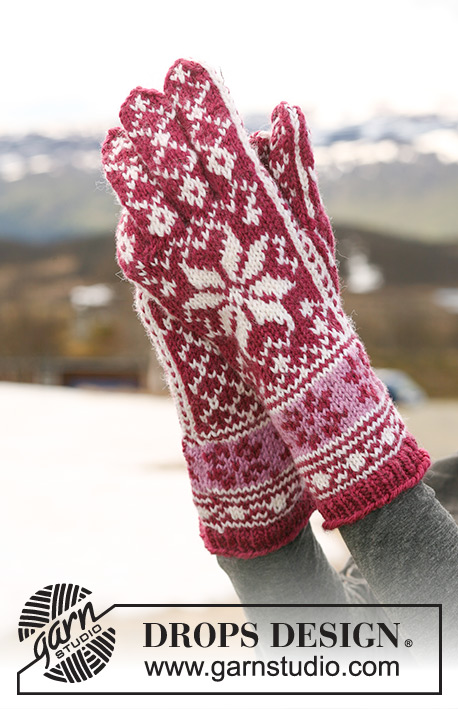
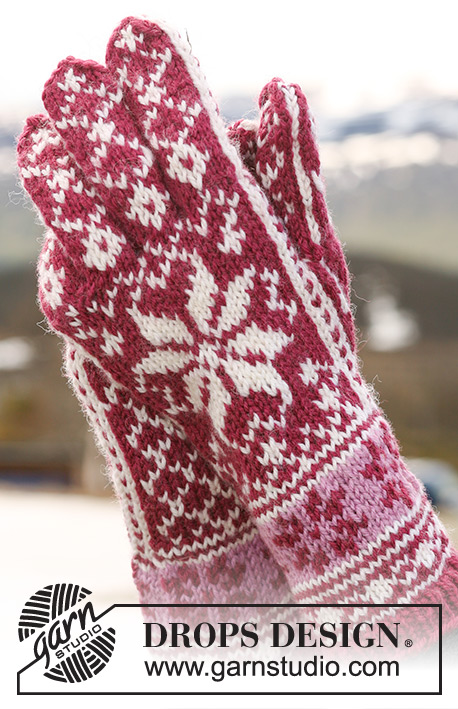
Catching Stars |
|||||||||||||
 |
 |
||||||||||||
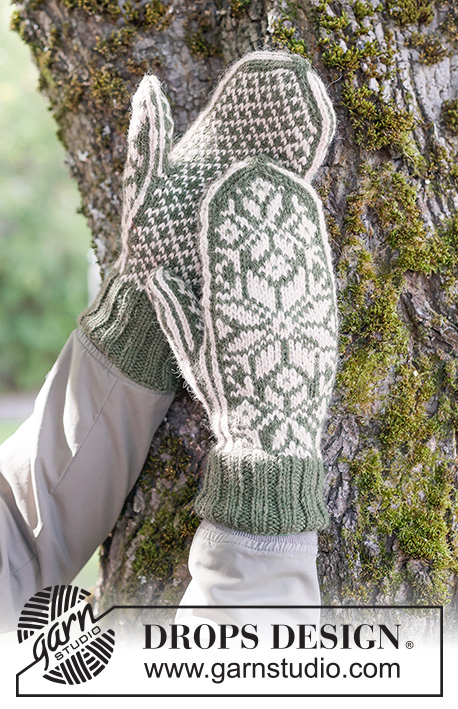
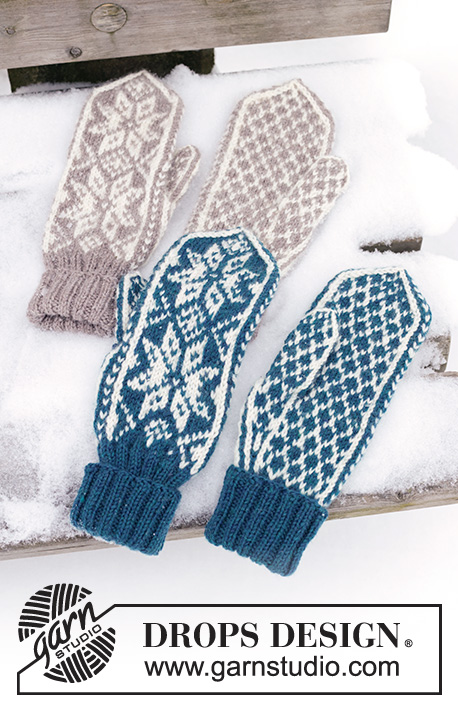
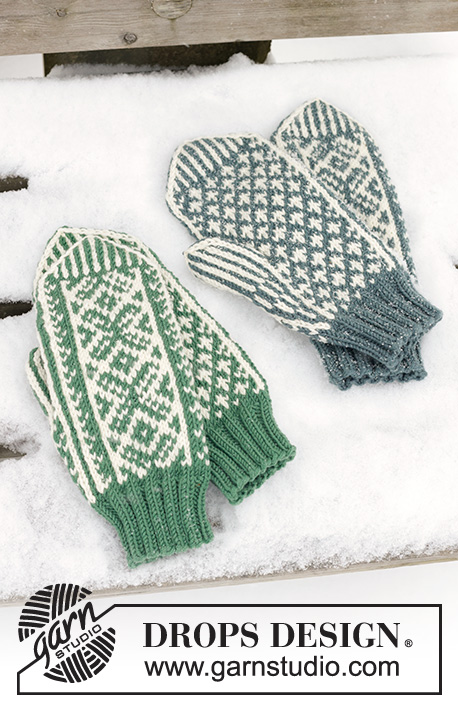
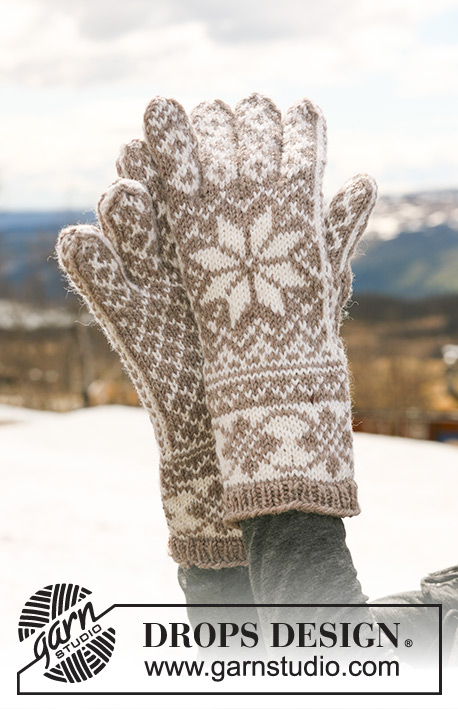
DROPS gloves with pattern in ”Karisma”.
DROPS 116-8 |
|||||||||||||
|
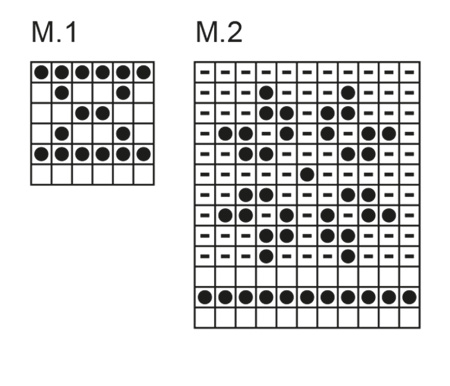
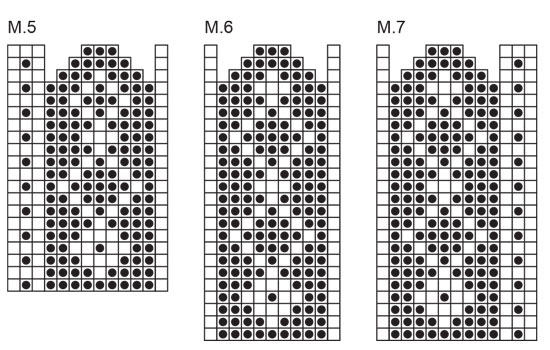
PATTERN: See diagram M.1 to M.7. Diagram shows the pattern from RS. The entire pattern is worked in stocking st. -------------------------------------------------------- LEFT GLOVE: Worked in the round on double pointed needles. Cast on 54-54 sts on double pointed needles size 3 mm with maroon. K 1 round and work 4 rounds rib K1/ P1. Now continue in M.1 (= 6 sts) on all sts, AT THE SAME TIME on the last round of M.1 inc 1 st = 55-55 sts. REMEMBER THE KNITTING TENSION! Continue in M.2 (= 11 sts) on all sts, AT THE SAME TIME on the last round of M.2 adjust no of sts to 52-56. Continue in M.3 (= 52-56 sts), the first 3 sts and the middle 3 sts are worked in both sizes, see diagram for the remainder of pattern for the 2 sizes. When you reach the 3 black squares in diagram (row 4 in M.3) continue in M.4 on these 3 squares/sts, continue in M.3 on remaining sts. Inc in M.4 with 1 YO inside 1 st each side, on next round K YO into back of loop to avoid a hole. After 5 inc (= 10 inc sts and 13 sts in thumb gusset) slip the 13 thumb sts on a stitch holder. Cast on 3 new sts behind sts on stitch holder = 52-56 sts. Continue in M.3. When M.3 is completed slip the first 21-23 sts on upper hand on a stitch holder, keep the next 14-14 sts on needle and slip the last 17-19 sts from palm of hand on another stitch holder. LITTLE FINGER: = 14-14 sts, Cast on 6-8 new sts towards sts on stitch holder = 20-22 sts. Work M.5 on 13 sts at the top of finger. NOTE! Beg round so that the 3 sts at the end of M.5 sit over the 3 sts in the middle of M.3, and continue pattern from under hand on the other side of finger (= 7-9 sts). Dec as follows (each side of the off-white st): Before the off-white st: K2 tog, after the off-white st: slip 1 st as if to K, K1, psso. Continue dec until there are 8-10 sts left on needle, cut the threads, pull through remaining sts, tighten and fasten. RING FINGER: Slip 6-6 sts from each stitch holder back on needle, pick up 4-5 sts towards little finger and cast on 4-5 new sts towards sts on stitch holders = 20-22 sts. Work M.6 on 11 sts at the top of finger. NOTE! Make sure that sts from hand sit in the middle of M.6 and continue pattern from under hand on the other side of finger (= 9-11 sts). Dec as follows (each side of the off-white st): Before the off-white st: K2 tog, after the off-white st: slip 1 st as if to K, K1, psso. Continue dec until there are 8-10 sts left on needle, cut the threads, pull through remaining sts, tighten and fasten. MIDDLE FINGER: Slip 6-7 sts from each stitch holder back on needle, pick up 4-4 sts towards ring finger and cast on 4-4 new sts towards sts on stitch holder = 20-22 sts. Work M.6 on 11 sts at the top of finger. NOTE! Make sure that sts from hand sit in the middle of M.6 and continue pattern from under hand on the other side of finger (= 9-11 sts). Dec as follows (each side of the off-white st): Before the off-white st: K2 tog, after the off-white st: slip 1 st as if to K, K1, psso. Continue dec until there are 8-10 sts left on needle, cut the threads, pull through remaining sts, tighten and fasten. INDEX FINGER: Slip the remaining 14-16 sts from stitch holders back on needle, pick up 6-6 sts towards middle finger = 20-22 sts. Work M.7 on 13 sts at the top of finger. NOTE! M.7 beg in the first st from sts on upper hand, and continue pattern from under hand on the other side of finger. Dec as follows (each side of the off-white st): Before the off-white st: K2 tog, after the off-white st: slip 1 st as if to K, K1, psso. Continue dec until there are 8-10 sts left on needle, cut the threads, pull through remaining sts, tighten and fasten. THUMB: Slip the 13 thumb sts back on double pointed needles size 3 mm. Pick up 9 sts behind thumb = 22 sts. Continue in M.4. Dec as follows (each side of the off-white st): Before the off-white st: K2 tog, after the off-white st: slip 1 st as if to K, K1, psso. Continue dec until there are 10 sts left on needle, cut the threads, pull through remaining sts, tighten and fasten. RIGHT GLOVE: Cast on and work like left glove, but mirrored, i.e. work thumb gusset on the 3 black squares in diagram in st 32, 33 and 34 for size S and in st 35, 36 and 37 for size M/L from the right side of diagram, and use stitch holders for fingers at the opposite side. Slip sts on stitch holders for fingers as follows: Keep the first 8-8 and the last 6-6 sts on needle, slip the next 21-23 sts on a stitch holder (= upper hand) and slip the next 17-19 sts on another stitch holder (= palm of hand). |
|||||||||||||
Diagram explanations |
|||||||||||||
|
|||||||||||||
 |
|||||||||||||
 |
|||||||||||||
 |
|||||||||||||
 |
|||||||||||||
Have you finished this pattern?Tag your pictures with #dropspattern or submit them to the #dropsfan gallery. Do you need help with this pattern?You'll find 18 tutorial videos, a Comments/Questions area and more by visiting the pattern on garnstudio.com. © 1982-2026 DROPS Design A/S. We reserve all rights. This document, including all its sub-sections, has copyrights. Read more about what you can do with our patterns at the bottom of each pattern on our site. |
|||||||||||||


With over 40 years in knitting and crochet design, DROPS Design offers one of the most extensive collections of free patterns on the internet - translated to 17 languages. As of today we count 324 catalogues and 12290 patterns translated into English (UK/cm). 12290
We work hard to bring you the best knitting and crochet have to offer, inspiration and advice as well as great quality yarns at incredible prices! Would you like to use our patterns for other than personal use? You can read what you are allowed to do in the Copyright text at the bottom of all our patterns. Happy crafting!
Post a comment to pattern DROPS 116-8
We would love to hear what you have to say about this pattern!
If you want to leave a question, please make sure you select the correct category in the form below, to speed up the answering process. Required fields are marked *.