
Popular categories
Looking for a yarn?


Comments / Questions (9)
![]() Chris wrote:
Chris wrote:
En is dit patroon ook aan te passen qua lengte (van zowel lijf als de armen)?
09.06.2026 - 13:54
![]() Chris wrote:
Chris wrote:
Is deze trui ook geschikt voor beginners?
09.06.2026 - 13:52
![]() Laura wrote:
Laura wrote:
Nella foto le trecce nel corpo vicino alla manica sono di più che nella spiegazione. Finiti gli aumenti delle maniche ci sono 56 punti x le maniche e 92 per il davanti e dietro, come la spiegazione. E se fossero così tante trecce circa 8 ripetizioni di A3 A4 ci sarebbero piu punti nel corpo..
28.04.2026 - 21:41DROPS Design answered:
Buonasera Laura, al momento non sono riportate correzioni per questo modello. Buon lavoro!
01.05.2026 - 19:24
![]() Claire wrote:
Claire wrote:
Il ne manquerait pas un jeté au premier rang de A1 et A2 ?
02.04.2026 - 10:57DROPS Design answered:
Bonjour Claire, le jeté (augmentation) fait partie des symboles des torsades correspondantes, cf 2ème et 3ème symboles. Bon tricot!
07.04.2026 - 16:55
![]() Susanne wrote:
Susanne wrote:
Danke für diese tolle Anleitung- mein Pullover in schwarz, Grösse L, ist traumhaft geworden. Ich habe den Rumpf länger gestrickt. Besonders schön ist der Schulterbereich. Der Pullover sitzt prima, ich finde diese europäische Schulter absolut toll! Der Aufwand und das Zählen ( zu Beginn) lohnt ganz wirklich.
23.02.2026 - 21:26
![]() Ayşe wrote:
Ayşe wrote:
Betrachten Sie die Anleitung noch einmal Bitte. Die Anleitung für Rückenteil ist nicht vollendet, deswegen fehlt die Länge und die linke und rechte Schulter sind vice versa.
26.10.2025 - 13:27
![]() Ayşe wrote:
Ayşe wrote:
Hi, the picture from the back side shows the cables of the back piece. But under instructions there are none of them. Am I wrong?
25.10.2025 - 00:21
![]() Rosi wrote:
Rosi wrote:
Ich habe lange nach einer Vorlage für einen nahtlosen Pullover mit europäischer Schulter und dünnem Garn gesucht und stricke jetzt dieses Modell in XL. Die Anleitung ist sehr gut zu verstehen und die kleinen Zöpfe für die Zunahmen sind hübsch. Die Passform ist gut. Das Halsbündchen habe ich vorgezogen und ich habe nur noch etwas Fleißarbeit am Rumpf und an den Ärmeln vor mir.
03.10.2025 - 11:19
![]() Eva wrote:
Eva wrote:
Ich finde den Pullover hübsch und hätte ihn mir h gerne gestrickt. Aber ich habe selten eine kompliziertere Anleitung gelesen und mein Vorhaben daher aufgegeben. Wäre es bei solchen Pullovern nicht einfacher, nach alter Tradition von unten nach oben zu arbeiten? Man könnte ja durchaus bis zur Ärmelöffnung in Runden stricken und erst dann die Arbeit öffnen. Man muss ja auch bei der Top-Down-Methode den gesamten oberen Teil in Hin- und Rückreihen stricken, man gewinnt folglich nichts.
10.09.2025 - 15:27DROPS Design answered:
Liebe Eva, die Methode von oben nach unten ist an sich nicht komplizierter als von unten nach oben. Hier ist der Vorteil, dass die Maschen aus der Schulter aufgefasst werden und die Schultern nicht zusammengenäht werden müssen, dadurch wirkt der Schulterbereich/die Passe etwas anders und sauberer. Außerdem werden die Ärmel direkt mit angestrickt, indem Maschen aus den Vorderteilen aufgefasst werden und sie zusammen mit dem Rückenteil direkt weitergestrickt werden. Die Anleitung wirkt sehr komplex, ist aber eigentlich nicht schwierig. Sie ist nur lang, weil fast jeder Einzelschritt beschrieben ist. Schauen Sie auch gern die Hilfsvideos.
23.10.2025 - 11:00
|
||||||||||||||||
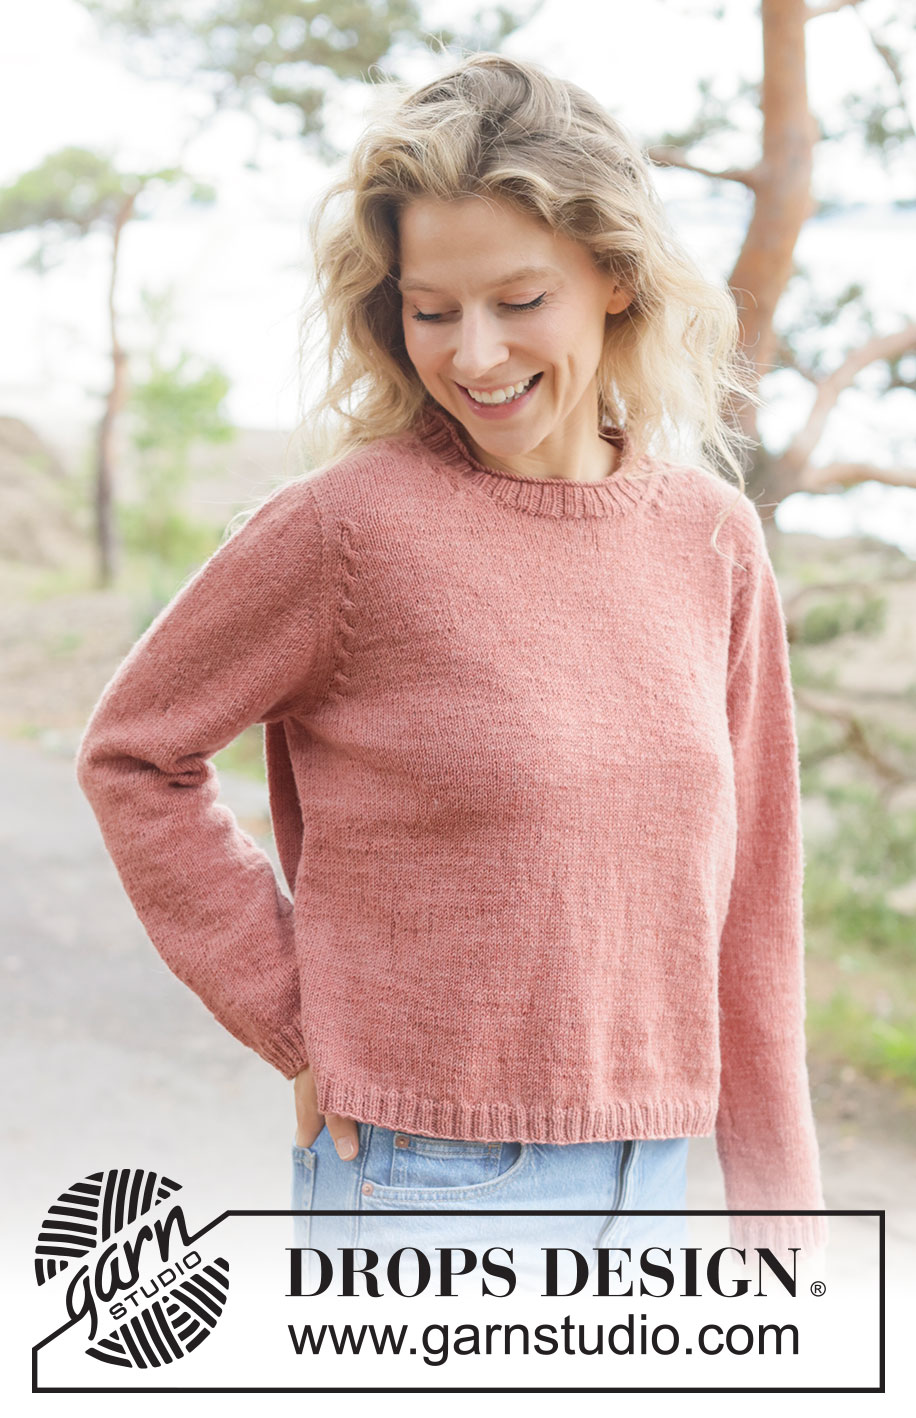
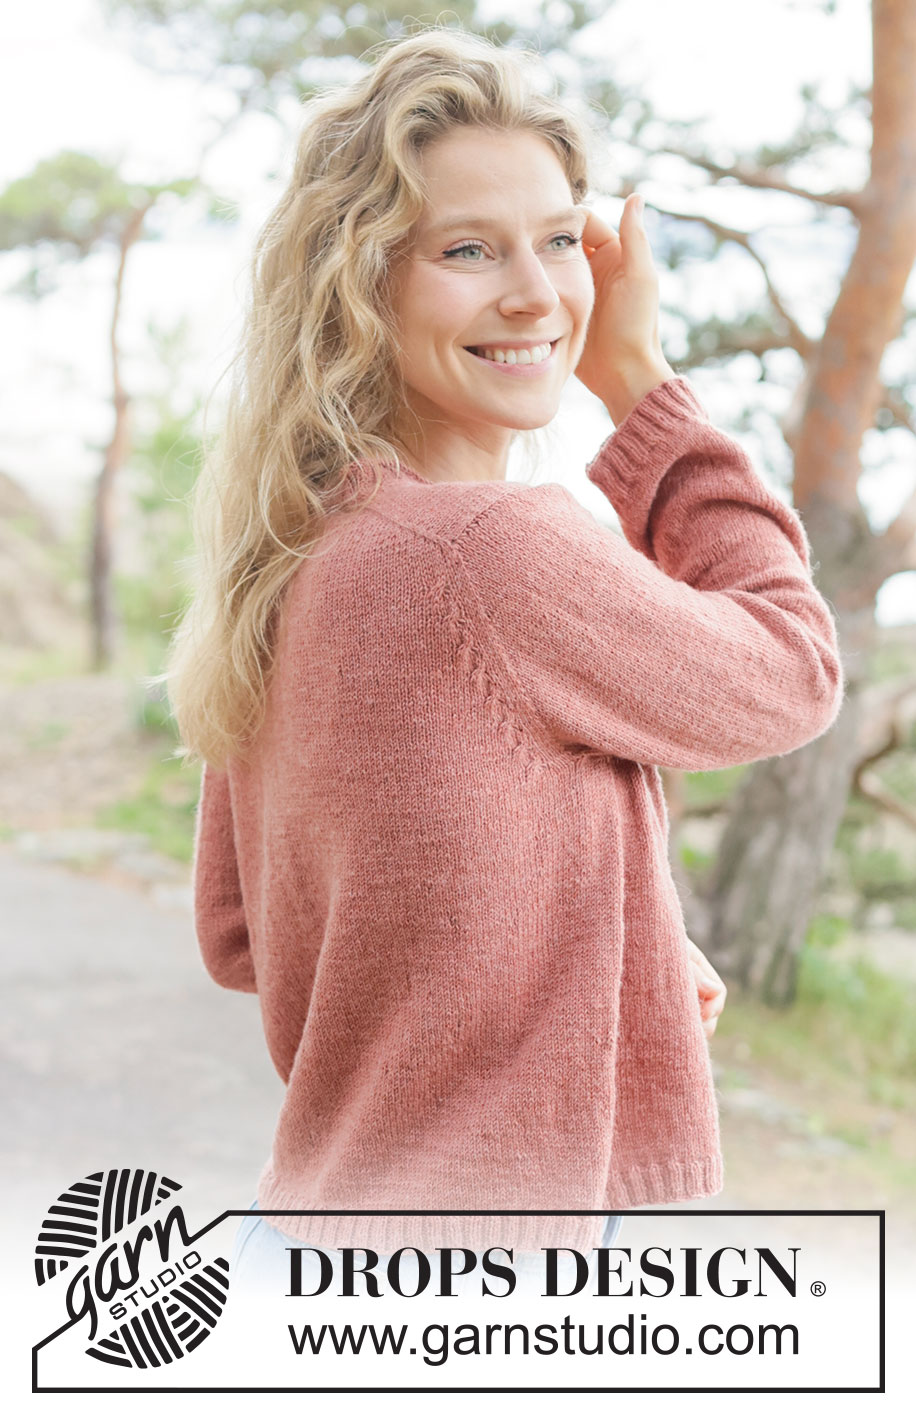
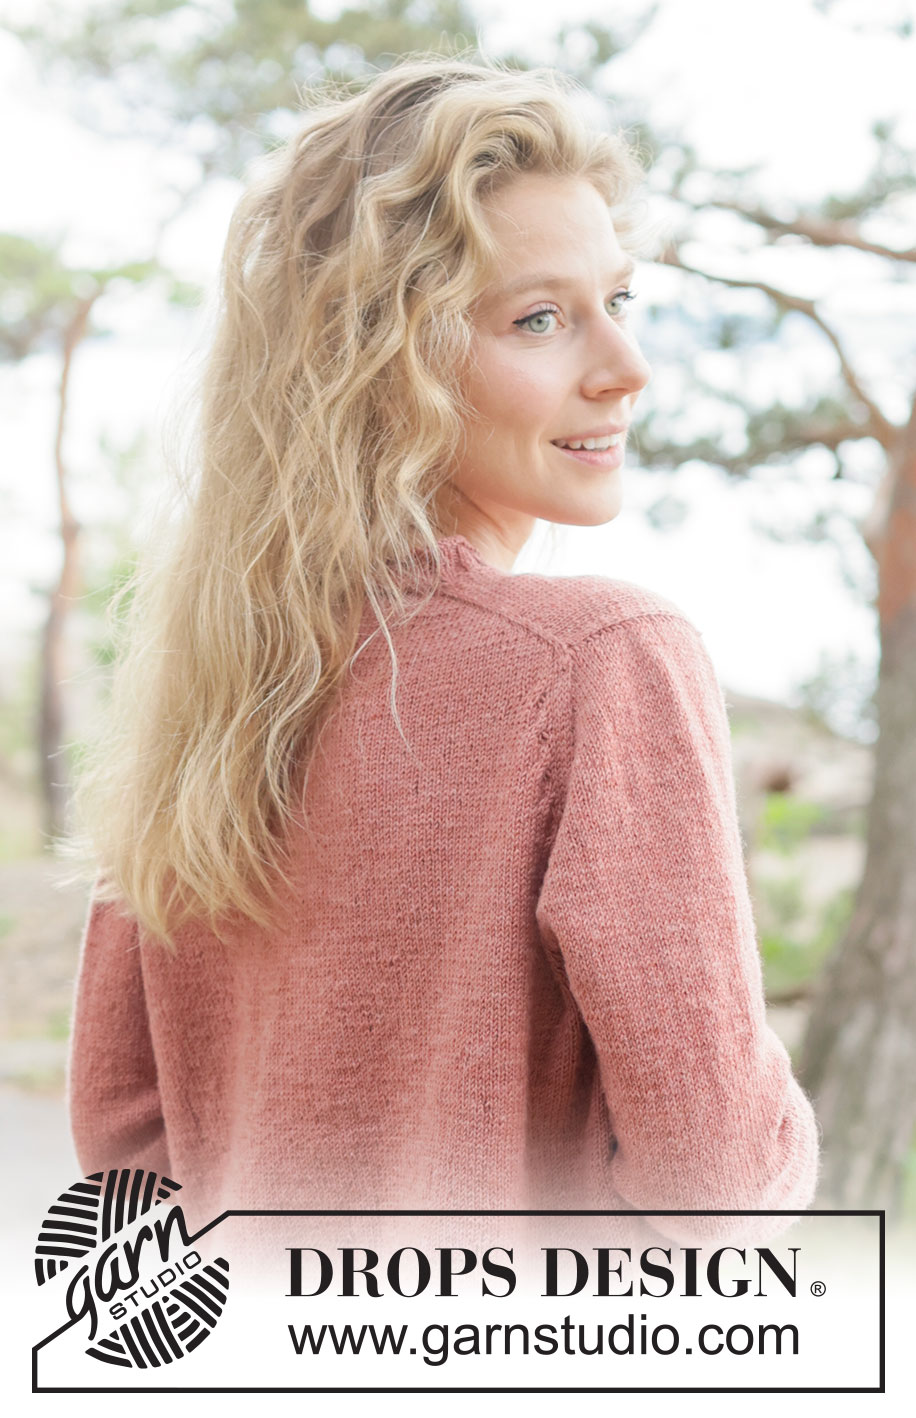
Frosted Cranberry Sweater#frostedcranberrysweater |
||||||||||||||||
 |
 |
|||||||||||||||
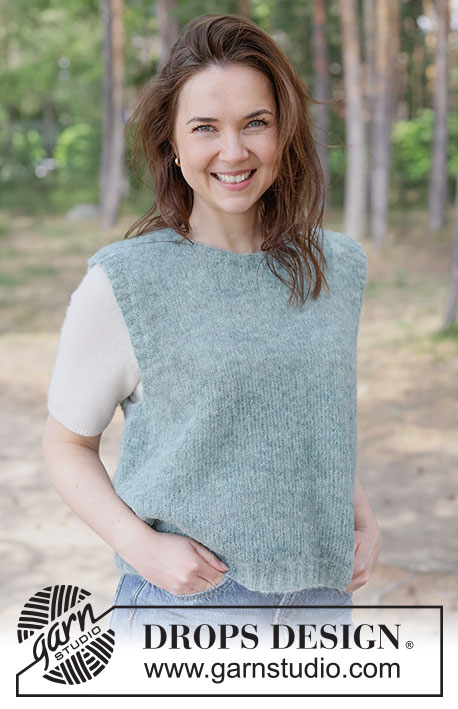
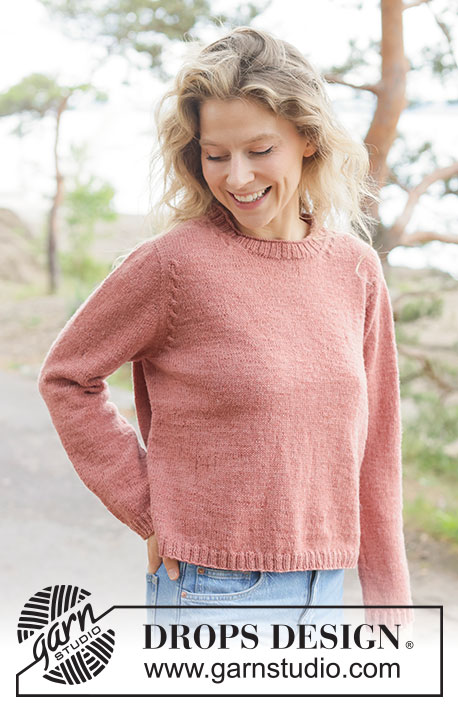
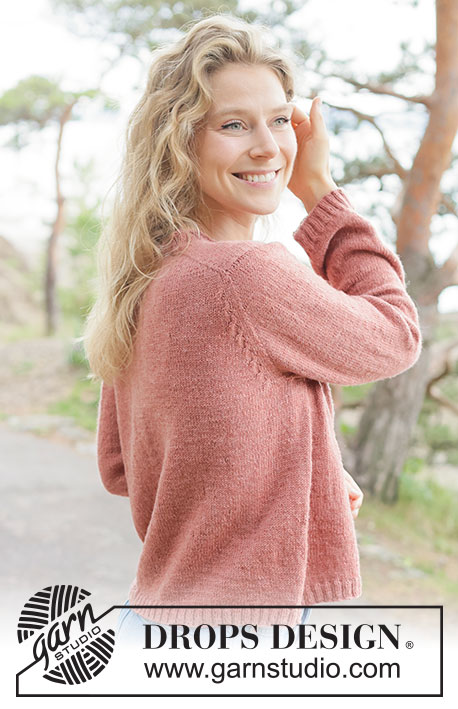
Knitted jumper in DROPS BabyMerino. The piece is worked top down in stocking stitch with European yoke, cables and rolled neck-edge. Sizes XS - XXXL.
DROPS 264-13 |
||||||||||||||||
|
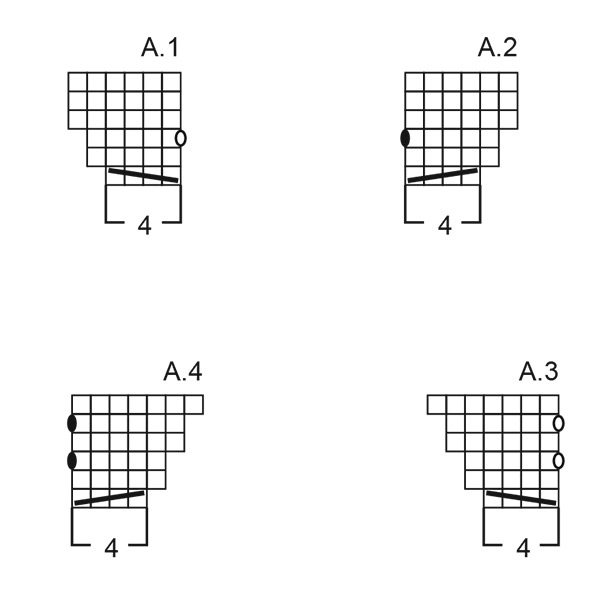
------------------------------------------------------- EXPLANATIONS FOR THE PATTERN: ------------------------------------------------------- PATTERN: See diagrams A.1 to A.4. The diagrams are worked from right to left when working from the right side and left to right when working from the wrong side. INCREASE TIP-1: INCREASE 1 STITCH TOWARDS THE LEFT - from RIGHT SIDE: Use left needle to pick up yarn between 2 stitches from row below, pick up yarn from the front and knit in the stitch loop that is on the back of the needle. INCREASE 1 STITCH TOWARDS THE RIGHT - from RIGHT SIDE: Use left needle to pick up yarn between 2 stitches from row below, pick up yarn from the back and knit in the stitch loop that is on the front side of the needle. . INCREASE TIP-2: INCREASE 1 STITCH TOWARDS THE RIGHT - from WRONG SIDE: Use left needle to pick up yarn between 2 stitches from row below, pick up yarn from the back and purl in the stitch loop that is on the front side of the needle. INCREASE 1 STITCH TOWARDS THE LEFT - from WRONG SIDE: Use left needle to pick up yarn between 2 stitches from row below, pick up yarn from the front and purl in the stitch loop that is on the back side of the needle. SLEEVE TIP: When knitting up stitches under the sleeve, you can get a small hole in the transition between stitches on the body and sleeve. This hole can be closed by picking up the strand between 2 stitches and working this strand twisted together with the first stitch between body and sleeve. DECREASE TIP: Decrease 1 stitch on each side of the marker thread as follows: Work until there are 3 stitches left before the marker thread, knit 2 together, knit 2 (marker thread sits between these 2 stitches) slip 1 stitch knit-wise, knit 1 and pass the slipped stitch over the knitted stitch (= 2 stitches decreased). ------------------------------------------------------- START THE PIECE HERE: ------------------------------------------------------- JUMPER – SHORT OVERVIEW OF THE PIECE. The pattern uses both long and short needles; start with the length which fits the number of stitches and change when necessary. Work according to points 1 – 5. 1 BACK PIECE: Cast on stitches for the back of the neck. Work the back piece back and forth, increasing stitches on each side until the shoulder stitch count has been achieved. The back piece has slightly diagonal shoulder. 2 FRONT PIECE: Is worked in 2 sections (each side of neck). Start by knitting up stitches along one back shoulder, working downwards and increasing for the neckline. Repeat on the other shoulder. Then stitches are cast on for the neckline mid-front and the 2 front sections are joined. 3 YOKE: Place the front and back pieces on the same needle, working first the front piece, knitting up stitches for the sleeve along one side of the front piece, then working the back piece, knitting up stitches for the second sleeve along the other side of the front piece. The yoke is continued in the round. 4 INCREASE FOR BODY AND SLEEVES: While working the yoke, you increase stitches first for the sleeves, then for both the body and sleeves. 5 BODY AND SLEEVES: When all the increases are finished and the yoke is the correct length, it is divided and the body is continued in the round while the sleeves wait. Then the sleeves are worked top down in the round. Stitches are knitted up around the neckline and the neck is worked in the round. If there is a «0» in your chosen size, skip the information and go straight to the next instruction. BACK PIECE: The piece is worked back and forth. Cast on 42-44-46-48-54-56-58 stitches with circular needle size 3 mm and DROPS Baby Merino. ROW 1 (wrong side): Purl. ROW 2 (right side): Read INCREASE TIP-1. Knit 3, increase 1 stitch towards the left, knit until there are 3 stitches left on the row, increase 1 stitch towards the right, knit 3. ROW 3 (wrong side): Read INCREASE TIP -2. Purl 3, increase 1 stitch towards the right, purl until there are 3 stitches left on the row, increase 1 stitch towards the left, purl 3. Work ROWS 2 and 3 a total of 13-13-13-13-13-14-15 times (26-26-26-26-26-28-30 rows worked). There are 94-96-98-100-106-112-118 stitches. Remember to maintain the knitting tension. Cut the strand and place the stitches on a stitch holder. LEFT FRONT SHOULDER: Find the left back shoulder as follows: Lay the back piece flat, right side up, with the stitch holder towards you; left side of piece = left shoulder. Start from the right side by the neckline on the left back shoulder and knit up 1 stitch in each worked row as far as the armhole (inside the outermost stitch = 26-26-26-26-26-28-30 stitches), then knit up 1 stitch outermost on the shoulder (= edge stitch) = 27-27-27-27-27-29-31 shoulder-stitches. Insert 1 marker by the neck. All length-measurements on the front piece are taken from here. Continue with stocking stitch, with the first row from the wrong side. When the piece measures 5-5-4-5-6-7-8 cm, increase for the neckline as follows: ROW 1 (right side): Knit 4, work row 1 in A.1, knit to end of row (= 1 increased stitch). ROW 2 (wrong side): Purl, working the yarn over as described in the symbol explanations. ROW 3 (right side): Knit 4, work row 3 in A.1, knit to end of row (= 1 increased stitch). ROW 4 (wrong side): Purl, working the yarn over twisted. ROW 5 (right side): Knit without increasing. ROW 6 (wrong side): Purl without increasing. Work ROWS 1 to 6 a total of 3-3-4-4-4-4-4 times (18-18-24-24-24-24-24 rows worked) = 33-33-35-35-35-37-39 stitches. The neckline increases are finished. The piece measures approx. 10-10-11-12-14-14-15 cm from the marker. A little of the neck-length will lie on the back piece. Neck-length in front approx. 8-8-9-9-10-10-11 cm. Neck-length at back approx. 2-2-2-3-4-4-4 cm. Cut the strand and place the stitches on a stitch holder. Work the right front shoulder. RIGHT FRONT SHOULDER: Start from the right side by the armhole on the right back shoulder and knit up 1 stitch outermost on the shoulder (edge stitch), then knit up 1 stitch in each worked row as far as the neckline (inside the outermost stitch = 26-26-26-26-26-28-30 stitches) = 27-27-27-27-27-29-31 shoulder-stitches. Insert 1 marker by the neck. All length-measurements on the front piece are taken from here. Continue with stocking stitch, with the first row from the wrong side. When the piece measures 5-5-4-5-6-7-8 cm, increase for the neckline as follows: ROW 1 (right side): Knit until there are 8 stitches left on the row, work row 1 in A.2, knit 4. ROW 2 (wrong side): Purl, working the yarn over as described in the symbol explanations. ROW 3 (right side): Knit until there are 9 stitches left, work row 3 in A.2, knit 4. ROW 4 (wrong side): Purl, working the yarn over twisted. ROW 5 (right side): Knit without increasing. ROW 6 (wrong side): Purl without increasing. Work ROWS 1 to 6 a total of 3-3-4-4-4-4-4 times (18-18-24-24-24-24-24 rows worked) = 33-33-35-35-35-37-39 stitches. The neckline increases are finished. The piece measures approx. 10-10-11-12-14-14-15 cm from the marker. A little of the neck-length will lie on the back piece. Neck-length in front approx. 8-8-9-9-10-10-11 cm. Neck-length at back approx. 2-2-2-3-4-4-4 cm. FRONT PIECE: On the next row (right side) join the 2 front sections as follows: Knit the 33-33-35-35-35-37-39 stitches from the right shoulder, cast on 28-30-28-30-36-38-40 stitches for the neckline, knit the 33-33-35-35-35-37-39 stitches from the left shoulder = 94-96-98-100-106-112-118 stitches. Work stocking stitch back and forth until the piece measures 11-11-12-13-15-15-16 cm from the marker, with the last row from the wrong side. The front and back pieces are now joined and stitches are knitted up for the sleeves as follows: ROW 1 (right side): Knit together the first 2 stitches on the front piece (1 stitch decreased), knit until there are 2 stitches left on the front piece, slip 1 stitch, knit 1 and pass the slipped stitch over (1 stitch decreased), insert 1 marker, knit up 28-28-30-34-38-40-42 stitches along the left side of the front piece (= sleeve-stitches, knitted up inside the outermost stitch), insert 1 marker, knit together the first 2 stitches on the back piece (1 stitch decreased), knit until there are 2 stitches left on the back piece, slip 1 stitch, knit 1 and pass the slipped stitch over (1 stitch decreased), insert 1 marker, knit up 28-28-30-34-38-40-42 stitches along the right side of the front piece (= sleeve-stitches, knitted up inside the outermost stitch), insert 1 marker = 240-244-252-264-284-300-316 stitches. YOKE: The piece is now worked in the round. ROUND 1: Knit all stitches, increasing 1 stitch on each side of the sleeves - remember INCREASE TIP-1, increasing 1 stitch towards the left at the beginning of the sleeve and 1 stitch towards the right at the end of the sleeve. The stitch count on the sleeves increases but remains the same on the front and back pieces. Work this round 3-3-3-3-5-5-5 times; 34-34-36-40-48-50-52 stitches on each sleeve and 92-94-96-98-104-110-116 stitches on the front and back pieces = 252-256-264-276-304-320-336 stitches. Continue as follows: ROUND 1: Knit all stitches, increasing 1 stitch on each side of the sleeves as before. The stitch count on the sleeves increases but remains the same on the front and back pieces. ROUND 2: Knit without increasing. Work ROUNDS 1 and 2, 11-9-7-6-3-1-1 times (22-18-14-12-6-2-2 rounds worked). A total of 14-12-10-9-8-6-6 increases in height on the sleeves (56-52-50-52-54-52-54 sleeve-stitches and 92-94-96-98-104-110-116 stitches on the front and back pieces) = 296-292-292-300-316-324-340 stitches. Now increase on both the body and sleeves, increasing 4 stitches inside the markers on the body so there are 4 knitted stitches between the increases on the body and sleeves. ROUND 1: Knit 4, work round 1 in A.3, knit until there are 8 stitches left on the front piece before the marker, work round 1 in A.4, knit 4, move the marker onto the right needle, increase 1 stitch towards the left, knit to the next marker (= sleeve), increase 1 stitch towards the right, move the marker onto the right needle, knit 4, work round 1 in A.3, knit until there are 8 stitches left on the back piece before the marker, work round 1 in A.4, knit 4, move the marker onto the right needle, increase 1 stitch towards the left, knit to the next marker (= sleeve), increase 1 stitch towards the right, move the marker onto the right needle (= 8 increased stitches, increasing 1 stitch on each side of all 4 markers in each transition between the body and sleeves). ROUND 2: Knit without increasing. ROUND 3: Knit 4, work round 3 in A.3, knit until there are 9 stitches left on the front piece before the marker, work round 3 in A.4, knit 4, move the marker onto the right needle, increase 1 stitch towards the left, knit to the next marker (= sleeve), increase 1 stitch towards the right, move the marker onto the right needle, knit 4, work round 3 in A.3, knit until there are 9 stitches left on the back piece before the marker, work round 3 in A.4, knit 4, move the marker onto the right needle, increase 1 stitch towards the left, knit to the next marker (= sleeve), increase 1 stitch towards the right, move the marker onto the right needle (= 8 increased stitches). ROUND 4: Knit without increasing. ROUND 5: Knit 4, work round 5 in A.3, knit until there are 10 stitches left on the front piece before the marker, work round 5 in A.4, knit 4, move the marker onto the right needle, increase 1 stitch towards the left, knit to the next marker (= sleeve), increase 1 stitch towards the right, move the marker onto the right needle, knit 4, work round 5 in A.3, knit until there are 10 stitches left on the back piece before the marker, work round 5 in A.4, knit 4, move the marker onto the right needle, increase 1 stitch towards the left, knit to the next marker (= sleeve), increase 1 stitch towards the right, move the marker onto the right needle (= 8 increased stitches). ROUND 6: Knit without increasing. Work ROUNDS 1 to 6, 3-4-5-6-7-9-9 times (18-24-30-36-42-54-54 rounds worked), then work the first 0-0-2-2-4-0-4 rounds of 1 to 6 (a total of 18-24-32-38-46-54-58 rounds worked). A total of 23-24-26-28-31-33-35 increases in height on the sleeves and 9-12-16-19-23-27-29 increases in height on the body; 74-76-82-90-100-106-112 sleeve-stitches and 110-118-128-136-150-164-174 stitches on the front and back pieces = 368-388-420-452-500-540-572 stitches. The sleeves measure approx. 13-13-14-16-17-18-19 cm. NOTE: When the jumper is folded double at the shoulder, the piece should measures approx. 18-19-20-22-24-25-27 cm from outermost on the shoulder and down the armhole. Continue working until the yoke measures 19-20-21-22-24-25-27 cm from the top of the shoulder and down the armhole. Now divide for the body and sleeves. DIVIDE FOR BODY AND SLEEVES: Knit the first 110-118-128-136-150-164-174 stitches (= front piece), place the next 74-76-82-90-100-106-112 stitches on a thread for the sleeve, cast on 10-12-12-14-14-16-18 stitches (mid-under the sleeve), knit 110-118-128-136-150-164-174 (= back piece), place the next 74-76-82-90-100-106-112 stitches on a thread for the sleeve, cast on 10-12-12-14-14-16-18 stitches (mid-under the sleeve). The body and sleeves are finished separately. BODY: = 240-260-280-300-328-360-384 stitches. Work stocking stitch in the round for a further 24-25-26-27-26-27-27 cm. Change to circular needle size 2.5 mm. Work rib (knit 2, purl 2), AT THE SAME TIME increase 40-48-52-56-60-64-72 stitches evenly on the first round = 280-308-332-356-388-424-456 stitches. When the rib measures 3-3-3-3-4-4-4 cm, cast off. The jumper measures approx. 50-52-54-56-58-60-62 cm from the top of the shoulder. SLEEVES: Place the 74-76-82-90-100-106-112 sleeve-stitches from one thread on circular needle size 3 mm and knit up 1 stitch in each of the 10-12-12-14-14-16-18 stitches cast on under the sleeve – read SLEEVE TIP = 84-88-94-104-114-122-130 stitches. Insert a marker-thread in the middle of the 10-12-12-14-14-16-18 stitches under the sleeve- the round starts by the marker-thread. Work stocking stitch in the round. AT THE SAME TIME, when the sleeve measures 1 cm from the division, decrease mid-under the sleeve – read DECREASE TIP as follows: Decrease 2 stitches every 2nd round 2-2-2-2-3-3-4 times, then decrease 2 stitches every 2-2-1½-1-1-1-1 cm a total of 6-7-9-12-14-15-16 times = 68-70-72-76-80-86-90 stitches. Continue working until the sleeve measures 39-40-40-38-36-35-34 cm from the division. Change to double pointed needles size 2.5 mm. Work rib (knit 2, purl 2) AT THE SAME TIME increase 12-14-16-16-16-14-14 stitches evenly on the first round = 80-84-88-92-96-100-104 stitches. When the rib measures 3-3-3-3-4-4-4 cm, change to double pointed needles size 3 mm and cast off with rib. The sleeve measures approx. 42-43-43-41-40-39-38 cm from the division. NECK: Using circular needle size 2.5 mm, start from the right side by one shoulder-line and knit up approx. 120-128-136-144-160-168-176 stitches, inside 1 stitch, around the neckline. Knit one round and adjust the stitch count if necessary; it should be divisible by 4. Work rib in the round (knit 2, purl 2) for 3-3-3-3-4-4-4 cm, knit 2-2-3-3-3-3-3 rounds (= rolled edge). Change to circular needle size 3 mm and cast off slightly loosely with knit. |
||||||||||||||||
Diagram explanations |
||||||||||||||||
|
||||||||||||||||
 |
||||||||||||||||
 |
||||||||||||||||
Have you finished this pattern?Tag your pictures with #dropspattern #frostedcranberrysweater or submit them to the #dropsfan gallery. Do you need help with this pattern?You'll find 36 tutorial videos, a Comments/Questions area and more by visiting the pattern on garnstudio.com. © 1982-2026 DROPS Design A/S. We reserve all rights. This document, including all its sub-sections, has copyrights. Read more about what you can do with our patterns at the bottom of each pattern on our site. |
||||||||||||||||


With over 40 years in knitting and crochet design, DROPS Design offers one of the most extensive collections of free patterns on the internet - translated to 17 languages. As of today we count 325 catalogues and 12298 patterns translated into English (UK/cm). 12298
We work hard to bring you the best knitting and crochet have to offer, inspiration and advice as well as great quality yarns at incredible prices! Would you like to use our patterns for other than personal use? You can read what you are allowed to do in the Copyright text at the bottom of all our patterns. Happy crafting!
Post a comment to pattern DROPS 264-13
We would love to hear what you have to say about this pattern!
If you want to leave a question, please make sure you select the correct category in the form below, to speed up the answering process. Required fields are marked *.