
Popular categories
Looking for a yarn?


Comments / Questions (13)
![]() Mischa wrote:
Mischa wrote:
Dank voor uw antwoorden. Inderdaad de halslijn begintbij 57 cm (maat m). Bij simpel keren kreeg ik gaatjes om de 4 steken dus uiteindelijk 5 cm moeten uithalen. Ik ga het nu proberen op te lossen door zgn. Duitse verkorte toeren te breien. Was dat misschien de bedoeling?
01.11.2025 - 20:59DROPS Design answered:
Dag Mischa,
Het is niet expliciet aangegeven, maar je kunt natuurlijk Duitse verkorte toeren breien.
12.11.2025 - 16:52
![]() Mischa wrote:
Mischa wrote:
Ik ben maar gaan breien en kwam tot de conclusie dat er wellicht verkorte toeren gebreid moesten worden voor de diagonale schouder? Ik ben dan nog steeds 4 steken kwijt. 86 achterpand min 24 hals = 62 en in de beschrijving staat 29 per schouder en niet 31.
29.10.2025 - 18:53DROPS Design answered:
Dag Mischa,
Je hebt op elke schouder 29 steken in totaal. Je mindert 24 voor de hals en daarnaast minder je nog 2 keer aan elke kant van de hals. dus nog 4 steken in totaal. Daarmee kom je op 29+29+24+4=86. Dit komt overeen met het aantal opgezette steken.
01.11.2025 - 19:32
![]() Mischa wrote:
Mischa wrote:
Diagonale schouders achterpand maat m: "tot er vier steken over zijn". Wat doe ik met deze steken? Ik moet namelijk het werk keren. Verder: "Tot er vijf steken over zijn aan elke kant". Dit begrijp ik niet. Uiteindelijk moeten er 29 over zijn per schouder (twee schouders is 58) dus dat is 28 minder: 14 per schouder minder? Niet duidelijk hoe en wat. Kunt u me verder helpen? Ik heb drops video's gekeken, maar daar werd ik helaas niet wijzer van. Dank
29.10.2025 - 17:48DROPS Design answered:
Dag Mischa,
Je breit de naald niet helemaal uit, maar stopt als je nog 4 steken op de linker naald hebt. Dan keer je het werk en brei je terug tot je nog 4 steken over hebt, dan keer je weer. Dan brei je tot er nog 8 steken over hebt (dus de eerste 4 steken plus nog 4 steken.) Zo brei je steeds heen en weer en brei je over steeds minder steken aan elke kant zodat de schouders schuin worden. Let erop dat je tegelijkertijd de halslijn moet breien (zie volgende paragraaf), waardoor je elke schouder apart verder moet breien.
01.11.2025 - 19:25
![]() Mischa wrote:
Mischa wrote:
Hoe minder ik 4 steken over elke kabel? Welke steken minder ik dan en hoe moet ik dit doen? Dank!
28.10.2025 - 15:08DROPS Design answered:
Dag Mischa,
De kabels gaan over 8 steken, dus je kunt alle 8 steken 2 aan 2 samen breien.
28.10.2025 - 21:25
![]() Liese wrote:
Liese wrote:
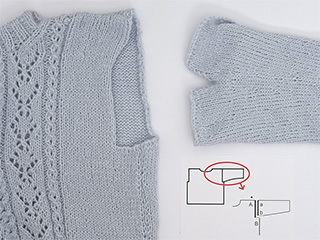
Guten Tag, ich habe ein Problem mit den Ärmeln. Das Armloch ist größer als der fertige Ärmel. Meine Maschenanzahl des Ärmels und der Schulter stimmen mit der Anleitung überein. Die Skizze stellt dar, dass der Ärmel an der Schulter festgenäht wird, aber auf dem Foto sieht es so aus, als ob der Ärmel tiefer sitzt. Können sie mir sagen, wo mein Fehler liegt. Ich habe den Pullover in Größe M gestrickt. Vielen Dank im Voraus.
26.04.2025 - 07:10DROPS Design answered:
Liebe Liese, der Armausschnitt ist insgesamt 42 cm in M (21 cm x 2), für den Ärmel sind es 72 M nach allen Zunahmen mit 17 M = 10 cm sollen diese 72 M ca 42 cm messen. Hier zeigen wir, wie man eine Ärmelkugel mit Schlitz in einen Armausschnitt näht; das kann Ihnen sicher helfen. Viel Spaß beim Stricken!
28.04.2025 - 07:45
![]() Lisa wrote:
Lisa wrote:
Guten Morgen, Ich habe eine Frage zum Bündchen. Vor dem Muster A1, A2 usw sind 2 Maschen rechts angegeben, sowie am Ende der Reihe 2 Maschen rechts und dann folgen die Maschen am Rand. Meine Frage lautet: die 2 Maschen rechts in der Hin-Reihe werden die in der Rück-Reihe auch rechts gestrickt?
14.11.2024 - 06:47DROPS Design answered:
Liebe Lisa, bei den Rückreihen stricken Sie die Maschen wie sie erscheinen, so haben Sie Bündchen wie bei der Vorderseite beschrieben; dh die Rückreihen beginnen mit 2 M links (damit die Hinreihen mit 2 M rechts enden). Viel Spaß beim Stricken!
14.11.2024 - 10:17
![]() Liese wrote:
Liese wrote:
Guten Tag, das Bündchen wird im Rippenmuster , 2 Rechts, 2 links gestrickt, insgesamt 4-5-5-7-7-9 x arbeiten, dann 2 Maschen rechts, A.1, A.2, A.3, A.2, A.1, *Meine Frage lautet: Beginnt das Muster wirklich schon nach der 5.Runde, also im Bündchen? Auf dem Foto sieht es nicht so aus. Vielen Dank im Voraus für Ihre Hilfe.
12.11.2024 - 07:46DROPS Design answered:
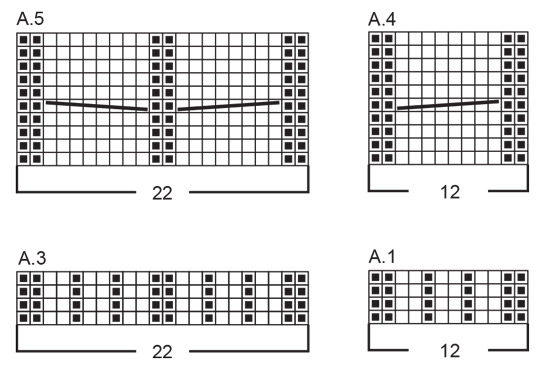
Liebe Liese, die Diagramme A.1 bis A.3 sind Rippenmuster, die Zöpfe beginnen erst mit den Diagrammen A.4 und A.5 die erst bei der 2. Runde vom Rumfpteil gestrickt werden. Viel Spaß beim Stricken!
12.11.2024 - 09:27
![]() Liesbeth wrote:
Liesbeth wrote:
De trui is bijna af en wordt heel mooi! Ik heb alleen nog een vraag over de laatste zin: om te voorkomen dat de hals te strak wordt, is het belangrijk dat de naad elastisch is.’ Bedoelen jullie hier dat er losjes afgekant en genaaid moet wordt? Of moet er echt met elastisch draad genaaid worden?
08.07.2024 - 20:44DROPS Design answered:
Dag Liesbeth,
Ja, er wordt inderdaad bedoeld dat je losjes af moet kanten. Zorg ervoor dat de halsrand niet te strak wordt.
07.08.2024 - 10:32
![]() Liesbeth wrote:
Liesbeth wrote:
Aan het eind van de beschrijving van de mouwen staat: ‘ (een split van 1-2-2-3-4-4 cm op de bovenkant)´ Wat wordt er bedoeld / wat moet ik doen als ik 51 cm heb in maat L?
09.06.2024 - 15:24DROPS Design answered:
Dag Liesbeth,
Het laatste stukje van de mouw brei je heen en weer in plaats van in de rondte, waardoor de naad midden onder de mouw daar open is, dus er ontstaat a.h.w. een split.
Als het werk 51 cm kant je af. 09.06.2024 - 16:42
![]() Liesbeth wrote:
Liesbeth wrote:
Bij telpatronen A4 en A5: zitten er steeds 9 toeren tussen de toeren waarin je kanelnaald gebruikt? Dus: de eerste keer kanelnaald in de 5e toer en daarna elke 10e toer?
04.04.2024 - 21:27DROPS Design answered:
Dag Liesbeth,
Klopt, de eerste keer kabel je op de 5e toer en daarna steeds op de 10e toer.
07.04.2024 - 17:55
|
||||||||||||||||
Climbing Vines#climbingvinessweater |
||||||||||||||||
 |
 |
|||||||||||||||
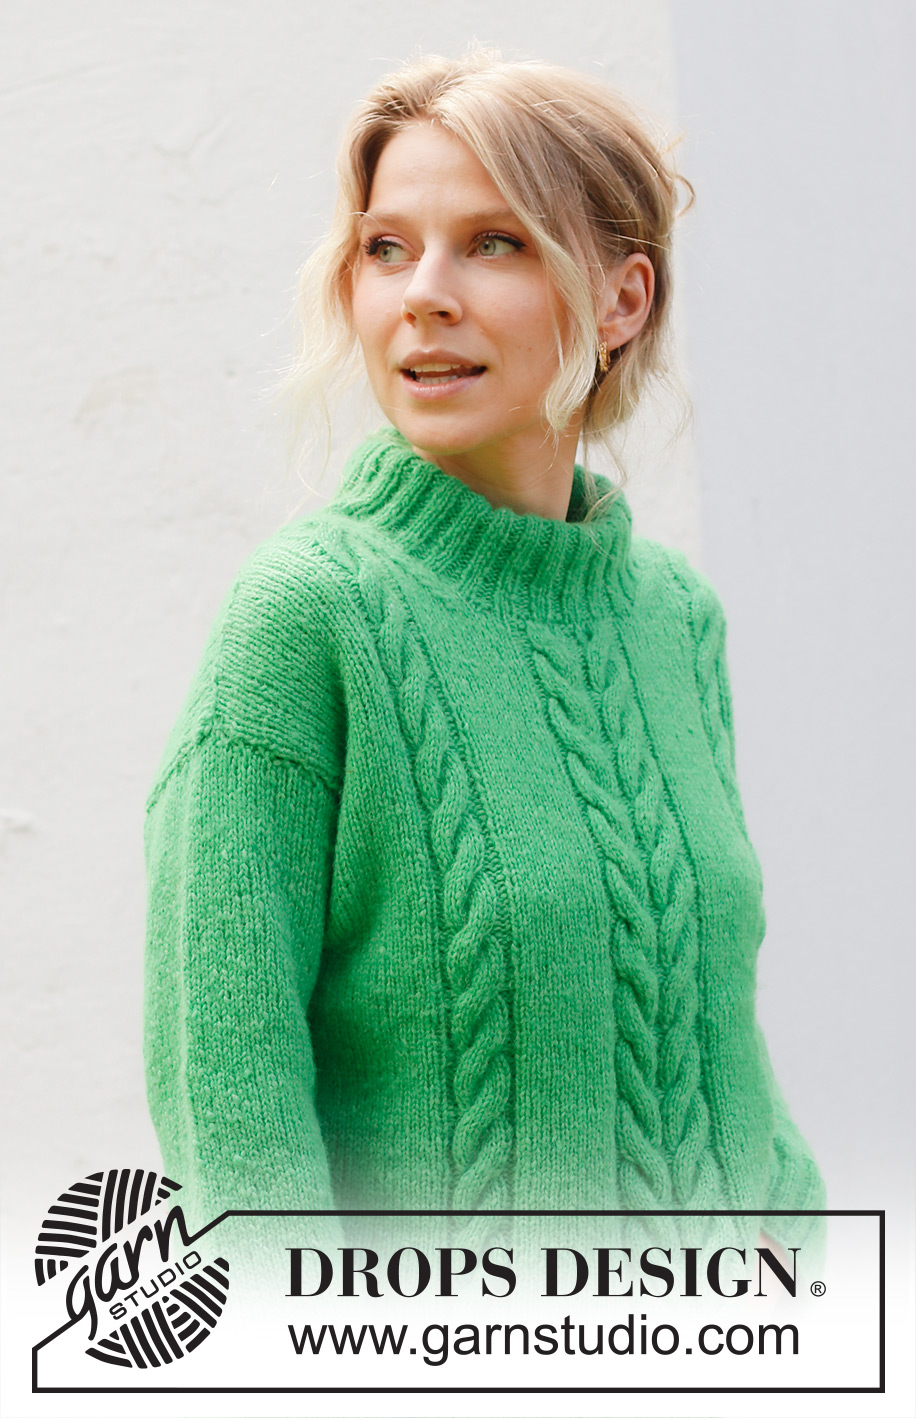
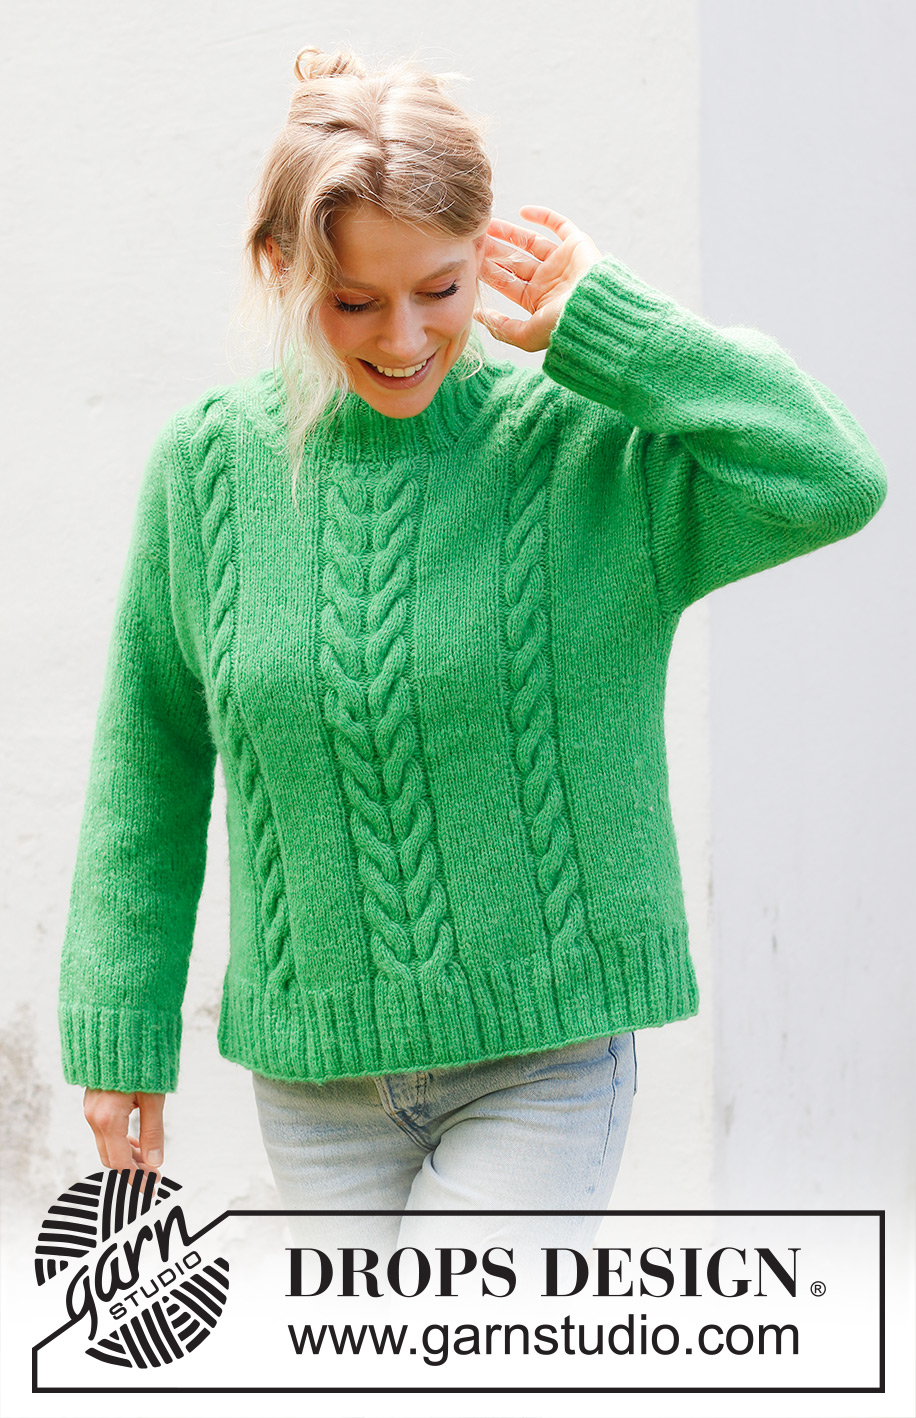
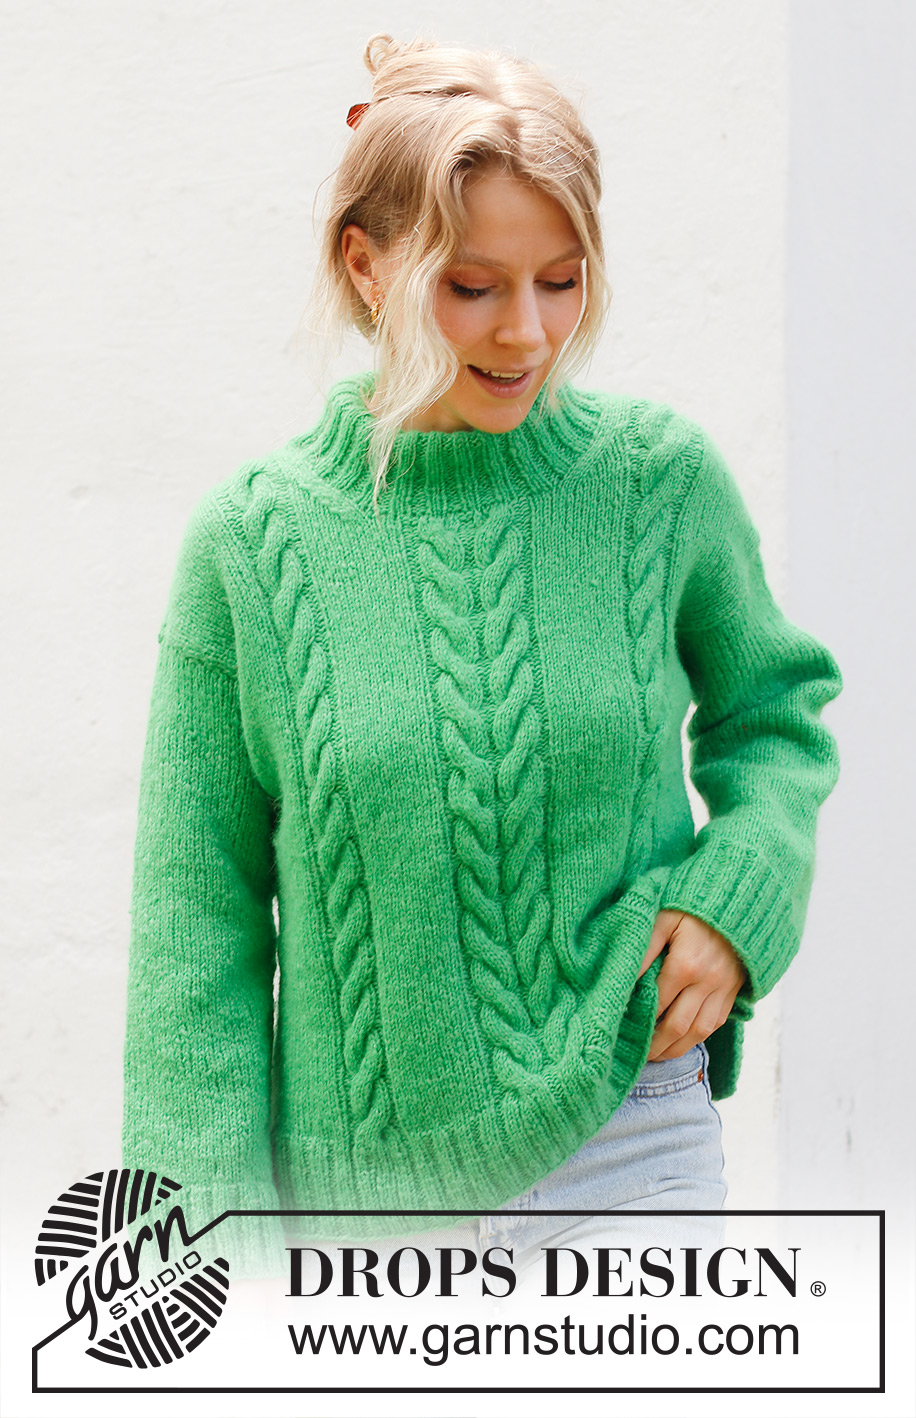
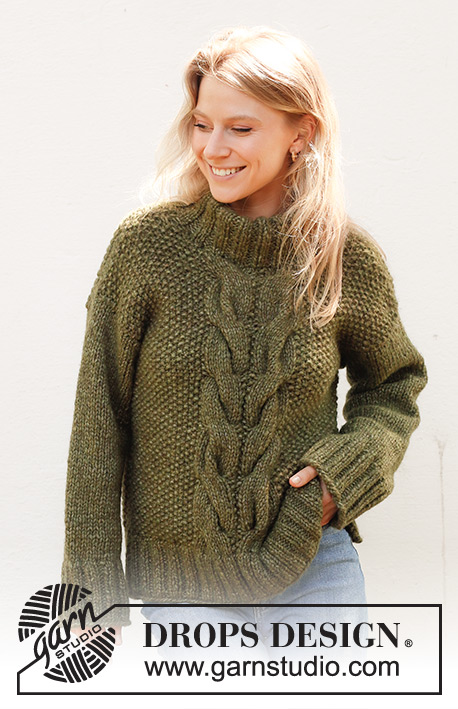
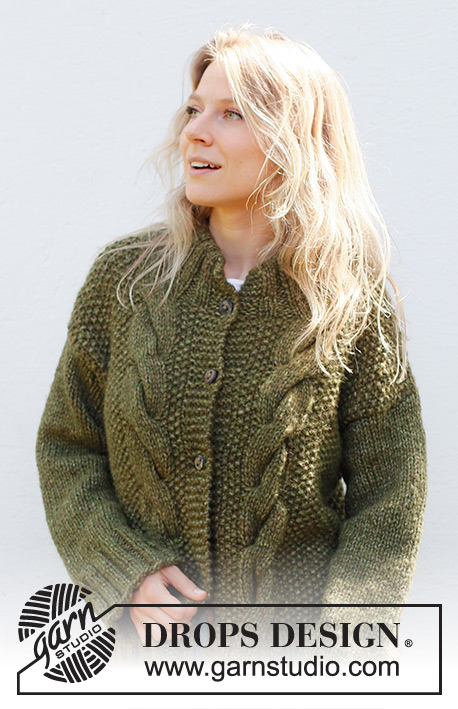
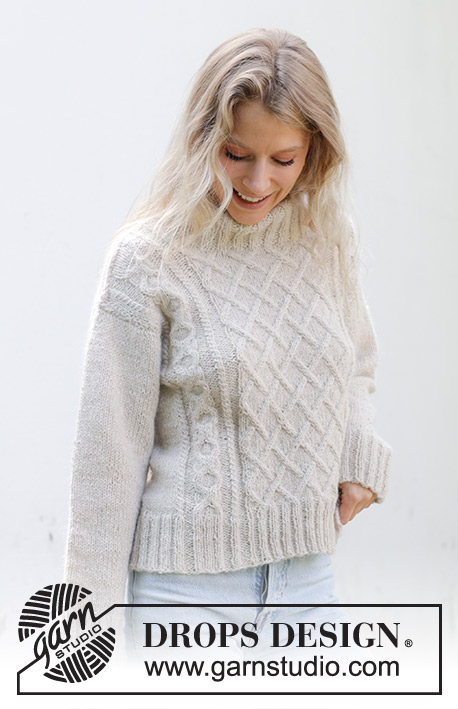
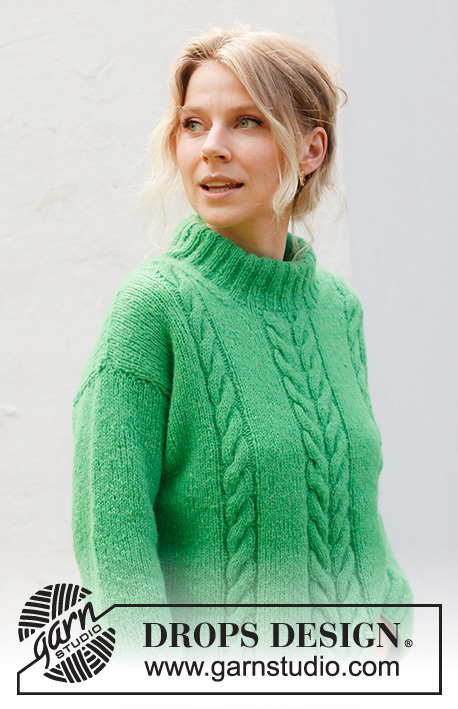
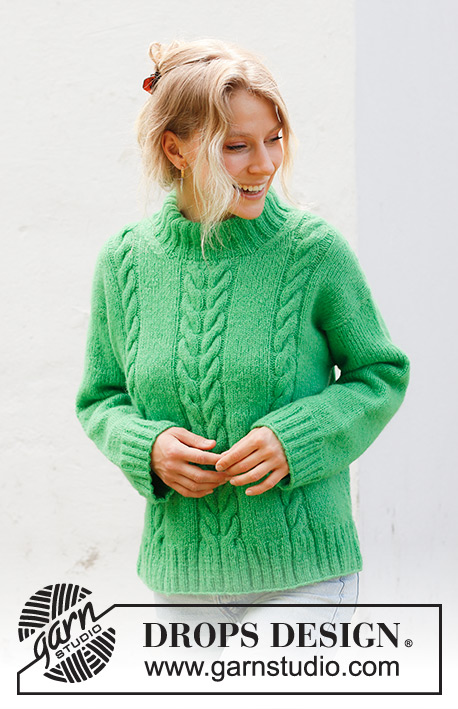
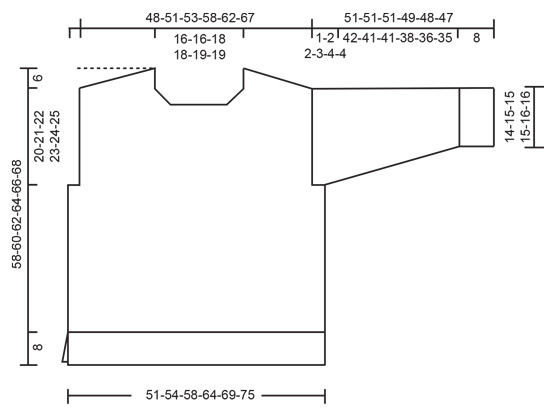
Knitted jumper in DROPS Air. The piece is worked bottom up with cables, diagonal shoulders and double neck. Sizes S - XXXL.
DROPS 244-29 |
||||||||||||||||
|
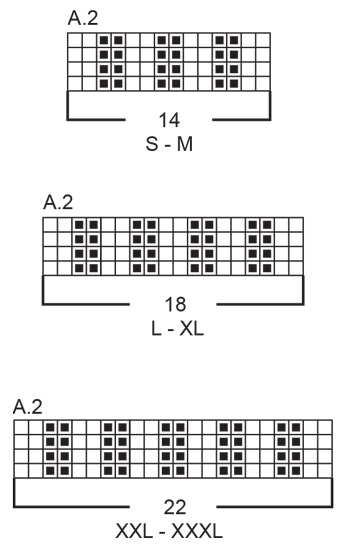
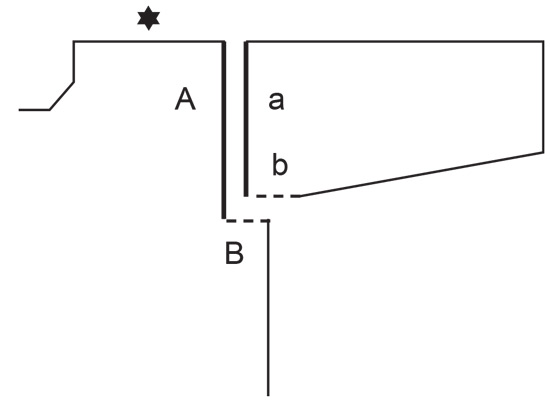
------------------------------------------------------- EXPLANATIONS FOR THE PATTERN: ------------------------------------------------------- EDGE STITCHES: The edge stitches are knitted from both the right and wrong sides (garter stitch). PATTERN: See diagrams A.1 to A.5. Choose diagram for your size (applies to A.2). The diagrams show all rows in the pattern from the right side. DECREASE TIP (for neckline): All decreases are worked from the right side. Decrease 1 stitch for the neckline at the beginning of the row from the right side: Knit 3, slip 1 stitch knit-wise, knit 1 and pass the slipped stitch over the knitted stitch. Decrease 1 stitch for the neckline at the end of the row from the right side: Work until there are 5 stitches left by the neck, knit 2 together, knit 3. INCREASE TIP (for sleeves): Start 2 stitches before the marker thread, 1 yarn over, knit 4 (marker thread sits between these 4 stitches), 1 yarn over. On the next round knit the yarn overs twisted to avoid holes. Then work the new stitches in stocking stitch. ------------------------------------------------------- START THE PIECE HERE: ------------------------------------------------------- JUMPER - SHORT OVERVIEW OF THE PIECE: The front and back pieces are started separately, back and forth with circular needle and bottom up until the split is finished. The piece is joined, and the body continued in the round with circular needle as far as the armholes. The piece is divided again, and each piece finished separately, back and forth with circular needle. The sleeves are worked in the round with double pointed needle/ with a short circular needle, bottom up as far as the sleeve cap, which is finished back and forth with circular needle. The piece is sewn together, and the double neck worked in the round to finish. FRONT PIECE: Cast on 114-122-130-146-154-170 stitches with circular needle size 3.5 mm and DROPS Air. Purl 1 row from the wrong side. Work as follows from the right side: 2 EDGE STITCHES – read description above, * knit 2, purl 2 *, work from *-* a total of 4-5-5-7-7-9 times, knit 2, A.1, A.2, A.3, A.2, A.1, * knit 2, purl 2 *, work from *-* a total of 4-5-5-7-7-9 times, knit 2 and 2 edge stitches. Continue this rib back and forth for 8 cm, finishing after a row from the wrong side. Cut the strand. Place the stitches on a stitch holder. BACK PIECE: Cast on 114-122-130-142-154-170 stitches with circular needle size 3.5 mm and DROPS Air. Purl 1 row from the wrong side. Work the next row as follows from the right side: 2 edge stitches, * knit 2, purl 2 *, work from *-* until there are 4 stitches left, knit 2 and 2 edge stitches. Continue this rib back and forth for 8 cm, finishing after a row from the wrong side. Now join the 2 pieces for the body. BODY: Change to circular needle size 5 mm and knit the 114-122-130-142-154-166 stitches on the back piece from the right side, decreasing 28-30-32-34-36-38 stitches evenly spaced, then work as follows from the right side over the front piece: Knit 20-24-24-32-32-40 and decrease 4-5-4-7-5-8 stitches evenly spaced, work A.4 over the stitches in A.1, knit 14-14-18-18-22-22 and decrease 2-2-4-4-5-5 stitches evenly spaced, work A.5 over the stitches in A.3, knit 14-14-18-18-22-22 and decrease 2-2-4-4-5-5 stitches evenly spaced, work A.4 over the stitches in A.1, knit 20-24-24-32-32-40 stitches and decrease 4-5-4-7-5-8 stitches evenly spaced. Insert 1 marker-thread in each side of the body, in the transitions between the front and back pieces. There are 188-200-212-232-252-272 stitches on the needle (102-108-114-124-134-144 stitches on the front piece and 86-92-98-108-118-128 stitches on the back piece). Continue with stocking stitch over the back piece and as follows over the front piece: 16-19-20-25-27-32 stitches in stocking stitch, A.4, 12-12-14-14-17-17 stitches in stocking stitch, A.5, 12-12-14-14-17-17 stitches in stocking stitch, A.4, 16-19-20-25-27-32 stitches in stocking stitch. REMEMBER THE KNITTING TENSION! When the piece measures 32-33-34-35-36-37 cm, and the next round is an odd round in the diagrams, work the armholes as follows: Start 2-3-4-5-6-7 stitches before the first marker-thread, cast off 4-6-8-10-12-14 stitches, work until there are 2-3-4-5-6-7 stitches left before the next marker-thread, cast off 4-6-8-10-12-14 stitches and work to the end of the round. The front and back pieces are finished separately. FRONT PIECE: = 98-102-106-114-122-130 stitches. Start from the wrong side and continue the pattern back and forth with 1 edge stitch on each side. When the piece measures 48-50-51-53-54-56 cm and the next row is from the right side, decrease 8 stitches evenly over the stitches in A.5 (decrease 4 stitches over each cable) = 90-94-98-106-114-122 stitches. On the next row place the middle 18-18-20-20-22-22 stitches on a thread for the neckline and finish each shoulder separately = 36-38-39-43-46-50 stitches on each shoulder. You now decrease for the neckline and work the diagonal shoulders. Read NECKLINE and DIAGONAL SHOULDERS before continuing. NECKLINE: Decrease by the neck, on each row from the right side, 5 times – read DECREASE TIP. DIAGONAL SHOULDERS: AT THE SAME TIME, when the piece measures 52-54-56-58-60-62 cm, work as follows: Work as before until there are 4-5-5-6-6-7 stitches left by the armhole, turn, tighten the strand and work back. Turn, work until there are 8-10-10-12-12-14 stitches left by the armhole, turn, tighten the strand and work back. Continue back and forth like this with 4-5-5-6-6-7 fewer stitches each time and until there are 7-3-4-2-5-3 stitches left. Work back over these stitches, then work 1 row over all 31-33-34-38-41-45 stitches and decrease 4 stitches over the cable in A.4 = 27-29-30-34-37-41 stitches. Cast off on the next row. Work the other shoulder in the same way. BACK PIECE: = 82-86-90-98-106-114 stitches. Start from the wrong side and work stocking stitch back and forth, with 1 edge stitch on each side. When the piece measures 52-54-56-58-60-62 cm, insert 1 marker in the middle of the row, which will be used when working the neckline. Now work diagonal shoulders and cast off for the neckline. Read DIAGONAL SHOULDERS and NECKLINE before continuing. DIAGONAL SHOULDERS: Work as before until there are 4-4-4-5-5-6 stitches left on the row, turn, tighten the strand and work back until there are 4-4-4-5-5-6 stitches left. Turn, tighten the strand and work until there are 8-8-8-10-10-12 stitches left, turn, tighten the strand and work until there are 8-8-8-10-10-12 stitches left. Continue back and forth like this with 4-4-4-5-5-6 fewer stitches each time and until there are 3-5-6-4-7-5 stitches left on each side. Work back over these stitches, then work 1 row over all 27-29-30-34-37-41 stitches. Cast off on the next row. Work the other shoulder in the same way. NECKLINE: At the same time, when the piece measures 55-57-59-61-63-65 cm, cast off the middle 24-24-26-26-28-28 stitches for the neckline (12-12-13-13-14-14 stitches on each side of the marker). Finish each shoulder separately. Continue by decreasing for the neckline on each row from the right side 2 times – read DECREASE TIP. SLEEVES: Cast on 64-68-68-68-72-72 stitches with double pointed needles size 3.5 mm and DROPS Air. Knit 1 round, then work rib in the round (knit 2, purl 2) for 8 cm. Change to double pointed needles size 5 mm. Knit 1 round and decrease 16-18-18-16-18-16 stitches evenly spaced = 48-50-50-52-54-56 stitches. Insert 1 marker-thread at the beginning of the round. Allow the thread to follow your work onwards, it is used when increasing under the sleeve. Work stocking stitch in the round. When the sleeve measures 10-10-12-12-10-13 cm, increase 1 stitch on each side of the marker-thread – read INCREASE TIP. Increase like this every 4-3½-3-2½-2½-2 cm a total of 10-11-12-13-14-14 times = 68-72-74-78-82-84 stitches. When the sleeve measures 50-49-49-46-44-43 cm, work stocking stitch back and forth for the sleeve cap (from the marker-thread) until the sleeve measures 51-51-51-49-48-47 cm (a split of 1-2-2-3-4-4 cm at the top). Cast off. Work the other sleeve in the same way. ASSEMBLY: Sew the shoulder seams inside the cast-off edge. Sew the sleeve cap to the armhole, then the split to the bottom of the armhole – see sketch. NECK: Use short circular needle size 3.5 mm and DROPS Air. Start at one shoulder seam and knit up from the right side 96-96-104-104-112-112 stitches around the neckline – stitch count must be divisible by 4. Work rib in the round (knit 2, purl 2) for 13-13-15-15-17-17 cm. Cast off a little loosely. Fold the neck double to the inside and sew down. To avoid the neck being tight and rolling outwards, it is important that the seam is elastic. |
||||||||||||||||
Diagram explanations |
||||||||||||||||
|
||||||||||||||||
 |
||||||||||||||||
 |
||||||||||||||||
 |
||||||||||||||||
 |
||||||||||||||||
Have you finished this pattern?Tag your pictures with #dropspattern #climbingvinessweater or submit them to the #dropsfan gallery. Do you need help with this pattern?You'll find 31 tutorial videos, a Comments/Questions area and more by visiting the pattern on garnstudio.com. © 1982-2026 DROPS Design A/S. We reserve all rights. This document, including all its sub-sections, has copyrights. Read more about what you can do with our patterns at the bottom of each pattern on our site. |
||||||||||||||||


With over 40 years in knitting and crochet design, DROPS Design offers one of the most extensive collections of free patterns on the internet - translated to 17 languages. As of today we count 324 catalogues and 12290 patterns translated into English (UK/cm). 12290
We work hard to bring you the best knitting and crochet have to offer, inspiration and advice as well as great quality yarns at incredible prices! Would you like to use our patterns for other than personal use? You can read what you are allowed to do in the Copyright text at the bottom of all our patterns. Happy crafting!
Post a comment to pattern DROPS 244-29
We would love to hear what you have to say about this pattern!
If you want to leave a question, please make sure you select the correct category in the form below, to speed up the answering process. Required fields are marked *.