
Popular categories
Looking for a yarn?


Comments / Questions (26)
![]() Zuzana wrote:
Zuzana wrote:
Skvelý model. Páči sa mi tento patentový vzor. Podľa návodu sa mi dobre plietlo a top veľmi pekne sedí. Mám z neho radosť. Plietla som vo farbe 06 džínovo modrej.
21.08.2023 - 09:26
![]() Ratna wrote:
Ratna wrote:
Hi -- can you pls help with the count of the increases at the armhold. I am knitting a size XL. At the beginning of the armhole increase I have 107 stitches, same as in the pattern. Pattern calls for 5 increases every other row (10 stitches) and 11 increases every row (22 stitches) -- At this point, I will have 107 + 32 = 149 stitches. This is very different from the stitch count given in the pattern (121 stitches) Pls help
21.02.2023 - 11:15DROPS Design answered:
Dear Ratna, please note that when you work the first row in A.1/A.2 before you will decrease 2 sts in each diagram (= there will remain 89 stitches after first row has been worked, then you increase 31 sts for armholes and get 121 stitches. Happy knitting!
21.02.2023 - 17:37
![]() Pia Mortensen wrote:
Pia Mortensen wrote:
Skal man stikke A1 eller A2 A1 - 8 gange og så A2 til slut og så starte med A2 på vrang siden og resten af pinden med A 1 det passer med maske antal men synes ikke det er sådan det står i forklaringen
20.02.2023 - 10:10DROPS Design answered:
Hej Pia, du starter med 1 m retstrik, så rib (antal masker i din størrelse) så strikker du A.1 8 gange, så A.2 og sidst rib og 1 retstrik ifølge opskriften :)
23.02.2023 - 15:34
![]() Elise wrote:
Elise wrote:
Bonjour ! Je ne comprends pas le choix des aiguilles. Cet ouvrage est fait avec des aiguilles droites ou des aiguilles circulaires n°2.5 ou les deux ? Merci beaucoup pour la réponse.
21.01.2023 - 17:16DROPS Design answered:
Bonjour Elise, on tricote en allers et retours sur aiguilles droites puis sur aiguille circulaire pour avoir suffisamment de place pour y loger toutes les mailles. Vous pouvez utiliser des aiguilles droites si vous préférez, vos mailles seront juste plus serrées. Bon tricot!
23.01.2023 - 09:12
![]() Ania wrote:
Ania wrote:
Dzień dobry, przebrnęłam przez schematy z Waszą pomocą. Dziękuję! Teraz mam dodać dla rozm. L 12 oczek na końcu 2 kolejnych rzędów(na podkroje).Jestem na prawej str. robótki. I tu nie wiem. Dodawać 6 ocz. na jednym końcu i potem kolejne 6ocz. na drugim końcu rzędu czy dzielić to i równomiernie po 3 ocz. dodawać z każdej strony. I jeszcze drugie ważne pytanie: Dodać je na końcu rzędów czy w odległości 9 ocz. od brzegu( tak jak dotychczas je dodawałam)?
15.01.2023 - 11:15DROPS Design answered:
Brawo Aniu! Teraz nabierasz na podkroje rękawów 6 oczek na końcu 2 kolejnych rzędów, czyli przerabiasz rząd na prawej stronie i na końcu nabierasz 6 oczek (tak jak się nabiera oczka na początku robótki). Obracasz i przerabiasz rząd na lewej stronie, na końcu tego rzędu nabierasz 6 oczek. Powodzenia i miłej pracy!
16.01.2023 - 19:16
![]() Anna wrote:
Anna wrote:
Przerobiłam 1raz na długość wz. a1 i a2 ( ost. ich rząd to same oczka lewe) Podczas przerabiania tych wzorów dodałam łącznie 8ocz.(po 1 z każdej strony co drugi rząd). Nast.zrobiłam 2 rzędy dżersejem zachowując 8 ocz. ściąg.+ocz. brzeg. jak wcześniej. Przy tych 2 rzędach narzuciłam po 3 oczka z każdej str. robótki. Czyli dodałam w sumie 12 ocz. Mam 109 ocz., nie zaś 121. Gdzie robię błąd? Skomplikowana jest ta instrukcja.
10.01.2023 - 15:10DROPS Design answered:
Witaj Aniu, jak skończysz przerabiać schematy A.1 i A.2 to dalej dodajesz po 1 o. z każdej strony co 2 rzędy, jeszcze 6 razy 6 razy (tu jest 12 brakujących oczek) na formowanie skosu podkroju rękawa. Dodawanie oczek na podkrój rękawa (skos) miało być 10 razy w rozmiarze L, a nie 4. Pozdrawiamy!
11.01.2023 - 08:41
![]() Ania wrote:
Ania wrote:
Witam, dziękuje za odp. Widzę, że schemat A2 się różni od A1( nie ma on 8-ego rzędu). Przerobiłam 7 rzędów schematu A1 i A2 i nie wiem co dalej. Dodałam dotychczas łącznie 8ocz. ( w co drugim rzędzie po oczku z każdej strony robótki) Gdzie dodać pozostałe 12 ocz? Czy przerabiać 8 rząd schematu A1 z pustymi kratkami? a co wtedy ze schematem A2? Po przerobieniu 1 rzędu od ostatnich dod. ocz. na podkroje, nabrać na podkroje 6 oczek na końcu 2 kolejnych rz.
09.01.2023 - 19:33DROPS Design answered:
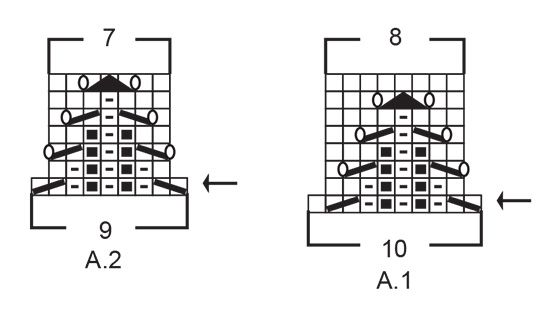
Witaj Aniu, 1) w schemacie A.2 brakuje ostatniego rzędu. Jest taki sam jak w schemacie A.1. 2) Po przerobieniu 1 rzędu od ostatnich dodanych oczek na podkroje rękawów, nabrać na podkroje rękawów 6 oczek na końcu 2 kolejnych rzędów. Pozdrawiamy!
10.01.2023 - 08:33
![]() Ania wrote:
Ania wrote:
Witam, Czy może Pani rozpisać dokładnie jak dodawać oczka dla rozm. L ? 10 razy co 2 rzędy? dodaje 10 ocz. co drugi rząd przez całą wysokość schematu A1 czyli 80 ocz. razem? I tylko po bokach robótki? bo w schemacie A1 i A2 już są widzę zaznaczone narzuty jakieś. 2 dni staram się to rozgryźć. .. PS. Mogłoby być dodatkowe zdjęcie jak ten top wygląda właśnie z boku na modelce. To by znacznie ułatwiło pracę.pozdr.
05.01.2023 - 12:49DROPS Design answered:
Witaj Aniu, na podkroje rękawów dodajesz 1 oczko z każdej strony, w rozmiarze L 10 razy co 2 rzędy (patrz DODAWANIE OCZEK (podkroje rękawów)). Czyli w co drugim rzędzie dodajesz tylko 2 oczka. W sumie na podkroje rękawów dodasz 20 oczek. Podsumowując: 107 oczek jest przed rozpoczęciem schematów A.1 i A.2. Po ich przerobieniu zostanie 89 oczek (w 1-szym rzędzie każdego schematu A.1 i A.2 są zamknięte 2 oczka >18 zamkniętych oczek). Po dodaniu 20 oczek na podkroje rękawów mamy 89+20=109 oczek. W razie potrzeby pisz. Zapytam czy mamy ujęcie z boku sweterka. Pozdrawiamy!
06.01.2023 - 18:06
![]() Ania wrote:
Ania wrote:
Dzień dobry, nie rozumiem ile i kiedy mam dodawać oczka na podkroje rękawów. Dodawać 1 oczko z każdej strony w sumie 4-2-0-0-0-0 razy co 4 rzędy, 0-7-10-5-6-2 razy co 2 rzędy i 0-0-0-11-13-24 razy w każdym rzędzie = 93-103-109-121-131-145 oczek. Czemu to jest 3 razy rozpisane i są zera? z góry dzięki za odp., pozdrawiam
03.01.2023 - 18:18DROPS Design answered:
Witaj Aniu, wybierasz jedną cyfrę z ciągu cyfr w zależności od przerabianego rozmiaru. Np. jeśli przerabiasz rozmiar S (najmniejszy) to wybierasz zawsze 1-szą cyfrę. Tzn. w rozmiarze S dodajesz tylko 1 oczko z każdej strony 4 razy co 4 rzędy (jak widzisz 0 to nie ma wogóle dodawania oczek). Jak dodawać oczka patrz DODAWANIE OCZEK (podkroje rękawów) na górze we wzorze. Pozdrawiamy!
04.01.2023 - 09:15
![]() Katk Elshout wrote:
Katk Elshout wrote:
Ik begin met de meerderingen voor de armsgaten en start met A2 voor maat L 8 keer en A1. Ik heb 107 steken en na 10 keer 2 steken te hebben gemeerderd moet ik 109 steken hebben. Maar 107 st en 10 keer 2 steken gemeerderd komt uit op 127 steken. Wat doe ik niet goed?
01.12.2022 - 20:37
|
|||||||||||||||||||||||||
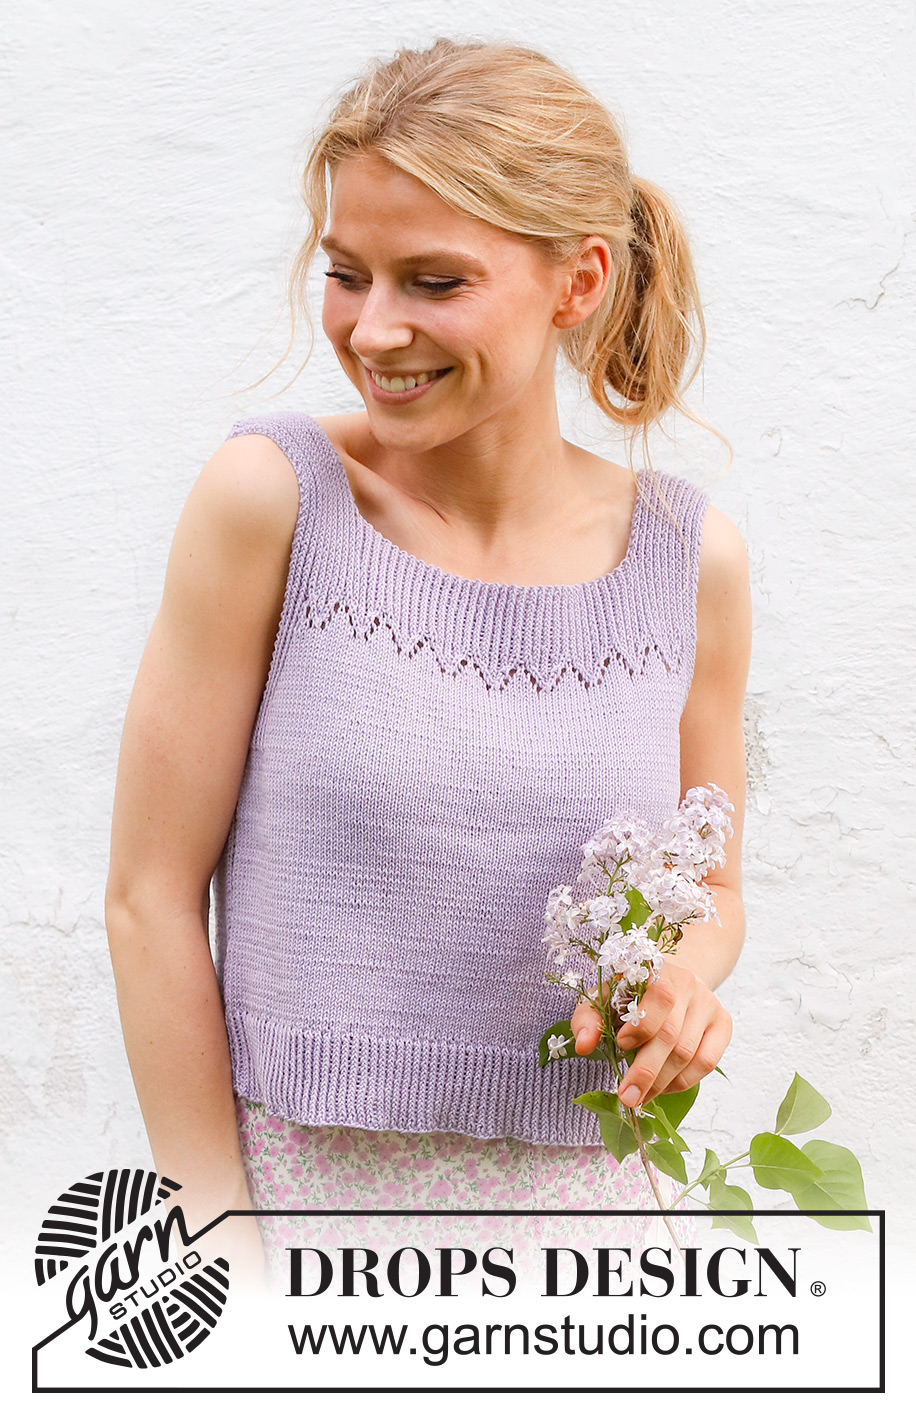
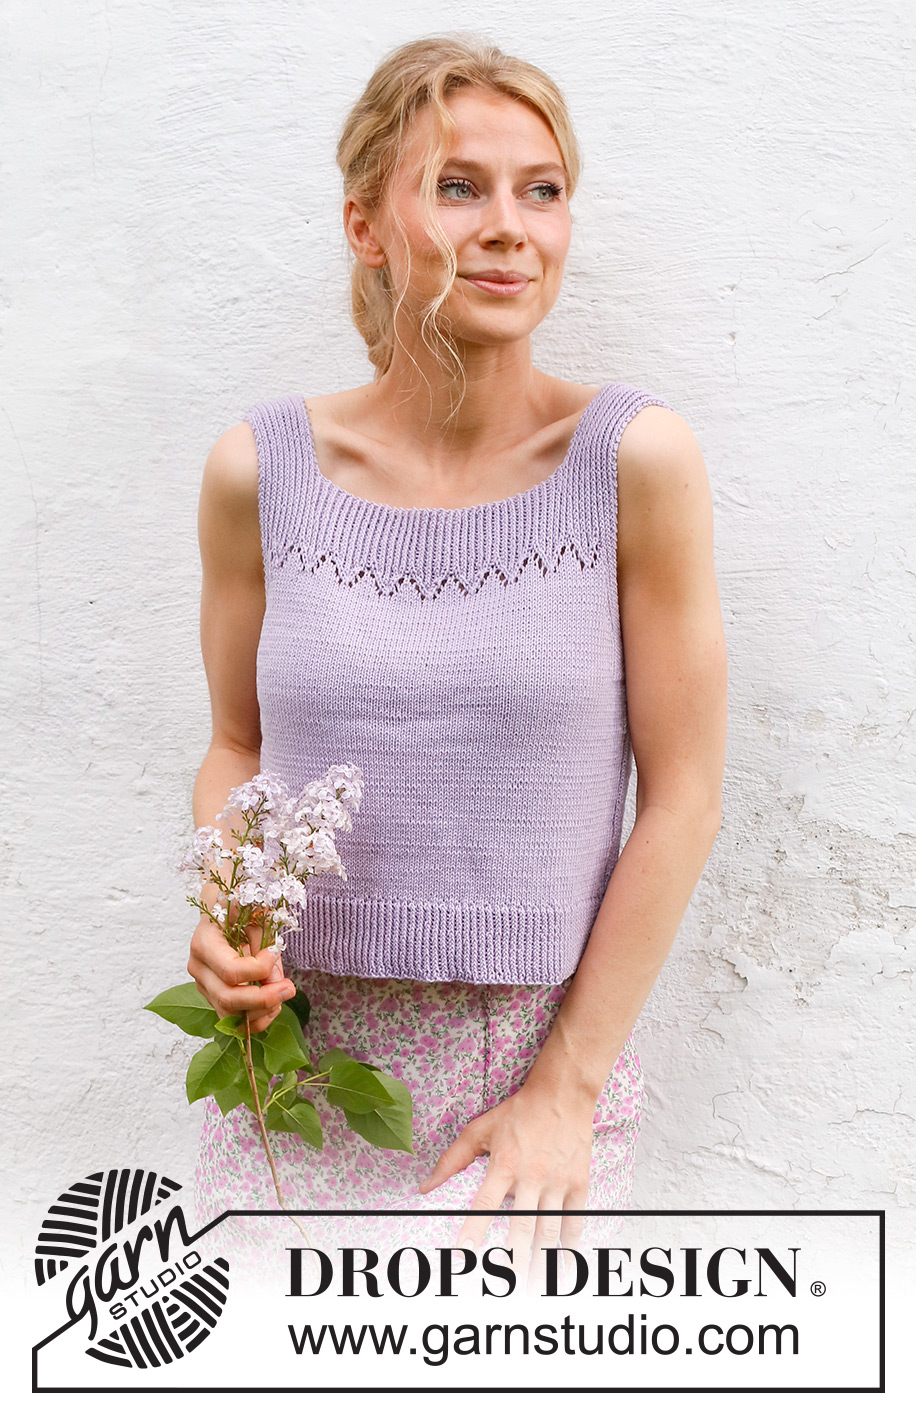
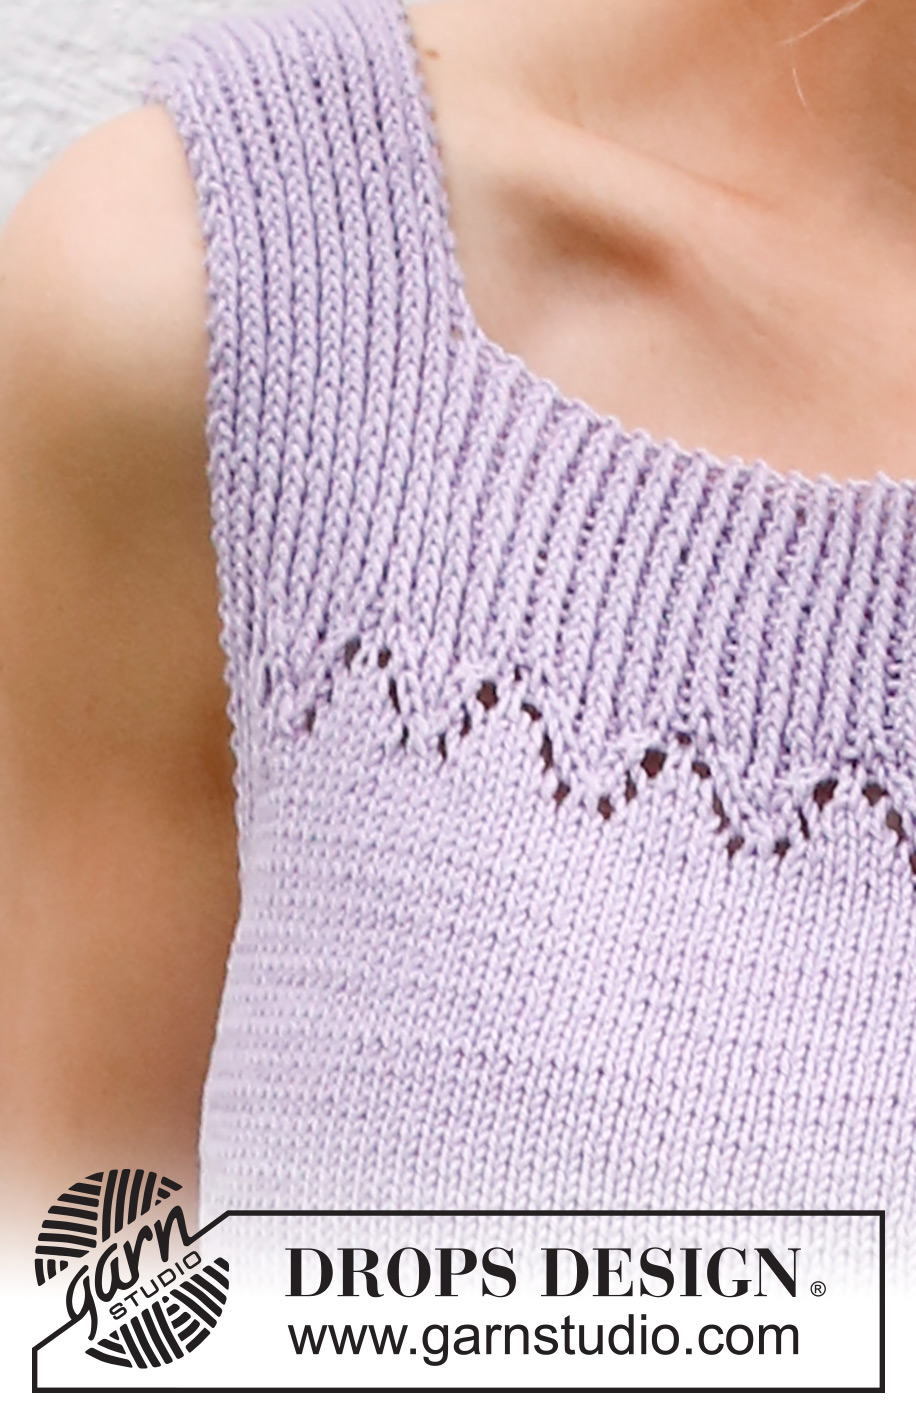
Spring Peak#springpeaktop |
|||||||||||||||||||||||||
 |
 |
||||||||||||||||||||||||
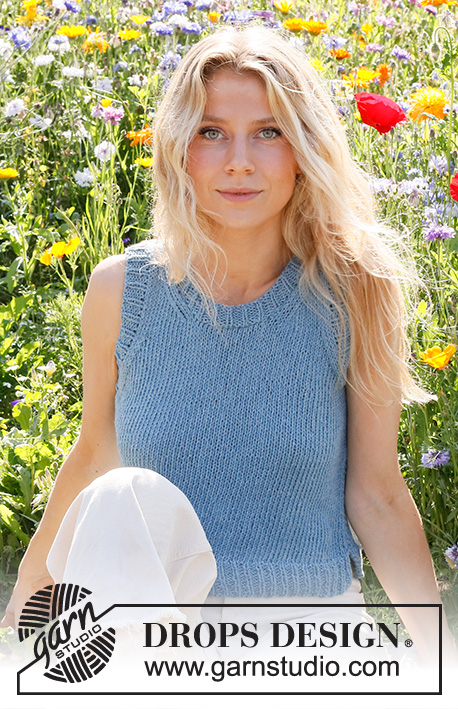
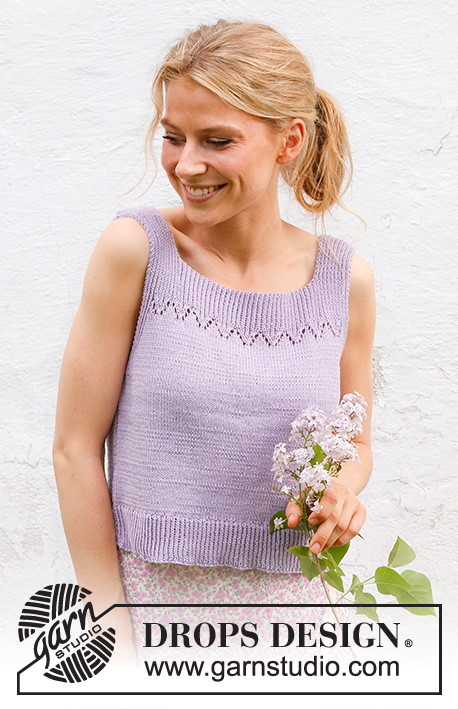
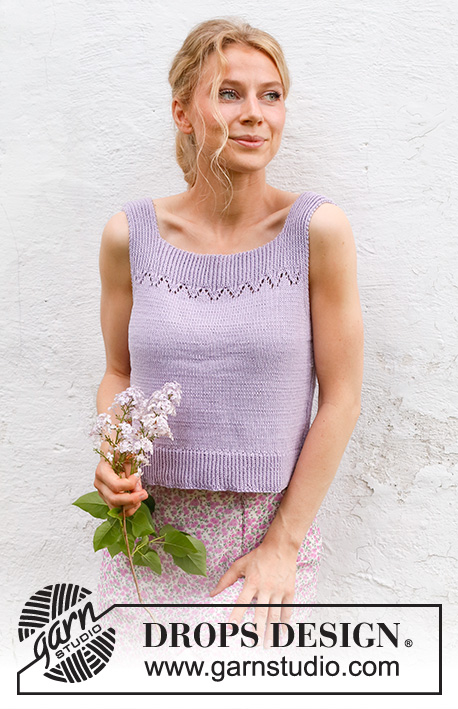
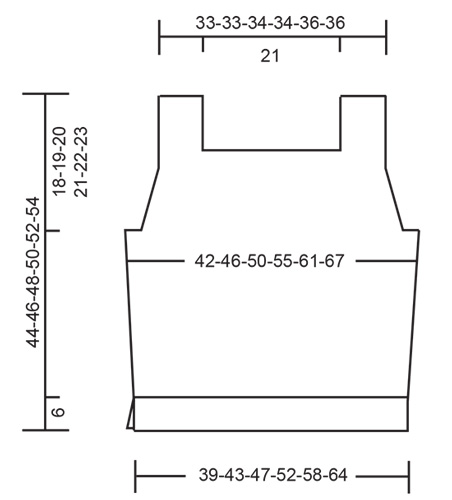
Knitted top top/singlet in DROPS Safran. Piece is knitted top down with lace pattern and vents in the sides. Size: S - XXXL
DROPS 230-54 |
|||||||||||||||||||||||||
|
---------------------------------------------------------- EXPLANATION FOR THE PATTERN: ---------------------------------------------------------- GARTER STITCH (back and forth): Knit all rows. 1 ridge vertically = knit 2 rows. PATTERN: See diagrams A.1 and A.2. Diagrams show all rows in pattern seen from the right side. INCREASE TIP (applies to armholes): Increase 1 stitch by making 1 yarn over inside the outermost 7-7-9-9-11-11 stitches in each side. On next row work yarn over twisted to avoid holes Then work the new stitches in stocking stitch. DECREASE TIP (applies to sides on front and back piece): All decreases are done from the right side! DECREASE AT BEGINNING OF ROW AS FOLLOWS: Work 1 stitch in garter stitch, 2 stitches in stocking stitch, slip 1 stitch knitwise, knit 1, pass slipped stitch over stitch worked DECREASE AT END OF ROW AS FOLLOWS: Work until 5 stitches remain, knit 2 together, 2 stitches in stocking stitch, and 1 stitch in garter stitch. ---------------------------------------------------------- START THE PIECE HERE: ---------------------------------------------------------- TOP - SHORT OVERVIEW OF THE PIECE: Work front and back piece back and forth separately and work top down. Sew piece together on the shoulders and in the sides. FRONT PIECE: Begin with left shoulder at the front (when garment is worn). LEFT SHOULDER: Cast on 19-19-21-21-23-23 stitches on circular needle size 3 mm with DROPS Safran. Purl 1 row from wrong side. Then work a rib as follows: ROW 1 (= right side): 1 stitch in GARTER STITCH - read explanation above - * knit 1 twisted, purl 1 *, work from *-* until 2 stitches remain on needle, knit 1 twisted and 1 stitch in garter stitch. ROW 2 (= wrong side): 1 stitch in garter stitch, * purl 1 twisted, knit 1 *, repeat from *-* until 2 stitches remain, purl 1 twisted and 1 stitch in garter stitch. Repeat 1st and 2nd row until piece measures 8-8-8-9-9-9 cm – finish after a row from wrong side, do not turn piece, but cast on 65 new stitches at the ned of row for neck. Put piece aside and work the right shoulder. RIGHT SHOULDER: Cast on 19-19-21-21-23-23 stitches on circular needle size 3 mm with DROPS Safran. Purl 1 row from wrong side. Then work rib the same way as on left shoulder until piece measures 8-8-8-9-9-9 cm – finish after a row from wrong side. OVERVIEW OF NEXT SECTION: Now put parts together and work pattern as explained below - in addition increase for armholes in each side. Read section PATTERN and ARMHOLES before continuing! PATTERN: Work from right side as before over the first 18-18-20-20-22-22 stitches on right shoulder, purl next stitch, continue rib over the 65 stitches cast on for neck, purl first stitch on left shoulder, and work the last 18-18-20-20-22-22 stitches on left shoulder in rib as before = 103-103-107-107-111-111 stitches. Work rib like this over all stitches with 1 stitch in garter stitch in each side until piece measures 13-13-14-14-15-15 cm from cast-on edge on shoulder straps. Work next row as follows from right side: 1 stitch in garter stitch, work rib as before over the next 6-6-8-8-10-10 stitches, work A.1 8 times in total, A.2, rib as before over the next 6-6-8-8-10-10 stitches, and 1 stitch in garter stitch. Continue this pattern back and forth like this. When A.1 and A.2 have been worked vertically, work in stocking stitch with 6-6-8-8-10-10 stitches in rib and 1 stitch in garter stitch at the edge in each side. REMEMBER THE KNITTING TENSION! ARMHOLE: AT THE SAME TIME when first row in A.1/A.2 is worked, begin increase for armhole – read INCREASE TIP. Increase 1 stitch in each side on every 4th row 4-2-0-0-0-0 times in total, on every other row 0-7-10-5-6-2 times in total, and then every row 0-0-0-11-13-24 times in total = 93-103-109-121-131-145 stitches. When a row has been worked after last increase for armhole, cast on 4-4-6-6-8-8 new stitch for armhole at the end of the next 2 rows = 101-111-121-133-147-161 stitches. Piece measures approx. 18-19-20-21-22-23 cm from cast-on edge on shoulder straps. Continue front piece as explained below. Insert 1 marker on row – now measure piece from this marker. Work in stocking stitch with 6-6-8-8-10-10 stitches in rib and 1 stitch in garter stitch at the edge in each side. When piece measures 2 cm from marker, work in stocking stitch with 1 stitch in garter stitch at the edge in each side. When piece measures 5 cm from marker, decrease 1 stitch in each side - read DECREASE TIP. Decrease like this every 5 cm 4 times in total in each side = 93-103-113-125-139-153 stitches. When piece measures 20-21-22-23-24-25 cm from marker, knit 1 row from right side while increasing 28-30-34-38-42-46 stitches evenly = 121-133-147-163-181-199 stitches. Piece measures now approx. 38-40-42-44-46-48 cm from cast-on edge on shoulder straps. Switch to circular needle size 2.5 mm. Then work a rib as follows: ROW 1 (= wrong side): 1 stitch in garter stitch, * purl 1 twisted, knit 1 *, repeat from *-* until 2 stitches remain, purl 1 twisted and 1 stitch in garter stitch. ROW 2 (= right side): 1 stitch in garter stitch, * knit 1 twisted, purl 1 *, work from *-* until 2 stitches remain, knit 1 twisted and 1 stitch in garter stitch. Repeat 1st and 2nd row until rib measures 6 cm. Loosely cast off. Front piece measures approx. 44-46-48-50-52-54 cm. BACK PIECE: Cast on and work as front piece – back and front pieces are exactly the same. ASSEMBLY: Sew the shoulder seams. Sew side seams in outer loops of edge stitch - begin seam at armholes and stop when 6 cm remain at the bottom in each side (vent). |
|||||||||||||||||||||||||
Diagram explanations |
|||||||||||||||||||||||||
|
|||||||||||||||||||||||||
 |
|||||||||||||||||||||||||
 |
|||||||||||||||||||||||||
Have you finished this pattern?Tag your pictures with #dropspattern #springpeaktop or submit them to the #dropsfan gallery. Do you need help with this pattern?You'll find 24 tutorial videos, a Comments/Questions area and more by visiting the pattern on garnstudio.com. © 1982-2026 DROPS Design A/S. We reserve all rights. This document, including all its sub-sections, has copyrights. Read more about what you can do with our patterns at the bottom of each pattern on our site. |
|||||||||||||||||||||||||


With over 40 years in knitting and crochet design, DROPS Design offers one of the most extensive collections of free patterns on the internet - translated to 17 languages. As of today we count 324 catalogues and 12290 patterns translated into English (UK/cm). 12290
We work hard to bring you the best knitting and crochet have to offer, inspiration and advice as well as great quality yarns at incredible prices! Would you like to use our patterns for other than personal use? You can read what you are allowed to do in the Copyright text at the bottom of all our patterns. Happy crafting!
Post a comment to pattern DROPS 230-54
We would love to hear what you have to say about this pattern!
If you want to leave a question, please make sure you select the correct category in the form below, to speed up the answering process. Required fields are marked *.