
Popular categories
Looking for a yarn?


Comments / Questions (82)
![]() Jean wrote:
Jean wrote:
At the end of arm hole decreases for my size, it says total of stiches on needle is 79 sts. Does this number include 2 garter edge sts? Im making the 4th size in where i casted on 151 to begin back piece. Thank you! Jean
08.04.2026 - 14:36DROPS Design answered:
Hi Jean, Yes, the stitch count includes the edge stitches. Regards, Drops Team.
09.04.2026 - 07:43
![]() Jean wrote:
Jean wrote:
If this is a response to jean, can it be translated to english? Thank you
03.04.2026 - 18:23
![]() Henriette wrote:
Henriette wrote:
INDTAGNINGSTIPS-2 Hvor mange pinde skal der være mellem hver indtages pindene? Det jeg forstår er at der skal en maske i på hver af de 12 masker til jeg har 190 masker i alt på pinden.
03.04.2026 - 13:21DROPS Design answered:
Hej Henriette, indtagningen i siden gør du kun 2 gange, første gang når arbejdet måler 20 cm og næste gang når arbejdet måler 28-29-30-31-32-33 cm alt efter hvilken størrelse du strikker :)
09.04.2026 - 13:34
![]() Jean wrote:
Jean wrote:
Im on portion of vest to decrease for arm hiles. My round starts at beginning of 12 garter stitcheson right side row. Do i cast off the 12 garter stitches then the garter edge stitch and proceed to decrease as instructed around to eor and decrease final 12 garter stitches? I love this pattern! Thank you, jean
27.03.2026 - 21:25DROPS Design answered:
Dear Jean, in the first 2 sizes, you cast off the 12 sts worked previously in garter stitch then continue each piece separately in stocking stitch with 1 stitch in garter stitch on each side, decreasing 2 sts on each side for armholes, first on every row from RS (every other row) then on every other row from RS (every 4th row).. Happy knitting!
07.04.2026 - 08:25
![]() Faith wrote:
Faith wrote:
Do you have a video tutorial of the skyscraper vest?
06.03.2026 - 18:44DROPS Design answered:
Dear Faith, you will find all relevant videos under tab "Videos" but there are no specific videos to that pattern, is there something you would need help with?
09.03.2026 - 07:37
![]() Johanne wrote:
Johanne wrote:
Avez vous un tutoriel pour le diagramme A1
02.03.2026 - 16:53DROPS Design answered:
Bonjour Johanne, A.1 consiste simplement en des côtes 1 m torse à l'endroit, 1 m envers, sur l'envers, tricotez les mailles comme elles se présentent: les mailles endroit à l'endroit et les mailles envers torse à l'envers - vous trouverez des vidéos de ces côtes en rond et des mailles torse à l'envers sous l'onglet "Videos" en haut de page. Bon tricot!
03.03.2026 - 09:23
![]() Dorit wrote:
Dorit wrote:
Auf dem Bild sind an den Seiten Rippenmuster zu sehen die extra aufgenommen werden müssen. Von daher ist die Beschreibung in Runden falsch. Wie lautet die Nummer der richtigen Anleitung?
14.01.2026 - 09:32DROPS Design answered:
Liebe Dorit, ich verstehe leider nicht, was Sie hier meinen. Am Anfang strickt man die beide Teilen für die Schlitzen separat - jeweils mit 6 Maschen kraus rechts beidseitig, dann für das Rumpfteil strickt man beide Teile in der Runde mit 12 Maschen krausrechts beidseitig (über die je 6 Maschen kraus rechts am Ende Vorder-/Rückenteil und Rücken-/Vorderteil = 12 Maschen). Vie Spaß beim Stricken!
15.01.2026 - 09:19
![]() Cathy wrote:
Cathy wrote:
Bonjour, je suis à la fin de mon ouvrage, et je galère pour faire la pointe du col v. Je fais le modèle karisma, je fais des échantillons et ça ne correspond pas du tout à la pointe v! Merci de m'éclairer
11.12.2025 - 14:41DROPS Design answered:
Bonjour Cathy,le bas de la pointe du col V va se tricoter comme dans cette vidéo: Time code 1,19 = marqueur dans la maille en bas de la pointe, 3:30: on fait la diminution au milieu de A.3 (notez que tous les 2 tours dans ce modèle, on tricote les 3 m du bas de la pointe à l'endroit sur l'endroit). Bon tricot!
11.12.2025 - 17:57
![]() Mary wrote:
Mary wrote:
Guten Abend, Was passiert mit den Randmaschen bei der Zusammenführung von Rücken- und Vorderteil? Herzlichen Gruß, Mary
01.12.2025 - 17:05DROPS Design answered:
Liebe Mary, es sind keine extra Randmaschen davor, dh es sind 6 Maschen krausrechts beidseitig, dann 12 Maschen krausrechts auf beiden Seiten. Viel Spaß beim Stricken!
02.12.2025 - 09:05
![]() Christiane wrote:
Christiane wrote:
Bonjour. Pour la bordure des emmanchures il est mentionné qu’on doit relever environ 132 à 154 mailles. Je tricote le modèle large combien de mailles je devrais relever? La même question pour le col: on doit relever entre 158 à 188 mailles combien je devrais relever.
17.11.2025 - 20:31DROPS Design answered:
Bonjour Christiane, le nombre de mailles à relever dépend de votre tension en hauteur, raison pour laquelle nous donnons une échelle et non un nombre précis, on relève en général 3 m pour 4 rangs (cf vidéo) ce qui compte avant tout c'est d'en avoir suffisamment pour que la bordure ne resserre pas l'ouvrage sans qu'elle soit trop lâche. Retrouvez aussi ici comment relever les mailles autour d'une encolure. Bon tricot!
18.11.2025 - 09:00
|
||||||||||||||||
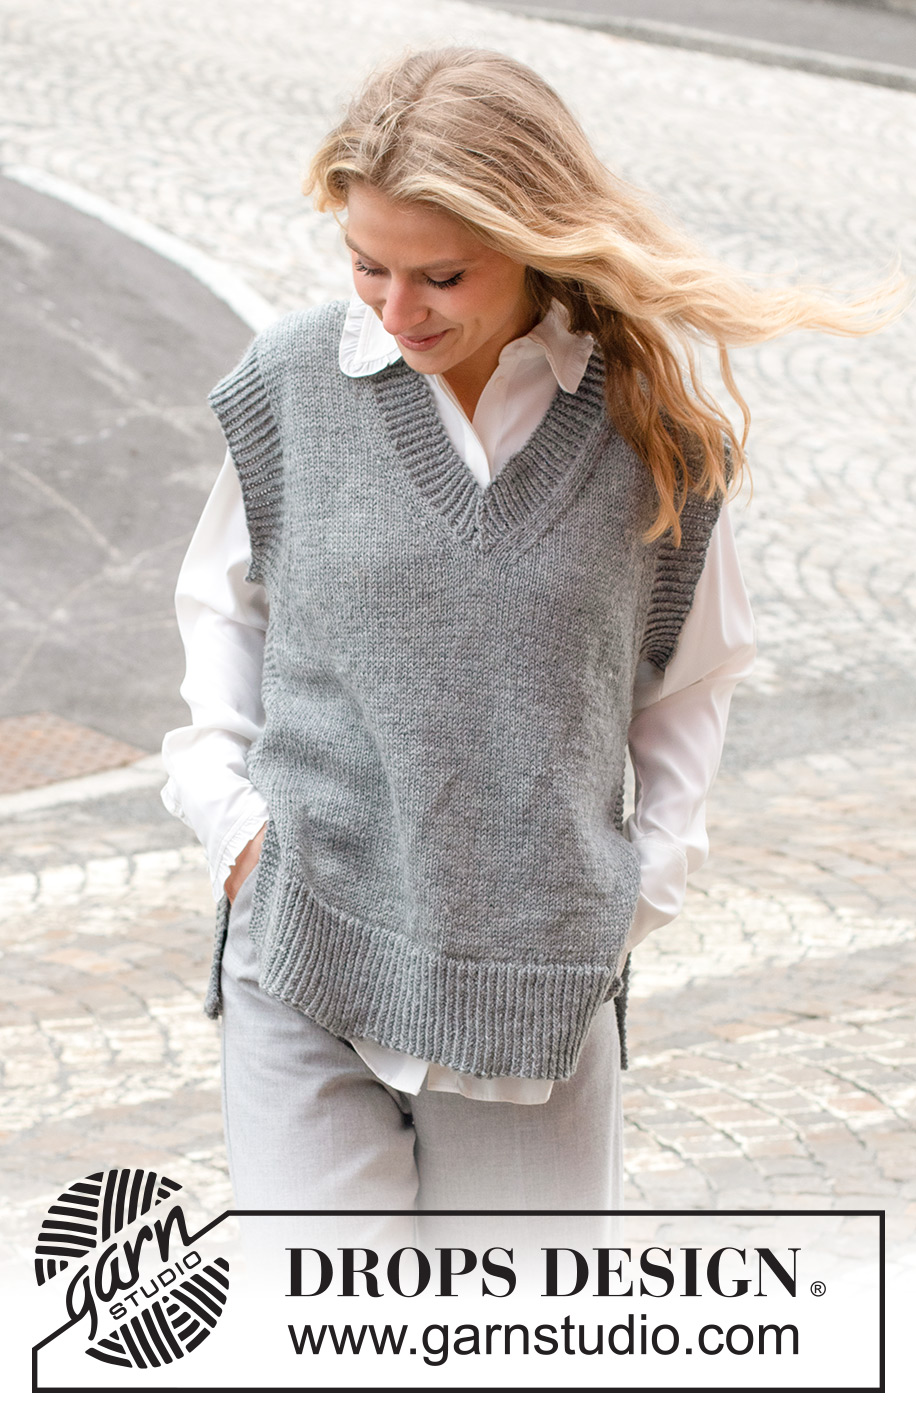
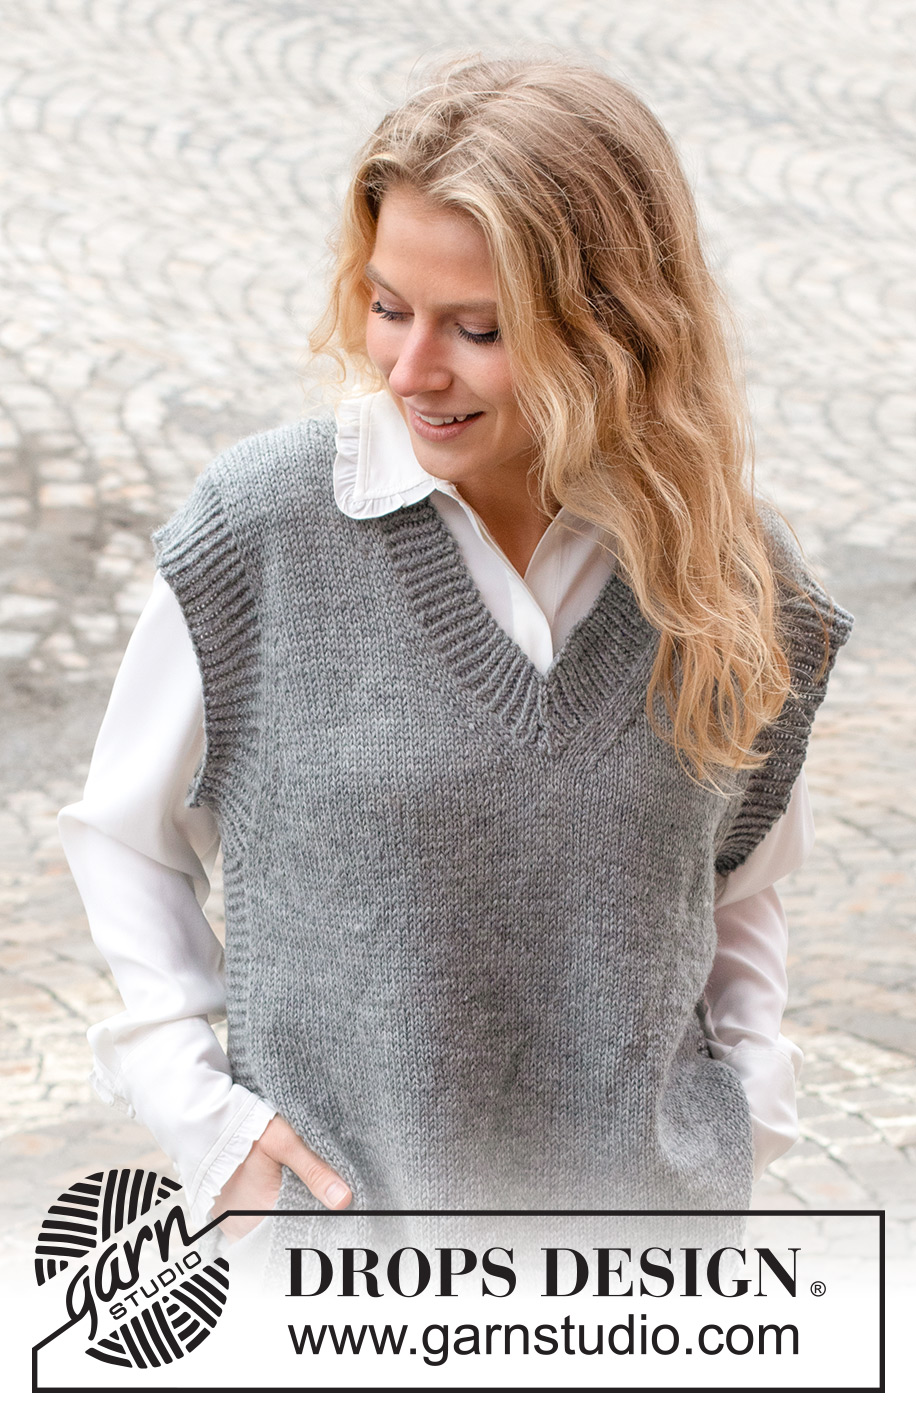
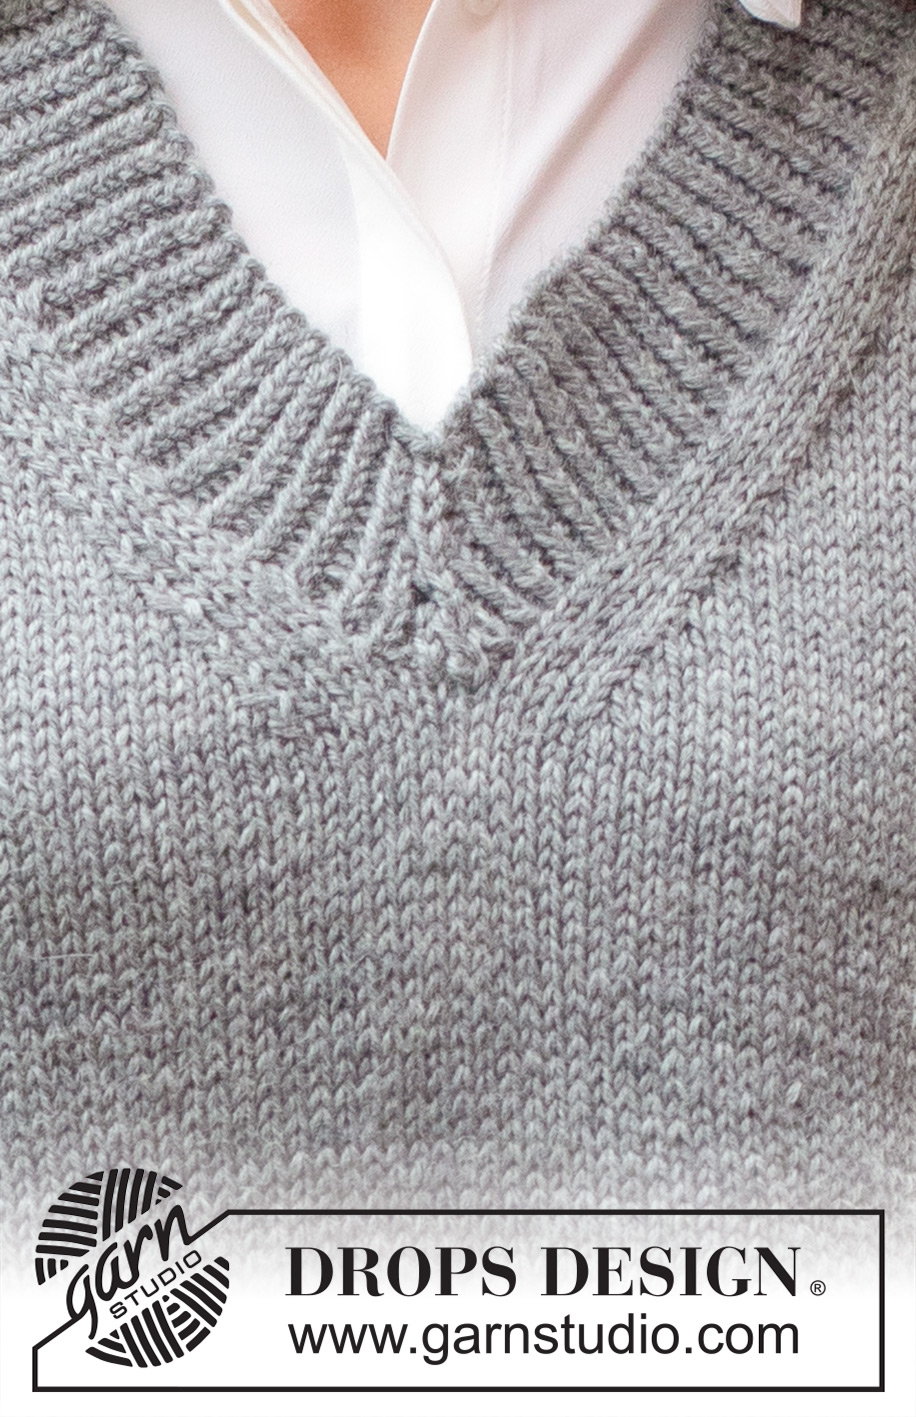
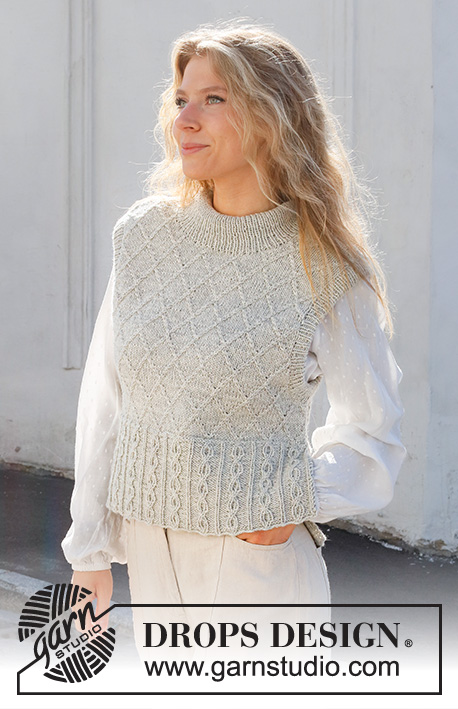
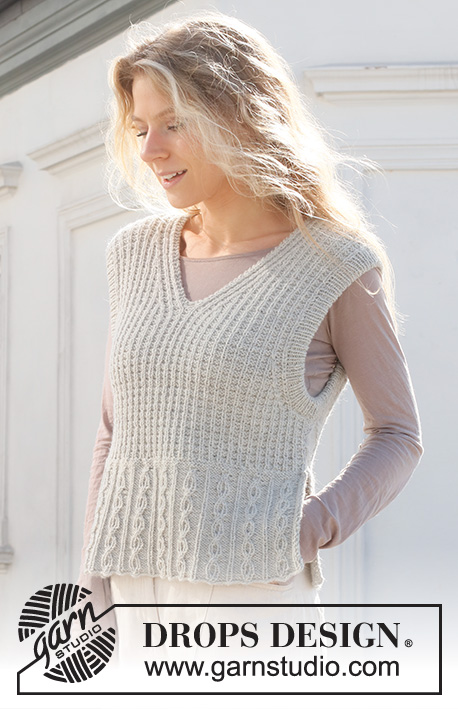
Skyscraper Vest#skyscrapervest |
||||||||||||||||
 |
 |
|||||||||||||||
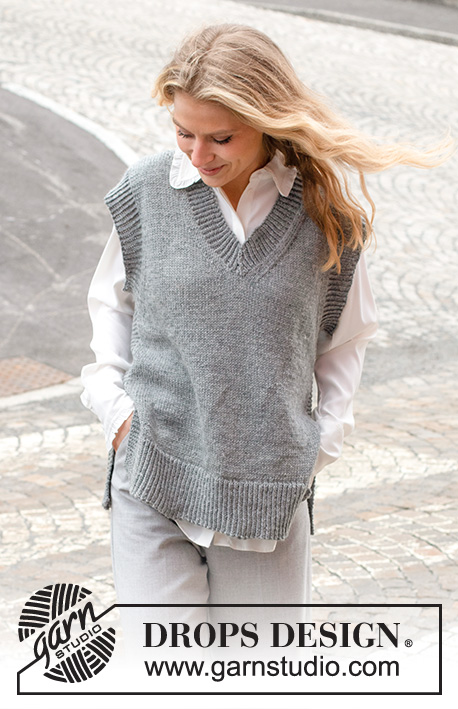
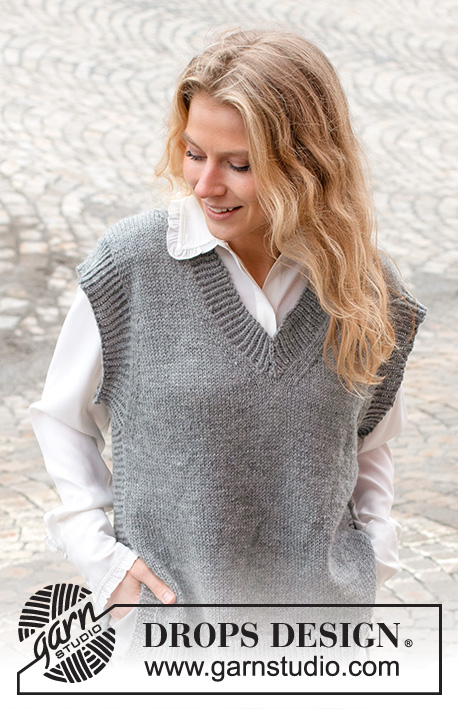
Knitted vest / slipover in DROPS Karisma. Piece is knitted with V-neck, edges in rib and vents in the sides. Size: S - XXXL
DROPS 228-3 |
||||||||||||||||
|
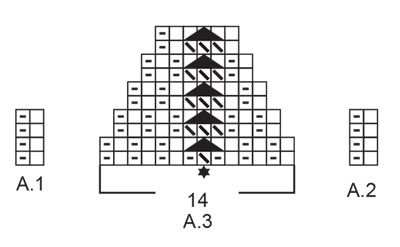
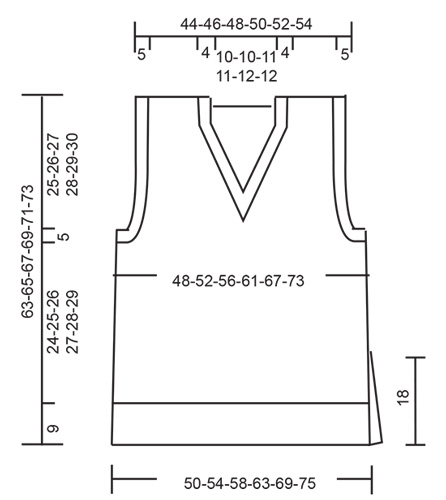
---------------------------------------------------------- EXPLANATION FOR THE PATTERN: ---------------------------------------------------------- GARTER STITCH (worked in the round): 1 ridge vertically = 2 rounds, i.e. knit 1 round and purl 1 round. GARTER STITCH (back and forth): Knit all rows. 1 ridge vertically = knit 2 rows. PATTERN: See diagrams A.1 to A.3. Diagrams show all rows in pattern seen from the right side. DECREASE TIP-1 (evenly): To calculate how to decrease evenly, use the total number of stitches on row (e.g. 119 stitches), minus edge stitches (e.g. 12 stitches) , and divide the remaining 107 stitches by number of increases/decreases to be done (e.g. 20) = 5.3. If decreasing knit in this example approx. every 4th and 5th stitch and every 5th and 6th stitch together. DECREASE TIP-2 (applies to sides of body): Decrease 1 stitch on each side of stitches in garter stitch as follows: Work until 2 stitches remain before stitches in garter stitch, knit 2 together, work 12 stitches in garter stitch, slip 1 stitch knitwise, knit 1, pass slipped stitch over stitch worked. DECREASE TIP-3: All decreases are done from the right side! Decrease at beginning of row as follows: Decrease 1 stitch after 1 edge stitch in garter stitch and 3 knit stitches as follows: Slip 1 stitch knitwise, knit 1, pass slipped stitch over stitch worked (= 1 stitch decreased). Decrease at end of row as follows: Decrease 1 stitch before 3 knit stitches and 1 edge stitch in garter stitch as follows: Work until 6 stitches remain on needle, knit 2 together, knit 3, work 1 edge stitch in garter stitch (= 1 stitch decreased). CAST-OFF TIP: To avoid a tight cast-off edge when casting off, you may use a larger needle. If this still is too tight make 1 yarn over after approx. every 4th stitch while casting off (cast off yarn overs as stitches). ---------------------------------------------------------- START THE PIECE HERE: ---------------------------------------------------------- VEST – SHORT SUMMARY OF PIECE: Work back piece and front piece back and forth on circular needle upwards until vent is done, then slip the 2 part on to same circular needle and work in the round on circular needle up to armhole. Divide piece for front piece and back piece, and finish each part separately back and forth. Work sleeve edges and neck edge in the round on circular needle. BACK PIECE: Cast on 119-129-139-151-165-179 stitches on circular needle size 3.5 mm with DROPS Karisma. Work rib as follows: 6 stitches in GARTER STITCH – read explanation above, A.1 until 7 stitches remain, work first stitch in A.1, 6 stitches in garter stitch. Continue back and forth like this until piece measures 9 cm. Work next row as follows from right side: Work garter stitch as before over the first 6 stitches, knit the next 107-117-127-139-153-167 stitches and decrease at the same time 20-22-24-26-28-30 stitches evenly – read DECREASE TIP-1, work in garter stitch as before over the last 6 stitches = 99-107-115-125-137-149 stitches. Switch to circular needle size 4.5 mm. Now work in stocking stitch with 6 stitches in garter stitch in each side. REMEMBER THE KNITTING TENSION! When piece measures 18 cm – adjust so that next row is worked from right side, put piece aside. Work front piece. FRONT PIECE: Work as on back piece. BODY: Slip stitches on front piece and back front piece on to same circular needle size = 198-214-230-250-274-298 stitches. Begin round before 12 stitches in garter stitch in one side. Continue in stocking stitch and 12 stitches in GARTER STITCH in each side - read explanation above. When piece measures 20 cm, decrease 1 stitch on each side of the 12 stitches in garter stitch - read DECREASE TIP-2. Repeat decrease when piece measures 28-29-30-31-32-33 cm = 190-206-222-242-266-290 stitches. When piece measures 33-34-35-36-37-38 cm, cast off 12-12-14-16-18-20 stitches in each side for armholes (i.e. cast off the 12 stitches in garter stitch and 0-0-1-2-3-4 stitches on each side of garter stitches). Then finish front and back piece separately. BACK PIECE: = 83-91-97-105-115-125 stitches. Continue back and forth in stocking stitch with 1 edge stitch in garter stitch in each side. At the same time on next row from right side begin decrease for armhole - read DECREASE TIP-3. Decrease like this every other row 1-1-3-7-12-18 times, then every 4th row 7-9-8-6-4-1 times (= 8-10-11-13-16-19 stitches decreased for armhole in each side) = 67-71-75-79-83-87 stitches. Continue to work until piece measures 61-63-65-67-69-71 cm. Now cast off the middle 33-33-35-35-37-37 stitches for neck and finish each shoulder separately. Then on next row from the neck, decrease 1 stitch = 16-18-19-21-22-24 stitches remain on shoulder. When piece measures 63-65-67-69-71-73 cm, cast off. Work the other shoulder the same way. FRONT PIECE: = 83-91-97-105-115-125 stitches. Continue back and forth in stocking stitch with 1 edge stitch in garter stitch in each side. At the same time decrease for armholes the same way as on back piece. When piece measures 41-42-43-44-45-46 cm, slip the middle stitch on front piece on a stitch holder (= middle stitch), and slip all stitches after this middle stitch on a stitch holder (= right front piece). Stitches before middle stitch are still on the needle (= left front piece). Left front piece: Continue back and forth with stocking stitch, 1 edge stitch in garter stitch in each side and decrease for armholes as before, at the same time on next row from right side begin decrease for V-neck: Work until 6 stitches remain towards the neck, knit 2 together (= 1 stitch decreased), knit 3, 1 edge stitch in garter stitch. Decrease like this every other row 11-11-11-11-11-11 times, then every 4th row 6-6-7-7-8-8 times (= 17-17-18-18-19-19 stitches decreased for V-neck) = 16-18-19-21-22-24 stitches remain for shoulder. Continue to work until piece measures approx. 63-65-67-69-71-73 cm. Cast off. Right front piece: Continue back and forth with stocking stitch, 1 edge stitch in garter stitch in each side and decrease for armholes as before, at the same time on next row from right side begin decrease for V-neck: Work 1 edge stitch in garter stitch, knit 3, slip 1 stitch knitwise, knit 1, pass slipped stitch over (= 1 stitch decreased), work the rest of row. Decrease like this every other row 11-11-11-11-11-11 times, then every 4th row 6-6-7-7-8-8 times (= 17-17-18-18-19-19 stitches decreased for neck) = 16-18-19-21-22-24 stitches remain for shoulder. Continue to work until piece measures approx. 63-65-67-69-71-73 cm. Cast off. ASSEMBLY: Sew shoulder seams with grafting/kitchener stitches inside cast-off edges. SLEEVE EDGES: Begin from right side where piece was divided for armhole. Use circular needle size 3.5 mm and pick up approx. 132 to 154 stitches around the entire armhole (number of stitches must be divisible by 2). Work rib according to diagram A.1 in the round for 4½-5 cm. Cast off stitches with knit over knit and purl over purl. Repeat around the other armhole. NECK EDGE: Begin mid on top of one shoulder with circular needle size 3.5 mm and DROPS Karisma and pick up 158 to 188 stitches inside 1 edge stitch in garter stitch around the entire neck edge including middle stitch on stitch holder mid front (number of stitches must be divisible by 2). Work rib according to pattern A.2 in the round - adjust so that pattern is worked according to A.3 over the 14 stitches mid front (stitch with star in A.3 should be middle stitch mid front), and so that pattern fits knit 1 twisted / purl 1 in the round on first round worked. Continue in the round and decrease as shown in A.3 until rib measures 4 cm. Cast off with knit over knit and purl over purl, at the same time decrease as before over the middle 3 stitches mid front. |
||||||||||||||||
Diagram explanations |
||||||||||||||||
|
||||||||||||||||
 |
||||||||||||||||
 |
||||||||||||||||
Have you finished this pattern?Tag your pictures with #dropspattern #skyscrapervest or submit them to the #dropsfan gallery. Do you need help with this pattern?You'll find 33 tutorial videos, a Comments/Questions area and more by visiting the pattern on garnstudio.com. © 1982-2026 DROPS Design A/S. We reserve all rights. This document, including all its sub-sections, has copyrights. Read more about what you can do with our patterns at the bottom of each pattern on our site. |
||||||||||||||||


With over 40 years in knitting and crochet design, DROPS Design offers one of the most extensive collections of free patterns on the internet - translated to 17 languages. As of today we count 324 catalogues and 12290 patterns translated into English (UK/cm). 12290
We work hard to bring you the best knitting and crochet have to offer, inspiration and advice as well as great quality yarns at incredible prices! Would you like to use our patterns for other than personal use? You can read what you are allowed to do in the Copyright text at the bottom of all our patterns. Happy crafting!
Post a comment to pattern DROPS 228-3
We would love to hear what you have to say about this pattern!
If you want to leave a question, please make sure you select the correct category in the form below, to speed up the answering process. Required fields are marked *.