
Popular categories
Looking for a yarn?


Comments / Questions (67)
![]() Jensine Adler wrote:
Jensine Adler wrote:
Håber på hjælp. Min datter vil gerne strikke denne her. Kan det gå til en nybegynder? Anbefalinger til garn uden uld, evt bomuld og hør el. Bomuld og Viskose. Tak for hjælpen, Jensine adler
18.06.2025 - 16:41DROPS Design answered:
Hei Jensine. Denne kan fint strikkes av en nybegynner, men denne strikkes frem og tilbake og deretter sys den sammen. Om din datter helst ønsker å strikke mest mulig rettmasker, ville jeg ha gått for en vest som strikkes rundt og har minst mulig montering. Husk, bruk hjelpevideone som er lagt til oppskriften under Video. Om man ikke ønsker å bruke ull, ta en titt på ander kvaliteter i garngruppe B, f.eks Belle, Cotton Light og Muskat. Bare husk å overholde den oppgitte strikkefastheten i oppskriften. mvh DROPS Design
23.06.2025 - 09:57
![]() Claudette wrote:
Claudette wrote:
Combien de balles de laine pour faire le débardeur u-920 ?
04.05.2025 - 21:58DROPS Design answered:
Bonjour Claudette, vous trouverez les quantités nécessaires indiquées pour chaque taille dans l'onglet "Explications" en haut de page; autrement dit, il faut ici par exemple en taille S: 450 g DROPS Karisma/50 g la pelote = 9 pelotes Karisma en taille S. Bon tricot!
05.05.2025 - 08:46
![]() Ellen wrote:
Ellen wrote:
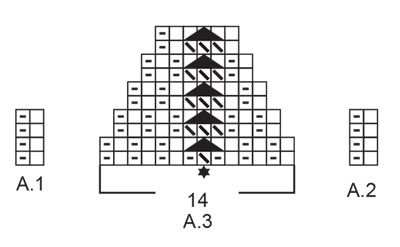
I diagrammet er A1 og A2 ens. Enten A1 eller A2 burde vel vise alm. retmasker, ellers giver det ikke mening. Men hvilket af dem? Eller hvis alle ribkanter skal være med drejet ret, hvorfor så ikke nøjes med ét diagram?
13.04.2025 - 11:43DROPS Design answered:
Hej Ellen, alle retmasker i ribben skal strikkes drejet (undtagen dem midt i A.3) tror bare det er en fejl at vi har lavet 2 ens diagrammer, så det skal du ikke tage hensyn til :)
24.04.2025 - 14:54
![]() Angie wrote:
Angie wrote:
Jeg strikker strl M. Hvor mange masker ska det være på pinnen når jeg ska begynne på V-halsen? (Altså når arbeidet måler 42 cm). Jeg begynte med 91 og har minsket 1 maske i hver side for ermehull til 42 cm. Så ska jeg sette en tråd rundt midtmasken og sette alle masker etter midtmasken på vent, hvor mange masker er dette? I strl M.
08.10.2024 - 12:20DROPS Design answered:
Hei Angie, Du feller for ermehullene 10 ganger på begge sider. Da har du 71 masker igjen på pinnen. Midtmasken settes på en tråd med 35 masker før og etter denne masken til hver skulder. God fornøyelse!
10.10.2024 - 10:23
![]() Peppi wrote:
Peppi wrote:
Moikka! Onko kavennusvinkki 3:ssa virhe? Takapuolella kerroksen alussa kavennettavat ja kerroksen lopussa kavennettavat silmukka määrät eivät täsmää.
27.09.2024 - 14:55DROPS Design answered:
Olet oikeassa, ohjeessa oli virhe. Kerroksen alussa kavennetaan 1 ainaoikeinneulotun reunasilmukan ja 3 oikean silmukan jälkeen. Ohjeeseen on tehty korjaus.
27.09.2024 - 18:52
![]() Madlen wrote:
Madlen wrote:
Guten Tag, ich bin gerade beim Vorderteil, habe jetzt in jeder 2. Reihe 11 × abgenommen, dann geht es weiter mit in jeder 4.Reihe 6× abnehmen. Ich komm dann aber nur auf 17 Abnahmen. Es sollen aber nur noch 18 Maschen übrig bleiben. Start war aber 45 - 17 =26 was mache ich falsch? \r\nLiebe Grüße
19.09.2024 - 09:29DROPS Design answered:
Liebe Madlen, haben Sie auch für die Armlöcher beidseitig wie beim Rückenteil abgenommen?
19.09.2024 - 13:02
![]() Madlen wrote:
Madlen wrote:
Guten Tag, ich bin gerade beim Vorderteil, habe jetzt in jeder 2. Reihe 11 × abgenommen, dann geht es weiter mit in jeder 4.Reihe 6× abnehmen. Ich komm dann aber nur auf 17 Abnahmen. Es sollen aber nur noch 18 Maschen übrig bleiben. Start war aber 45 - 17 =26 was mache ich falsch? \r\nLiebe Grüße
16.09.2024 - 15:33
![]() Alicia Cefeño wrote:
Alicia Cefeño wrote:
Al realizar la muestra 10x10 con el número de puntos indicados no coincide con los 10cm resulta la muestra más pequeña, que debo hacer? Agujas más grandes ? Cambio de lana ? En la etiqueta de la lana que usé dice tejer con agujas 4.5 Gracias por su ayuda
22.08.2024 - 14:28DROPS Design answered:
Hola Alicia, la lana se puede trabajar con diferentes grosores de aguja según el tipo de tejido resultante; si el tejido es más abierto se usan agujas más grandes; si es más prieto se usan agujas más pequeñas. En el apartado MUESTRA te indican cómo proceder según tu muestra: si 20 puntos x 26 hileras miden más de 10cm, usa agujas más pequeñas. Si 20 puntos x 26 hileras miden menos de 10 x10 cm usa agujas más grandes. En principio, si usas el hilo indicado, no deberías necesitar cambiar de hilo y el cambio de agujas debería ser suficiente. Puedes leer más información en la siguiente lección: https://www.garnstudio.com/lesson.php?id=25&cid=23.
25.08.2024 - 21:15
![]() Alicia Cedeño wrote:
Alicia Cedeño wrote:
Al inicio del chaleco y el contorno de cuello y mangas yo veo que es un resorte 1_1 y ustedes indican que se teja punto musgo , tengo confusión, por favor ayúdeme a entender este patrón quiero hacer este chaleco pero de una forma más sencilla la explicación Gracias por su atención y ayuda
02.08.2024 - 01:10DROPS Design answered:
Hola Alicia, al inicio de la prenda trabajas según A.1, que como puedes ver es un patrón resorte/elástico. Aparte del diagrama A.1 en los extremos de la fila trabajas 6 pts en pt musgo; estos son los pts orillo o del borde, que rodean las aberturas, para que los bordes no se doblen. En las cenefas de las mangas y del cuello trabajas también según A.1 o A.2, ambos patrones de pt elástico.
05.08.2024 - 23:38
![]() Cynthia M Husek wrote:
Cynthia M Husek wrote:
I'm having trouble with achieving the pattern's measurements for size medium. I did knit the 10x10 cm in stockinette and achieved the correct gauge per the instructions. For the ribbing, to achieve pattern width I changed from US 4 to size US 7 and got 52 cm (should be 54). for the stockinette portion, I stayed with size 7 per the instructions and have almost 60 cm (should be 52). I usually knit close to gauge so I'm confounded why this isn't working out. Any suggestions? Thank you.
17.07.2024 - 21:59DROPS Design answered:
Dear Cynthia, there could be many reasons that your gauge does not match, and since we do not see how you knit, it is difficult to say why. However, with this piece, not achieveing row gauge could be compensated with knitting an extra row here and there. Adhere to the stitchcount, and instead of the number of rows, pay attention the length-measurements. Happy Knitting!
18.07.2024 - 04:28
|
||||||||||||||||
Skyscraper Vest#skyscrapervest |
||||||||||||||||
 |
 |
|||||||||||||||
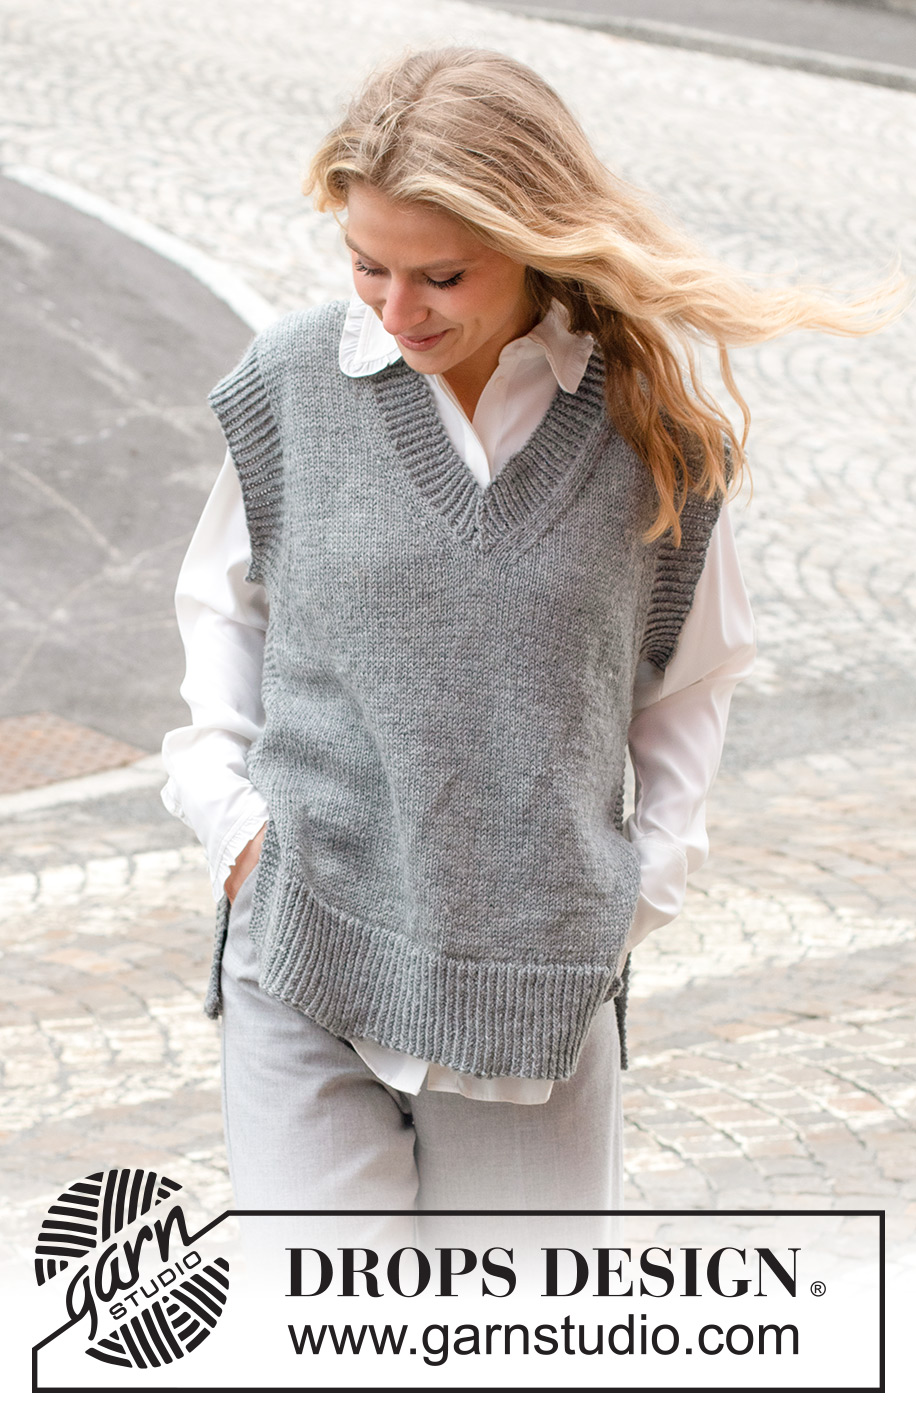
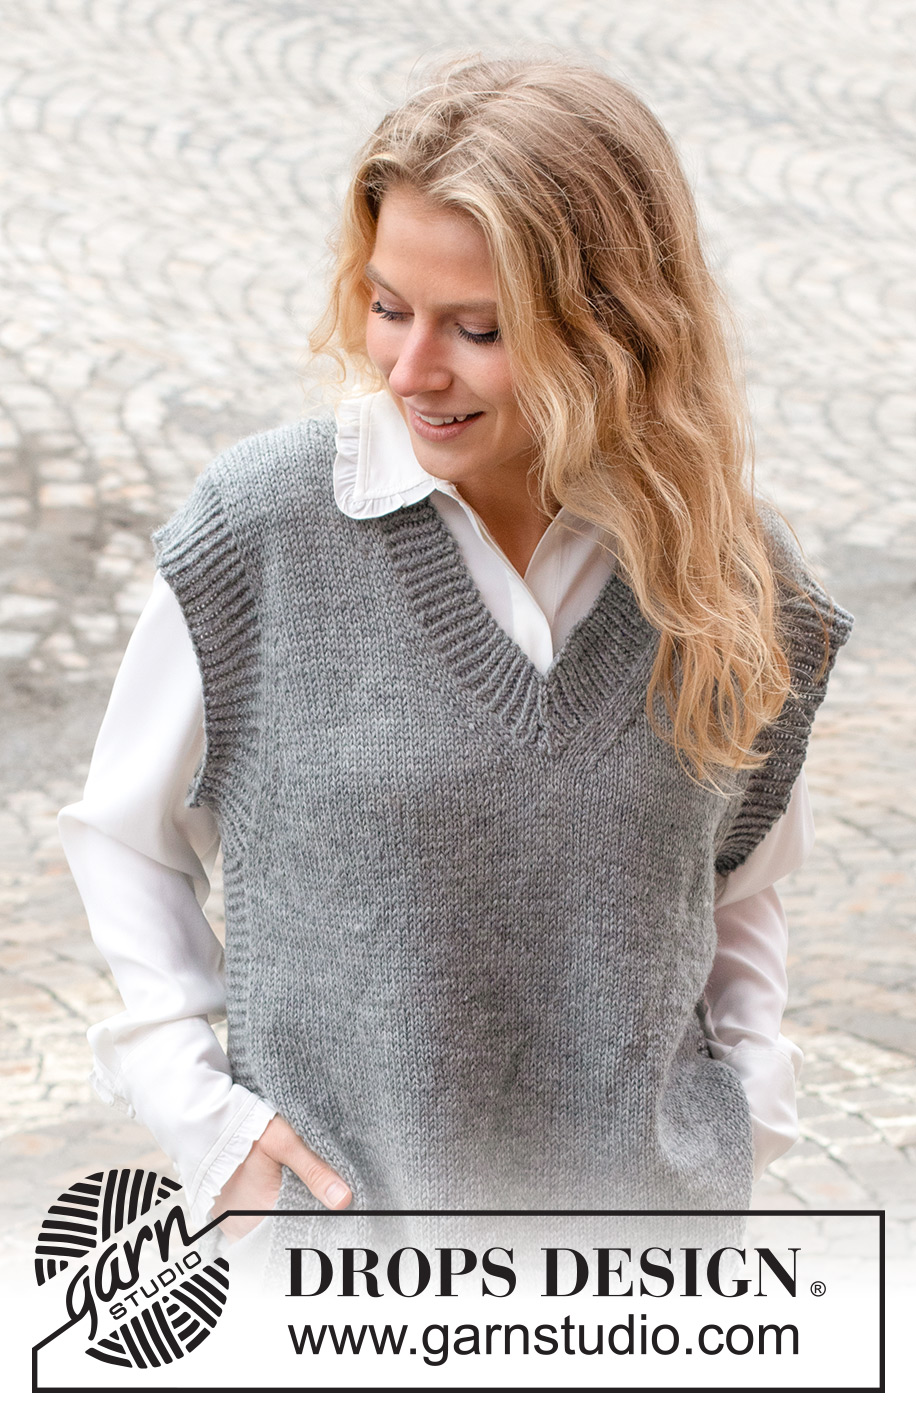
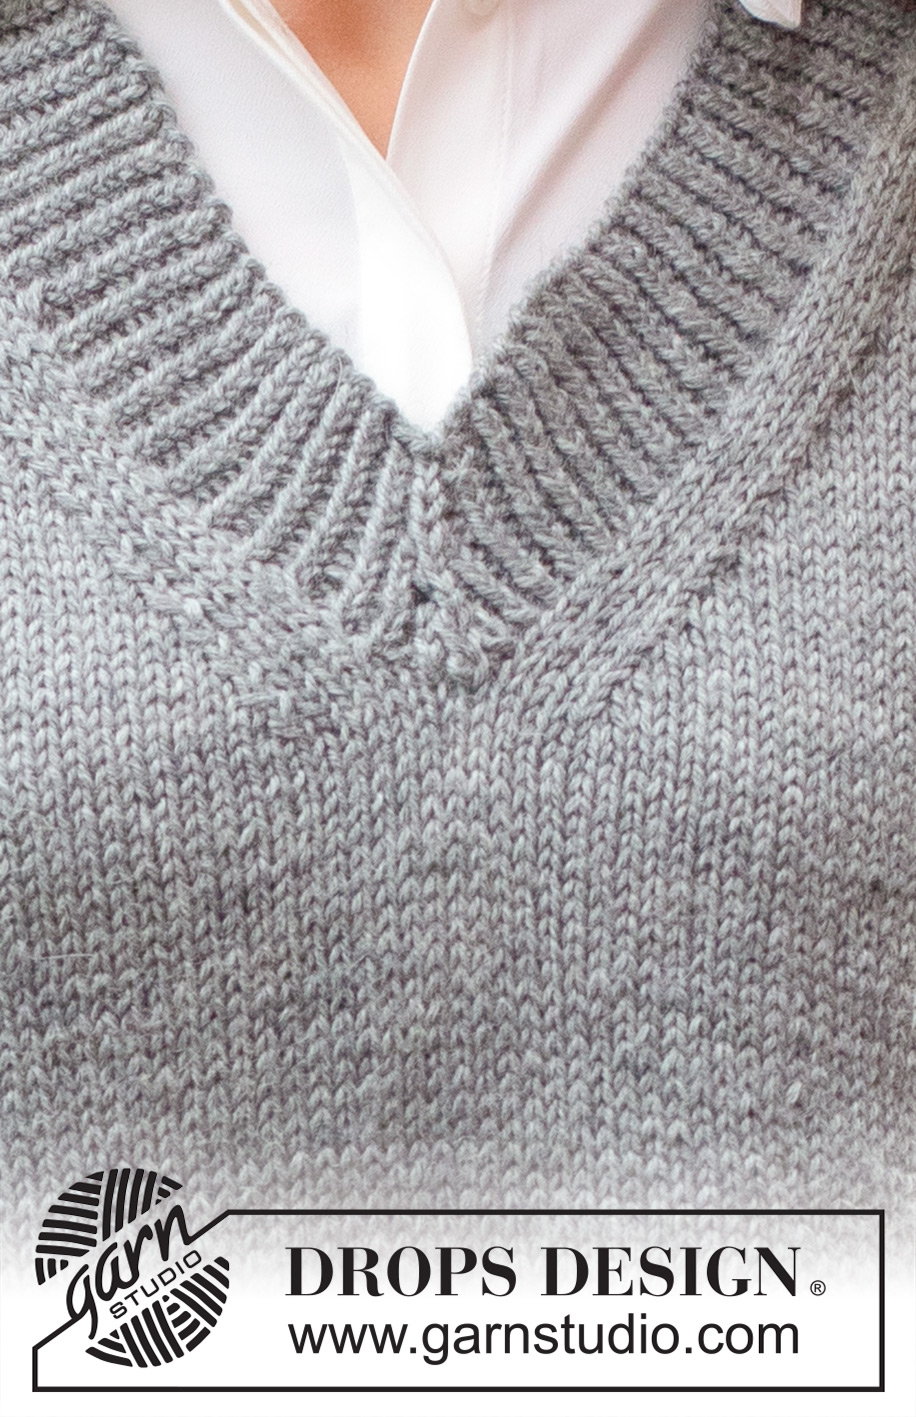
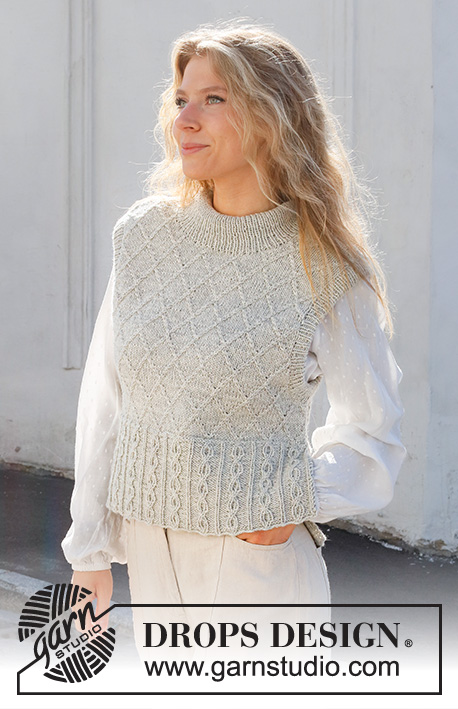
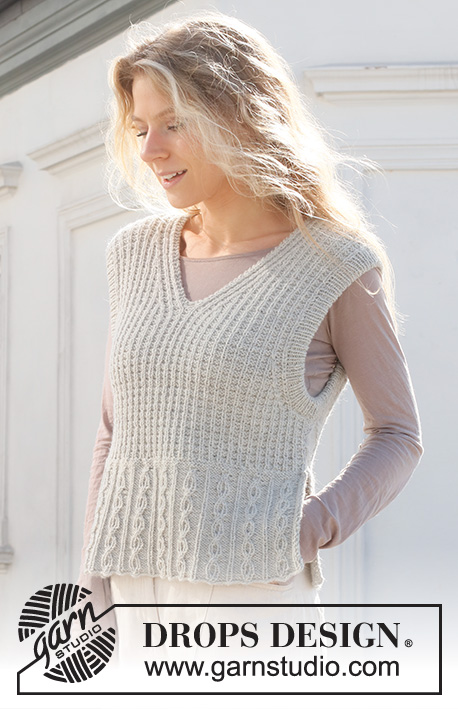
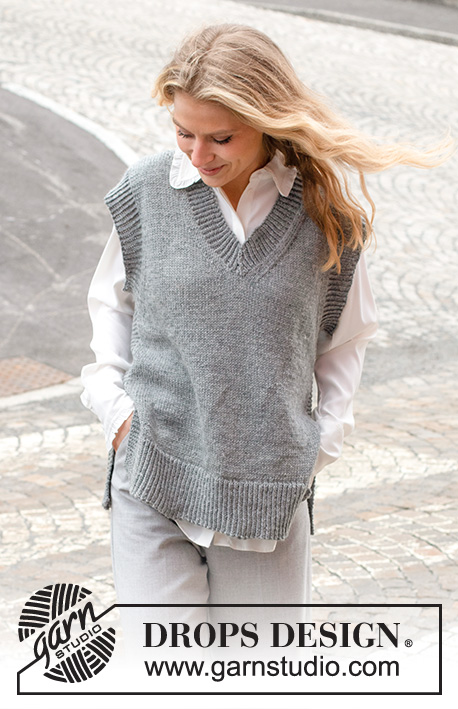
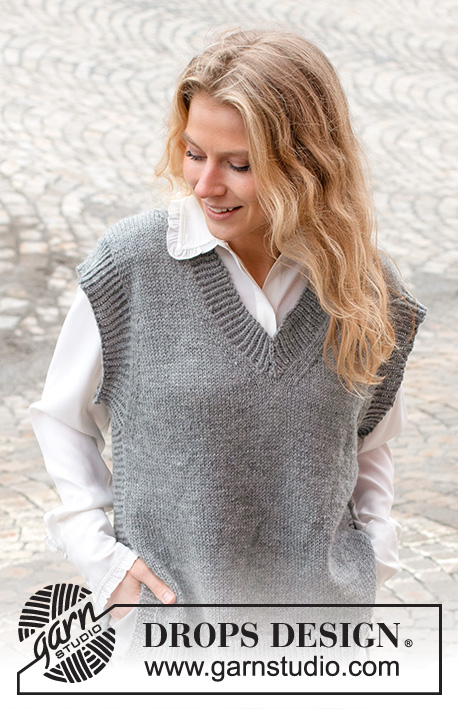
Knitted vest / slipover in DROPS Karisma. Piece is knitted with V-neck, edges in rib and vents in the sides. Size: S - XXXL
DROPS 228-3 |
||||||||||||||||
|
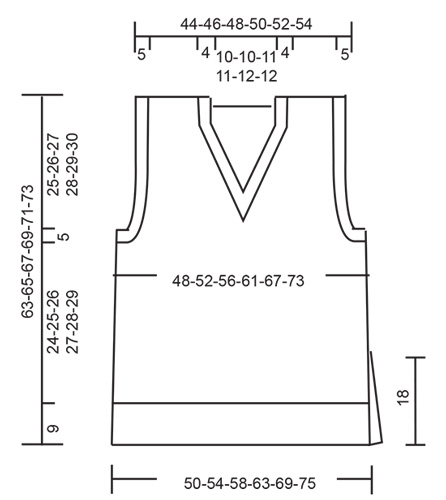
---------------------------------------------------------- EXPLANATION FOR THE PATTERN: ---------------------------------------------------------- GARTER STITCH (worked in the round): 1 ridge vertically = 2 rounds, i.e. knit 1 round and purl 1 round. GARTER STITCH (back and forth): Knit all rows. 1 ridge vertically = knit 2 rows. PATTERN: See diagrams A.1 to A.3. Diagrams show all rows in pattern seen from the right side. DECREASE TIP-1 (evenly): To calculate how to decrease evenly, use the total number of stitches on row (e.g. 119 stitches), minus edge stitches (e.g. 12 stitches) , and divide the remaining 107 stitches by number of increases/decreases to be done (e.g. 20) = 5.3. If decreasing knit in this example approx. every 4th and 5th stitch and every 5th and 6th stitch together. DECREASE TIP-2 (applies to sides of body): Decrease 1 stitch on each side of stitches in garter stitch as follows: Work until 2 stitches remain before stitches in garter stitch, knit 2 together, work 12 stitches in garter stitch, slip 1 stitch knitwise, knit 1, pass slipped stitch over stitch worked. DECREASE TIP-3: All decreases are done from the right side! Decrease at beginning of row as follows: Decrease 1 stitch after 1 edge stitch in garter stitch and 3 knit stitches as follows: Slip 1 stitch knitwise, knit 1, pass slipped stitch over stitch worked (= 1 stitch decreased). Decrease at end of row as follows: Decrease 1 stitch before 3 knit stitches and 1 edge stitch in garter stitch as follows: Work until 6 stitches remain on needle, knit 2 together, knit 3, work 1 edge stitch in garter stitch (= 1 stitch decreased). CAST-OFF TIP: To avoid a tight cast-off edge when casting off, you may use a larger needle. If this still is too tight make 1 yarn over after approx. every 4th stitch while casting off (cast off yarn overs as stitches). ---------------------------------------------------------- START THE PIECE HERE: ---------------------------------------------------------- VEST – SHORT SUMMARY OF PIECE: Work back piece and front piece back and forth on circular needle upwards until vent is done, then slip the 2 part on to same circular needle and work in the round on circular needle up to armhole. Divide piece for front piece and back piece, and finish each part separately back and forth. Work sleeve edges and neck edge in the round on circular needle. BACK PIECE: Cast on 119-129-139-151-165-179 stitches on circular needle size 3.5 mm with DROPS Karisma. Work rib as follows: 6 stitches in GARTER STITCH – read explanation above, A.1 until 7 stitches remain, work first stitch in A.1, 6 stitches in garter stitch. Continue back and forth like this until piece measures 9 cm. Work next row as follows from right side: Work garter stitch as before over the first 6 stitches, knit the next 107-117-127-139-153-167 stitches and decrease at the same time 20-22-24-26-28-30 stitches evenly – read DECREASE TIP-1, work in garter stitch as before over the last 6 stitches = 99-107-115-125-137-149 stitches. Switch to circular needle size 4.5 mm. Now work in stocking stitch with 6 stitches in garter stitch in each side. REMEMBER THE KNITTING TENSION! When piece measures 18 cm – adjust so that next row is worked from right side, put piece aside. Work front piece. FRONT PIECE: Work as on back piece. BODY: Slip stitches on front piece and back front piece on to same circular needle size = 198-214-230-250-274-298 stitches. Begin round before 12 stitches in garter stitch in one side. Continue in stocking stitch and 12 stitches in GARTER STITCH in each side - read explanation above. When piece measures 20 cm, decrease 1 stitch on each side of the 12 stitches in garter stitch - read DECREASE TIP-2. Repeat decrease when piece measures 28-29-30-31-32-33 cm = 190-206-222-242-266-290 stitches. When piece measures 33-34-35-36-37-38 cm, cast off 12-12-14-16-18-20 stitches in each side for armholes (i.e. cast off the 12 stitches in garter stitch and 0-0-1-2-3-4 stitches on each side of garter stitches). Then finish front and back piece separately. BACK PIECE: = 83-91-97-105-115-125 stitches. Continue back and forth in stocking stitch with 1 edge stitch in garter stitch in each side. At the same time on next row from right side begin decrease for armhole - read DECREASE TIP-3. Decrease like this every other row 1-1-3-7-12-18 times, then every 4th row 7-9-8-6-4-1 times (= 8-10-11-13-16-19 stitches decreased for armhole in each side) = 67-71-75-79-83-87 stitches. Continue to work until piece measures 61-63-65-67-69-71 cm. Now cast off the middle 33-33-35-35-37-37 stitches for neck and finish each shoulder separately. Then on next row from the neck, decrease 1 stitch = 16-18-19-21-22-24 stitches remain on shoulder. When piece measures 63-65-67-69-71-73 cm, cast off. Work the other shoulder the same way. FRONT PIECE: = 83-91-97-105-115-125 stitches. Continue back and forth in stocking stitch with 1 edge stitch in garter stitch in each side. At the same time decrease for armholes the same way as on back piece. When piece measures 41-42-43-44-45-46 cm, slip the middle stitch on front piece on a stitch holder (= middle stitch), and slip all stitches after this middle stitch on a stitch holder (= right front piece). Stitches before middle stitch are still on the needle (= left front piece). Left front piece: Continue back and forth with stocking stitch, 1 edge stitch in garter stitch in each side and decrease for armholes as before, at the same time on next row from right side begin decrease for V-neck: Work until 6 stitches remain towards the neck, knit 2 together (= 1 stitch decreased), knit 3, 1 edge stitch in garter stitch. Decrease like this every other row 11-11-11-11-11-11 times, then every 4th row 6-6-7-7-8-8 times (= 17-17-18-18-19-19 stitches decreased for V-neck) = 16-18-19-21-22-24 stitches remain for shoulder. Continue to work until piece measures approx. 63-65-67-69-71-73 cm. Cast off. Right front piece: Continue back and forth with stocking stitch, 1 edge stitch in garter stitch in each side and decrease for armholes as before, at the same time on next row from right side begin decrease for V-neck: Work 1 edge stitch in garter stitch, knit 3, slip 1 stitch knitwise, knit 1, pass slipped stitch over (= 1 stitch decreased), work the rest of row. Decrease like this every other row 11-11-11-11-11-11 times, then every 4th row 6-6-7-7-8-8 times (= 17-17-18-18-19-19 stitches decreased for neck) = 16-18-19-21-22-24 stitches remain for shoulder. Continue to work until piece measures approx. 63-65-67-69-71-73 cm. Cast off. ASSEMBLY: Sew shoulder seams with grafting/kitchener stitches inside cast-off edges. SLEEVE EDGES: Begin from right side where piece was divided for armhole. Use circular needle size 3.5 mm and pick up approx. 132 to 154 stitches around the entire armhole (number of stitches must be divisible by 2). Work rib according to diagram A.1 in the round for 4½-5 cm. Cast off stitches with knit over knit and purl over purl. Repeat around the other armhole. NECK EDGE: Begin mid on top of one shoulder with circular needle size 3.5 mm and DROPS Karisma and pick up 158 to 188 stitches inside 1 edge stitch in garter stitch around the entire neck edge including middle stitch on stitch holder mid front (number of stitches must be divisible by 2). Work rib according to pattern A.2 in the round - adjust so that pattern is worked according to A.3 over the 14 stitches mid front (stitch with star in A.3 should be middle stitch mid front), and so that pattern fits knit 1 twisted / purl 1 in the round on first round worked. Continue in the round and decrease as shown in A.3 until rib measures 4 cm. Cast off with knit over knit and purl over purl, at the same time decrease as before over the middle 3 stitches mid front. |
||||||||||||||||
Diagram explanations |
||||||||||||||||
|
||||||||||||||||
|
||||||||||||||||
|
||||||||||||||||
Have you finished this pattern?Tag your pictures with #dropspattern #skyscrapervest or submit them to the #dropsfan gallery. Do you need help with this pattern?You'll find 28 tutorial videos, a Comments/Questions area and more by visiting the pattern on garnstudio.com. © 1982-2025 DROPS Design A/S. We reserve all rights. This document, including all its sub-sections, has copyrights. Read more about what you can do with our patterns at the bottom of each pattern on our site. |
||||||||||||||||


With over 40 years in knitting and crochet design, DROPS Design offers one of the most extensive collections of free patterns on the internet - translated to 17 languages. As of today we count 314 catalogues and 11822 patterns translated into English (UK/cm).
We work hard to bring you the best knitting and crochet have to offer, inspiration and advice as well as great quality yarns at incredible prices! Would you like to use our patterns for other than personal use? You can read what you are allowed to do in the Copyright text at the bottom of all our patterns. Happy crafting!
Post a comment to pattern DROPS 228-3
We would love to hear what you have to say about this pattern!
If you want to leave a question, please make sure you select the correct category in the form below, to speed up the answering process. Required fields are marked *.