
Popular categories
Looking for a yarn?


Comments / Questions (29)
![]() Dagmar wrote:
Dagmar wrote:
Ich habe gerade mit dem Pullover begonnen. Der untere Rand rollt sich nach oben. Sind 2 Reihen kraus zu wenig als stabilisierender Bund? Bessert sich der Zustand erst mit dem Häkelrand? Ich möchte nicht erst ganz am Schluss feststellen, dass der Pulli nicht gerade fällt (wie auf dem Foto zur Anleitung).
01.07.2025 - 11:34DROPS Design answered:
Liebe Dagmar, Sie können später den Pullover mit Stecknadeln auf einer geeigneten Unterlage spannen, anfeuchten (z.B. mit einer Sprühflasche für Blumen) und trocknen lassen, danach entfernen Sie die Stecknadeln, dann sollte sich der Rand nicht mehr rollen. Viel Spaß beim Stricken!
01.07.2025 - 13:30
![]() Magdalena wrote:
Magdalena wrote:
Efter man har slået den antal masker op man skal bruge på rundpinden og arbejde begynder ( ryg og forstykke) …skal der strikkes 2 omg retstrik- der er en forklaring om at der skal strikkes en omg ret og en omgang vrang . Er det en fejl i opskriften ?.::da det jo ikke er retstrik når det er på rundpinde
27.05.2025 - 23:41DROPS Design answered:
Hei Magdalena. Jo, i denne oppskriften er forklaringen til RETSTRIK 2 omganger der det strikkes 1 omgang med rett masker og 1 omgang med vrangmasker. Du skal da skal strikke 2 omganger RETSTRIK = 1 omgang rett - 1 omgang vrang - 1 omgang rett - 1 omgang vrang. mvh DROPS Design
02.06.2025 - 08:08
![]() Stefania wrote:
Stefania wrote:
Ho un dubbio sulle maniche. Fin quando ho 88 punti, ci stanno correttamente 8 ripetizioni del motivo, ma quando le maglie aumentano a 94 o diminuiscono? Lascio qualche maglia intorno al segnapunti non calcolata in modo da basarmi sempre su multipli di 8? Grazie
20.01.2025 - 16:08DROPS Design answered:
Buongiorno Stefania, può continuare a lavorare una parte del motivo. Buon lavoro!
17.02.2025 - 16:31
![]() Stefania wrote:
Stefania wrote:
Ciao. Grazie per la risposta, quindi dove il tutorial, perché dice ' Intrecciare per gli scalfi all’inizio di ogni ferro sia dal diritto che dal rovescio del lavoro.' , sarebbe invece 'all'inizio e alla fine di ogni ferro, sia dal diritto che dal rovescio del lavoro'?
11.09.2024 - 08:50DROPS Design answered:
Buongiorno Stefania, gli intrecci sono come indicati: deve intrecciare all'inizio del ferro, poi alla fine gira il lavoro e intreccia, così ha lavorato 1 diminuzione intera. Deve ripetere questa sequenza per il numero di volte riportato per la sua taglia. Buon lavoro!
11.09.2024 - 09:02
![]() Stefania wrote:
Stefania wrote:
Ciao. Sto iniziando la parte separata del davanti per la taglia S. Parto da 120 maglie e diminuisco 3m x 2 = 6 , 2m x 2 = 4 , 1m x 1 = 1; 6+4+1 = 11; 120-11 = 109. Però il tutorial mi dice che restano 98 maglie. Sto sbagliando qualcosa? Grazie
09.09.2024 - 16:20DROPS Design answered:
Buonasera Stefania, deve lavorare le diminuzioni a ogni lato del lavoro, quindi sono 22 maglie diminuite. Buon lavoro!
10.09.2024 - 22:36
![]() Emma wrote:
Emma wrote:
Hej! Stämmer verkligen måttskissen? Har storlek S och M samma bredd?
17.02.2024 - 08:13DROPS Design answered:
Hej Emma, ja det stemmer ifølge opskriften (man slår også samme antal masker op osv) men ærmegabet og længden er forskellig :)
23.02.2024 - 10:43
![]() Linda wrote:
Linda wrote:
Hvordan undgår man, at kanten på ærmer og krop ruller? Selv efter hæklekanten er lavet, ruller det. Har I nogle tips, så jeg ikke skal presse min fine bluse hver gang, jeg vil bruge den? Kan jeg evt. hækle/strikke en anden type kant? Jeg elsker denne bluse og er i gang med min anden. Den første blev lavet i ren bomuld. Denne i Drops Flora 😊
29.10.2023 - 11:29DROPS Design answered:
Hei Linda. Du kan evnt prøve å strikke 4 omgange retstrik i begynnelsen (istedenfor 2 omganger retstrik). Prøve på ett ermet først å se om du syns det er OK før du fortsetter. mvh DROPS Design
30.10.2023 - 09:48
![]() Gun Skogmyr wrote:
Gun Skogmyr wrote:
Hej! Undrar över ärmarna. Förutsätter att de också stickas nerifrån och upp men så här står det "När arbetet mäter 16-15-12-13-12-10 cm maskas det av 8 maskor mitt under ärmen (= 4 maskor på varje sida av markören). Arbetet stickas nu färdigt fram och tillbaka på rundsticka." Kan det verkligen stämma? Jag vill få det till att man börjar maska av när det är ex 10 cm "kvar". Tacksam för svar! Hälsningar Gun
17.08.2022 - 18:56DROPS Design answered:
Hei Gun. Du strikker ermet rundt på rundpinne til ermet måler 16-15-12-13-12-10 cm, deretter skal ermtoppen strikkes fram og tilbake (du fortsetter å bruke rundpinnen, men strikker fram og tilbake). Du feller 8 masker under ermet og så starter du med ermtoppen og følger fellingene som beskrevet i oppskriften til ermet måler ca 26-26-25-26-26-26 cm. Om du ser på målskissen feller du de 8 maskene i "krysset" mellom bolen og ermet, deretter strikkes ermtoppen frem og tilbake de siste 10-11-13-13-14-16 cm. mvh DROPS Design
22.08.2022 - 10:32
![]() Antonella Marian wrote:
Antonella Marian wrote:
Buongiorno ho fatto questa maglia con i ferri normali nn circolari ma il bordo si arrotola...qualche suggerimento? Grazie.
22.04.2022 - 13:45DROPS Design answered:
Buonasera Antonella, ha bloccato il lavoro dopo il lavaggio? Il bordo arrotolato può dipendere anche da una tensione diversa nell'avvio/chiusura, nel caso provi ad avviare/chiudere le maglie con mezza misura di ferri in più. Buon lavoro!
24.04.2022 - 16:34
![]() Shio wrote:
Shio wrote:
Liebes drops-team leider hab ich noch nie in runden gestrickt. deswegen eine vielleicht blöde frage. muß ich jetzt die rückreihe als hinreihe stricken und dann einfach genauso wie es kommt nur rechts stricken? oder wird hier wirklich keine \"rückreihe\" gestrickt? danke für die antwort :)
18.04.2022 - 23:53DROPS Design answered:
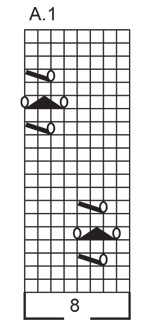
Liebe Shio, wenn Sie in Runden stricken, sind alle Reihen "Hinreihen" = sie werden alle von der Vorderseite gestrickt, Das Diagram lesen Sie dann immer rechts nach links. Wenn sie dann die Arbeit teilen, beachten Sie nur, daß die Reihen mit Lochmuster immer noch einer Hinreihe bleiben. Mehr über Diagramme lesen Sie hier. Viel Spaß beim stricken!
19.04.2022 - 11:52
|
|||||||||||||
Country Roads#countryroadssweater |
|||||||||||||
 |
 |
||||||||||||
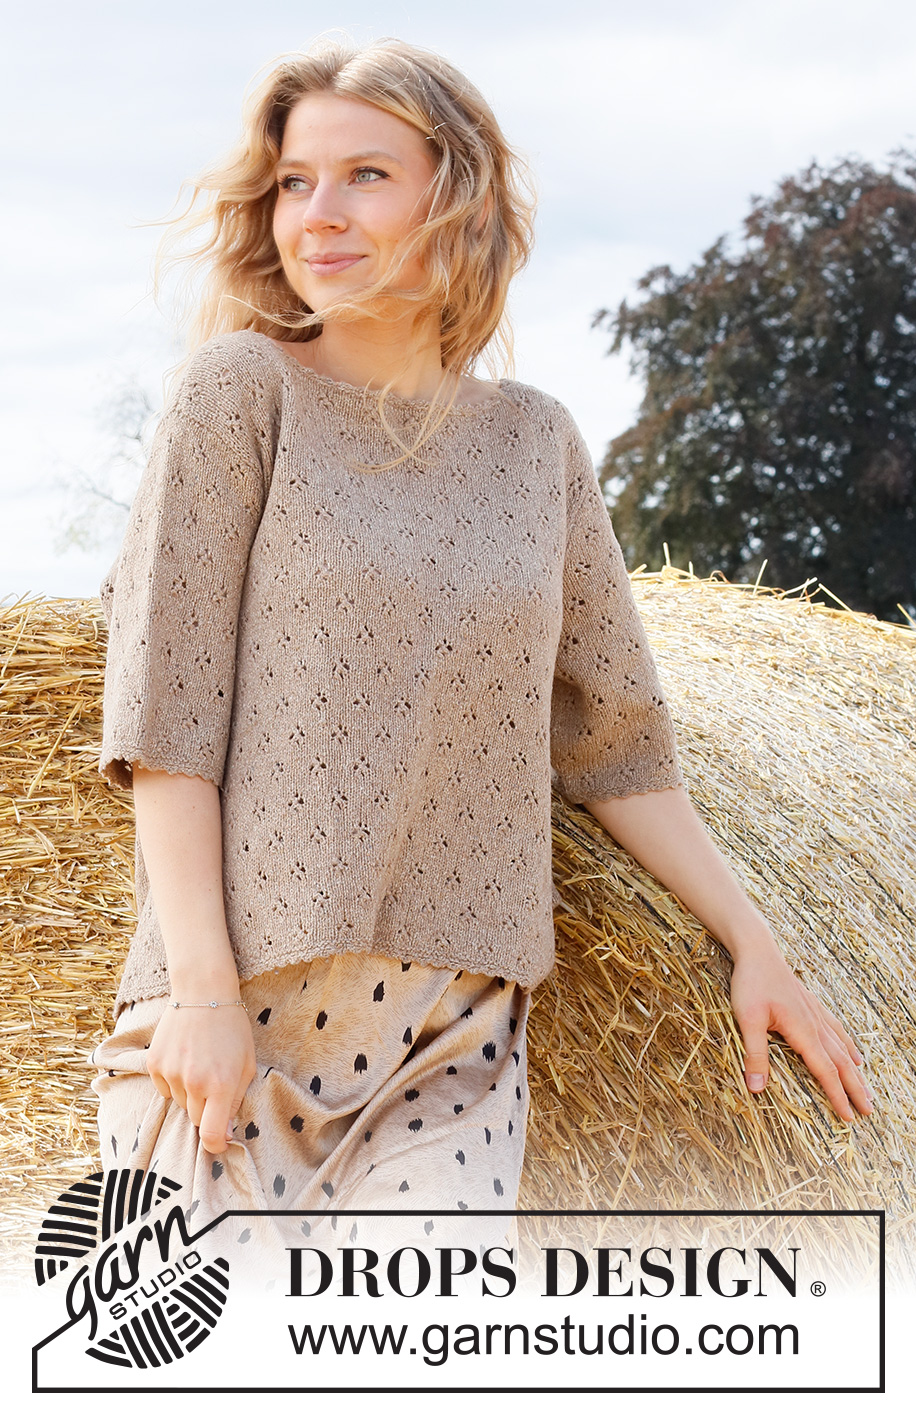
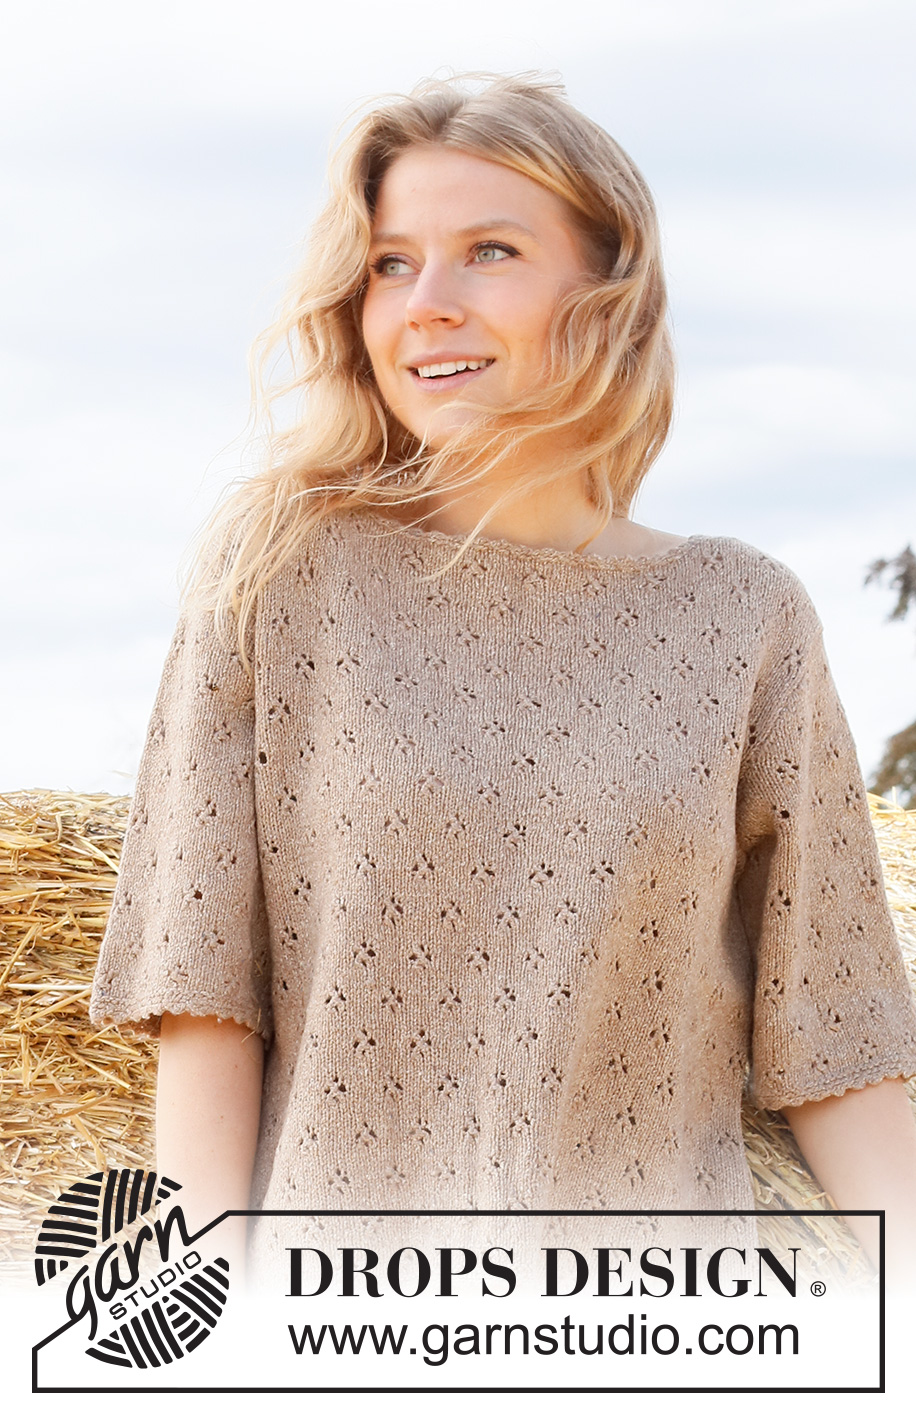
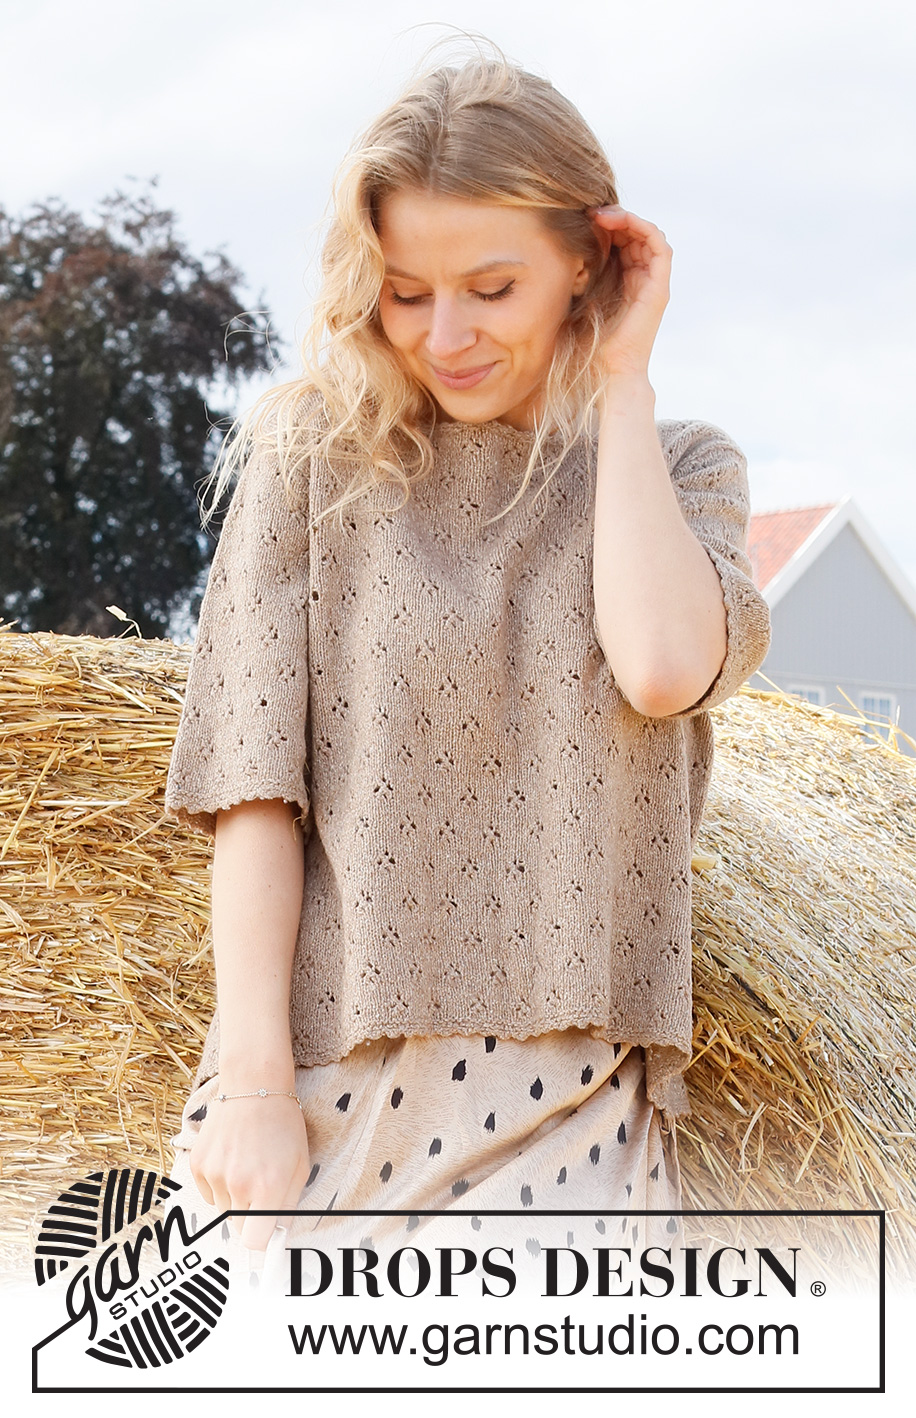
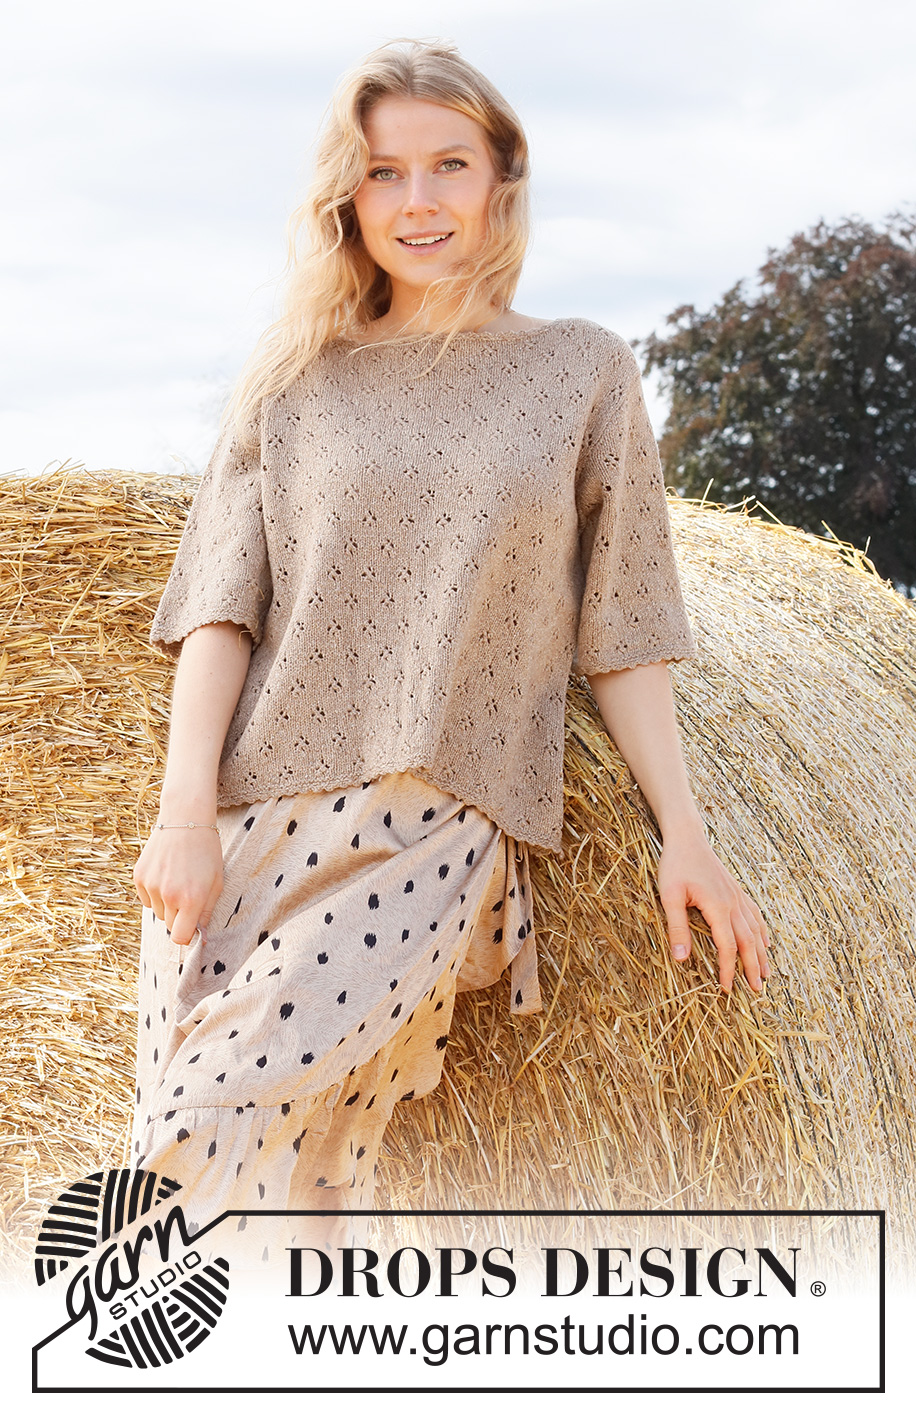
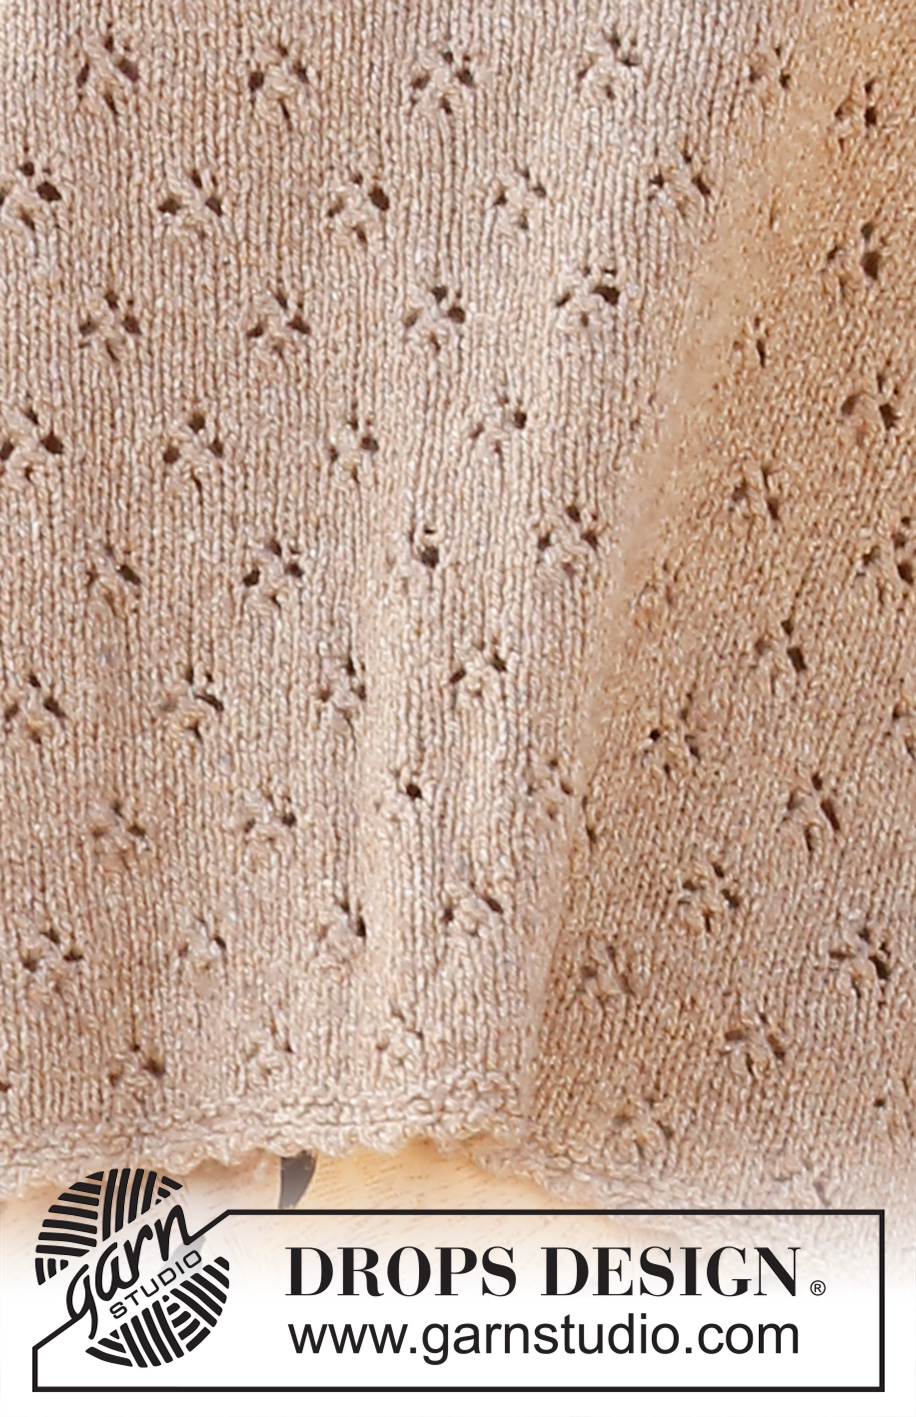
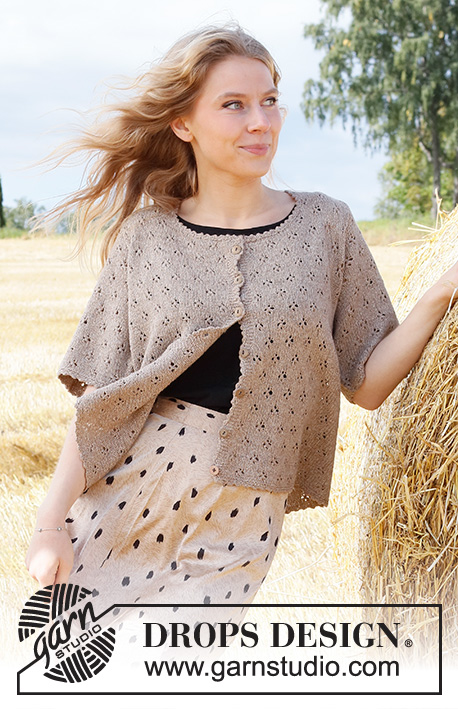
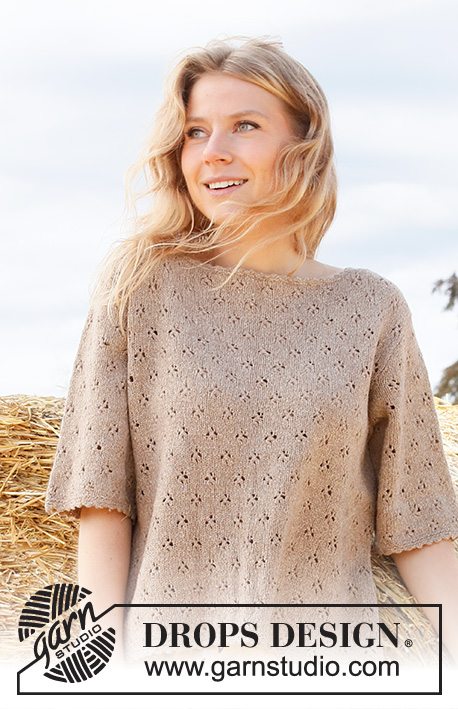
Knitted jumper in DROPS Flora. The piece is worked with lace pattern and short sleeves. Sizes XS – XXL.
DROPS 223-6 |
|||||||||||||
|
------------------------------------------------------- EXPLANATIONS FOR THE PATTERN: ------------------------------------------------------- RIDGE/GARTER STITCH (worked in the round): 1 ridge in height = 2 rounds; Knit 1 round and purl 1 round. PATTERN: See diagram A.1. The diagram shows all the rows in the pattern from the right side. INCREASE TIP (for sleeves): Increase 1 stitch on each side of the marker thread as follows: Work until there is 1 stitch left before the marker thread, 1 yarn over, work 2 stitches as before (marker thread sits between these 2 stitches), 1 yarn over. On the next round work the yarn overs twisted to avoid holes ------------------------------------------------------- START THE PIECE HERE: ------------------------------------------------------- JUMPER – SHORT OVERVIEW OF THE PIECE: The jumper is worked in the round as far as the armholes. The body is divided and each piece finished separately, back and forth. The sleeves are worked in the round with double pointed needles or short circular needle. An edge is crocheted around the neck, around the bottom of the jumper and the sleeves to finish. BODY: Cast on 224-256-256-288-320-352 stitches with circular needle size 3 mm and Flora. Work 1 RIDGE – read description above. Then work A.1 over all stitches (= 28-32-32-36-40-44 repeats of 8 stitches). Work A.1 until the piece measures 31-32-33-34-35-36 cm from the cast-on edge. Now cast off for the armholes on the next round as follows: Cast off the first 4 stitches, work the next 104-120-120-136-152-168 stitches, cast off 8 stitches, work the next 104-120-120-136-152-168 stitches and cast off the last 4 stitches. Cut the strand. Front and back pieces are finished separately, working back and forth. FRONT PIECE: = 104-120-120-136-152-168 stitches. Continue with A.1 as before. Cast off for the armholes at the beginning of each row from both the right and wrong side as follows: 3 stitches 1-2-2-2-2-2 times, 2 stitches 1-2-1-3-4-6 times and 1 stitch 0-1-0-2-6-7 times = 94-98-104-108-112-118 stitches. Continue working until the piece measures 47-49-51-53-55-57 cm. Now cast off the middle 36-38-42-44-46-48 stitches for the neck and each shoulder is finished separately. Cast off on each row from the neck as follows: 2 stitches 1 time and 1 stitch 2 times = 25-26-27-28-29-31 stitches on the shoulder. Continue with pattern as before. Cast off when the piece measures 52-54-56-58-60-62 cm (= 21-22-23-24-25-26 cm from the bottom of the armhole). Work the other shoulder in the same way. BACK PIECE: = 104-120-120-136-152-168 stitches. Continue with A.1 as before. Cast off for the armholes at the beginning of each row from both the right and wrong side as follows: 3 stitches 1-2-2-2-2-2 times, 2 stitches 1-2-1-3-4-6 times and 1 stitch 0-1-0-2-6-7 times = 94-98-104-108-112-118 stitches. Continue working until the piece measures 50-52-54-56-58-60 cm. Now cast off the middle 42-44-48-50-52-54 stitches for the neck and each shoulder is finished separately. On the next row cast off 1 stitch from the neck = 25-26-27-28-29-31 stitches on the shoulder. Continue with pattern as before. Cast off when the piece measures 52-54-56-58-60-62 cm (= 21-22-23-24-25-26 cm from the bottom of the armhole). Work the other shoulder in the same way. SLEEVES: The sleeves are worked in the round as far as the sleeve cap, then finished back and forth. Cast on 80-88-88-96-104-112 stitches with double pointed needles size 3 mm and Flora. Insert 1 marker thread at the beginning of the round. Work 1 ridge then work A.1 over all stitches (= 10-11-11-12-13-14 repeats of 8 stitches). AT THE SAME TIME, when the piece measures 6-6-6-5-5-5 cm, increase 1 stitch on either side of the marker thread – read INCREASE TIP. Increase every 2½-4-1-1-1-1 cm a total of 4-3-6-7-6-5 times = 88-94-100-110-116-122 stitches. When the sleeve measures 16-15-12-13-12-10 cm cast off 8 stitches mid-under the sleeve (= 4 stitches on each side of the marker thread). The piece is now finished back and forth. Continue with A.1 and cast off at the beginning of each row from both the right and wrong side as follows: 3 stitches 1 time, 2 stitches 2-2-2-3-3-3 times, 1 stitch 8-10-12-10-11-16 times. Then cast off 2 stitches on each side until the piece measures 25-25-24-25-25-25 cm, cast off 3 stitches 1 time on each side and 4 stitches 1 time on each side, then cast off the remaining stitches. The sleeve measures approx. 26-26-25-26-26-26 cm. Work the other sleeve in the same way. ASSEMBLY: Sew the shoulder seams. Sew in the sleeves. CROCHETED EDGE: Crochet an edge around the neck, bottom of the jumper and bottom of the sleeves. Using Flora and crochet hook size 3 mm: 1 double crochet, * 3 chain stitches, 1 double crochet in the first chain stitch, skip 1 cm, 1 double crochet *, work from *-*, and finish with 1 slip stitch in the first double crochet at the beginning of the round. |
|||||||||||||
Diagram explanations |
|||||||||||||
|
|||||||||||||
 |
|||||||||||||
 |
|||||||||||||
Have you finished this pattern?Tag your pictures with #dropspattern #countryroadssweater or submit them to the #dropsfan gallery. Do you need help with this pattern?You'll find 26 tutorial videos, a Comments/Questions area and more by visiting the pattern on garnstudio.com. © 1982-2026 DROPS Design A/S. We reserve all rights. This document, including all its sub-sections, has copyrights. Read more about what you can do with our patterns at the bottom of each pattern on our site. |
|||||||||||||


With over 40 years in knitting and crochet design, DROPS Design offers one of the most extensive collections of free patterns on the internet - translated to 17 languages. As of today we count 324 catalogues and 12290 patterns translated into English (UK/cm). 12290
We work hard to bring you the best knitting and crochet have to offer, inspiration and advice as well as great quality yarns at incredible prices! Would you like to use our patterns for other than personal use? You can read what you are allowed to do in the Copyright text at the bottom of all our patterns. Happy crafting!
Post a comment to pattern DROPS 223-6
We would love to hear what you have to say about this pattern!
If you want to leave a question, please make sure you select the correct category in the form below, to speed up the answering process. Required fields are marked *.