
Popular categories
Looking for a yarn?


Comments / Questions (12)
![]() Florence wrote:
Florence wrote:
Bonjour , j\'ai commencé ce pull mais de bas en haut (bottom up), mon problème est au niveau de l\'empiècement ( je dois remplacer les augmentations par des diminutions). En faisant mon échantillon de jacquard et en faisant mes diminutions je me retrouve avec moins de maille entre chaque dessins . Comment puis-je faire pour garder le même écart entre chaque dessin ? Je vous remercie par avance de votre réponse cordialement florence raynaud
05.02.2023 - 15:32DROPS Design answered:
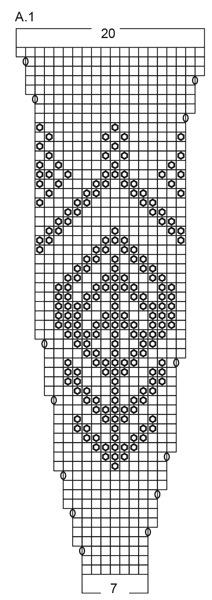
Bonjour Florence, si vous remplacez chaque jeté par 2 m ens à l'end vous devriez logiquement vous retrouver à diminuer 13 mailles dans chaque A.1 et ainsi passer de 20 à 7 mailles. Bon tricot!
06.02.2023 - 11:01
![]() Wendy wrote:
Wendy wrote:
Ik begrijp niet wat er bedoeld word met de pas. 16 herhaling van 7 steken. Hoe word dit gebreid
09.07.2022 - 23:36DROPS Design answered:
Dag Wendy,
Je breit het telpatroon A.1 en dit herhaal je steeds in de breedte. Telpatroon A.1 is 7 steken breedte en deze 7 steken herhaal je in de rondte totdat je weer aan het begin van de naald bent. Daarna brei je de tweede naald van A.1 ook deze herhaal je 16 keer in de rondte. En zo ga je verder met A.1 in de hoogte.
12.07.2022 - 21:16
![]() Andrea wrote:
Andrea wrote:
Moin aus dem hohen Norden, es ist ein fantastischer Pullover mit guter Anleitung. Leider macht mir der Satz:“ , 6-6-8-8-10-10 neue Maschen anschlagen (= an der Seite unter dem Arm) “ Probleme, da ich nicht weiß, ob die nun bei dem Vor- oder Rückenteil oder jeweils bei der Armaufteilung angeschlagen werden sollen… Über eine Antwort würde ich mich sehr freuen. Viele liebe Grüße Andrea
23.03.2022 - 13:35DROPS Design answered:
Liebe Andrea, diese 6-6-8-8-10-10 neue Maschen schlagen Sie auf beiden Seiten, zwischen Vorder- und Rückenteil, dh über die stillgelegelten Maschen, schauen Sie mal diese Lektion; ab 9. Bild zeigt man, wie man die Maschen der Ärmel stilllegt und wie diese neuen Maschen (Bild 11 + 14) angeschlagen werden. Viel Spaß beim stricken!
23.03.2022 - 14:15
![]() Mw Bruring wrote:
Mw Bruring wrote:
Ik heb een vraag over het aantal steken aan de onderkant van het lijf. In de laatste naald meerder je verdeeld over de naald het opgegeven aantal steken, maar dan kom je uit op een aantal dat niet deelbaar is door 4. Voor XL zijn het 334 steken, ik kom dan niet uit met de boordsteek van 2x2?
22.10.2021 - 22:52DROPS Design answered:
Dag Mw Bruring,
Het komt inderdaad niet uit en je kunt 2 steken meer minderen, zodat je uitkomt op 332 steken. Bedankt voor het doorgeven, ik zal het aan de ontwerpafdeling doorgeven om na te kijken.
23.10.2021 - 14:16
![]() MAHEU MJo wrote:
MAHEU MJo wrote:
Bonjour, il est indiqué dans les explications que des corrections ont été apportées à ce modèle (MANDAL). Je ne les trouve pas, pouvez-vous m'aider. ? Un grand merci de toutes les façons pour tous ces modèles qui réjouissent entre autre mes enfants et petits-enfants
07.02.2021 - 19:14DROPS Design answered:
Bonjour Mme Maheu, si vous avez imprimé les explications ce modèle avant la date des corrections, il peut être sage de les imprimer à nouveau, dans le cas contraire, vous pouvez l'imprimer tel quel, les corrections ont déjà été faites. Bon tricot!
08.02.2021 - 10:29
![]() Monika Rock wrote:
Monika Rock wrote:
Super Anleitung. Bin jetzt endlich fertig. Hat total Spaß gemacht. War gar nicht so schwierig wie ich dachte. Klasse! Macht weiter so Garnstudio.
13.12.2020 - 05:11
![]() Sophie wrote:
Sophie wrote:
Bonjour, il est superbe, je l'ai commencé, j'ai hâte de le terminer. Merci pour vos modèles si jolis et bien expliqués.
08.12.2020 - 06:56
![]() Patricia wrote:
Patricia wrote:
Bonjour Il est superbe. Je finis mon gilet Cardinal Winter et je fais celui ci. Le motif me plait beaucoup. Merci pour l'accès à tous vos modèles.
07.02.2020 - 21:59
![]() Labaysse wrote:
Labaysse wrote:
Merci pour votre réponse
25.01.2020 - 14:46
![]() Labaysse wrote:
Labaysse wrote:
Quelqu'un peut me dire où on fait les augmentations avec les 2 carrés. Est ce dans le dessin du pull ? je suis coincée. merci de votre réponse
24.01.2020 - 14:15DROPS Design answered:
Bonjour Mme Labaysse, vous retrouvez ces augmentations (= 1 jeté entre 2 mailles) alternativement au début et à la fin de A.1, par ex au 3ème tour, on augmente à la fin de chaque A.1 en faisant 1 jeté, puis au 5ème tour, on fait 1 jeté au début de chaque A.1 et ainsi de suite. Bon tricot!
24.01.2020 - 14:25
|
||||||||||
Mandal#mandalsweater |
||||||||||
 |
 |
|||||||||
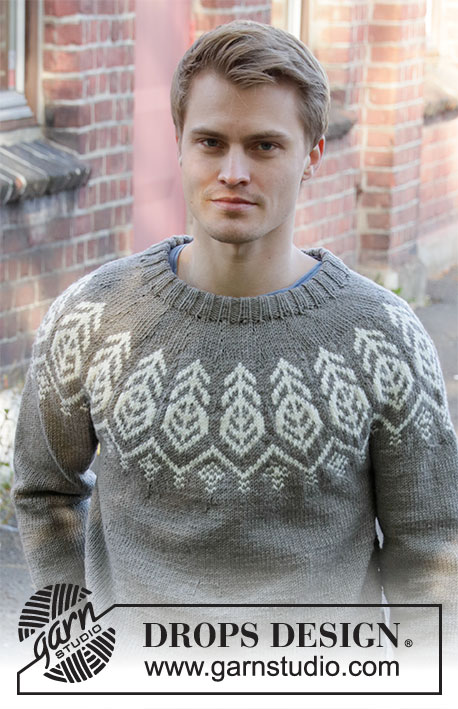
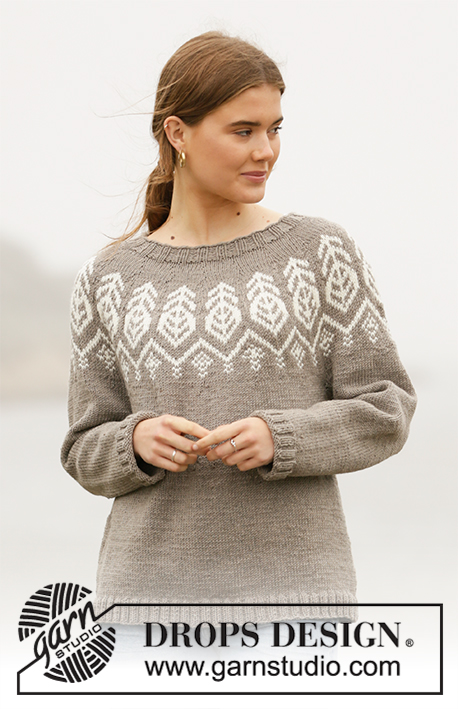
Knitted jumper with round yoke and Nordic pattern in DROPS Merino Extra Fine. The piece is worked top down. Sizes S - XXXL.
DROPS 207-5 |
||||||||||
|
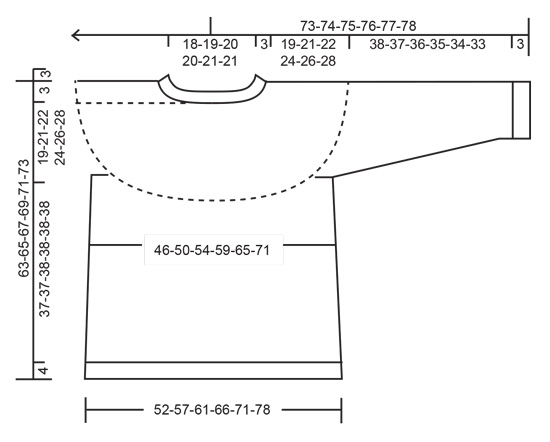
------------------------------------------------------- EXPLANATIONS FOR THE PATTERN: ------------------------------------------------------- PATTERN: See diagram A.1. The diagram is worked in stocking stitch. INCREASE TIP-1 (evenly spaced): To work out how to increase evenly, count the total number of stitches on the needle (e.g. 82 stitches) and divide by the number of increases to be made (e.g. 4) = 20.5. In this example, increase by making 1 yarn over after alternately each 20th and 21st stitch. On the next round knit the yarn overs twisted to avoid holes. INCREASE TIP-2 (for sides of body): Work until there are 2 stitches left before the marker thread, make 1 yarn over, knit 4 (marker thread sits between these 4 stitches) make 1 yarn over (= 2 stitches increased at each marker thread; 4 stitches increased on round). On the next round knit the yarn overs twisted to avoid holes. Then work the new stitches in stocking stitch. DECREASE TIP (for sleeves): Decrease 1 stitch on each side of the marker thread as follows: Work until there are 3 stitches left before the marker thread, knit 2 together, knit 2 (marker thread sits between these 2 stitches), slip 1 stitch as if to knit, knit 1 and pass the slipped stitch over the knitted stitch = 2 stitches decreased. ------------------------------------------------------- START THE PIECE HERE: ------------------------------------------------------- JUMPER – SHORT OVERVIEW OF THE PIECE: The neck and yoke are worked in the round with circular needle, top down from mid back. The yoke is divided for body and sleeves and the body continued in the round with circular needle. The sleeves are worked in the round with short circular needle/double pointed needles, top down. NECK: Cast on 96-100-104-108-116-120 stitches with circular needle size 3.5 mm and light brown. Knit 1 round then work the next round as follows from mid back: * Knit 2, purl 2 *, repeat from *-* to end of round. Continue this rib for 3 cm. When the rib is finished knit 1 round where you increase 16-19-22-32-31-41 stitches evenly spaced – read INCREASE TIP-1 = 112-119-126-140-147-161 stitches. Change to circular needle size 4 mm and work yoke as described below. YOKE: Work A.1 over all stitches (= 16-17-18-20-21-23 repeats of 7 stitches). Work and increase as shown in A.1. REMEMBER THE KNITTING TENSION! When A.1 has been completed in height there are 320-340-360-400-420-460 stitches on the needle. Continue with light brown until the piece measures 22-24-25-27-29-31 cm from the cast-on edge; on the last round increase 0-16-12-0-4-0 stitches evenly spaced = 320-356-372-400-424-460 stitches. Next round: Work the first 45-50-53-58-63-70 stitches in stocking stitch as before (= half back piece), place the next 70-78-80-84-86-90 stitches on 1 thread for sleeve, cast on 6-6-8-8-10-10 new stitches on the needle (= in side under sleeve), work 90-100-106-116-126-140 stitches in stocking stitch as before (= front piece), place the next 70-78-80-84-86-90 stitches on 1 thread for sleeve, cast on 6-6-8-8-10-10 new stitches on the needle (= in side under sleeve) and work the remaining 45-50-53-58-63-70 stitches in stocking stitch as before (= half back piece). Body and sleeves are finished separately. THE PIECE IS NOW MEASURED FROM HERE! BODY: = 192-212-228-248-272-300 stitches. Insert 1 marker thread in each side (= in the middle of the new stitches cast on = 96-106-114-124-136-150 stitches on back/front piece). Allow the marker threads to follow your work onwards; they will be used when increasing in the sides. Work stocking stitch over all stitches using light brown. When the piece measures 4 cm from the division increase 1 stitch on each side of both marker threads – read INCREASE TIP-2. Increase like this every 4 cm a total of 7 times on each side = 220-240-256-276-300-328 stitches. Continue working until the piece measures 37-37-38-38-38-38 cm from the division in all sizes (or to desired length; there is 4 cm left to finished length). Knit 1 round where you increase 44-48-52-56-60-68 stitches evenly spaced = 264-288-308-332-360-396 stitches. Change to circular needle size 3.5 mm and * purl 2, knit 2 *, repeat from *-* over all stitches to end of round. Continue this rib for 4 cm. Loosely cast off with knit over knit and purl over purl. The jumper measures approx. 63-65-67-69-71-73 cm from the shoulder down. SLEEVE: Place the 70-78-80-84-86-90 stitches from the thread on the one side of the piece on short circular needle/double pointed needles size 4 mm and knit up 1 stitch in each of the 6-6-8-8-10-10 stitches cast on under the sleeve = 76-84-88-92-96-100 stitches. Insert 1 marker thread in the middle of the 6-6-8-8-10-10 stitches under the sleeve. Allow the thread to follow your work onwards; it will be used when decreasing mid under sleeve. Start the round at the marker thread and work stocking stitch in the round with light brown. When the piece measures 3 cm from the division decrease 2 stitches mid under sleeve – read DECREASE TIP. Decrease like this every 2½-2-1½-1½-1½-1 cm a total of 12-15-16-17-18-19 times = 52-54-56-58-60-62 stitches. Continue working until the sleeve measures 38-37-36-35-34-33 cm from the division (shorter measurements in larger sizes due to wider neck and longer yoke). Knit 1 round where you increase 8-10-8-10-8-10 stitches evenly spaced = 60-64-64-68-68-72 stitches. Change to double pointed needles size 3.5 mm and work rib (= knit 2 / purl 2) for 3 cm. Loosely cast off with knit over knit and purl over purl. The sleeve measures approx. 41-40-39-38-37-36 cm from the division. Work the other sleeve in the same way. |
||||||||||
Diagram explanations |
||||||||||
|
||||||||||
 |
||||||||||
 |
||||||||||
Have you finished this pattern?Tag your pictures with #dropspattern #mandalsweater or submit them to the #dropsfan gallery. Do you need help with this pattern?You'll find 25 tutorial videos, a Comments/Questions area and more by visiting the pattern on garnstudio.com. © 1982-2026 DROPS Design A/S. We reserve all rights. This document, including all its sub-sections, has copyrights. Read more about what you can do with our patterns at the bottom of each pattern on our site. |
||||||||||


With over 40 years in knitting and crochet design, DROPS Design offers one of the most extensive collections of free patterns on the internet - translated to 17 languages. As of today we count 324 catalogues and 12290 patterns translated into English (UK/cm). 12290
We work hard to bring you the best knitting and crochet have to offer, inspiration and advice as well as great quality yarns at incredible prices! Would you like to use our patterns for other than personal use? You can read what you are allowed to do in the Copyright text at the bottom of all our patterns. Happy crafting!
Post a comment to pattern DROPS 207-5
We would love to hear what you have to say about this pattern!
If you want to leave a question, please make sure you select the correct category in the form below, to speed up the answering process. Required fields are marked *.