
Popular categories
Looking for a yarn?


Comments / Questions (92)
![]() Marica wrote:
Marica wrote:
Salve, è possibile avere la traduzione in italiano del modello? Grazie
04.05.2023 - 08:45DROPS Design answered:
Buonasera Marica, certo, potrà trovare la traduzione online la prossima settimana. Buon lavoro!
04.05.2023 - 23:40
![]() Andrea Telaar wrote:
Andrea Telaar wrote:
Bin gerade mit dem Rückenteil angefangen, es rollt sich schon jetzt ganz stark nach innen ! Was tun?
03.03.2023 - 22:10DROPS Design answered:
Liebe Frau Telaar, die Weste können Sie danach mit Stecknadeln auf einer geeigneten Unterlage spannen, anfeuchten (z.B. mit einer Sprühflasche für Blumen) und trocknen lassen, danach entfernen Sie die Stecknadeln, dann sollte sich der Rand nicht mehr rollen. Viel Spaß beim stricken!
06.03.2023 - 09:04
![]() Marianne wrote:
Marianne wrote:
Str. 1-3 mdr. FORSTYKKE (og ryg): Jeg kan ikke se, hvordan man kan få 46 m tilbage ud af 50, når man først lukker 3 m af i hver side (50-6=44) og derefter tager en maske ind i hver side 4 gange (44-8=36!) ??? Mvh. Marianne, Danmark
30.09.2022 - 12:46
![]() Hanne Schuch wrote:
Hanne Schuch wrote:
Hej. Skal der ikke tages ud til 66 masker på rygstykket, som på forstykket? Hilsen Hanne
28.06.2022 - 13:48DROPS Design answered:
Hej Hanne, du tager ud på forstykket for at få nok masker til snoningerne. Du strikker ikke snoninger på rygstykket, derfor behøver du ikke tage ud :)
29.06.2022 - 10:04
![]() Anita Bøjland wrote:
Anita Bøjland wrote:
Jeg kan ikke få opskriften til at passe.. Jeg skal slå 50 masker op, men efter første mønstergang skal jeg have 60 masker!! Jeg kan ikke se noget om udtagning nogen steder?
31.01.2022 - 14:32DROPS Design answered:
Hei Anita. I dette avsnittet står det at du skal strikke 2 masker i 1 maske (har skrevet det med store bokstaver, slik at man lettere kan se). Næste p strikkes således (fra retsiden): 1 kantm i retstrik, strik 11 vrang, * STRIK 2 R I HVER AF DE NÆSTE 2 M, 4 vr *, gentag fra *-* 4 gange, STRIK 2 R I HVER AF DE NÆSTE 2 M, strik 11 vrang og 1 kantm i retstrik = 60 m. mvh DROPS Design
31.01.2022 - 15:08
![]() Karin wrote:
Karin wrote:
Bij afwerking staat “ Naai de zijnaden in de kant st en naai de knopen op de schouders” . Zitten de knopen er voor de sier of moeten ze open kunnen? Ik heb maar hele kleine gaten in de schouders door de omslag in het voorpand, niet groot genoeg voor een knoop. Of naai ik ze gewoon vast aan voor en achterpand?
14.11.2021 - 22:13DROPS Design answered:
Dag Karin,
Excuses voor het late antwoord. Als het goed is heb je bij de linker schouder op het voorpand knoopsgaten gemaakt. (2 st samen breien en 1 omslag.) De knopen naai je op de bies van het achterpand en je knoopt ze door de gaatjes op de linker bies van de schouder.
09.12.2021 - 13:50
![]() Sorrel O'Leary wrote:
Sorrel O'Leary wrote:
Sorry, I don't get it. The pattern says to work the cable pattern starting on the WS. I have done this twice and of course the cable pattern only shows on the WS. It would be clearer if it was stated that you start off without cabling in this M.1. I have knitted lace blankets and complex cable patterns but this one has me stumped. It is not clear at all.
10.04.2021 - 05:54DROPS Design answered:
Dear Sorrel, the cable pattern, is pattern M.1 wich have a "twist" (cable) in the sixth row, in other words, you knit 1st: WS, 2nd: RS, 3d: WS, 4th: RS, 5th: WS, and the sixth row, from the right side in which you do the cabling. I hope this helps. Happy Knitting!
10.04.2021 - 09:33
![]() Joy W wrote:
Joy W wrote:
If the RS is the Perl side & is where the cable is, shouldn’t the M1 diagram show the white boxes as PERL on RS & KNIT on WS?
11.02.2021 - 21:04DROPS Design answered:
Dear Joy, the diagram M.1 is shown from RS and is for the cable, this means all stitches in M.1 /of the cables are worked in stocking stitch (= knit from RS and purl from WS). Between each diagram/cable you will work 11 to 24 stitches in reversed stocking stitch (purl from RS, knit from WS). Hope this help, happy knitting!
12.02.2021 - 07:49
![]() Birgit wrote:
Birgit wrote:
Hallo, ich möchte die Anleitung mit zwei Farben arbeiten (beige und Natur), um ein meliertes Ergebnis zu erreichen. Welches Garn kann ich dafür verwenden? Der Pullunder soll nicht dicker werden. Oder welches Garn können Sie für ein leicht meliertes Erscheinungsbild empfehlen?
06.01.2021 - 15:01DROPS Design answered:
Liebe Birgit, vielleicht können Sie die gleiche Maschenprobe bekommen wenn Sie 1 Faden DROPS Flora + 1 Faden Kid-Silk benutzen, am besten stricken Sie eine Maschenprobe, so können Sie auch den Textur prüfen, ob er Ihnen gefällt. Ihr DROPS Laden kann sonnst Ihnen auch gerne das beste passende Garn empfehlen - auch telefonisch oder per E-Mail. Viel Spaß beim stricken!
06.01.2021 - 15:51
![]() Katrin wrote:
Katrin wrote:
Hallo. Ich habe eine Frage zum Halsausschnitt. Werden da in der Mitte über den Zöpfen keine 2 Maschen rechts zusammen gestrickt? Und was bitte bedeutet bei der Halskante eine Reihe rechts auf links stricken? 1 Reihe rechte Maschen auf der Vorder - oder Rückseite? Besten Dank
06.12.2020 - 16:29DROPS Design answered:
Liebe Katrin, es wird hier keine Abnahmen über den Zöpfen gestrickt - Eine Reihe rechts auf links ist eine Rückreihe mit rechten Maschen. Viel Spaß beim stricken!
07.12.2020 - 08:35
|
|||||||
Little Gent#littlegentslipover |
|||||||
 |
 |
||||||
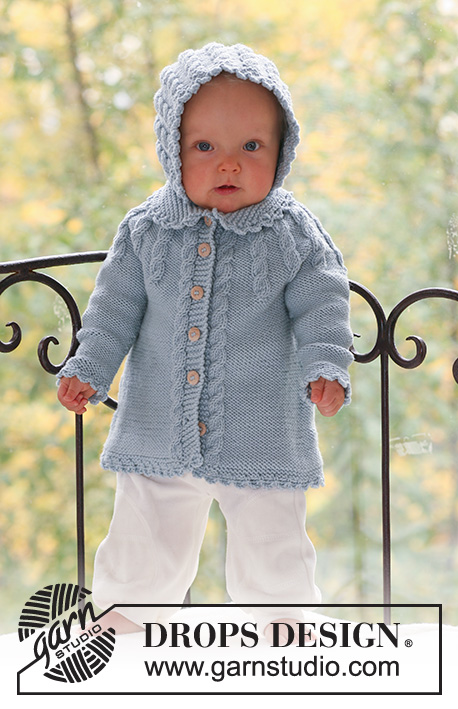
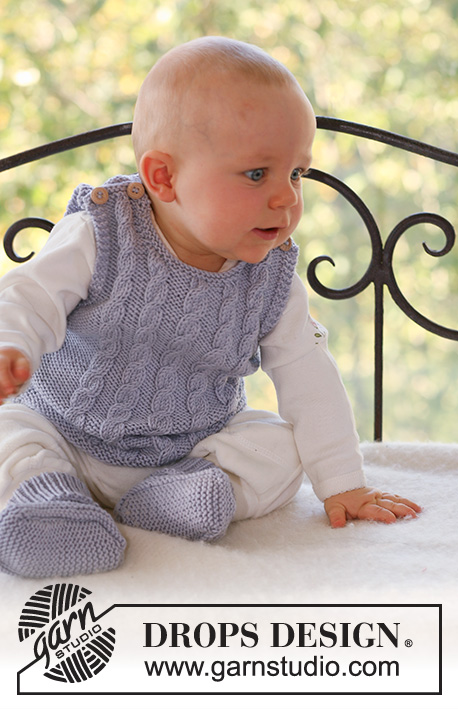
Set of knitted vest and socks with cables for baby and children in DROPS Merino Extra Fine
DROPS Baby 17-9 |
|||||||
|
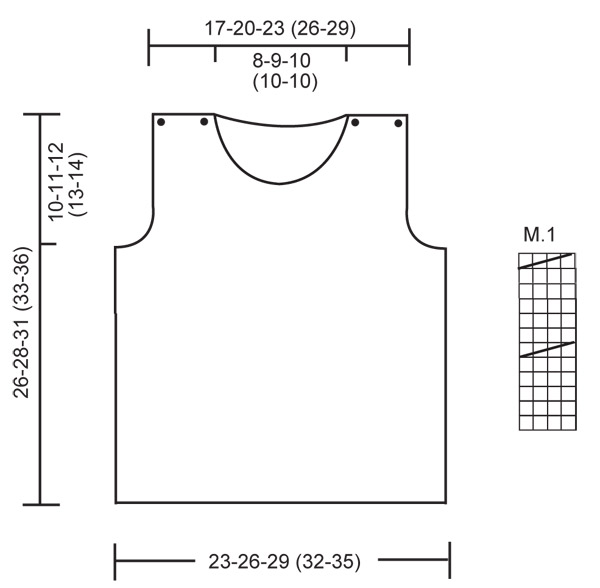
PATTERN: See diagram M.1. The diagram is seen from the RS. GARTER ST (back and forth on needle): K all rows. GARTER ST (in the round): K 1 round, P 1 round. DECREASING TIP (applies to armhole on top): Dec from RS inside 3 garter sts by P2 tog. ---------------------------------------------------------- SLEEVELESS TOP: FRONT PIECE: Worked back and forth on needle. Cast on 50-56-62 (70-76) sts (includes 1 edge st each side, worked in garter st throughout) on needle size 4 mm with Merino Extra Fine. Work 4 rows garter st – SEE ABOVE. Work next row as follows from RS: 1 edge st, P 11-14-17 (21-24), * K2 in each of the next 2 sts, P4 *, repeat from *-* 4 times, K2 in each of the next 2 sts, P 11-14-17 (21-24), 1 edge st = 60-66-72 (80-86) sts. Work next row as follows from WS: 1 edge st, K 11-14-17 (21-24), * M.1, K 4 *, repeat from *-* 4 times, M.1, K 11-14-17 (21-24), 1 edge st. Work next row as follows from RS: 1 edge st, P 11-14-17 (21-24), * M.1, P 4 *, repeat from *-* 4 times, M.1, P 11-14-17 (21-24), 1 edge st. Continue in pattern like this. REMEMBER THE KNITTING TENSION! When piece measures 15-16-18 (19-21) cm work 4 rows garter st on 6 sts each side (work remaining sts as before), AT THE SAME TIME on last row cast off 3 sts at beg of row, work remaining sts on row as before, and cast off 3 sts at beg of next row, work remaining sts on row as before. Continue with 3 garter sts each side, AT THE SAME TIME cast off to shape the armhole each side – SEE DECREASING TIP: 1 st on every other row 4-4-4 (5-5) times = 46-52-58 (64-70) sts. When piece measures 22-23-26 (28-31) cm slip the middle 12-12-14 (14-14) sts on a stitch holder for neck and complete each side separately. Cast off to shape the neckline at the beg of every row from mid front: 2 sts 1 time and 1 st 3-4-4 (4-4) times = 12-14-16 (19-22) sts left on shoulder. When piece measures 26-28-31 (33-36) cm work the 4 sts over cable tog 2 by 2 = 10-12-14 (17-20) sts left on shoulder. Slip shoulder sts on a stitch holder. NECKLINE: Pick up approx 30 to 40 sts round neckline (includes sts on stitch holder) on needle size 4 mm with Merino Extra Fine. K 1 row from WS, AT THE SAME TIME adjust no of sts to 26-28-30 (32-34). K 2 rows and cast off. LEFT SHOULDER: Work sts from stitch holder back on needle and pick up 2 sts on neckline = 12-14-16 (19-22) sts. K 1 row from WS and work next row as follows: K 1-1-1 (2-2), K2 tog, 1 YO, K 5-7-9 (10-13), K2 tog, 1 YO, K 2-2-2 (3-3). K 1 row and cast off on next row. RIGHT SHOULDER: Pick up 2 sts on neckline and work sts from stitch holder back on needle = 12-14-16 (19-22) sts. Work like left shoulder. BACK PIECE: Worked back and forth on needle. Cast on 50-56-62 (70-76) sts (includes 1 edge st each side, worked in garter st throughout) on needle size 4 mm with Merino Extra Fine. Work 4 rows garter st and continue in reverse stocking st. Cast off for armhole each side as described for front piece and continue until piece measures 24-26-29 (31-34) cm. Now cast off the middle 14-16-18 (18-18) sts for neck and complete each side separately. Cast off 1 st on neckline on next row = 10-12-14 (17-20) sts left on shoulder. When piece measures 26-28-31 (33-36) cm slip shoulder sts on a stitch holder. NECKLINE: Pick up approx 18 til 26 sts round neckline on needle size 4 mm with Merino Extra Fine. K 3 rows and cast off. LEFT SHOULDER: Work sts from stitch holder back on needle and pick up 2 sts on neckline = 12-14-16 (19-22) sts. K 3 rows and cast off. RIGHT SHOULDER: Like left shoulder. ASSEMBLY: Sew side seams inside 1 edge st and sew on buttons on shoulders. ---------------------------------------------------------- BOOTIES: Worked in the round on double pointed needles. Cast on 48-52-52 (56-56) sts on double pointed needles size 2.5 mm with Merino Extra Fine. Work rib, K1/P1 – round beg mid back. When piece measures 4-5-5 (5-6) cm K 3 tog (= K1. P1, K1) mid back, work 4 rounds and then K3 tog again (= P1, K1, P1) mid back = 44-48-48 (52-52) sts. When piece measures 10-11-12 (13-14) cm change to double pointed needles size 3.5 mm. K 1 round, AT THE SAME TIME dec 6-6-6 (6-6) sts evenly = 38-42-42 (46-46) sts. REMEMBER THE KNITTING TENSION! Slip the first 14-15-15 (16-16) sts on a stitch holder, keep the next 10-12-12 (14-14) sts on needle (= upper foot), and slip remaining 14-15-15 (16-16) sts on a stitch holder. Work sts on upper foot back and forth on needle as follows: 2-3-3 (4-4) garter sts – SEE ABOVE, 1 st in reverse stocking st, M.1 (beg on row 4 in diagram), 1 st in reverse stocking st, and 2-3-3 (4-4) garter sts. When piece on upper foot measures 3½-4-5 (6½-7½) cm pick up 8-9-11 (14-16) sts on both sides and slip sts from stitch holders back on needle = 54-60-64 (74-78) sts. Continue in garter st on all sts for 1½-2-2½ (3-3½) cm, now P 1 round and cast off all sts except the 10-12-12 (14-14) sts mid front. Work 9-10-11 (13-15) cm garter sts on these sts for sole and cast off. Sew sole to bootie, edge to edge to avoid a chunky seam. Knit the other bootie in the same way. |
|||||||
Diagram explanations |
|||||||
|
|||||||
 |
|||||||
Have you finished this pattern?Tag your pictures with #dropspattern #littlegentslipover or submit them to the #dropsfan gallery. Do you need help with this pattern?You'll find 13 tutorial videos, a Comments/Questions area and more by visiting the pattern on garnstudio.com. © 1982-2026 DROPS Design A/S. We reserve all rights. This document, including all its sub-sections, has copyrights. Read more about what you can do with our patterns at the bottom of each pattern on our site. |
|||||||


With over 40 years in knitting and crochet design, DROPS Design offers one of the most extensive collections of free patterns on the internet - translated to 17 languages. As of today we count 324 catalogues and 12290 patterns translated into English (UK/cm). 12290
We work hard to bring you the best knitting and crochet have to offer, inspiration and advice as well as great quality yarns at incredible prices! Would you like to use our patterns for other than personal use? You can read what you are allowed to do in the Copyright text at the bottom of all our patterns. Happy crafting!
Post a comment to pattern DROPS Baby 17-9
We would love to hear what you have to say about this pattern!
If you want to leave a question, please make sure you select the correct category in the form below, to speed up the answering process. Required fields are marked *.