
Popular categories
Looking for a yarn?


Comments / Questions (15)
![]() Christine Vanherweghen wrote:
Christine Vanherweghen wrote:
Bonjour, pour la 1ère ligne de A1, on diminue de deux mailles. Donc, on passe à 15 mailles, il manque une maille pour la suite, non ? Merci pour votre réponse
29.11.2025 - 21:29DROPS Design answered:
Bonjour Mme Vanherweghen, au 1ème rang, A.1 se tricote effectivement sur 8 mailles, mais dès le 3ème rang, on va "récupérer" cette 9ème maille grâce au jeté entre les 2 mailles endroit. Notez que l'on compte toujours 9 mailles pour chaque A.1 quand on compte le nombre de mailles, même si c'est un rang où il n'y en a que 8. Bon tricot!
01.12.2025 - 08:51
![]() Inga-Lill wrote:
Inga-Lill wrote:
Finns det ngn video som förklarar hur man stickar I-CORD tillsammans med A.1 i mönster 258-28? Kommer inte på hur man gör här.
29.11.2025 - 16:26DROPS Design answered:
Heri Inga-Lill. Nei, ingen video på i-cord og A.1, men ta gjerne en titt på den generelle videoen: Hur man stickar en i-cord kant, fram och tillbaka. mvh DROPS Design
08.12.2025 - 09:14
![]() Beatrice wrote:
Beatrice wrote:
Hoi Ich habe eine Frage zum V-Ausschnitt: „beidseitig innerhalb von A1 und der Blende aufnehmen“ - wo ist innerhalb? Zwischen I-Cord und A1? Wie werden diese neuen Maschen gestrickt? Rechts? Vielen Dank! 😊
14.09.2025 - 09:37DROPS Design answered:
Liebe Beatrice, die Zunahmen erfolgen am Ende der Reihe vor dem Muster + der Blende bzw. am Anfang der Reihe nach dem Muster + der Blende, also nicht dazwischen. Die zugenommenen Maschen stricken Sie glatt rechts, wie unter "V-AUSSCHNITT" ganz am Anfang der Anleitung beschrieben. Gutes Gelingen weiterhin!
15.09.2025 - 10:04
![]() Ursula wrote:
Ursula wrote:
Wat ik niet snap is dat je begint met de rechter voorbies te breien. Dit is toch het stuk van onderaan de boord naar de hals of begrijp ik het verkeerd? Ik heb al lang niet meer gebreid dus snap ik het niet goed denk ik, sorry.
31.07.2025 - 20:59
![]() Ursula wrote:
Ursula wrote:
Op welke hoogte begin ik in de voorbies met punnikrand met de knoopsgaten. Ik vind de beschrijving erg lastig te lezen doordat alles apart staat beschreven.
31.07.2025 - 20:08DROPS Design answered:
Dag Ursula,
Het eerste knoopsgat wordt op de eerste naald aan de goede kant gebreid nadat de meerderingen voor de V-hals klaar zijn. Brei dan de andere 3-4-4-4-4-4 knoopsgaten met 8½-7-7½-8-8-8½ cm tussen elk.
31.07.2025 - 20:47
![]() Susanna wrote:
Susanna wrote:
Ich verstehe nicht den Aufbau des Pullovers. An welcher Stelle sitzen die am Anfang gestrickten „Blenden“? Wieso stricke ich unter den 19 cm Blenden weiter als Raglan? Wo sollen die 2 x 19 cm hin? Stricke ich ab dem Raglan sozusagen normal von oben nach unten? Ich finde die Zweiteilung der Anleitung in Techniken und Ablauf in der Form sehr unübersichtlich. Ich weiß gerade gar nicht, was ich stricke.
17.07.2025 - 14:15DROPS Design answered:
Liebe Susanna, in diesem Video zeigen wir, wie man die Halsblende in 2 Teilen strickt (in diesem Modell wird man keine verkürtze Reihe stricken) und wie diese Halsblende zusammen gestrickt wird, mit dazwischen die neuen Maschen der Passe/Hals. Hoffentlich kann das Ihnen helfen. Viel Spaß beim Stricken!
24.07.2025 - 15:34
![]() Barbara wrote:
Barbara wrote:
Ich teile die Meinung von Susi und Andrea. Es wäre hilfreich, die Anleitung entsprechend der Antwort an Andrea zu ändern. Missverständlich ist insbesondere, dass für den Begriff "Blende" in den Tipps die 8 Maschen (i-Cord und kraus rechts) verwendet werden und in der Anleitung offenbar diese 8 Maschen inkl. die 9 Maschen für A1 gemeint sind. So kommt man leicht auf die Idee, die Zunahmen müssten zwischen den 9 Maschen A1 und den 8 Maschen aus den Tipps für Blende gemacht werden.
16.07.2025 - 15:53
![]() Gail wrote:
Gail wrote:
Hi, where do I increase for the v neck? Thank you :)
14.07.2025 - 13:41DROPS Design answered:
Hi Gail, you will increase stitches both for RAGLAN and V-NECK at the same time but in diffrent pace. Please see section raglan and V-neck. Happy knitting!
14.07.2025 - 14:10
![]() Heike wrote:
Heike wrote:
Hallo, Ich verzweifle gerade an der Fertigstellung der Jacke, vor allem daran die hintere Blende so an-/aufzunähen,, dass es mit gefällt. Gibt es dafür ein Tutorial oder irgendwelche Tipps?
05.06.2025 - 18:16DROPS Design answered:
Liebe Heike, in diesem Video können Sie schauen, wie man Blenden-Maschen zusammennäht und dann en der Halsblende festnäht - hoffentlich kann das Ihnen helfen. Viel Spaß beim Stricken!
06.06.2025 - 08:01
![]() Susi wrote:
Susi wrote:
Bitte folgendes klären: Das erste Knopfloch soll direkt nach Beendigung der 22 Zunahmen gefertigt werden. Damit liegt der V Ausschnitt bei mir in Größe L etwa 10 Krausrippen höher, als bei Ihren Modell Fotos die sicher eine kleinere Größe zeigen. Nach den Angaben erreiche ich lange nicht die angegebene Ausschnitt Tiefe von 22cm in Größe L. Was ist da falsch erklärt ??? Bitte dringend um Antwort.
23.03.2025 - 17:45DROPS Design answered:
Liebe Susi, die Maßskizze ist etwas standard, der Halsausschnitt in L wird nach 50 Reihen ca 15 cm fertig sein + die 4 cm Schulter sind es nach 19 cm - den Armausschnitt ist tiefer mit 22 cm + 4 cm Schulter. Viel Spaß beim Stricken!
24.03.2025 - 09:36
|
||||||||||||||||
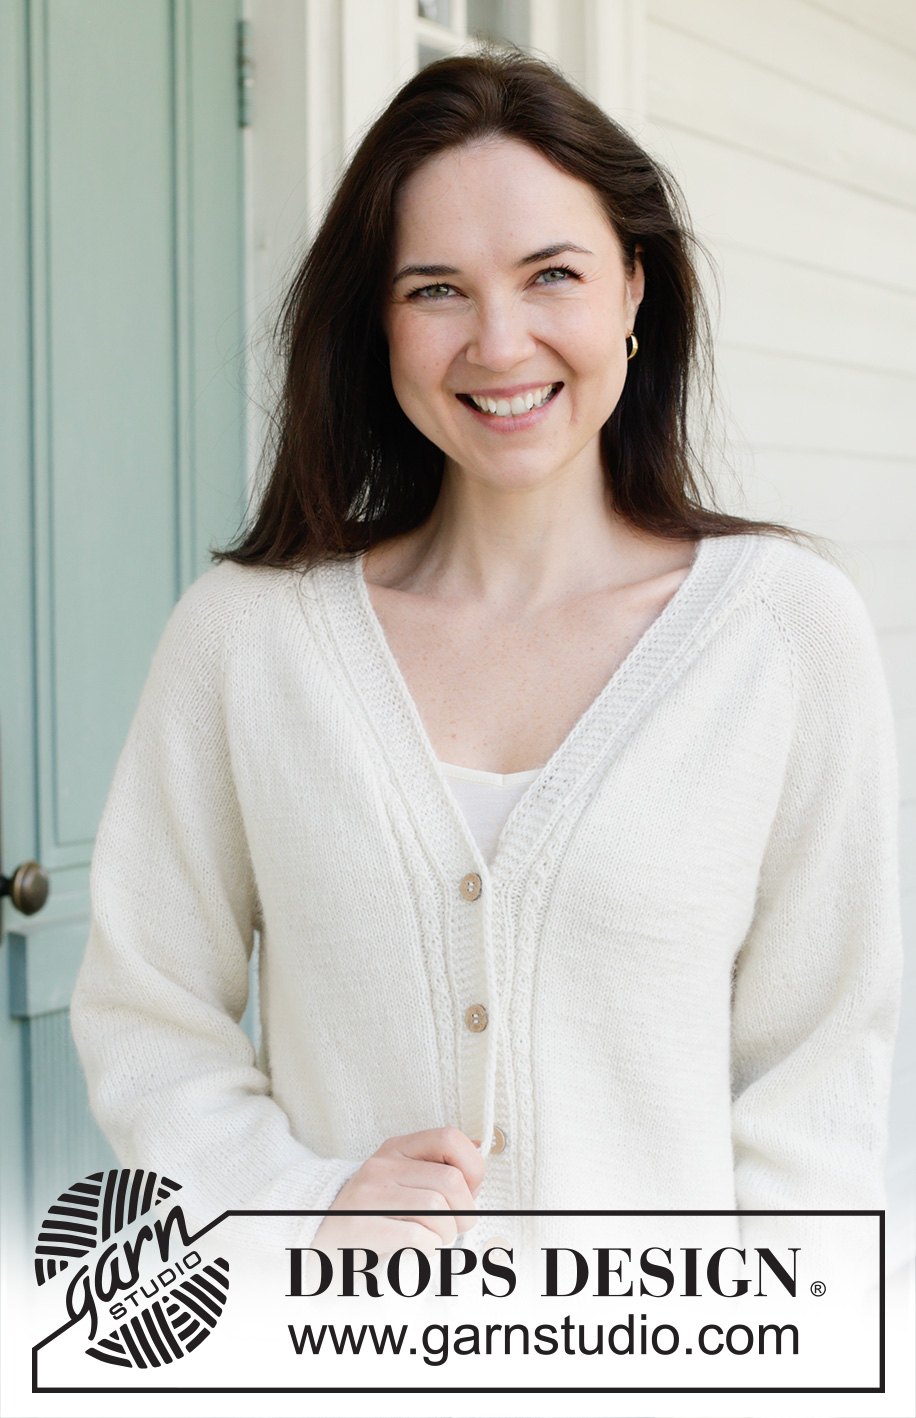
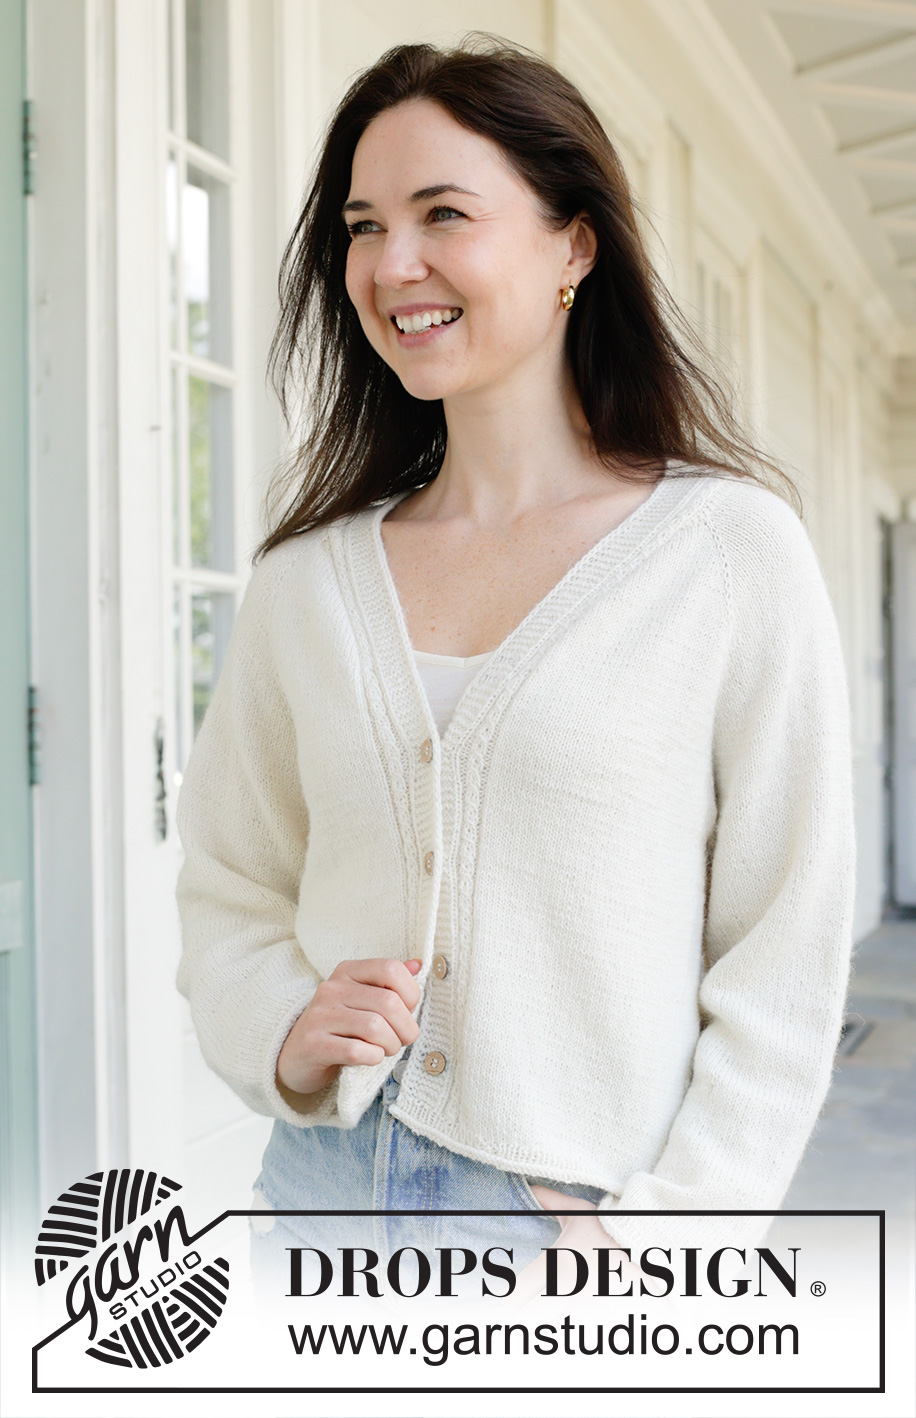
White River Cardigan#whiterivercardigan |
||||||||||||||||
 |
 |
|||||||||||||||
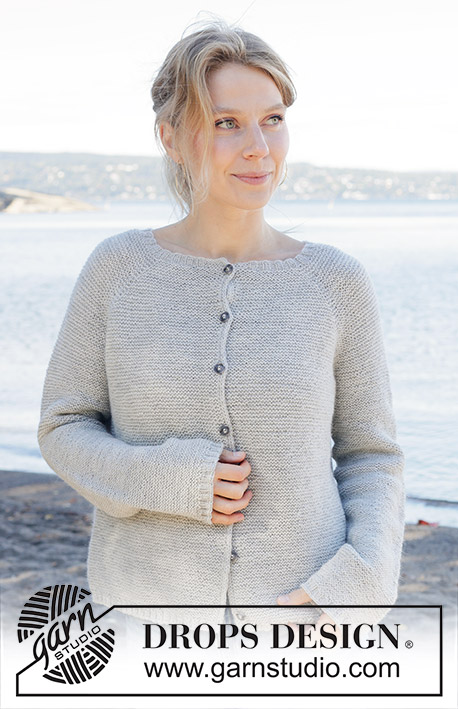
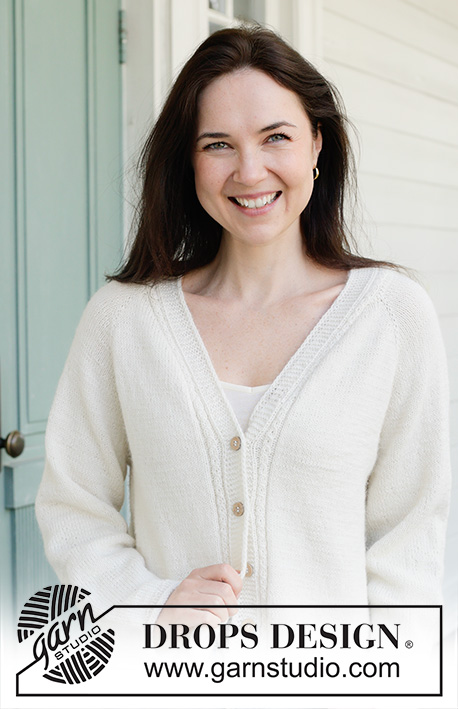
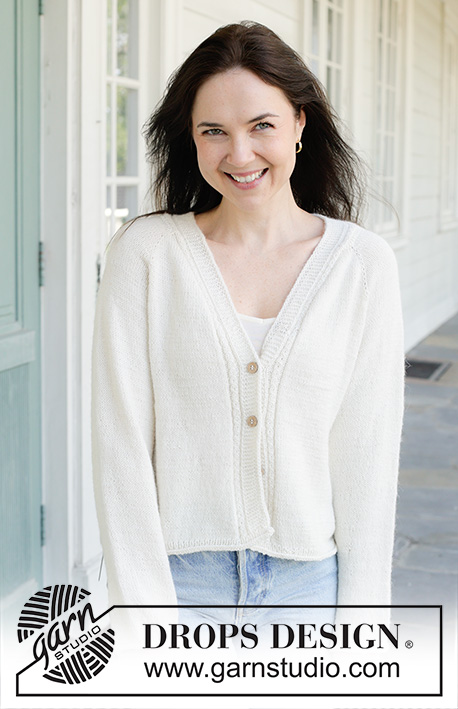
Knitted jacket in DROPS Flora or DROPS BabyMerino. The piece is worked top down with raglan, V-neck, lace pattern, I-cord and rolled edges. Sizes S - XXXL.
DROPS 258-28 |
||||||||||||||||
|
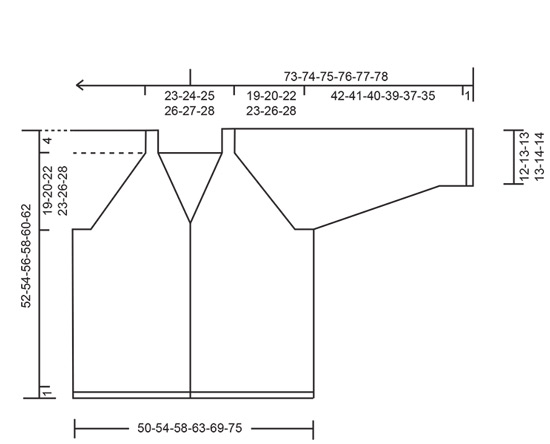
------------------------------------------------------- EXPLANATIONS FOR THE PATTERN: ------------------------------------------------------- PATTERN: See diagram A.1. A.1 is always counted as 9 stitches. The diagram shows all the rows in the pattern seen from the right side. GARTER STITCH (worked back and forth): Knit all rows, from both the right and wrong side. 1 ridge in height = knit 2 rows. RIGHT BAND WITH I-CORD: RIGHT SIDE: Work 6 garter stitches, slip 1 stitch purl-wise with the strand in front, knit 1. WRONG SIDE: Slip 1 stitch purl-wise with the strand in front, knit 1 and work 6 garter stitches. LEFT BAND WITH I-CORD: RIGHT SIDE: Slip 1 stitch purl-wise with the strand in front, knit 1 and work 6 garter stitches. WRONG SIDE: Work 6 garter stitches, slip 1 stitch purl-wise with the strand in front, knit 1. RAGLAN: All increases are worked from the right side! Increase 1 stitch by making 1 yarn over, which is worked as follows on the next row (wrong side) to avoid a hole: BEFORE MARKER: Purl through the back loop. Then work the new stitch in stocking stitch. AFTER MARKER: Slip the yarn over off the left needle and replace it the other way round (insert the left needle through the back when replacing it). Purl through the front loop. Then work the new stitch in stocking stitch. V-NECK: All increases are worked from the right side! Increase 1 stitch by making 1 yarn over, which is worked as follows on the next row to avoid a hole (= wrong side): AFTER RIGHT BAND: Slip the yarn over off the left needle and replace it the other way round (insert the left needle through the back when replacing it). Purl through the front loop. Then work the new stitch in stocking stitch. BEFORE LEFT BAND: Purl through the back loop. Then work the new stitch in stocking stitch. BUTTONHOLES: Work the buttonholes on the right band (when garment is worn) and from the right side, when there are 6 stitches left on the row. ROW 1 (right side): Make 1 yarn over, knit 2 together, knit 2, slip 1 purl-wise with strand in front, knit 1. ROW 2 (wrong side): Work the band as before, knit the yarn over to leave a hole. The first buttonhole is worked on the first row from the right side after the increases for the V-neck are finished. Then work the other 3-4-4-4-4-4 buttonholes with 8½-7-7½-8-8-8½ cm between each one. SLEEVE TIP: When knitting up stitches under the sleeve, you can get a small hole in the transition between stitches on the body and sleeve. This hole can be closed by picking up the strand between 2 stitches and working this strand twisted together with the first stitch between body and sleeve. DECREASE TIP (for sleeves): Decrease 1 stitch on each side of the marker-thread as follows: Work until there are 3 stitches left before the marker-thread, knit 2 together, knit 2 (marker-thread sits between these 2 stitches), slip 1 stitch knit-wise, knit 1 and pass the slipped stitch over the knitted stitch (2 stitches decreased). ------------------------------------------------------- START THE PIECE HERE: ------------------------------------------------------- JACKET – SHORT OVERVIEW OF THE PIECE. The pattern uses both long and short needles; start with the length which fits the number of stitches and change when necessary. The 2 bands are worked first, then stitches are cast on between them for the yoke, which is worked from mid-front, top down and back and forth. When the yoke is finished, it is divided for the body and sleeves and the body is continued back and forth, while the sleeves wait. The sleeves are worked in the round, top down. The bands are sewn together mid-back, then sewn to the back neckline. RIGHT BAND: Cast on 17 stitches with circular needle size 3 mm and DROPS Flora or DROPS Baby Merino. Work the first row from the right side as follows: A.1, then work RIGHT BAND WITH I-CORD – read description above. Continue back and forth like this until the band measures 19-19-20-20-21-21 cm, finishing after a row from the wrong side. Cut the strand, place the stitches on a stitch holder and work the left band. LEFT BAND: Cast on 17 stitches with circular needle size 3 mm. Work the first row from the right side as follows: LEFT BAND WITH I-CORD – read description above, work A.1. Continue back and forth like this until the band measures 19-19-20-20-21-21 cm, finishing after a row from the wrong side. Do not cut the strand. Continue the yoke as follows: YOKE: Turn and work the stitches on the left band as before, i.e. the first 8 stitches according to band with I-cord, then A.1, then cast on 105-109-111-113-117-119 stitches, work the right band as before from the right side, i.e., first A.1, then 8 stitches according to band with I-cord = 139-143-145-147-151-153 stitches. Insert 1 marker inside one band; the piece is now measured from here. Insert 4 markers while working the next row from the wrong side as follows (the markers are inserted in stitches – raglan-stitches – which are worked in stocking stitch): Work the 8 band stitches and A.1 as before, purl 1 (= right front piece), insert 1 marker in the next stitch and purl this stitch (= raglan-stitch), purl 21 (= sleeve), insert 1 marker in the next stitch and purl this stitch (= raglan-stitch), purl 57-61-63-65-69-71 (= back piece), insert 1 marker in the next stitch and purl this stitch (= raglan-stitch), purl 21 (= sleeve), insert 1 marker in the next stitch and purl this stitch (= raglan-stitch), purl 1 and finish with A.1 and 8 band stitches as before (= left front piece). Continue with stocking stitch, A.1 and bands, increasing for both RAGLAN and V-NECK – read descriptions above; read the next 2 sections before continuing. Remember to maintain the knitting tension. RAGLAN: Increase for raglan on each side of all 4 raglan-stitches (= 8 increased stitches). Increase every 2nd row a total of 29-31-33-38-39-40 times. Then increase only on the front and back pieces – no further increases on the sleeves (= 4 increased stitches). Increase every 2nd row a total of 1-2-2-1-4-8 times. You increase a total of 30-33-35-39-43-48 times on the front and back pieces and 29-31-33-38-39-40 times on the sleeves. V-NECK: Increase for the V-neck on both sides of the piece, from the right side, inside A.1 and the band-stitches (= 1 stitch increased on each side). Increase every 2nd row 16-18-19-20-22-23 times, then every 4th row 3 times. You increase a total of 19-21-22-23-25-26 times for the V-neck on each side. When all the increases for raglan and V-neck are finished, there are 413-441-461-501-529-557 stitches. Remember the BUTTONHOLES – read description above, then continue working without further increases until the yoke measures 19-20-22-23-26-28 cm measured straight down from the marker mid-front (do not measure along the V-neck). Now divide for the body and sleeves. DIVIDE FOR BODY AND SLEEVES: Work the band and A.1 as before, work 51-56-59-64-70-76 stocking stitches (= front piece), place the next 79-83-87-97-99-101 stitches on 1 thread for the sleeve, cast on 10-12-16-18-22-26 stitches (under the sleeve), work 119-129-135-145-157-169 stocking stitches (= back piece), place the next 79-83-87-97-99-101 stitches on 1 thread for the sleeve, cast on 10-12-16-18-22-26 stitches (under the sleeve), work 51-56-59-64-70-76 stocking stitches, A.1 and band as before (= front piece). The body and sleeves are finished separately. BODY: = 275-299-319-343-375-407 stitches. Continue with stocking stitch, A.1 and the bands as before until the piece measures 47-49-51-53-55-57 cm from the marker mid-front, with the last row from the wrong side. Work 4 rows of rib (knit 1, purl 1) across all stitches (including the bands). Work 4 rows of stocking stitch and cast off a little loosely (= rolled edge). The jacket measures 48-50-52-54-56-58 cm from the marker mid-front and 52-54-56-58-60-62 cm from top of shoulder. SLEEVES: Place the 79-83-87-97-99-101 sleeve-stitches from one thread on circular needle size 3 mm and knit up 1 stitch in each of the 10-12-16-18-22-26 stitches cast on under the sleeve – read SLEEVE TIP = 89-95-103-115-121-127 stitches. Insert a marker-thread in the middle of the 10-12-16-18-22-26 stitches under the sleeve. Start at the marker-thread and work stocking stitch in the round. When the sleeve measures 2-2-2-2-4-3 cm, decrease 2 stitches under the sleeve – read DECREASE TIP. Decrease like this every 3-2½-2-1½-1-1 cm a total of 13-15-18-23-25-27 times = 63-65-67-69-71-73 stitches. Continue working until the sleeve measures 42-41-40-39-37-35 cm from the division. Work 4 rounds of rib (knit 1, purl 1) increasing 1 stitch on the first round = 64-66-68-70-72-74 stitches. Work 4 rounds of stocking stitch, then cast off a little loosely (= rolled edge). The sleeve measures approx. 43-42-41-40-38-36 cm from the division. ASSEMBLY: Sew the buttons onto the left band. Sew the bands together mid-back and sew the bands to the neckline. |
||||||||||||||||
Diagram explanations |
||||||||||||||||
|
||||||||||||||||
 |
||||||||||||||||
 |
||||||||||||||||
Have you finished this pattern?Tag your pictures with #dropspattern #whiterivercardigan or submit them to the #dropsfan gallery. Do you need help with this pattern?You'll find 33 tutorial videos, a Comments/Questions area and more by visiting the pattern on garnstudio.com. © 1982-2026 DROPS Design A/S. We reserve all rights. This document, including all its sub-sections, has copyrights. Read more about what you can do with our patterns at the bottom of each pattern on our site. |
||||||||||||||||


With over 40 years in knitting and crochet design, DROPS Design offers one of the most extensive collections of free patterns on the internet - translated to 17 languages. As of today we count 324 catalogues and 12290 patterns translated into English (UK/cm). 12290
We work hard to bring you the best knitting and crochet have to offer, inspiration and advice as well as great quality yarns at incredible prices! Would you like to use our patterns for other than personal use? You can read what you are allowed to do in the Copyright text at the bottom of all our patterns. Happy crafting!
Post a comment to pattern DROPS 258-28
We would love to hear what you have to say about this pattern!
If you want to leave a question, please make sure you select the correct category in the form below, to speed up the answering process. Required fields are marked *.