Comments / Questions (44)
![]() Susanne wrote:
Susanne wrote:
Liebes Drops-Team, wenn ich den Halsauschnitt mit verkürzten Reihen stricke, habe ich doch nur 16 und nicht 32 Maschen zugenommen, oder?! In der Hinreihe arbeite ich die Umschläge und in der Rückreihe stricke ich sie ab. Also 8 Maschen pro Hin-und Rückreihe. Danke für die Hilfe!
23.08.2024 - 05:28DROPS Design answered:
Liebe Susanne, es wird 8 Maschen bei jeder der 4 verkürzten Reihen zugenommen, so sind es insgesamt 32 Maschen zugenommen; man soll auch bei den Rückreihen zunehmen. Viel Spaß beim Stricken!
23.08.2024 - 08:09
![]() Nina wrote:
Nina wrote:
Jag ska börja med förkortade varv och ökning för raglan efter halsen. Ska jag öka (göra omslag) på varje varv? Hur ska det göras när jag då har omslaget från förra varvet att sticka? I mönstret står att man ska öka 8 maskor varje varv (både på rätan och avigan). Ska jag först sticka omslaget från förra varvet, sedan göra ett omslag, sedan maskan med markören, sedan ett omslag, och sedan sticka omslaget från förra varvet? Eller hur är det tänkt?
14.07.2024 - 16:11DROPS Design answered:
Hej Nina, du laver altid økningen/omslaget lige før og efter masken med mærket i :)
31.07.2024 - 11:42
![]() Steven wrote:
Steven wrote:
Hello. I dont understand about increase to raglan and work short row at the same time. I have put 4 markers after work rib2, and now I dont know how to work next. Can you show me more clearly about increase to raglan and work short row at the same time, and the stitch which I have to increase? Thank you for your helping.
17.05.2024 - 14:27DROPS Design answered:
Dear Steven, in this video we show how to increase to raglan and how to work the short rows at the same time. Happy knitting!
17.05.2024 - 16:32
![]() Pesenti wrote:
Pesenti wrote:
Bonjour, Au sujet des rangs raccourcis vous répondez à un commentaire précédent : augmenter 4 mailles à chacun des rangs raccourcis hors il me semble qu’il n’y a que 4 rangs raccourcis dans l’explication ENCOLURE (avec chacun 8 augmentations par rang). Merci pour votre réponse
18.03.2024 - 14:33DROPS Design answered:
Bonjour Mme Pesenti, on ne tricote que 4 rangs pour les rangs raccourcis (2 rangs sur l'endroit, 2 rangs sur l'envers), et on va augmenter 8 mailles à chaque fois soit 32 mailles au total. Il doit y avoir une faute de frappe dans la réponse précédente entre le nombre de fois et le nombre d'augmentations. Bon tricot!
18.03.2024 - 15:43
![]() Lejeune Nicole wrote:
Lejeune Nicole wrote:
Après l’encolure vous dites qu’il faut pour la taille L augmenter 10 fois et ensuite 14 fois pour les dos et devant Pour moi je compte 24 fois et vous dites qu’il s’agit de 28 fois Pouvez vous me dire d’où viennent les 4 fois supplémentaires ? Merci Nicole
14.03.2024 - 09:58DROPS Design answered:
Bonjour Mme Lejeune, à la fin de l'encolure, vous avez 132 mailles, vous augmentez ensuite pour le raglan 10 fois 8 mailles au total (1 pour chaque demi-dos + 2 par manche + 2 pour le devant) soit 80 = 132 = 212 mailles. Vous augmentez ensuite tous les 2 rangs pour le dos/le devant et tous les 4 rangs pour les manches (alternativement 4 et 8 m), soit 14 x 4 + 7x4= 84 + 212=296 mailles quand toutes les augmentations sont faites. Vous aurez augmenté 4 fois pour l'encolure + 10 fois tous les 2 tours + 14 tous les 2 tours = 28 fois au total. Bon tricot!
14.03.2024 - 16:41
![]() Lejeune wrote:
Lejeune wrote:
Bonjour Je comprends les tours raccourcis, on laisse en attente les mailles du devant. Mais pour le raglan il faut faire 8 augmentations chaque tour. Si j’ai réalisé a l’endroit 1 jeté avant et après le marqueur je tricote les jetés au tour suivant sur l’envers. Comment faire en même temps des augmentations lorsque je tricote le second rang ? Il en est de même pour le 4 rangs. Comment avoir 32 points supplémentaires ? Merci pour l’information. Nicole
09.03.2024 - 08:18DROPS Design answered:
Bonjour Mme Lejeune, vous augmentez sur l'envers comme indiqué sous RAGLAN, autrement dit, vous tricotez les jetés faits sur l'endroit comme indiqué sur l'envers, puis vous augmentez avant/après les marqueurs comme expliqué = avant/après la maille jersey du raglan. Vous augmentez ainsi 4 mailles à chacun des 8 rangs raccourcis = 32 augmentations au total (4 pour chaque demi-devant, 8 pour chaque manche et 8 pour le dos. Bon tricot!
11.03.2024 - 07:48
![]() SP wrote:
SP wrote:
Hello! Thank you for the wonderful pattern. I am confused about the raglan increase. I understand it’s in short row, going back and forth. But what happens to the 23 stitches (L size) between stitch 3 and 2? If it’s beginning at 2 stitches before marker 3; and turning at 2 stitches after marker 2; there are 23 stitches of the front part not knitted on. Did I understand the instruction correctly? Is this how we shape the sweater?
01.03.2024 - 00:38DROPS Design answered:
Hi SP, Yes, the short rows at the back of the neck shape the neck and make it a little higher at the back. The other stitches on the round will be incorporated when the short rows are finished. Happy knitting!
01.03.2024 - 08:09
![]() Viki wrote:
Viki wrote:
Megnéztem a 280 felosztását a német leírásban. Úgy már jó. 42+57+83+57+41
27.01.2024 - 20:39
![]() Viki wrote:
Viki wrote:
M-es méretben a raglán végén 280 szem van. A felosztás leírása 42 szem a fél háta 42 szem a keze 83 szem az eleje 42 szem a keze 41 szem a fél háta Ez összeadva 250 szem. Így maradt még 30 szemem.... Azt hova osszam fel? Köszönöm!
27.01.2024 - 20:33DROPS Design answered:
Kedves Viki, köszönjük a megjegyzését, a minta javításra került, az M-es méretben mindkét oldalon 57 szemet kell az ujjához félretenni. Sikeres kézimunkázást.
11.03.2024 - 16:46
![]() Mariarosaria Bello wrote:
Mariarosaria Bello wrote:
Dove dice tutte le taglie cosa si intende continuare a lavorare a strisce? Grazie
16.01.2024 - 21:05DROPS Design answered:
Buonasera MariaRosaria, non ci sono strisce in questo modello. Buon lavoro!
17.01.2024 - 16:56
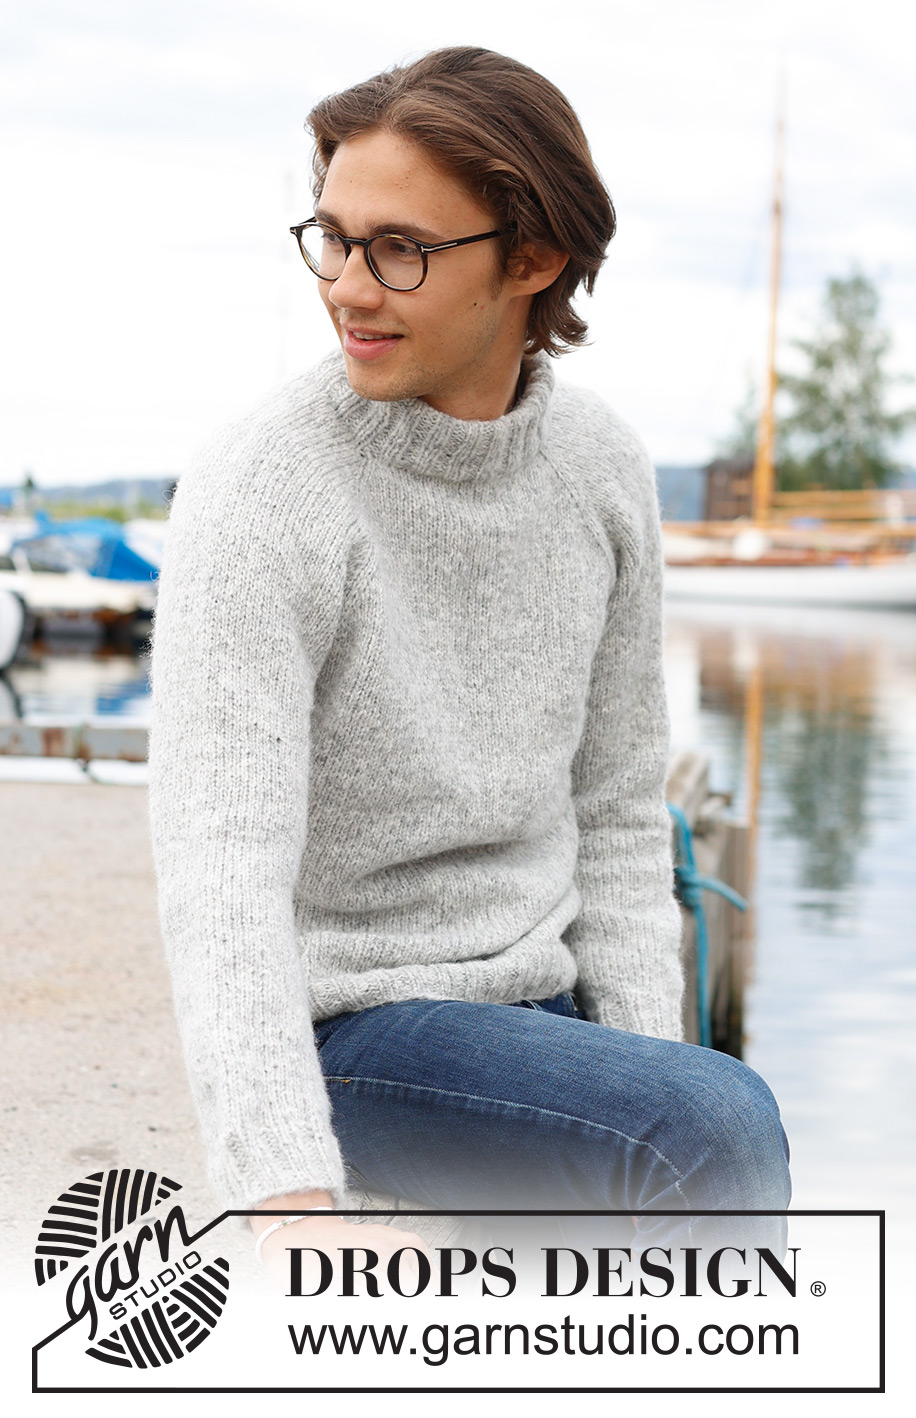
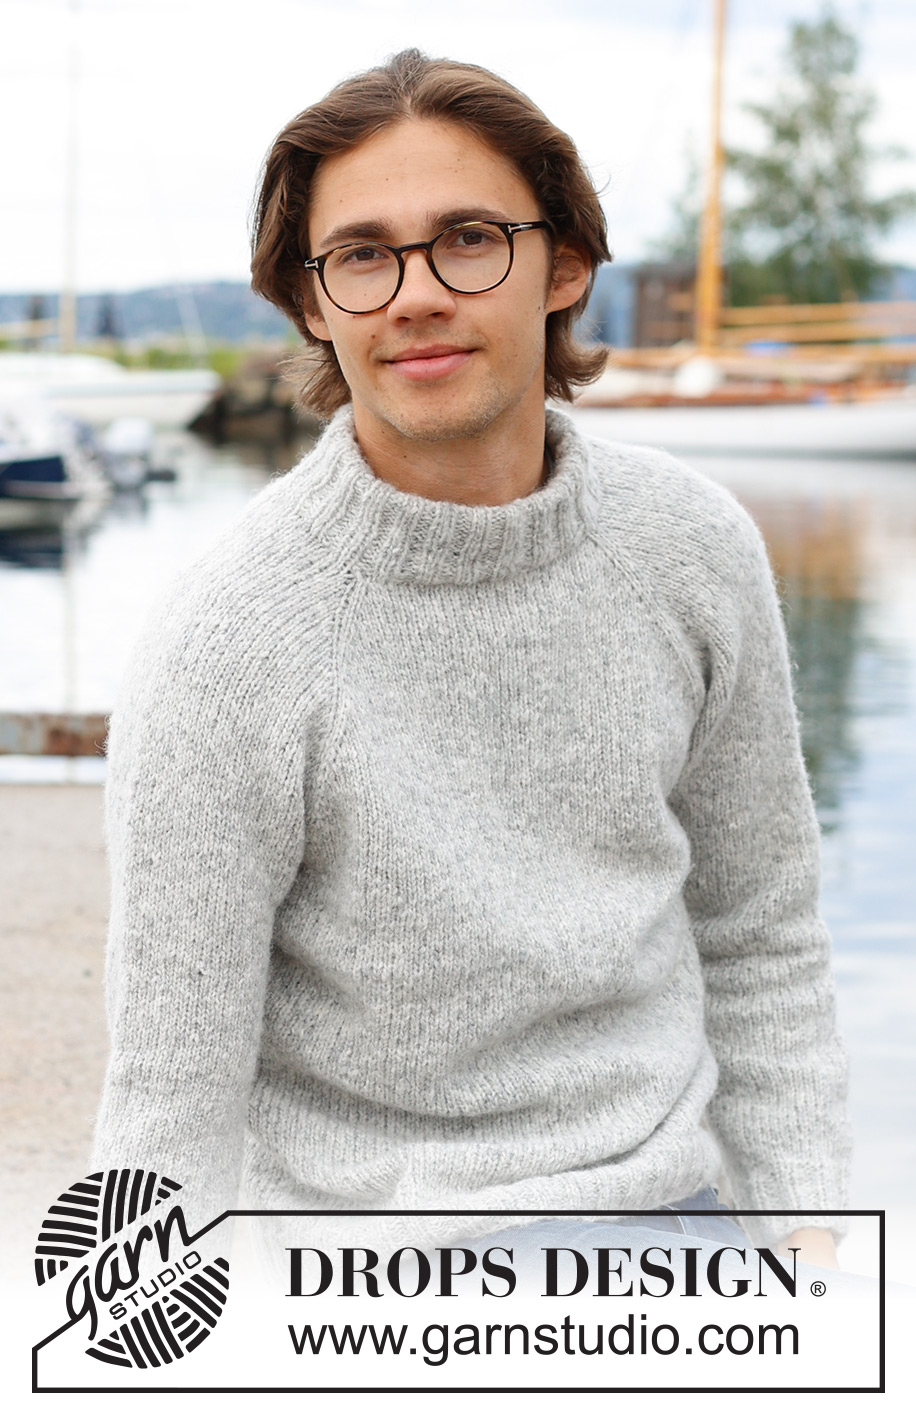
Early Moorning Mist#earlymoorningmistsweater |
|
 |
 |
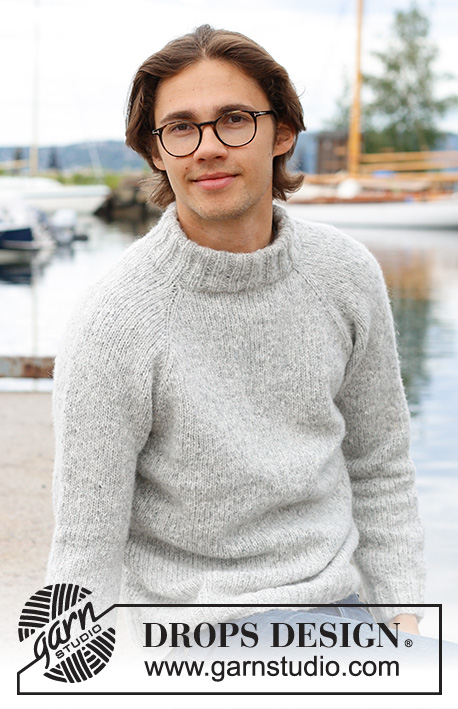
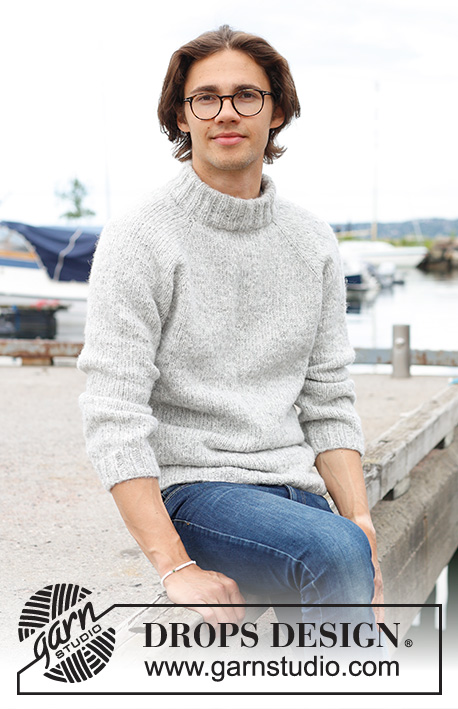
Knitted jumper for men in DROPS Air. The piece is worked top down with stocking stitch, double neck and raglan. Sizes S - XXXL.
DROPS 233-6 |
|
|
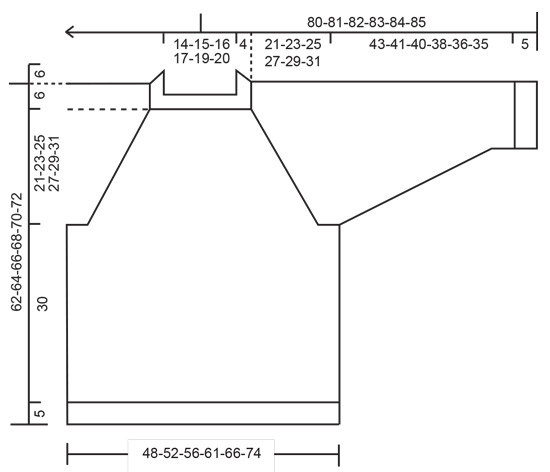
------------------------------------------------------- EXPLANATIONS FOR THE PATTERN: ------------------------------------------------------- RAGLAN: All increases before/after 1 stitch in stocking stitch (the stitch with the marker). Increase for the body before markers 1 and 3 and after markers 2 and 4 when working from the right side/after markers 1 and 3 and before markers 2 and 4 when working from the wrong side. Increase for the sleeves after markers 1 and 3 and before markers 2 and 4 when working from right side / before marker 1 and 3 and after marker 2 and 4 when working from wrong side. Increase 1 stitch by making 1 yarn over. The yarn overs are worked as follows from the wrong side: BEFORE MARKER: Purl the back loop. No hole. AFTER MARKER: Slip the yarn over off the left needle and place it back twisted (insert the left needle from the back when replacing it). Purl the front loop. No hole. The yarn overs are worked as follows from the right side: BEFORE MARKER: Slip the yarn over off the left needle and place it back twisted (insert the left needle from the back when replacing it). Knit the front loop; the stitch twists to the right. No hole. AFTER MARKER: Knit the back loop (the stitch twists to the left). No hole. DECREASE TIP (for sleeves): Start 3 stitches before the marker, knit 2 together, knit 2 (marker sits between these 2 stitches), slip 1 stitch as if to knit, knit 1 and pass the slipped stitch over the knitted stitch. ------------------------------------------------------- START THE PIECE HERE: ------------------------------------------------------- JUMPER – SHORT OVERVIEW OF THE PIECE: The neck and yoke are worked in the round with circular needle, from mid back and top down. The yoke is divided for body and sleeves and the body is continued in the round with circular needle. The sleeves are worked with short circular needle/double pointed needles. DOUBLE NECK: Cast on 88-92-96-100-104-108 stitches with short circular needle size 5 mm and DROPS Air. Change to circular needle size 4 mm. Work rib in the round (knit 2, purl 2) for 13 cm. On the next round, insert 4 markers at the same time as you increase 4 stitches on the round as follows – the markers are used when increasing for raglan: Knit 10-12-12-14-14-16 and increase 1 stitch (half back piece), insert marker-1 in the next stitch, knit 21 (sleeve), insert marker-2 in the next stitch, knit 21-23-25-27-29-31 and increase 2 stitches evenly spaced (front piece), insert marker-3 in the next stitch, knit 21 (sleeve), insert marker-4 in the next stitch, knit the last 11-11-13-13-15-15 stitches and increase 1 stitch (half back piece) = 92-96-100-104-108-112 stitches. Cut the strand. NECKLINE: Change to circular needle size 5 mm and work the neckline with short rows AT THE SAME TIME as increasing to raglan as follows: Start from the right side, 2 stitches before marker-3 (left front of neck when the garment is worn). Work stocking stitch, increase to RAGLAN – read description above, on each side of the 4 marker-stitches and until you have worked 2 stitches past marker-2 (right front of neck – 8 stitches increased for raglan). Turn, tighten the strand, work back from the wrong side, increase for raglan to 2 stitches past the beginning of the short rows by marker-3 (8 stitches increased for raglan). Turn, tighten the strand, work back from the right side, increase for raglan to 2 stitches past where you turned last time by marker-2 (8 stitches increased for raglan). Turn, tighten the strand, work back from the wrong side, increase for raglan to 2 stitches past marker-3 (8 stitches increased for raglan). Cut the strand. YOKE: = 124-128-132-136-140-144 stitches. Now work in the round as follows: SIZES S, M, L and XL: Start mid-back, work stocking stitch and increase for raglan on the body and sleeves (on each side of all 4 marker-stitches) every 2nd round 2-8-10-11 times = 140-192-212-224 stitches. Continue to increase but now every 2nd increase is only on the body (4 stitches increased); you are now increasing every 2nd round on the body and every 4th round on the sleeves. Increase like this 18-15-14-16 times on the body (9-7-7-8 times on the sleeves). A total of 24-27-28-31 times on the body and 15-19-21-23 times on the sleeves = 248-280-296-320 stitches. Go to ALL SIZES. SIZES XXL and XXXL: Start mid-back, work stocking stitch and increase for raglan every round on the body 2-6 times and every 2nd round on the sleeves 1-3 times = 152-180 stitches. Then increase on both the body and sleeves every 2nd round (on each side of all 4 marker-stitches) 10-7 times = 232-236 stitches. Continue to increase, but now every 2nd increase is only on the body (4 stitches increased); you are now increasing every 2nd round on the body and every 4th round on the sleeves. Increase like this 18-22 times on the body (9-11 times on the sleeves). A total of 34-39 times on the body and 24-25 times on the sleeves = 340-368 stitches. Go to ALL SIZES. ALL SIZES. = 248-280-296-320-340-368 stitches. Continue working without further increases until the yoke measures 21-23-25-27-29-31 cm measured mid-front after the rib on the neck. Divide for the body and sleeves as follows: Work 37-42-43-48-51-58 stitches (half back piece), place the next 49-57-61-65-67-69 stitches on a thread for the sleeve, cast on 6-6-8-8-10-10 stitches (in side under sleeve), work 75-83-87-95-103-115 stitches (front piece), place the next 49-57-61-65-67-69 stitches on a thread for the sleeve, cast on 6-6-8-8-10-10 stitches (in side under sleeve), work 38-41-44-47-52-57 stitches (half back piece). The body and sleeves are finished separately. The piece is now measured from here! BODY: = 162-178-190-206-226-250 stitches. Continue with stocking stitch in the round for a further 30 cm. Knit 1 round and increase 18-22-22-26-26-34 stitches evenly spaced = 180-200-212-232-252-284 stitches. Change to circular needle size 4 mm. Work rib (knit 2, purl 2) for 5 cm. Cast off a little loosely with knit over knit and purl over purl. The jumper measures approx. 62-64-66-68-70-72 cm from the shoulder down. SLEEVES: Place the 49-57-61-65-67-69 stitches from the thread on the one side of the piece on short circular needle/double pointed needles size 5 mm and knit up 1 stitch in each of the new stitches cast on under the sleeve = 55-63-69-73-77-79 stitches. Insert a marker in the middle of the new stitches under the sleeve; allow the marker to follow your work onwards, it is used when decreasing under the sleeve. Continue with stocking stitch in the round for 4 cm. Now decrease 2 stitches mid-under the sleeve – read DECREASE TIP. Decrease like this every 9-5-3½-3-2½-2½ cm a total of 5-8-10-11-12-12 times = 45-47-49-51-53-55 stitches. Continue working until the sleeve measures 43-41-40-38-36-35 from the division (or to desired length. There is approx. 5 cm left). Knit 1 round and increase 7-5-7-5-7-5 stitches evenly spaced = 52-52-56-56-60-60 stitches. Change to double pointed needles size 4 mm and work rib (knit 2, purl 2) for 5 cm. Loosely cast off with knit over knit and purl over purl. The sleeve measures approx. 48-46-45-43-41-40 cm from the division. Work the other sleeve in the same way. ASSEMBLY: Fold the neck double to the inside and fasten with a stitch in each raglan-line. |
|
 |
|
Have you finished this pattern?Tag your pictures with #dropspattern #earlymoorningmistsweater or submit them to the #dropsfan gallery. Do you need help with this pattern?You'll find 27 tutorial videos, a Comments/Questions area and more by visiting the pattern on garnstudio.com. © 1982-2026 DROPS Design A/S. We reserve all rights. This document, including all its sub-sections, has copyrights. Read more about what you can do with our patterns at the bottom of each pattern on our site. |
|









Post a comment to pattern DROPS 233-6
We would love to hear what you have to say about this pattern!
If you want to leave a question, please make sure you select the correct category in the form below, to speed up the answering process. Required fields are marked *.