
Popular categories
Looking for a yarn?


Comments / Questions (19)
![]() Maria wrote:
Maria wrote:
Buonasera. Posso lavorare le maniche in tondo per evitare la cucitura? Grazie.
03.12.2025 - 21:06DROPS Design answered:
Buonasera Maria, se preferisce può lavorarle in tondo. Buon lavoro!
04.12.2025 - 22:44
![]() Maria wrote:
Maria wrote:
Buongiorno. Non riesco a capire come lavorare il diagramma A1 ( taglia M) nei ferri a rovescio. Nel 1° ferro a diritto del diagramma lavoro 1 maglia di vivagno, 1 m. rovescio, 9 m. diritto, 1m. rovescio per 8 volte, 1 m. rovescio, 1 m. vivagno. Come lavoro queste maglie nel 2° ferro sul rovescio del lavoro? Aspetto con ansia la vostra risposta. Grazie. Maria
15.11.2025 - 12:28DROPS Design answered:
Buonasera Maria, il diagramma mostra sia i ferri a diritto che quelli a rovescio. Può seguire la legenda per la lavorazione sul rovescio del lavoro. Buon lavoro!
15.11.2025 - 14:59
![]() Pia wrote:
Pia wrote:
Jeg forstår stadig ikke, om ærmet skal deles ved 45 cm, hvor man sætter en tråd ?
31.10.2025 - 19:56DROPS Design answered:
Hei Pia. De 2 merkene man setter når arbeidet måler 45 cm viser hvor bunnen av ermhullet starter. Det trenger man å vite når man skal montere ermet. Under montering står det: I størrelse M-L-XL-XXL-XXXL: Sy bunnen av ermehullet – merkene som ble satt på ermene skal stemme med sidene på bolen. mvh DROPS Design
17.11.2025 - 10:18
![]() Pia wrote:
Pia wrote:
Mangler der ikke noget ved ærmet? Forklaring stopper brat
29.10.2025 - 09:05DROPS Design answered:
Hei, Pia, under forklaringen for "Ærme" står det hvordan man skal avslutte i de ulike størrelsene, S og M-L-XL-XXL-XXXL. Vennlig hilsen. DROPS Design
29.10.2025 - 10:24
![]() Silvia wrote:
Silvia wrote:
Buonasera,ho iniziato questo golf con i ferri dritti, non circolari , visto che é lavorato in piano ma mi sono accorta che lo zig zag del motivo mi viene in rilievo sul rovescio del lavoro!, non capisco perché…… non posso inviarvi foto? Grazie
16.01.2025 - 17:11DROPS Design answered:
Buonasera Silvia, ha lavorato il motivo dal basso verso l'alto e da sinistra verso destra? Buon lavoro!
19.01.2025 - 15:04
![]() Chiara wrote:
Chiara wrote:
Allora nelle indicazioni dite di usare ferri circolari, però poi nella descrizione parlare di DAVATI DEL LAVOTRO e poi DIETRO con un numero di maglie 124 per parte che non può essere per un lavoro su ferri circolari che dovrebbero essere il doppio. Non capisco
02.09.2024 - 09:58DROPS Design answered:
Buonasera Chiara, questo modello, come indicato nelle spiegazioni, è lavorato in piano, in ferri di andata e ritorno, in parti separate che poi vengono cucite alla fine. Si parte con la lavorazione del dietro. I ferri circolari possono essere utilizzati anche per la lavorazione in piano come i ferri dritti. Buon lavoro!
02.09.2024 - 22:54
![]() Chiara wrote:
Chiara wrote:
Allora perchè dicono rovescio con la successiva descrizione e poi diritto .. idem?
01.09.2024 - 16:38DROPS Design answered:
Buonasera Chiara, ci può spiegare esattamente il suo problema, in modo da poterla aiutare in modo più preciso? Buon lavoro!
01.09.2024 - 22:49
![]() Chiara wrote:
Chiara wrote:
Nel modello dite di usare ferri circolari poi la descrizioni parla di ferri diritti. Se voglio fare circolari come faccio? grazie
27.08.2024 - 18:22DROPS Design answered:
Buonasera Chiara, questo modello è lavorato in piano con i ferri circolari. Buon lavoro!
27.08.2024 - 21:09
![]() Liesbeth Dousy wrote:
Liesbeth Dousy wrote:
Klopt het dat de steken niet juist zijn? Maat XL starten met 112 steken, 19 minderingen is 93. 2 kantsteken en 9 herhalingen patroon is volgens mij 92 steken. Dan heb ik er 1 over
08.02.2024 - 08:43DROPS Design answered:
Dag Liesbeth,
Je breit 1 kantsteek, dan een aantal herhalingen van A.1, dan brei je de eerste steek van A.1 (dat is denk ik die steek die je over hebt) en tot slot nog een kantsteek.
01.03.2024 - 07:36
![]() VERDUZIER Elisabeth wrote:
VERDUZIER Elisabeth wrote:
Encolure: pour le dos, on doit rabattre les mailles pour l'encolure, alors qu'on les glisse pour les mettre en attente pour le devant. Et pour le col, il est dit de relever les mailles. Pourquoi cette différence entre dos et devant? Et comment relever des mailles mises en attente? Merci
09.01.2024 - 17:15DROPS Design answered:
Bonjour Mme Verduzier, mettre les mailles de l'encolure devant en attente donne davantage de souplesse à l'encolure, raison pour laquelle on rabat celle du dos mais pas celles dud avant. Pour relever les mailles mises en attente, tricotez-les simplement sur le tour où vous relevez les mailles autour de l'encolure. Bon tricot!
10.01.2024 - 09:03
|
||||||||||
Appalachian Trails#appalachiantrailssweater |
||||||||||
 |
 |
|||||||||
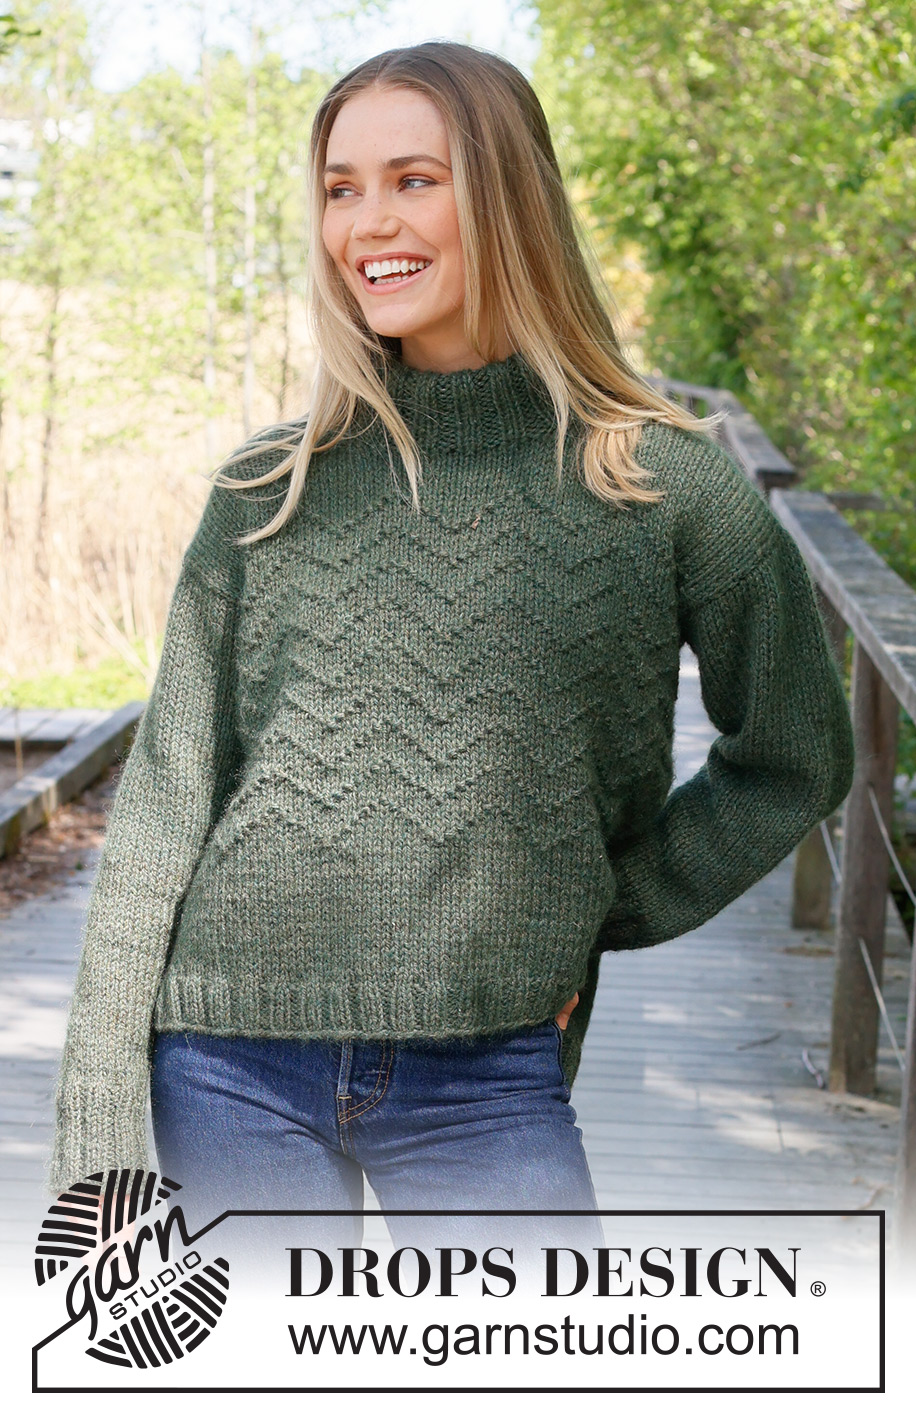
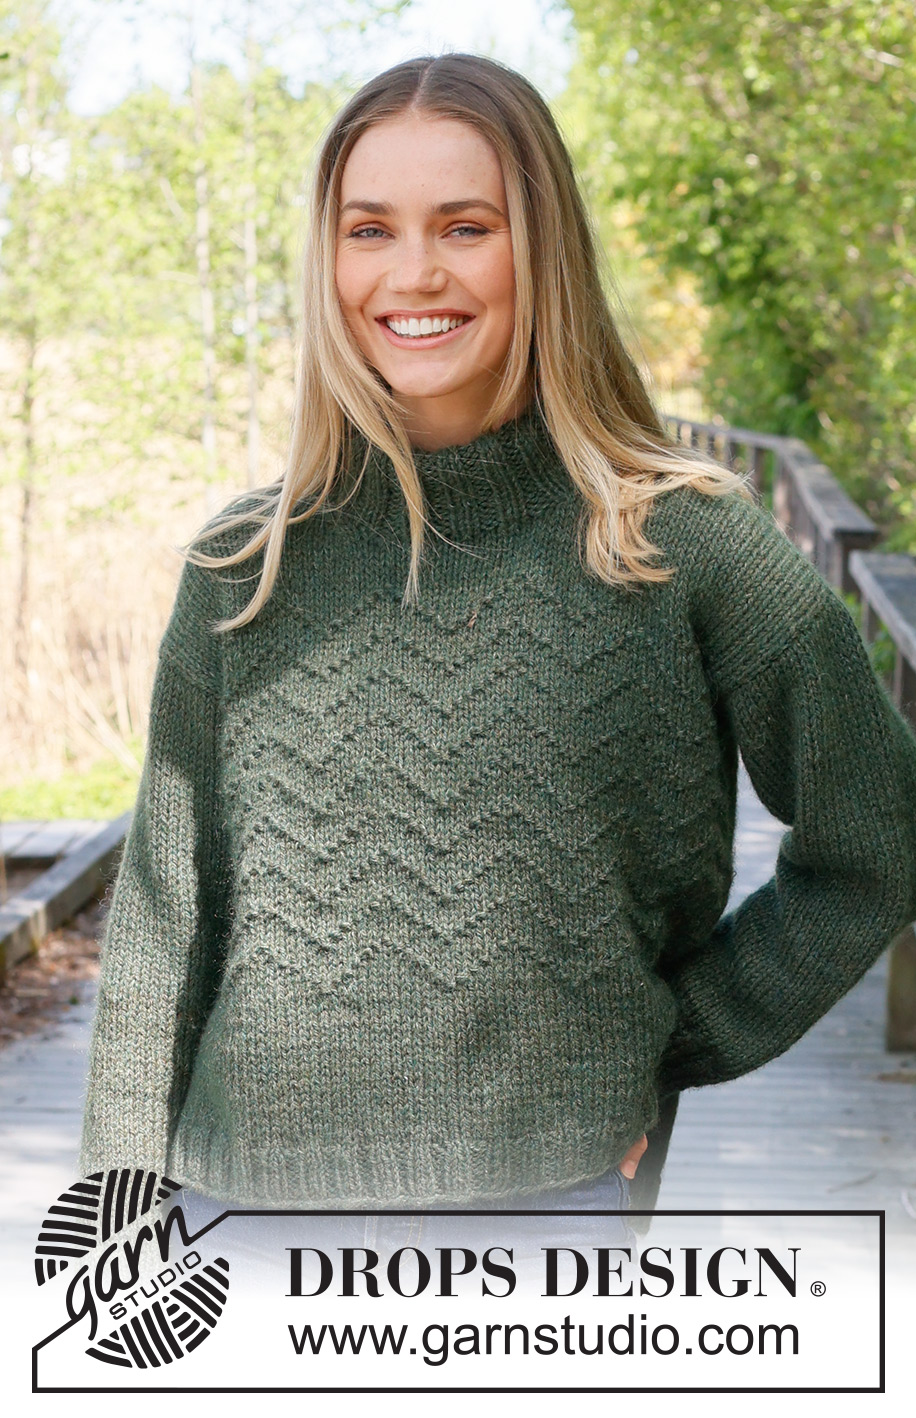
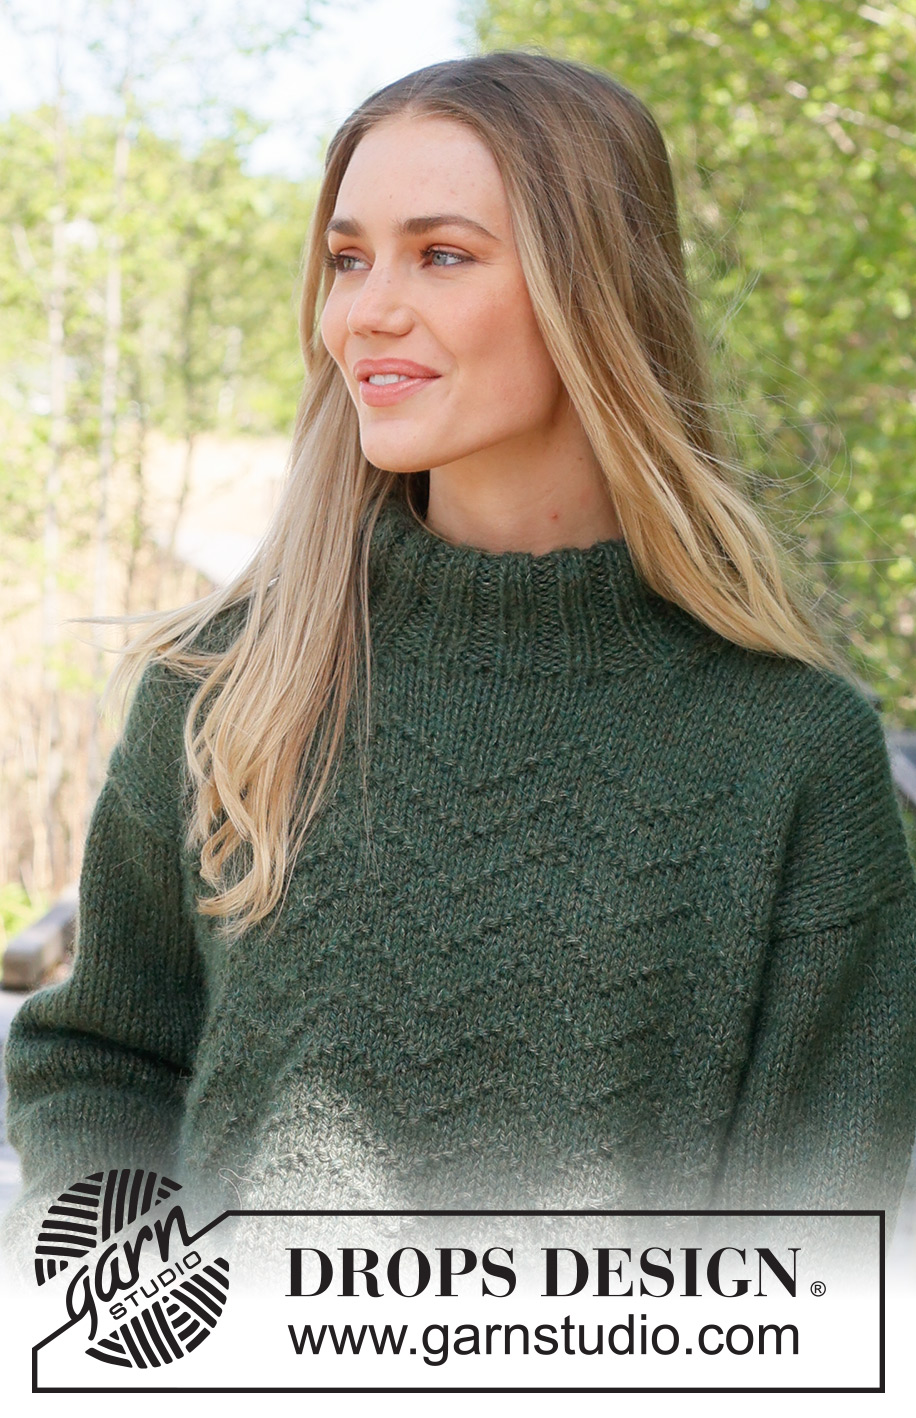
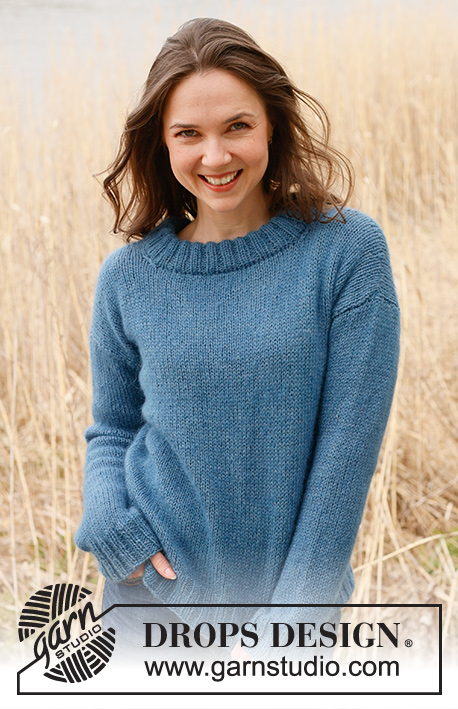
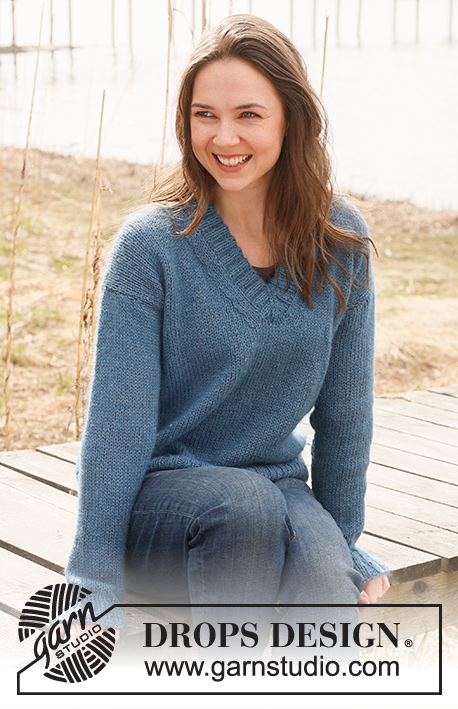
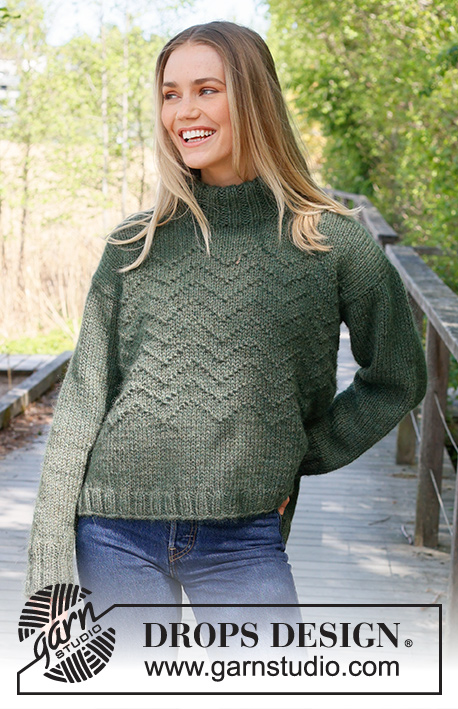
Knitted jumper in DROPS Nepal and DROPS Kid-Silk. Piece is knitted bottom up with textured pattern and double neck edge. Size: S - XXXL
DROPS 237-12 |
||||||||||
|
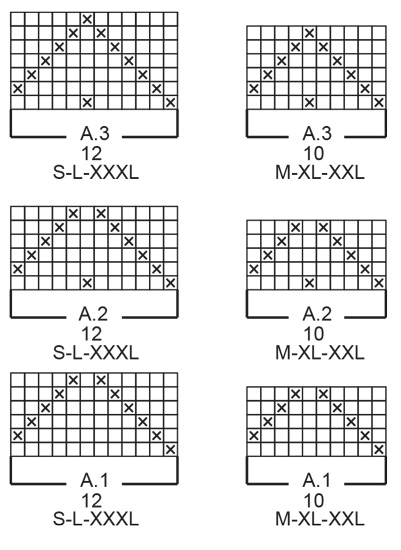
---------------------------------------------------------- EXPLANATION FOR THE PATTERN: ---------------------------------------------------------- GARTER STITCH (back and forth): Knit all rows. 1 ridge vertically = knit 2 rows. PATTERN: See diagrams A.1 to A.3. Choose diagram for your size. Diagrams show all rows in pattern seen from the right side. DECREASE TIP (applies to neck): All decreases are done from the right side! DECREASE AT END OF ROW AS FOLLOWS: Work until 4 stitches remain before neck, knit 2 together, knit 2. DECREASE AT BEGINNING OF ROW AS FOLLOWS: Knit 2, slip 1 stitch knitwise, knit 1, pass slipped stitch over stitch worked, work the rest of row as before. INCREASE TIP (applies to sleeves): All increases are done from the right side. Work 1 edge stitch in garter stitch, knit 1, make 1 yarn over (= 1 stitch increased), knit until 2 stitches remain, make 1 yarn over (= 1 stitch increased), knit 1 and 1 edge stitch in garter stitch. On next row purl yarns over twisted. Then work the new stitches in stocking stitch. ---------------------------------------------------------- START THE PIECE HERE: ---------------------------------------------------------- JUMPER - SHORT OVERVIEW OF THE PIECE: Piece is worked back and forth in parts, bottom up and sewn together when finished. BACK PIECE: Cast on 88-100-104-112-124-132 stitches on circular needle size 5 mm with 1 strand of each quality (2 strands). Purl 1 row from wrong side. Then work as follows from right side: 1 edge stitch in GARTER STITCH - read explanation above - * knit 2, purl 2 *, work from *-* until 3 stitches remain, knit 2 and 1 edge stitch in garter stitch. When rib measures 5 cm, switch to circular needle size 6 mm. Knit 1 row from right side and decrease 13-17-17-19-21-21 stitches evenly = 75-83-87-93-103-111 stitches. Work in stocking stitch with 1 edge stitch in garter stitch in each side. REMEMBER THE KNITTING TENSION! When piece measures 16 cm, work next row from right side as follows: 1 edge stitch in garter stitch, A.1 6-8-7-9-10-9 times in total, work next stitch as first stitch in A.1 (this is done so that the pattern is the same in both sides) and 1 edge stitch in garter stitch. When A.1 has been worked 1 time vertically, work A.2 over A.1. Repeat A.2 vertically. When piece measures 33-34-35-36-37-38 cm, cast off 1-4-4-6-7-8 stitches for armholes at the beginning of the next 2 rows = 73-75-79-81-89-95 stitches. Continue pattern as before vertically, i.e. work as follows from right side: 1 edge stitch in garter stitch, skip the first 1-4-4-6-7-8 stitches in A.2, work the next 11-6-8-4-3-4 stitches of A.2, work A.2 4-6-5-7-8-7 times in total in width, work the first 12-7-9-5-4-5 stitches of A.2 and 1 edge stitch in garter stitch. When piece measures approx. 38-40-40-42-42-44 cm, adjust to finish with 1 whole repetition of A.2 vertically, work A.3 over A.2 (i.e. on first repetition of A.3 in width do not work the first 1-4-4-6-7-8 stitch in pattern and last repetition of A.3 in width do not work the last 0-3-3-5-6-7 stitches of pattern). Then work in stocking stitch with 1 edge stitch in garter stitch in each side. When piece measures 49-51-53-55-57-59 cm, cast off the middle 21-21-23-23-25-25 stitches for neck and finish each shoulder separately = 26-27-28-29-32-35 stitches remain on each shoulder. Decrease 1 stitch for neck on every row from right side - read DECREASE TIP, 2 times in total = 24-25-26-27-30-33 stitches. Continue to work until piece measures 52-54-56-58-60-62 cm. Cast off. Work the other shoulder the same way. FRONT PIECE: Cast on 88-100-104-112-124-132 stitches on circular needle size 5 mm with 1 strand of each quality (2 strands). Purl 1 row from wrong side. Then work as follows from right side: 1 edge stitch in GARTER STITCH - read explanation above, * purl 2, knit 2 *, work from *-* until 3 stitches remain, purl 2 and 1 edge stitch in garter stitch. When rib measures 5 cm, switch to circular needle size 6 mm. Work as on back piece until piece measures 44-46-46-48-48-50 cm = 73-75-79-81-89-95 stitches. On next row slip the middle 17 stitches on a thread for neck, and finish each shoulder separately = 28-29-31-32-36-39 stitches remain on each shoulder. Decrease 1 stitch on every row from right side - remember DECREASE TIP, 4-4-5-5-6-6 times in total = 24-25-26-27-30-33 stitches. Continue to work until piece measures 52-54-56-58-60-62 cm. Cast off. Work the other shoulder the same way. SLEEVE: Cast on 50-50-54-54-58-58 stitches on circular needle size 5 mm with 1 strand of each quality (2 strands). Purl 1 row from wrong side. Then work as follows from right side: Work 1 edge stitch in garter stitch, * knit 2, purl 2 *, work from*-* until 1 stitch remains, 1 edge stitch in garter stitch. When rib measures 10 cm, switch to circular needle size 6 mm. Work in stocking stitch with 1 edge stitch in garter stitch in each side. On next row from right side decrease 7-7-9-9-11-11 stitches evenly = 43-43-45-45-47-47 stitches. When piece measures 14 cm, increase 1 stitch in each side - read INCREASE TIP! Increase like this every 6-4-4-3½-2½-2 cm 6-8-8-9-10-11 times in total = 55-59-61-63-67-69 stitches. SIZE S: Work until piece measures 48 cm. Cast off. Knit another sleeve the same way. SIZE M-L-XL-XXL-XXXL: Continue to work until sleeve measures 45-45-44-41-39 cm. Insert 1 marker in each side of sleeve - markers mark where bottom of armhole starts. Work until sleeve measures 48-48-48-46-45 cm (i.e. approx. 3-3-4-5-6 cm from marker). Cast off. Knit another sleeve the same way. ASSEMBLY: Sew shoulder seams inside cast-off edge. Sew in sleeves in size M-L-XL-XXL-XXXL: Sew bottom of armhole - markers inserted on sleeves should fit sides of body. Sew sleeve and side seams in one inside 1 edge stitch down to rib on jumper, i.e. there is approx. 5 cm vent on jumper. NECK EDGE: Pick up 64 to 78 stitches around the neck from right side with a short circular needle size 5 mm and 1 strand in each quality (2 strands). Number of stitches must be divisible by 4. Work rib (knit 2/purl 2). When rib measures 12 cm, work 1 round rib while increasing 1 stitch in every other purl section. Then cast off stitches with knit over knit and purl over purl. Fold rib at the top of neck down on inside of garment. Fasten rib to get a double neck edge. To avoid a tight neck edge that sticks out it is important to keep the seam elastic. |
||||||||||
Diagram explanations |
||||||||||
|
||||||||||
 |
||||||||||
 |
||||||||||
 |
||||||||||
Have you finished this pattern?Tag your pictures with #dropspattern #appalachiantrailssweater or submit them to the #dropsfan gallery. Do you need help with this pattern?You'll find 28 tutorial videos, a Comments/Questions area and more by visiting the pattern on garnstudio.com. © 1982-2026 DROPS Design A/S. We reserve all rights. This document, including all its sub-sections, has copyrights. Read more about what you can do with our patterns at the bottom of each pattern on our site. |
||||||||||


With over 40 years in knitting and crochet design, DROPS Design offers one of the most extensive collections of free patterns on the internet - translated to 17 languages. As of today we count 324 catalogues and 12290 patterns translated into English (UK/cm). 12290
We work hard to bring you the best knitting and crochet have to offer, inspiration and advice as well as great quality yarns at incredible prices! Would you like to use our patterns for other than personal use? You can read what you are allowed to do in the Copyright text at the bottom of all our patterns. Happy crafting!
Post a comment to pattern DROPS 237-12
We would love to hear what you have to say about this pattern!
If you want to leave a question, please make sure you select the correct category in the form below, to speed up the answering process. Required fields are marked *.