Comments / Questions (54)
![]() Helle wrote:
Helle wrote:
Hvis man i A3 på str. XL skal tage masker ud , så kommer mønstret vel ikke til at passe, for så vil knuderne i de efterfølgende omgange da blive forskudt, så de ikke sidder rigtigt over hinanden. Eller har jeg misforstået?
25.08.2023 - 08:47DROPS Design answered:
Hei Helle Jo, men det blir det på de største str. Om du syns forskyvningen blir for synlig, kan du jo fint avslutte med knutene tidligere. mvh DROPS Design
04.09.2023 - 13:22
![]() Margit Kuhn wrote:
Margit Kuhn wrote:
Bei Größe ab XL soll man teilen, bevor A 3 zu Ende ist - aber am Ende von A3 nochmal zunehmen. Die Maschenzahl bei der Teilung ist aber die Maschenzahl NACH der Zunahme. Das kann nicht stimmen, man soll doch vor der Zunahme teilen !!!
09.08.2023 - 15:12DROPS Design answered:
Liebe Frau Kuhn, zuerst stricken Sie A.3 , dann wiederholen Sie die Reihen mit dem Sternch bis ingesamt 5 Runden mit Noppen gestrickt wurden dh 1 Mal A.3 + 1 Mal die Reihen mit den Sternchen; die Reihen mit den Zunahmen wird am Ende vom 1. Mal gestrickt (= nach der Runden mit den 3. Noppen). Sollte Ihre Maschenprobe in der Höhe nicht stimmen, dann stricken Sie diese Zunahme früher, damit die Zunahmen vor der Verteilung kommt. Viel Spaß beim stricken!
09.08.2023 - 17:03
![]() Sabina wrote:
Sabina wrote:
Już wszystko jasne wszystko jest opisane czytelnie.:)
19.05.2023 - 19:49DROPS Design answered:
Bardzo się cieszę. Miłej pracy!
22.05.2023 - 12:44
![]() Sabina wrote:
Sabina wrote:
Dzień dobry, chce wykonać jeden ze swetrów i zastanawiam się jak zacząć. Czy mam sobie przeliczyć wg próbki ilość oczek na obwód? Przeczytałam cały opis i znalazłam niczego na czym mogłabym się oprzeć .
19.05.2023 - 19:20DROPS Design answered:
Witaj Sabino, w następnym komentarzu widzę, że wszystko się wyjaśniło. Pozdrawiamy!
22.05.2023 - 12:45
![]() Jenny wrote:
Jenny wrote:
Ich habe mir bei Drops Anleitungen mit Original Wolle angewöhnt, Maschenproben zu machen. Es passte einfach immer alles wie vorgeschlagen. Nicht so bei diesem Modell. Meine Maschenprobe war viel zu klein, weswegen ich den gesamten Körper wieder aufribbeln musste. Generell empfinde ich die Wolle als nicht sehr angenehm auf der Haut. Schade!
04.04.2023 - 20:19
![]() Deborah wrote:
Deborah wrote:
What are the measurements for each size? It’s impossible to guess.
25.02.2023 - 05:21DROPS Design answered:
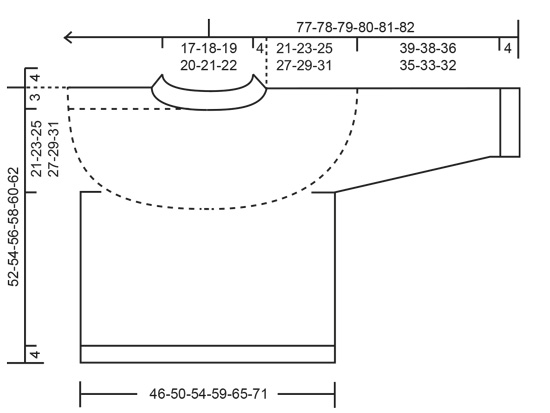
Dear Deborah, the measurements for each size are indicated in the measurement schematic after the pattern instructions (the measurements are in cm). For more help interpreting this schematic, you can check the following lesson: https://www.garnstudio.com/lesson.php?id=24&cid=19. Happy knitting!
26.02.2023 - 21:05
![]() Enrica wrote:
Enrica wrote:
Buongiorno , ho terminato la prima manica, ma è un po’ larga, mi potete dare un consiglio su cosa fare? Ho fatto la taglia M Grazie
06.02.2023 - 15:43DROPS Design answered:
Buonasera Enrica, ha controllato la sua tensione prima di procedere con la lavorazione della manica? Buon lavoro!
10.02.2023 - 16:10
![]() Enrica wrote:
Enrica wrote:
Buon giorno, ho terminato la prima manica, però è troppo larga. Per favore Mi potete dare un consiglio su cosa fare? Grazie mille
06.02.2023 - 15:36DROPS Design answered:
Buonasera Enrica, ha controllato la sua tensione prima di procedere con la lavorazione della manica? Buon lavoro!
10.02.2023 - 16:09
![]() Lelletta wrote:
Lelletta wrote:
Buonasera! Scusate, sono alla fine dello sprone, taglia M. Nella panoramica della sezione successiva, nel motivo non capisco cosa significa dividere lo sprone "PRIMA DELLA FINE DI A3": io ho concluso i 3 ferri di nodi, mi dovevo fermare prima? Grazie se vorrete chiarirmi questa parte! Buona serata e buon lavoro!
05.02.2023 - 22:34DROPS Design answered:
Buonasera Lelletta, per la taglia M dovrebbe arrivare alla divisione dello sprone prima della fine di A.3. Buon lavoro!
13.02.2023 - 22:53
![]() Lelletta wrote:
Lelletta wrote:
Scusatemi, non so che conto ho fatto.... 8x25=200 :( E\' evidente che ho sbagliato, scusatemi ancora! Buon lavoro.
21.01.2023 - 01:23DROPS Design answered:
Buonasera Lelletta, ora il calcolo è corretto. Buon lavoro!
21.01.2023 - 22:16
Miss Summerbee Sweater#misssummerbeesweater |
|||||||||||||||||||||||||||||||||||||
 |
 |
||||||||||||||||||||||||||||||||||||
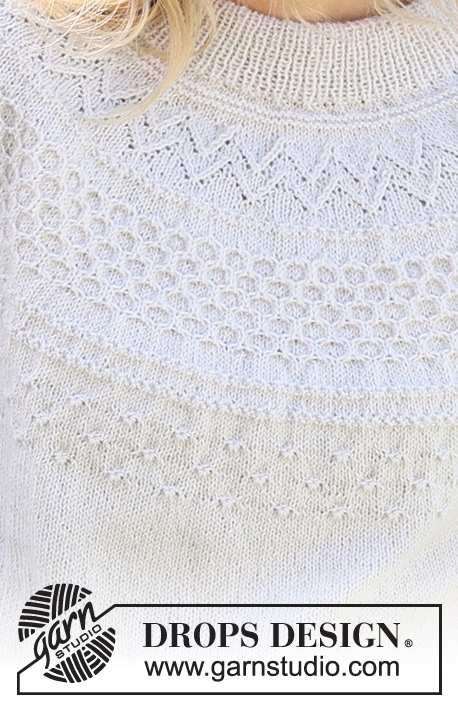
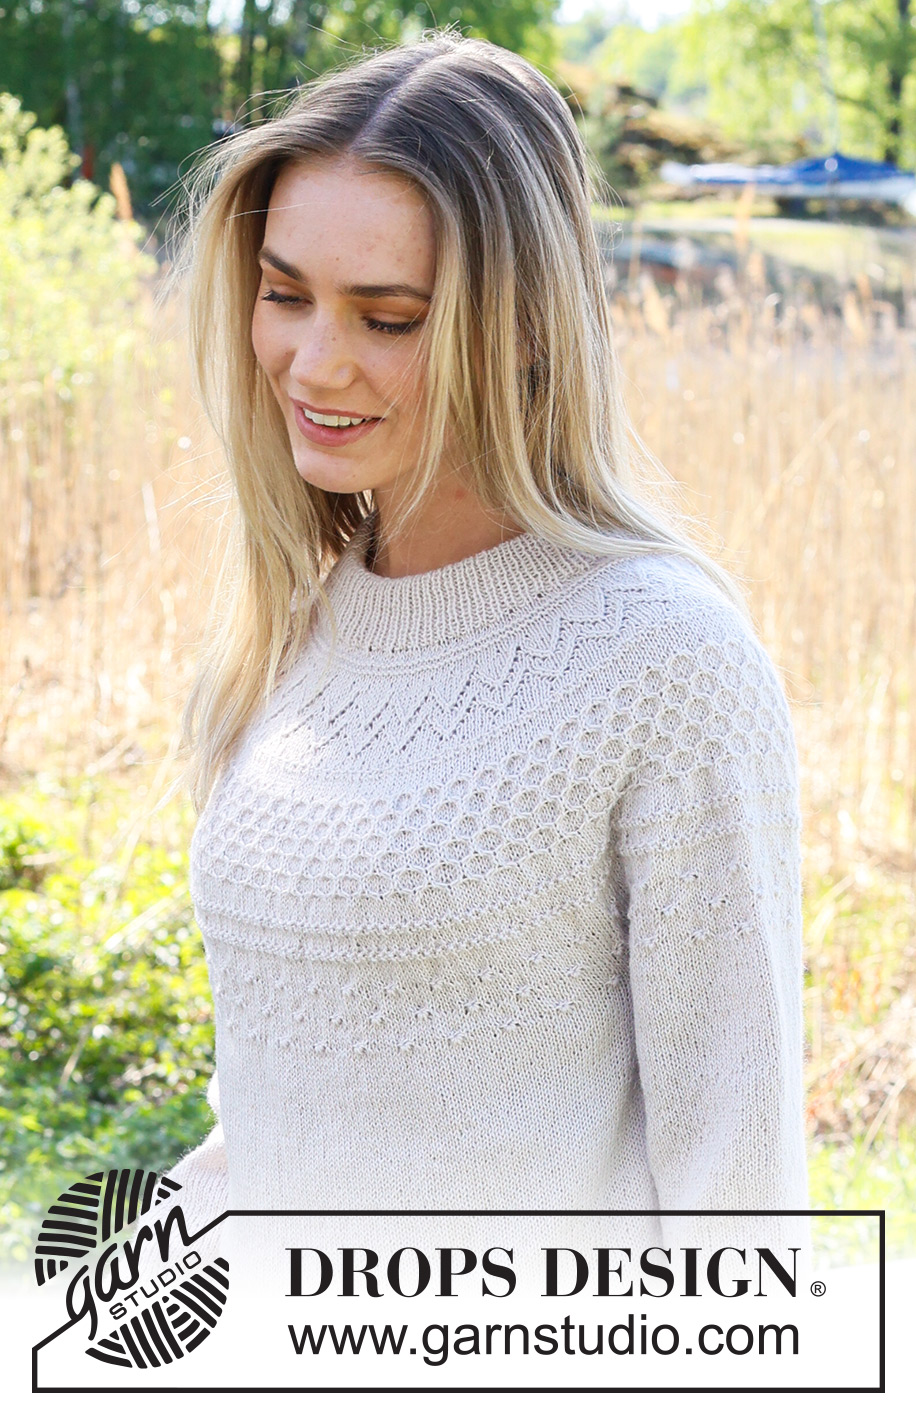
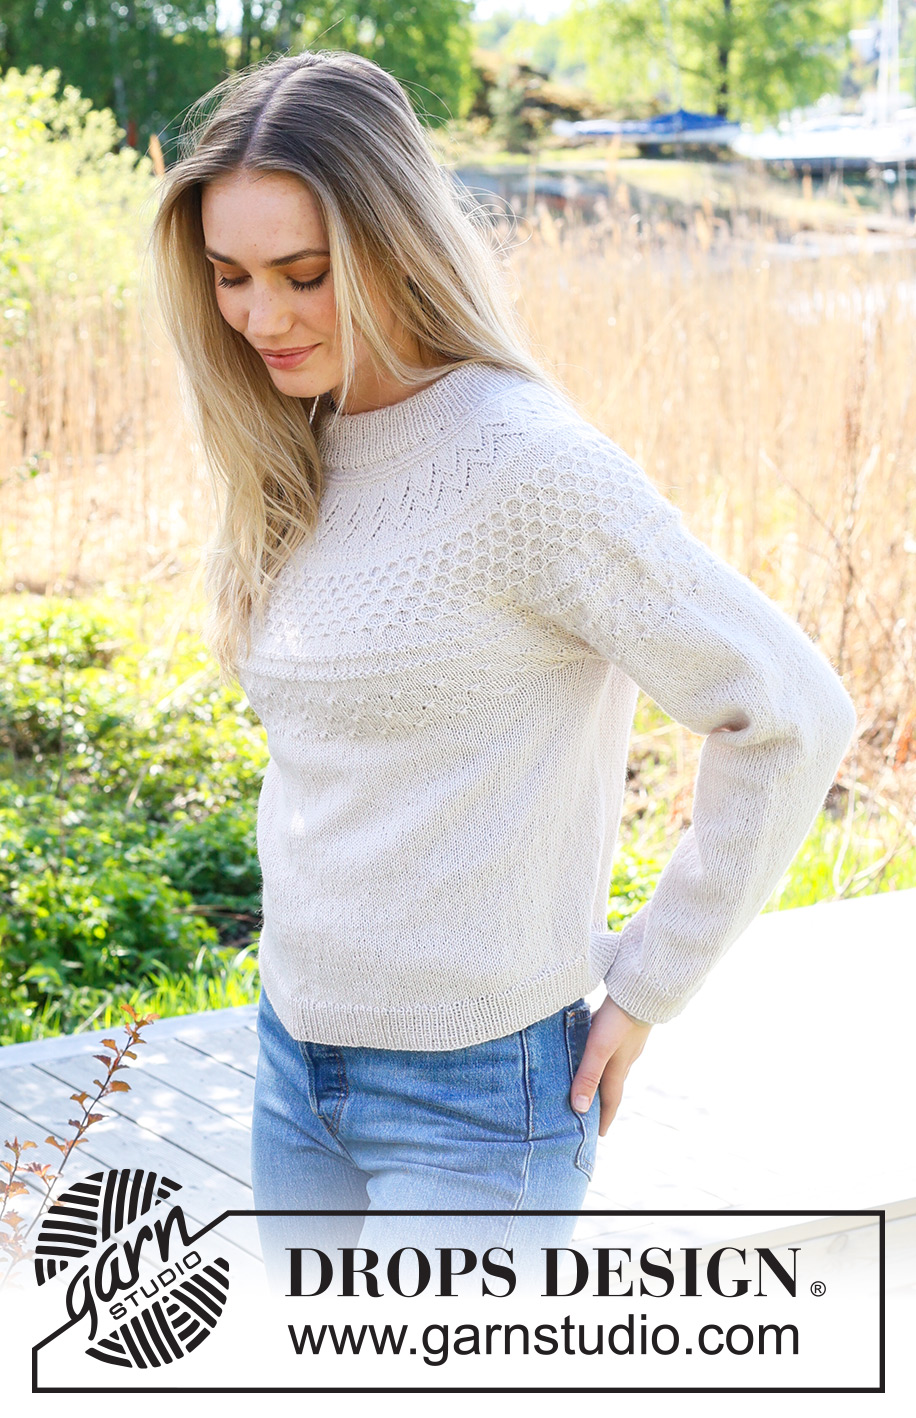
Knitted jumper in DROPS Flora. The piece is worked top down with double neck, round yoke and relief-pattern on the yoke. Sizes S - XXXL.
DROPS 236-2 |
|||||||||||||||||||||||||||||||||||||
|
------------------------------------------------------- EXPLANATIONS FOR THE PATTERN: ------------------------------------------------------- RIDGE/GARTER STITCH (worked in the round): 1 ridge in height = 2 rounds; Knit 1 round and purl 1 round. ELEVATION (back of neck): To make the back of the neck slightly higher when working the yoke, you can work an elevation as described here. Skip this section if you do not want an elevation. Insert 1 marker at the beginning of the round (mid-back). Start from the right side and knit 14-15-16-16-17-18 stitches past the marker, turn, tighten strand and purl 28-30-32-32-34-36 stitches back. Turn, tighten strand and knit 42-45-48-48-51-54 stitches, turn, tighten strand and purl 56-60-64-64-68-72 stitches back. Turn, tighten strand and knit 70-75-80-80-85-90 stitches, turn, tighten strand and purl 84-90-96-96-102-108 stitches back. Turn, tighten strand and knit 98-105-112-112-119-126 stitches, turn, tighten strand and purl 112-120-128-128-136-144 stitches back. Turn, tighten the strand and knit to mid-back. Then work YOKE as described in the text. PATTERN: See diagrams A.1 to A.3. INCREASE/DECREASE TIP (evenly spaced): To work out how to increase/decrease evenly, count the total number of stitches on needle (e.g. 120 stitches), and divide by the number of increases/decreases to be made (e.g. 32) = 3.8. In this example, increase by making 1 yarn over after approx. each 4th stitch. On the next row work the yarn overs twisted to avoid holes. When decreasing, knit together approx. each 3rd and 4th stitch. DECREASE TIP (for sleeves): Start 3 stitches before the marker, knit 2 together, knit 2 (marker sits between these 2 stitches), slip 1 stitch as if to knit, knit 1 and pass the slipped stitch over the knitted stitch. ------------------------------------------------------- START THE PIECE HERE: ------------------------------------------------------- JUMPER – SHORT OVERVIEW OF THE PIECE: The neck and yoke are worked in the round with circular needle, from mid back and top down. The yoke is divided for body and sleeves and the body is continued in the round. The sleeves are worked with short circular needle/double pointed needles. DOUBLE NECK: Cast on 120-124-130-136-140-146 stitches with DROPS Flora using 2 short circular needles size 2.5 mm and 3 mm held together. Remove the needle size 3 mm (doing this gives you an elastic cast-on edge) keeping the stitches on the needle size 2.5 mm. Work rib in the round (knit 1, purl 1) for 9 cm. Fold the neck double to the inside and work 1 more round of rib, working every 2nd stitch together with its corresponding stitch on the cast-on edge. You now have a double neck. Change to circular needle size 3 mm. Knit 1 round and increase 32-36-38-40-44-46 stitches evenly spaced - read INCREASE/DECREASE TIP = 152-160-168-176-184-192 stitches. Insert 1 marker in the middle of the round (mid-front) – this is used when measuring the yoke. You can now work an ELEVATION at the back – read description above. If you do not want an elevation go straight to YOKE. YOKE: Work 2-2-6-6-8-10 rounds of stocking stitch, then work 2 RIDGES over all stitches – read description above. REMEMBER THE KNITTING TENSION! Work A.1 in the round over all stitches, increasing as follows at each arrow: Arrow-1: Increase 40-40-48-56-64-64 stitches evenly spaced = 192-200-216-232-248-256 stitches. Arrow-2: Increase 48-52-60-68-64-74 stitches evenly spaced = 240-252-276-300-312-330 stitches. When A.1 is finished work A.2 over all stitches, increasing as follows at each arrow: Arrow-3: Increase 102-108-114-126-126-138 stitches evenly spaced = 342-360-390-426-438-468 stitches (you increase more stitches here as the pattern tightens the piece slightly). Arrow-4: Decrease 6-6-6-12-12-12 stitches evenly spaced – remember INCREASE/DECREASE TIP = 336-354-384-414-426-456 stitches. Arrow-5: Increase 24-30-30-30-36-42 stitches evenly spaced = 360-384-414-444-462-498 stitches. Arrow-6: Increase 16-24-26-28-34-38 stitches evenly spaced = 376-408-440-472-496-536 stitches. The increases are finished in sizes S, M and L. When A.2 is finished work A.3 over all stitches. Increase as follows at the arrow (applies only to XL, XXL and XXXL): Arrow-7 (XL, XXL and XXXL): Increase 16-24-24 stitches evenly spaced = 488-520-560 stitches. OVERVIEW OF THE NEXT SECTION: Continue with A.3 as described below. In addition the yoke is divided for the body and sleeves. Read PATTERN and DIVIDING FOR BODY AND SLEEVES before continuing. PATTERN: S and M: When A.3 is finished (a total of 3 rows of knots), continue with stocking stitch. NOTE: The yoke is divided for the body and sleeves before A.3 is finished. L: When A.3 is finished, work the first 6 rounds in the repeat marked with a star (a total of 4 rows of knots), then continue with stocking stitch. NOTE: The yoke is divided for the body and sleeves before A.3 is finished. XL, XXL and XXXL: When A.3 is finished, work the repeat marked with a star until you have a total of 5-6-6 rows of knots, then continue with stocking stitch. NOTE: The yoke is divided for the body and sleeves before A.3 is finished. DIVIDING FOR BODY AND SLEEVES: When the yoke measures 21-23-25-27-29-31 cm from the marker, divide for the body and sleeves as follows: Work 56-61-65-72-79-86 stitches as before (½ back piece), place the next 76-82-90-100-102-108 stitches on a thread for the sleeve, cast on 8-8-10-10-12-12 stitches (in side under sleeve), work 112-122-130-144-158-172 stitches (front piece), place the next 76-82-90-100-102-108 stitches on a thread for the sleeve, cast on 8-8-10-10-12-12 stitches (in side under sleeve), work the last 56-61-65-72-79-86 stitches (½ back piece). The body and sleeves are finished separately. The piece is now measured from here! BODY: = 240-260-280-308-340-368 stitches. Finish A.3 as described above – NOTE: After the division, the pattern will not fit under the sleeves; work pattern as far as possible with the remaining stitches under the sleeve in stocking stitch (the pattern is continued neatly from the yoke on the front and back pieces). When A.3 is finished (a total of 3-3-4-5-6-6 rows of knots), continue with stocking stitch until the body measures 24 cm from the division. Knit 1 round and increase 48-52-56-62-68-74 stitches evenly spaced = 288-312-336-370-408-442 stitches. Change to circular needle size 2.5 mm and work rib (knit 1, purl 1) for 4 cm. Cast off a little loosely. The jumper measures approx. 52-54-56-58-60-62 cm from the shoulder down. SLEEVES: Place the 76-82-90-100-102-108 stitches from the thread on the one side of the piece on short circular needle/double pointed needles size 3 mm and knit up 1 stitch in each of the new stitches cast on under the sleeve = 84-90-100-110-114-120 stitches. Insert a marker in the middle of the new stitches under the sleeve. Finish A.3 in the round as described above. NOTE: After the division, the pattern will not fit under the sleeve; work pattern as far as possible and then the stitches under the sleeve in stocking stitch. When A.3 is finished continue with stocking stitch until the sleeve measures 4-4-4-2-3-2 cm from the division. Now decrease 2 stitches under the sleeve – read DECREASE TIP. Decrease like this every 4½-3½-2-2-1½-1½ cm a total of 8-10-14-17-18-20 times = 68-70-72-76-78-80 stitches. Continue working until the sleeve measures 39-38-36-35-33-32 cm from the division. There is 4 cm left to finished length; try the jumper on and work to desired length.. Knit 1 round where you increase 12-14-14-14-14-16 stitches evenly spaced = 80-84-86-90-92-96 stitches. Change to double pointed needles size 2.5 mm and work rib (knit 1, purl 1) for 4 cm. Cast off a little loosely. The sleeve measures approx. 43-42-40-39-37-36 cm from the division. Work the other sleeve in the same way. |
|||||||||||||||||||||||||||||||||||||
Diagram explanations |
|||||||||||||||||||||||||||||||||||||
|
|||||||||||||||||||||||||||||||||||||
 |
|||||||||||||||||||||||||||||||||||||
 |
|||||||||||||||||||||||||||||||||||||
Have you finished this pattern?Tag your pictures with #dropspattern #misssummerbeesweater or submit them to the #dropsfan gallery. Do you need help with this pattern?You'll find 30 tutorial videos, a Comments/Questions area and more by visiting the pattern on garnstudio.com. © 1982-2026 DROPS Design A/S. We reserve all rights. This document, including all its sub-sections, has copyrights. Read more about what you can do with our patterns at the bottom of each pattern on our site. |
|||||||||||||||||||||||||||||||||||||


Post a comment to pattern DROPS 236-2
We would love to hear what you have to say about this pattern!
If you want to leave a question, please make sure you select the correct category in the form below, to speed up the answering process. Required fields are marked *.