
Popular categories
Looking for a yarn?


Comments / Questions (28)
![]() Martine wrote:
Martine wrote:
Bonjour, Est-ce possible de tricoter les 2 devants avec le motif mais avec le dos en jersey ? Y aura-t-il des impacts sur les mesures ?
08.12.2025 - 22:53DROPS Design answered:
Bonjour Martine, la tension doit être ici la même pour le jersey et le point ajouré, vous pouvez donc choisir de tricoter le dos en jersey seulement, pensez juste (mais comme d'habitude) à bien conserver la même tension que pour l'échantillon. Bon tricot!
09.12.2025 - 08:49
![]() Caroline wrote:
Caroline wrote:
Från början har man 16 maskor mellan markörerna (ärmarna). Efter totalt 6 ökningar (M) så har man 30 maskor (M) mellan markörerna. Men det ökas ju bara 2 maskor per varv och ärm så då har man ju 28 maskor mellan markörerna. Eller tänker jag fel?
09.10.2025 - 16:04DROPS Design answered:
Hej Caroline. Ja här ska det nog stå 30 m inkl. maskorna med markör, vi ber design-avdelningen att se över detta. Du kan bara fortsätta att sticka enligt mönstret för i övrigt ska vara riktigt (187 m + 12 maskor ökning per ärm = 211 m). Mvh DROPS Design
10.10.2025 - 07:27
![]() Helena Gustafsson wrote:
Helena Gustafsson wrote:
Tror jag hittat en felaktighet. Först står att sadlarna ska vara 18 m sen att man ska sticka de 16 m på sadelaxeln räta. Visst ska det väl vara 18 m?
28.02.2025 - 11:38DROPS Design answered:
Hej Helena, du sætter 1 mærke i de yderste masker på sadelskulderen og tager ud mod forstykkerne og bagstykket (ikke på sadelskulderen)
06.03.2025 - 12:07
![]() Ellen-Birgitte Agerlund wrote:
Ellen-Birgitte Agerlund wrote:
Hej, strikker i str XL. Er ved udtagning på ærmer. Der står at man skal tage ud 8 gange, og at arbejdet måler ca 4 cm derefter, mit er noget længere.
14.07.2024 - 12:40DROPS Design answered:
Hei Ellen-Birgitte. Det går fint om det kun er noget længere. Mvh DROPS Design
18.07.2024 - 10:28
![]() Irene Lüdenbach wrote:
Irene Lüdenbach wrote:
Wird die markierte Masche an den Schultern abgehoben oder gestrickt? Herzlichen Dank und liebe Grüße Irene
14.07.2024 - 11:59DROPS Design answered:
Liebe Irene, die Masche wird jeweils gestrickt. Viel Spaß beim Weiterstricken!
22.07.2024 - 08:59
![]() Sandr Huckaby wrote:
Sandr Huckaby wrote:
Will Tahki Cotton Classic mercerized cotton work satisfactorily for this pattern?
06.02.2023 - 15:23DROPS Design answered:
Dear Sandr, these patterns are made to be worked with DROPS yarn; you can check out whether the DROPS yarn is similar to your own yarn in the Yarns section.
07.02.2023 - 11:39
![]() Sandr Huckaby wrote:
Sandr Huckaby wrote:
My bust measures 36 1/2". Should I knit 40 or 45" bust size. The cardigan will be worn over cotton and light weight knits. I don't like a cardigan to fit snug, but not over sized either. Thanks for recommendation.
06.02.2023 - 11:02DROPS Design answered:
Dear Mrs Huckaby, measure a similar garment you have and like the size and compare its measurements to the one in the chart (in cm, from side to side) - this will be the best way to find out the matching size. Read more here. Happy knitting!
06.02.2023 - 14:58
![]() Jani O'Rourke wrote:
Jani O'Rourke wrote:
I am confused (like others) about how you do the multiple repeats of section B in diagram A1 for line 3. How can you start and stop a repeat of section B when you are in the middle of a (S1, K2 tog, PSSO)? I can understand the transition from A to B and B to C but I do not know how you go from B to B - exactly what 6 stitches do you for pattern B do as you start and end the repeat of B? Is it K2 tog, K1, YO, K1, YO, K1 ?
11.12.2022 - 02:19DROPS Design answered:
Dear Jani, work the last stitch of A with the first 2 stitches of the repeat of B (= the YO worked in A lets A remain a 3-stitch pattern). Work the last stitch in the first repeat of B with the first 2 stitches of the next repeat of B. Continue in this way until reaching the last repeat, where you will work the last stitch of B with the first 2 stitches of C. Happy knitting!
11.12.2022 - 23:55
![]() Isabelle Gravier Calleau wrote:
Isabelle Gravier Calleau wrote:
Bonjour, question concernant la reprise des manches : "Reprendre les 60-66-74-82-86-90 mailles... et relever en plus 1 maille de chaque côté des 5 nouvelles mailles montées sous la manche = 65-71-79-87-91-95 mailles. Si on ajoute 1m aux 5 nouvelles mailles cela donne 6 nouvelles mailles mais votre total donne un ajout de 5 mailles ? Merci !
20.09.2022 - 12:30DROPS Design answered:
Bonjour Mme Gravier Calleau, la formulation était un peu tarabiscotée... il faut en fait tout simplement relever 1 maile dans chacune des 5 mailles montées lors de la division de l'ouvrage (retrouvez cette étape dans cette leçon, photo 18B. (la formulation a été modifiée, merci pour votre retour). Bon tricot!
21.09.2022 - 09:38
![]() Nathalie B wrote:
Nathalie B wrote:
Bonjour, Je n’obtiens absolument pas le bon échantillon : 21 mailles donnent 8,5 cm de largeur. Si je prends des aiguilles plus grosses je vais avoir un tissu trop lâche. Est-ce que ce problème est fréquent avec cette laine ?
18.07.2022 - 12:33DROPS Design answered:
Bonjour Nathalie, ce modèle est travaillé de manière assez lâche. Donc, si vous travaillez habituellement avec les aiguilles que vous utilisez maintenant, vous aurez peut-être besoin de plus grosses aiguilles pour travailler ce modèle en particulier.
24.07.2022 - 20:49
|
||||||||||||||||||||||
Cotswolds#cotswoldscardigan |
||||||||||||||||||||||
 |
 |
|||||||||||||||||||||
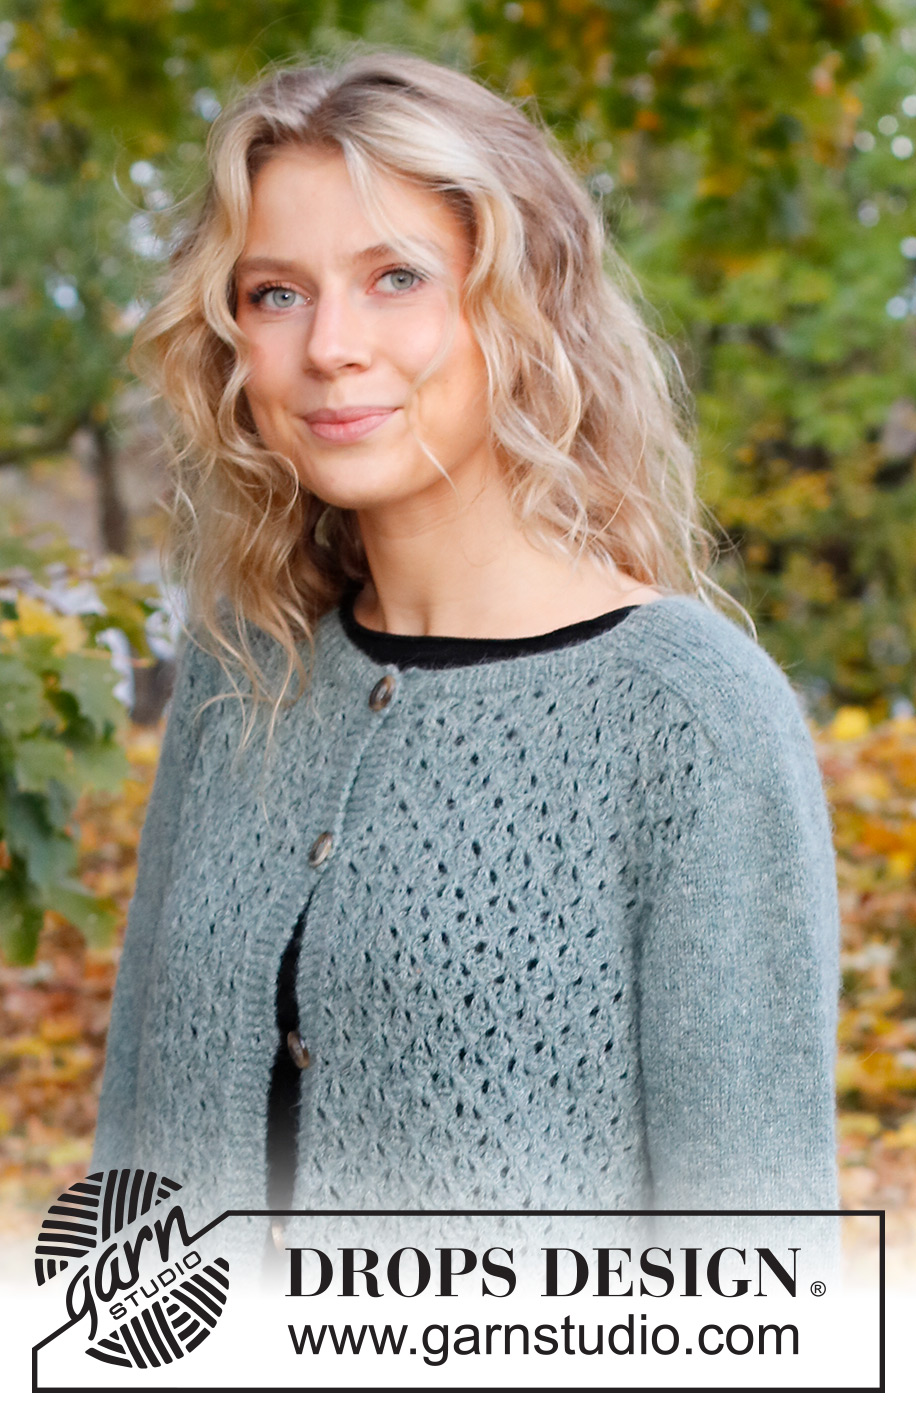
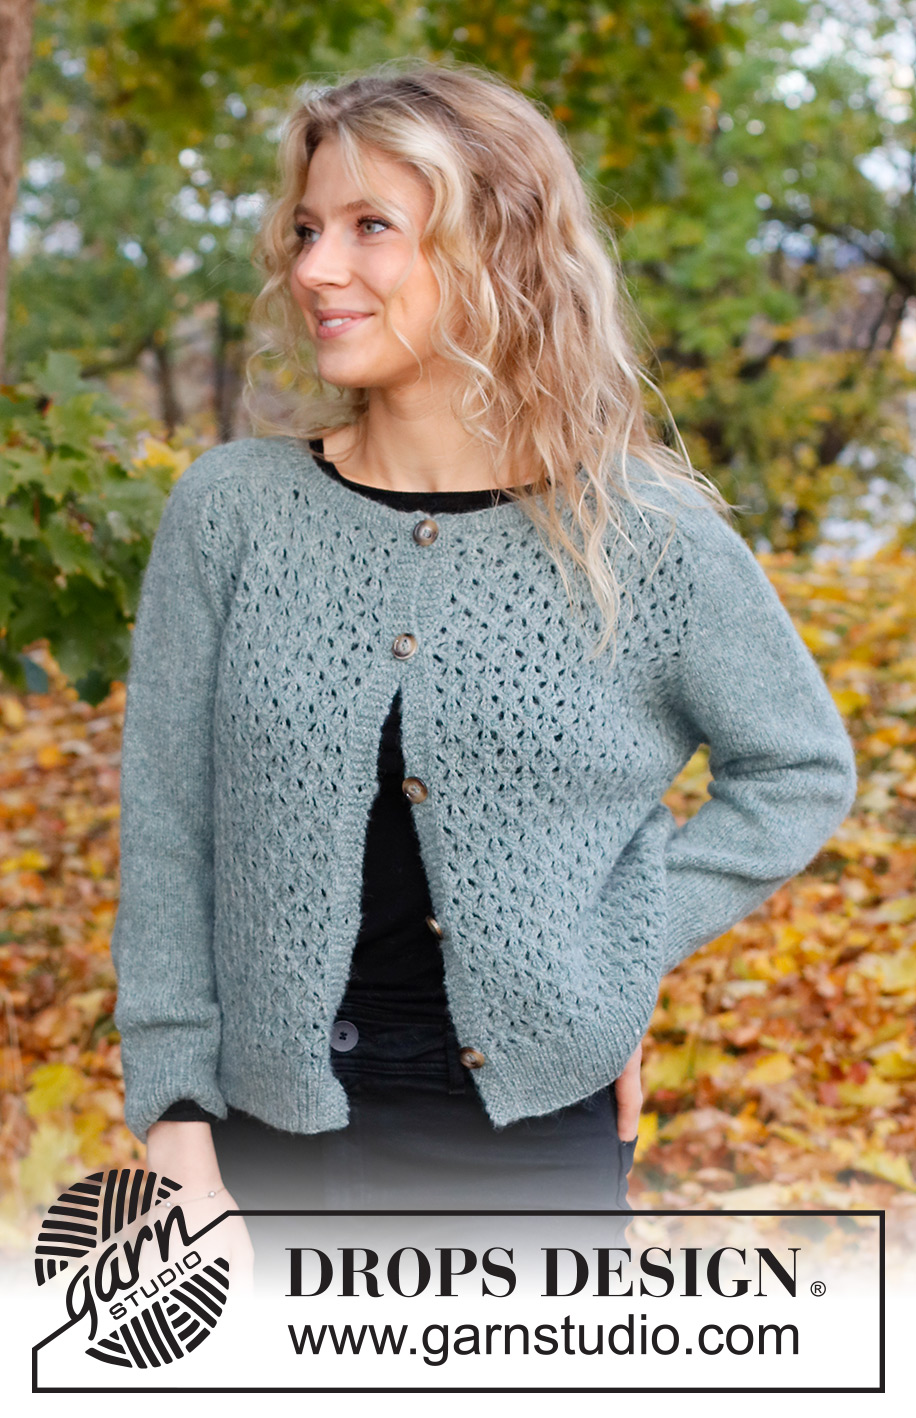
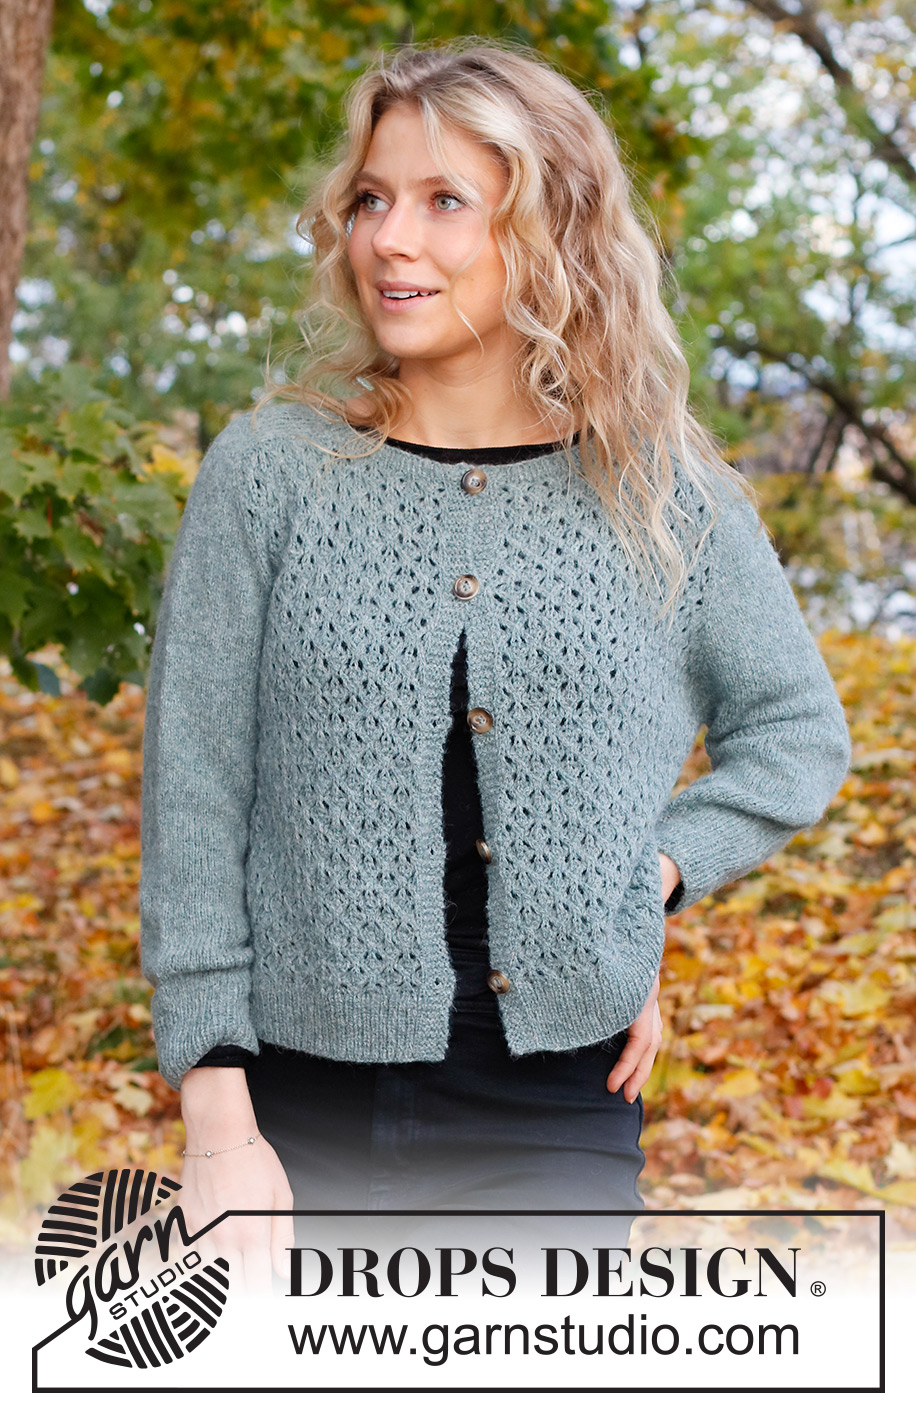
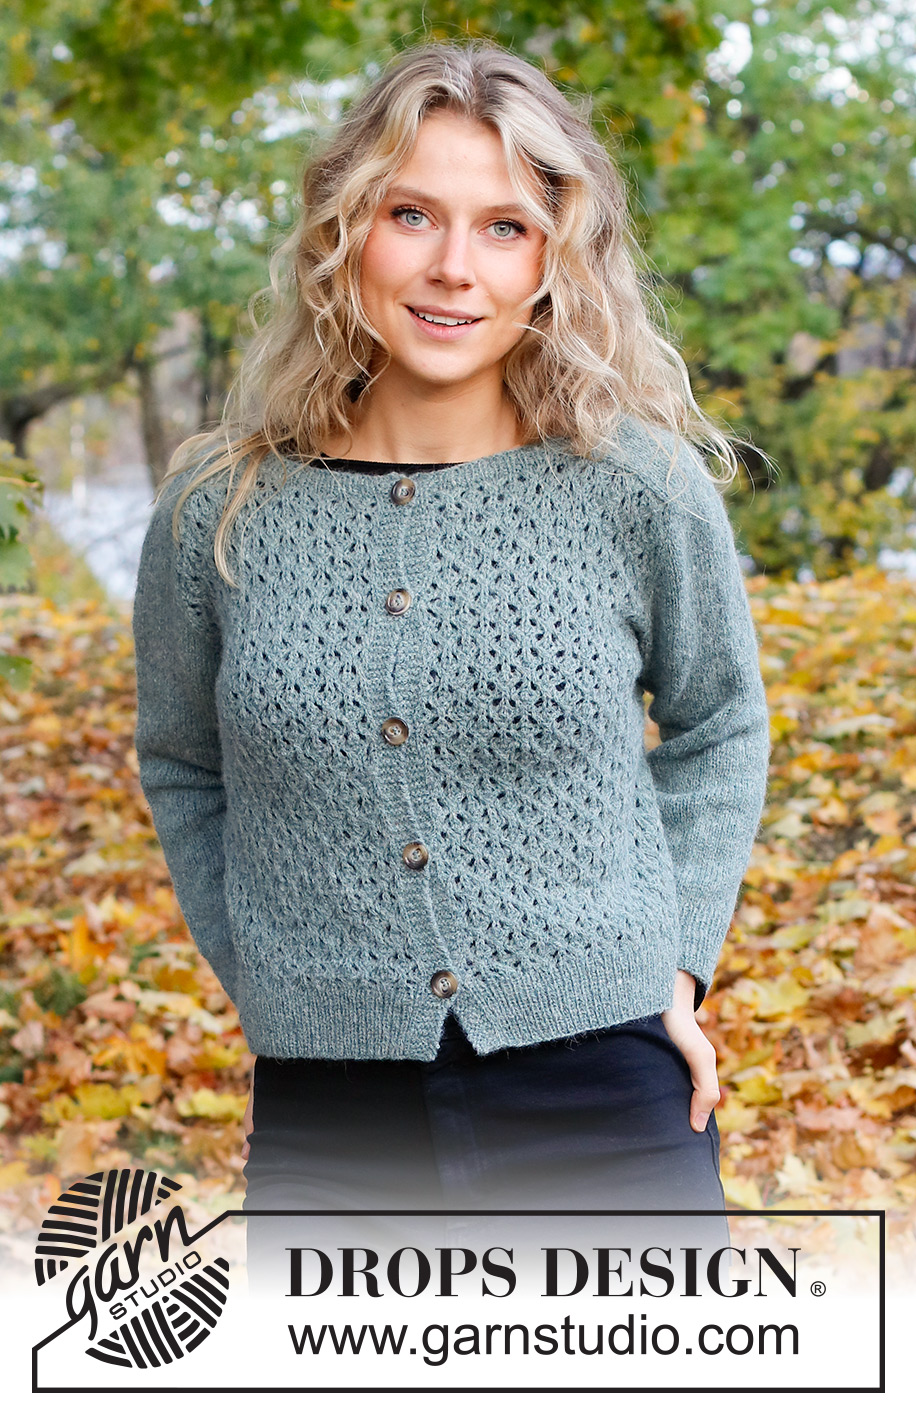
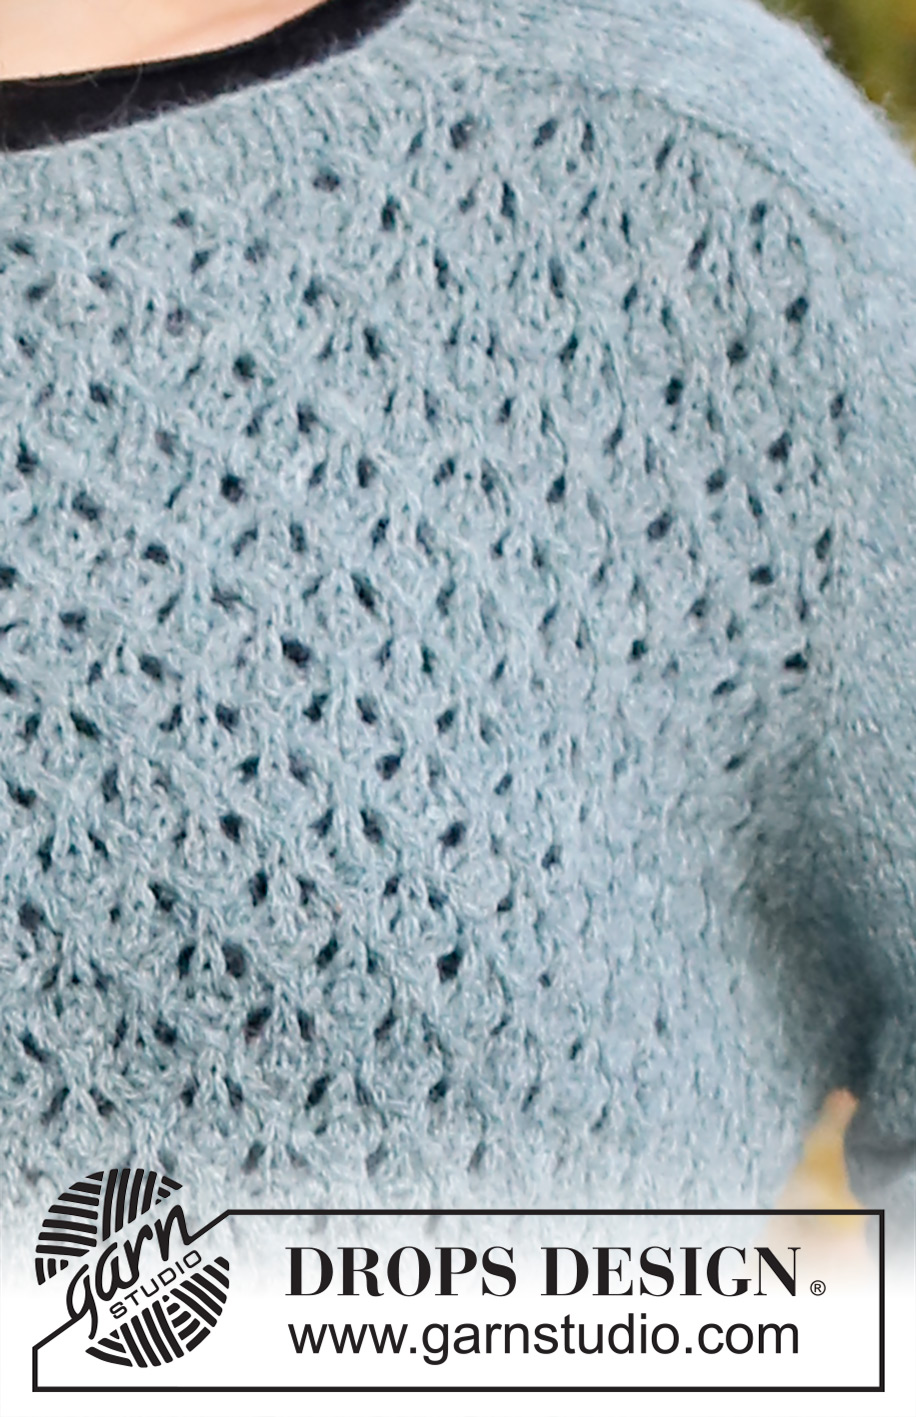
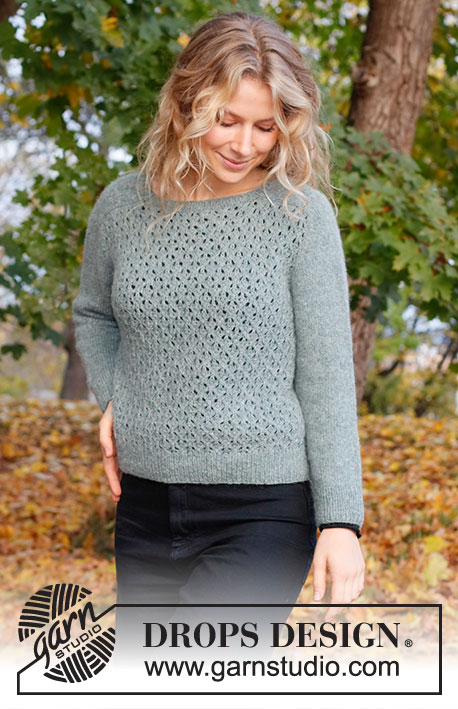
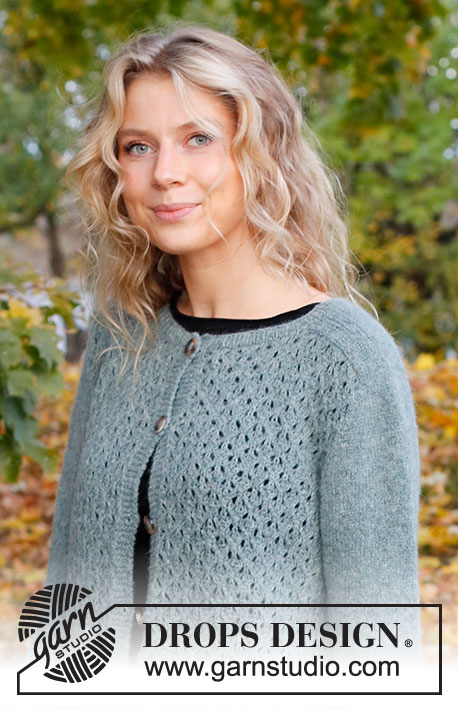
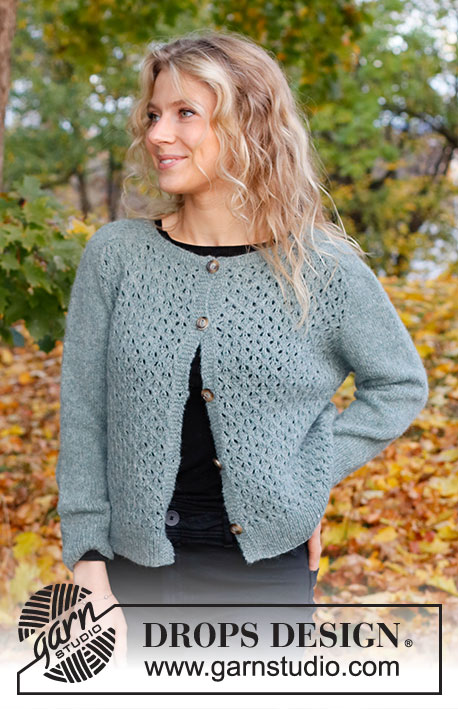
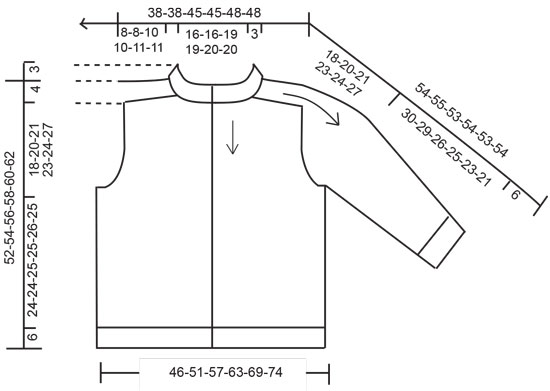
Knitted jacket in DROPS Sky. Piece is knitted top down with lace pattern and saddle shoulder. Size: S - XXXL
DROPS 226-11 |
||||||||||||||||||||||
|
---------------------------------------------------------- EXPLANATION FOR THE PATTERN: ---------------------------------------------------------- GARTER STITCH (back and forth): Knit all rows. 1 ridge vertically = knit 2 rows. PATTERN: See diagram A.1. Diagrams show all rows in pattern seen from the right side. BUTTONHOLES: Decrease for buttonholes on right band (when garment is worn). 1 buttonhole = work from right side as before until 3 stitches remain on needle, make 1 yarn over, knit 2 together and finish by knitting 1. On next row (wrong side) knit the yarn over to make a hole. Decrease first buttonhole right after rib in the neck, then decrease the next 4-4-4-5-5-5 buttonholes as explained above approx. 9 cm apart. INCREASE TIP-1: BEFORE MARKER: The new stitch is twisted towards the right. Use left needle to pick up yarn between 2 stitches from round below, pick up yarn from the back and knit stitch in front loop of stitch. AFTER MARKER: The new stitch is twisted towards the left. Use left needle to pick up yarn between 2 stitches from round below, pick up yarn from the front and knit stitch in back loop of stitch. INCREASE TIP-2 (evenly): To calculate how to increase evenly, use the total number of stitches on row (e.g. 209 stitches), minus bands (= 10 stitches) and divide the remaining stitches by number of increases to be done (e.g. 42) = 4.7. In this example increase by making 1 yarn over after approx. every 5th stitch and do not increase over bands. On next row work yarn overs twisted to avoid holes. DECREASE TIP (applies to sleeves): Decrease 1 stitch on each side of marker thread as follows: Work until 3 stitches remain before stitch with marker thread, knit 2 together, knit 3 (stitch with marker thread is in the middle of these stitches), slip 1 stitch knitwise, knit 1, pass slipped stitch over stitch worked. CAST-OFF TIP: To avoid a tight cast-off edge when casting off, you may use a larger needle. If this still is too tight make 1 yarn over after approx. every 4th stitch while casting off (cast off yarn overs as stitches). ---------------------------------------------------------- START THE PIECE HERE: ---------------------------------------------------------- JACKET - SHORT OVERVIEW OF THE PIECE: Work neck edge back and forth on circular needle. Then divide the piece for front pieces, back piece and saddle shoulder. Then work each saddle shoulder back and forth separately, before stitches from the thread are placed back on needle, and pick up stitches for front pieces and back piece (along the sides on saddle shoulders). Then work the rest of yoke back and forth, at the same time while increasing on sleeves and on front pieces and back piece. Now divide yoke for body and sleeves. Work body back and forth on circular needle, top down. Work sleeves in the round on double pointed needles/short circular needle, top down. NECK EDGE: Cast on 119-119-131-131-139-139 stitches (including 5 band stitches in each side towards mid front) on circular needle size 3.5 mm with DROPS Sky. Purl 1 row (= wrong side). Work next row as follows from right side: Work 5 band stitches in GARTER STITCH - read explanation above - * knit 1, purl 1 *, work from *-* until 6 stitches remain, knit 1 and finish with 5 band stitches in garter stitch. Continue rib like this for 2½ cm. SADDLE SHOULDER: Slip the first 25-25-28-28-30-30 stitches on a thread, slip the next 18 stitches on a short circular needle size 4 mm, slip the next 33-33-39-39-43-43 stitches on a thread, slip the next 18 stitches on a thread and slip the last 25-25-28-28-30-30 stitches on a thread. Work in stocking stitch over the first 18 stitches on needle, AT THE SAME TIME on first row cast on 1 edge stitch in each side = 20 stitches. Work edge stitches in garter stitch. Work back and forth over these 20 stitches for 8-8-10-10-11-11 cm, on last row cast off 1 edge stitch in each side = 18 stitches. Cut the yarn. Put these stitches on a thread. Work the same way over the 18 stitches from the thread in the other side. Cut the yarn. YOKE: Now pick up stitches along the sides on saddle shoulder, begin from right side and mid front on circular needle size 4 mm as follows: Work the first 25-25-28-28-30-30 stitches from thread, pick up 17-17-20-20-24-24 stitches inside an edge stitch on the side of saddle shoulder (= 42-42-48-48-54-54 stitches for left front piece), insert 1st marker in next stitch, knit the 16 stitches on saddle shoulder, insert 2nd marker in next stitch, pick up 17-17-20-20-24-24 stitches inside 1 edge stitch on the side of saddle shoulder, work the 33-33-39-39-43-43 stitches from thread, pick up 17-17-20-20-24-24 stitches inside 1 edge stitch on the side of saddle shoulder (= 67-67-79-79-91-91 stitches on back piece), insert 3rd marker in next stitch, knit the 16 stitches on saddle shoulder, insert 4th marker in next stitch, pick up 17-17-20-20-24-24 stitches inside an edge stitch on the side of saddle shoulder, and knit the last 25-25-28-28-30-30 stitches from thread (= 42-42-48-48-54-54 stitches on right front piece) = 187-187-211-211-235-235 stitches in total on needle. Purl 1 row (continue bands in garter stitch). Insert a marker thread inside band stitches at the beginning of row mid front – NOW MEASURE PIECE FROM HERE. Decrease for BUTTONHOLES on right band - read explanation above. Now work pattern as explanation below, and increase for sleeve as follows: SLEEVE INCREASE: Increase AFTER 1st and 3rd marker and increase BEFORE 2nd and 4th marker – read INCREASE TIP-1. Increase now only on sleeves and number of stitches on front pieces and back piece is the same. Work the increased stitches in stocking stitch. REMEMBER THE KNITTING TENSION! WORK PATTERN AS FOLLOWS: 5 stitches in garter stitch, A.1A (= 3 stitches), A.1B over the next 30-30-36-36-42-42 stitches (= 5-5-6-6-7-7 repetitions of 6 stitches), A.1C (= 4 stitches), work in stocking stitch over stitches on sleeve (i.e. between 1st and 2nd marker), A.1A (= 3 stitches), A.1B over the next 60-60-72-72-84-84 stitches (= 10-10-12-12-14-14 repetitions of 6 stitches), work A.1C (= 4 stitches) work in stocking stitch over stitches on sleeve (i.e. between 3rd and 4th marker), A.1A, A.1B over the next 30-30-36-36-42-42 stitches (= 5-5-6-6-7-7 repetitions of 6 stitches), A.1C (= 4 stitches), and finish with 5 stitches in garter stitch. The 4 stitches with a marker are worked in stocking stitch. Increase on sleeves every other row 9-6-10-8-10-6 times in total = 36-30-38-34-38-30 stitches on sleeves. Piece now measures approx. 6-4-7-4-7-4 cm. When increases on sleeve are done, continue with pattern and increases for yoke (there are now 223-211-251-243-275-259 stitches on needle). YOKE INCREASE: On next row from right side increase 8 stitches for yoke by increasing both before and after each of the 4 stitches with marker - remember INCREASE TIP-1. Increase stitch on front pieces, back piece and both sleeve, and work the increase stitch in pattern on front pieces and back piece and in stocking stitch on sleeves. Increase like this every other round 12-18-18-24-24-30 times in total = 319-355-395-435-467-499 stitches. When all increases are done, the piece measures approx. 15-17-20-23-24-26 cm from marker at the neck. Continue with pattern and stocking stitch as before until piece measures 18-20-21-23-24-27 cm. Now divide piece for body and sleeves. Work next row as follows – from wrong side: Work the first 54-60-66-72-78-84 stitches (= right front piece), slip the next 60-66-74-82-86-90 stitches on a thread for sleeve, cast on 5 new stitches on needle (= in the side under sleeve), work the next 91-103-115-127-139-151 stitches (= back piece), slip the next 60-66-74-82-86-90 stitches on a thread for sleeve, cast on 5 new stitches on needle (= in the side under sleeve), work the last 54-60-66-72-78-84 stitches on needle (= left front piece). BODY: = 209-233-257-281-305-329 stitches on needle. Work as follows - from right side: 5 stitches in garter stitch, A.1A (= 3 stitches), A.1B over the next 192-216-240-264-288-312 stitches (= 32-36-40-44-48-52 repetitions of 6 stitches), A.1C (= 4 stitches), 5 stitches in garter stitch. Continue this pattern like this until piece measures 24-24-25-25-26-25 cm. Purl 1 row from wrong side while increasing 42-44-52-56-62-66 stitches evenly - read INCREASE TIP-2 = 251-277-309-337-367-395 stitches. Switch to circular needle size 3.5 mm. Work as follows - from right side: 5 stitches in garter stitch, work rib (= knit 1/purl 1), until 6 stitches remain, knit 1 and 5 stitches in garter stitch. Continue like this until rib measures 6 cm, cast off with knit over knit , and purl over purl - read CAST-OFF TIP. Piece measures approx. 52-54-56-58-60-62 cm from shoulder. SLEEVES: Slip the 60-66-74-82-86-90 stitches from thread in the one side back on double pointed needles/short circular needle size 4 mm and pick in addition up 1 stitch in each side of the 5 new stitches cast on in the side under sleeve = 65-71-79-87-91-95 stitches. Insert a marker thread in the middle stitch under sleeve. Work in stocking stitch in the round. When sleeve measures 3-3-3-2-2-2 cm from division, decrease 1 stitch on each side of marker thread - read DECREASE TIP. Decrease like this approx. every 4½-3-2-1½-1-1 cm 6-8-11-14-15-16 times in total = 53-55-57-59-61-63 stitches. Then work until sleeve measures 30-29-26-25-23-21 cm from division, now knit 1 round while increasing 1 stitch = 54-56-58-60-62-64 stitches. Switch to double pointed needles size 3.5 mm. Work rib knit 1/purl 1 over all stitches for 6 cm. Cast off stitches with knit over knit and purl over purl. Sleeve measures 54-55-53-54-53-54 cm in total from the top of shoulder and down. Work the other sleeve the same way. ASSEMBLY: Sew the buttons on to left band. |
||||||||||||||||||||||
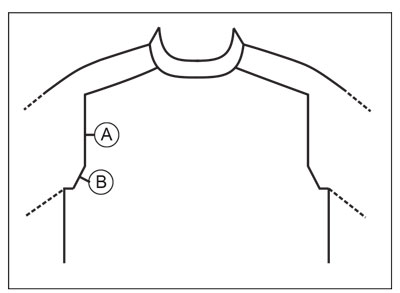
Diagram explanations |
||||||||||||||||||||||
|
||||||||||||||||||||||
 |
||||||||||||||||||||||
 |
||||||||||||||||||||||
 |
||||||||||||||||||||||
Have you finished this pattern?Tag your pictures with #dropspattern #cotswoldscardigan or submit them to the #dropsfan gallery. Do you need help with this pattern?You'll find 35 tutorial videos, a Comments/Questions area and more by visiting the pattern on garnstudio.com. © 1982-2026 DROPS Design A/S. We reserve all rights. This document, including all its sub-sections, has copyrights. Read more about what you can do with our patterns at the bottom of each pattern on our site. |
||||||||||||||||||||||


With over 40 years in knitting and crochet design, DROPS Design offers one of the most extensive collections of free patterns on the internet - translated to 17 languages. As of today we count 324 catalogues and 12290 patterns translated into English (UK/cm). 12290
We work hard to bring you the best knitting and crochet have to offer, inspiration and advice as well as great quality yarns at incredible prices! Would you like to use our patterns for other than personal use? You can read what you are allowed to do in the Copyright text at the bottom of all our patterns. Happy crafting!
Post a comment to pattern DROPS 226-11
We would love to hear what you have to say about this pattern!
If you want to leave a question, please make sure you select the correct category in the form below, to speed up the answering process. Required fields are marked *.