
Popular categories
Looking for a yarn?









































Comments / Questions (25)
 Helen Stenman wrote:
Hej nu är jag klar med min black forest kofta. En fråga till bara.. ska jag blocka den eller bara lägga den med fuktig duk över? Mvh Hrlén
14.06.2026 - 21:34DROPS Design answered:
Hei Helen. Om du føler at du må vaske den før bruk, kan du vaske den etter garnets vaskeanvisning. Om du blocker den, så pass på at ikke bladmönster blir strukket og flate. mvh DROPS Design
15.06.2026 - 08:08
Helen Stenman wrote:
Tusen tack för all hjälp. Fantastiskt att ni har denna service🤗
22.05.2026 - 13:25
Helen Stenman wrote:
Hej, jag skulle bli så glad om ni kan besvara min fråga jag ställde igår, angående om man räknar 45 maskor till första markeringen, för raglan med de första 5 framkantsmaskorna inräknade? Eller först sticka de 5 framkantsmaskorna o sedan räkna 45 maskor tii första markeringen??
22.05.2026 - 11:03DROPS Design answered:
Hej Helen. Du räknar 45 maskor inklusive de första 5 framkantsmaskorna. Mvh DROPS Design
22.05.2026 - 11:33
Helén Stenman wrote:
Hej igen En fråga angående raglan srtl XL. När man ska sätta de 4 markörerna, Räknar man de 45 m inklusive de 5 framkantsmaskorna till första markören? Eller är det 5 framkantsmaskor och 45 m till första markören och då blir det 50 m Mvh Helén Jag har räknat 45 m inklusive 5 framkantsmaskor till första markören.
21.05.2026 - 20:25
Helén Stenman wrote:
Hej, nu har jag gjort diagrammet klart på black forest memories kofta, strl XL. Behöver hjälp m raglan. Det står så här..Samtidigt på första v ökar man i XL 0 ggr på höjden och vad menas m höjden? Och sedan vart 4de v 5 ggr. (Står inget om höjden då) Ska jag då på strl XL börja med att öka vart 4de v och strunta i vart annat v 0 ggr på höjden? Vill inte behöva dra upp, om jag gör fel då garnet är lite lurvigt.😁 Mvh Helén
21.05.2026 - 10:20DROPS Design answered:
Hej Helen, ja det stemmer, du har 273 m øger på hver 4:e varv totalt 5 ggr (i höjden...) = (8x5=40m) 273+40=313 maskor :)
21.05.2026 - 10:50
Helén Stenman wrote:
Hej, jag har gjort halskant o knapphål o ska börja på oket o ska följa diagram A 2 L Börjar man m avig följt m omsl, en räta ett oms en avig o en rät. Fortsätter tills 8m o gör A3 avig, omsl, rät, omslag avig o 5 kantm. Hur gör jag när jag stickar tillbaks och hur ökar jag? Ska jag öka en m före A2 början och hur då? Hur stickar jag avigvarvet efter det första. Har ni inte en enklare förklaring på mönstret. Behöver hjälp att förstå mönstret
04.05.2026 - 13:12DROPS Design answered:
Hei Helén. Du har 93 masker, strikk 5 framkantsmaskor i rätstickning, så strikkes det etter diagram A.2 (= avig följt m omsl, en räta ett oms en avig o en rät). Gjenta dette totalt 20 ganger = det er nå strikket over 85 masker. Strikk deretter etter A.3 (= avig följt m omsl, en räta ett oms en avig) + 5 framkantsmaskor i rätstickning = det er nå strikket over 93 masker og økt med 42 masker/omslag. Fra avigsidan: Stick omslagene vridet rätt (det ska inte bli hål. På pinne 3-4 økes det ikke, men på pinne 5 økes det igjen - Husk: Les diagramteksten på hvordan det økes. mvh DROPS Design
04.05.2026 - 13:55
 Elisabeth S wrote:
Hej Jeg er lige begyndy på cardigan og jeg forstår ikke helt forklaringenp å diagrammerne ...jeg strikker str. L..Diagram A 3 er det vrangpinden ? og A 2 er Retsiden..? Venlig hilsen Elisabeth
27.01.2025 - 10:47DROPS Design answered:
Hei Elisabeth. Nei. Jakken strikkes ovenfra og ned og når du starter med bærestykket strikker du 5 stolpemasker + strikk A.2 20 ganger (start nederst til høyre på diagrammet) + strikk diagram A.3 + strikk 5 stolpemasker = 93 masker + 42 kast. Snu arbeidet og strikk fra vrangen og 2. pinne i diagrammene (blank rute = vrang, rute med strek = rett). Kastene strikkes vridd rett (det skal ikke bli hull). Nå leser du diagrammene fra venstre mot høyre. Les mer om hvordan diagrammer strikkes under TIPS & HJELP - DROPS Leksjoner - Les en oppskrift - Hvordan lese strikkediagrammer. mvh DROPS Design
27.01.2025 - 14:22
 Rosa wrote:
Hvis vi tager str. S som eksempel. I halskanten står der at man skal slå 85 masker op, inklusive 5 kantmasker i hver side. Vil det sige at man skal slå 95 masker op i alt?
07.04.2024 - 18:47DROPS Design answered:
Hej Rosa. De 5 kantmasker er inkluderet (medregnet) i de 85 masker :)
09.04.2024 - 11:06
Marianne Marianne Mogensen wrote:
Hej, er kommet til bærestykket, str. XXL, har strikket A2 rapporter a 4 masker afsluttet med A1 (med udtagninger i alt 6 m pr rapport) Så står der: strik A3 rapporter 3 m ? er det fra retsiden, eller starter mønster A3 fra vrang-siden ? er lidt forvirret over forklaringen
22.01.2023 - 12:44DROPS Design answered:
Hei Marianne. Litt usikker på hva du mener med "afsluttet med A1". Om du strikker Bærestykket skal ikke A.1 strikkes (A.1 strikkes kun ved halskant), men du skal avslutte med A.3. mvh DROPS Design
23.01.2023 - 14:12
 MARIE JOSE GALERAND wrote:
J'ai un problème avec le diagramme. Est-ce que l'on fait A3 seulement à la fin des rangs ou bien A2 et A3 tout le long du rang Merci
23.10.2022 - 17:40DROPS Design answered:
Bonjour Mme Galerand, vous répétez A.2 sur l'endroit jusqu'à ce qu'il reste 8 mailles et terminez par A.3 + les 5 m de bordure devant, et sur l'envers, vous commencez par A.3 (lisez les diagrammes de gauche à droite) et répétez A.2. Bon tricot!
24.10.2022 - 09:16
|
|||||||||||||||||||
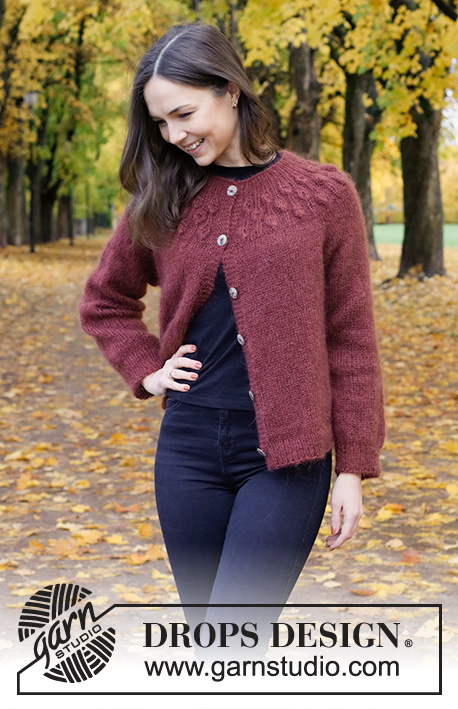
Blackforest Memories Cardigan#blackforestmemoriescardigan |
|||||||||||||||||||
 |
 |
||||||||||||||||||
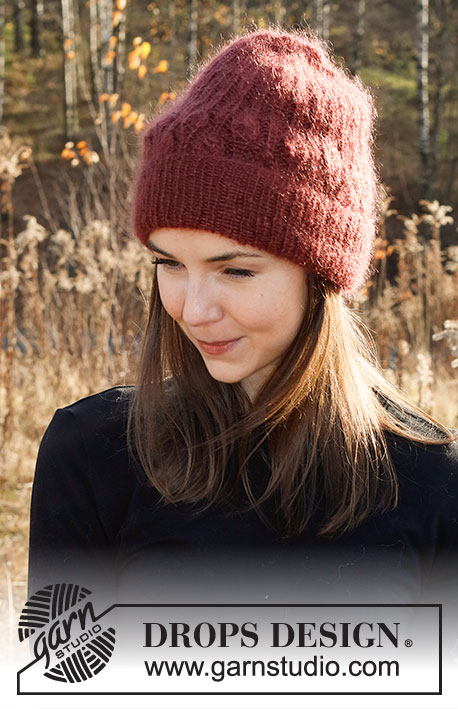
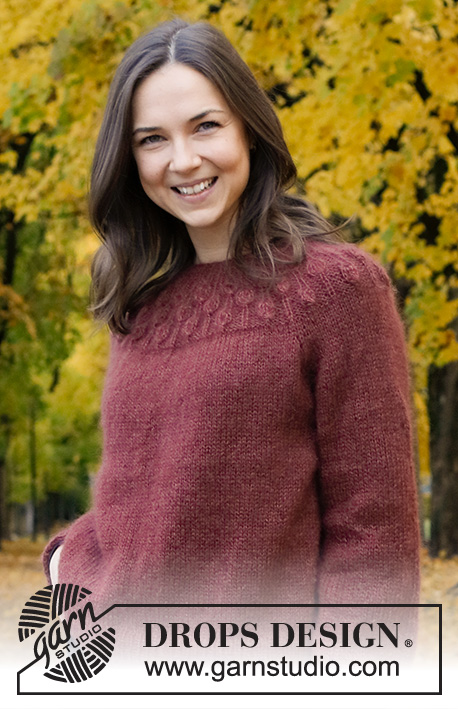
Knitted jacket in 2 strands DROPS Kid-Silk or 1 strand DROPS Brushed Alpaca Silk. Piece is knitted top down with round yoke, raglan and leaf pattern on yoke. Size: S - XXXL
DROPS 226-4 |
|||||||||||||||||||
|
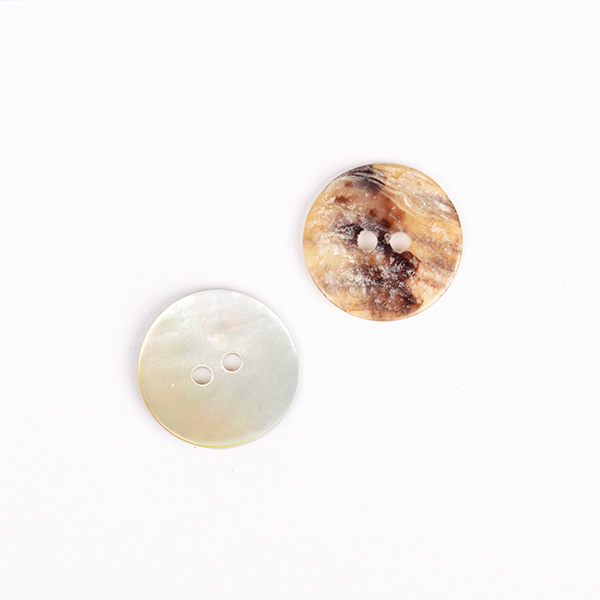
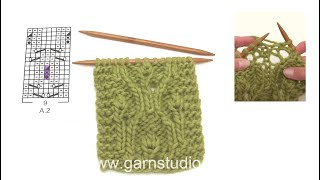
---------------------------------------------------------- EXPLANATION FOR THE PATTERN: ---------------------------------------------------------- GARTER STITCH (back and forth): Knit all rows. 1 ridge vertically = knit 2 rows. PATTERN: See diagrams A.1 to A.3. Choose diagram for your size (applies to A.2 and A.3). Diagrams show all rows in pattern seen from the right side. INCREASE/DECREASE TIP (evenly): To calculate how to increase/decrease evenly, use the total number of stitches on row (e.g. 199 stitches), minus bands (e.g. 10 stitches) , and divide the remaining 189 stitches by number of increases/decreases to be done (e.g. 6) = 31.5. In this example increase by making 1 yarn over after alternately every 31st and 32nd stitch (do not increase over bands). On next row work yarn overs twisted to avoid holes. If decreasing knit in this example every 30th and 31st stitch and every 31st and 32nd stitch together. RAGLAN: All increases are done from the right side. Increase 1 stitch in each side of the 4 stitches with marker - in every transition between front/back piece and sleeves (= 8 stitches increased on row). Increase 1 stitch by making 1 yarn over. On next row (wrong side) purl yarn over twisted to avoid holes. Then work the new stitches in stocking stitch. DECREASE TIP (applies to mid under sleeves): Decrease 1 stitch on each side of marker thread as follows: Work until 3 stitches remain before marker thread, knit 2 together, knit 2 stitches (marker thread is between these 2 stitches), slip 1 stitch knitwise, knit 1, pass slipped stitch over stitch worked (= 2 stitches decreased). BUTTONHOLES: Decrease for buttonholes on right band (when garment is worn). Decrease from right side when 4 stitches remain on row as follows: Make 1 yarn over, knit the next 2 stitches together, knit the last 2 stitches. On next row (wrong side) knit the yarn over to make a hole. Decrease first buttonhole when rib in neck measures approx. 2 cm. Then decrease the next 5-5-6-6-6-6 buttonholes, approx. 9½-10-8½-9-9½-9½ cm apart. CAST-OFF TIP: To avoid a tight cast-off edge when casting off, you may use a larger needle. If this still is too tight make 1 yarn over after approx. every 6th stitch while casting off (cast off yarn overs as stitches). ---------------------------------------------------------- START THE PIECE HERE: ---------------------------------------------------------- JACKET - SHORT OVERVIEW OF THE PIECE: Work neck edge and yoke back and forth on circular needle from mid front, work top down. Now divide yoke for body and sleeves. Work body back and forth on circular needle, top down. Work sleeves in the round on double pointed needles/short circular needle, top down. NECK EDGE: Cast on 85-89-93-97-101-105 stitches (including 5 band stitches in each side towards mid front) on circular needle size 4 mm with 2 strands DROPS Kid-Silk or 1 strand DROPS Brushed Alpaca Silk. Purl 1 row (= wrong side). Work next row as follows from right side: 5 band stitches in GARTER STITCH - read explanation above, work A.1 until 8 stitches remain on row (= 18-19-20-21-22-23 repetitions of 4 stitches), work the first 3 stitches in A.1 (so that pattern begins and ends the same in each side), and finish with 5 band stitches in garter stitch. Continue rib like this for 4 cm – remember BUTTONHOLES on right band – read explanation above, and finish after 1 row from wrong side. Insert 1 marker after band at the beginning of row mid front. Work yoke as explained below - measure yoke from this marker! YOKE: Switch to circular needle size 5 mm. Work first row as follows from right side: 5 band stitches in garter stitch, work A.2 until 8 stitches remain on row (= 18-19-20-21-22-23 repetitions of 4 stitches), work A.3 (= 3 stitches), and finish with 5 band stitches in garter stitch. Continue pattern back and forth like this and increase as shown in diagrams. When A.2 and A.3 have been worked vertically, there are 199-209-219-273-285-297 stitches on row and piece measures approx. 10-10-10-15-15-15 cm from marker by the neck. Work 2 rows in stocking stitch with 5 band stitches in garter stitch in each side - AT THE SAME TIME on first row increase 6-4-2-0-4-4 stitches evenly – read INCREASE/DECREASE TIP = 205-213-221-273-289-301 stitches. Now insert 4 new markers in the piece as explained below. Use these markers when increasing for raglan, and insert markers in piece without working: Count 35-37-38-45-49-52 stitches (= front piece), insert 1 marker in next stitch, count 36-36-38-50-50-50 stitches (= sleeve), insert 1 marker in next stitch, count 59-63-65-79-87-93 stitches (= back piece), insert 1 marker in next stitch, count 36-36-38-50-50-50 stitches (= sleeve), insert 1 marker in next stitch. 35-37-38-45-49-52 stitches remain on row after last marker (= front piece). Work in stocking stitch back and forth with 5 band stitches in garter stitch in each side towards mid front. AT THE SAME TIME on first row from right side increase for RAGLAN – read explanation above (= 8 stitches increased). Increase for raglan every other row (i.e. every row from right side) 0-2-3-0-2-3 times in total vertically and then every 4th row (i.e. every other row from right side) 5-5-5-5-4-5 times in total. After last increase there are 245-269-285-313-337-365 stitches on needle. Work in stocking stitch without increases, with 5 band stitches in garter stitch in each side towards mid front until yoke measures 20-22-24-25-27-29 cm from marker at the neck. Now divide yoke for body and sleeves and work last round as follows: Work 40-44-46-50-55-60 stitches as before (= front piece), slip the next 48-52-56-62-64-68 stitches on a stitch holder for sleeve, cast on 8-8-10-10-12-12 new stitches on row (= in the side under sleeve), work 69-77-81-89-99-109 stitches as before (= back piece), slip the next 48-52-56-62-64-68 stitches on a stitch holder for sleeve, cast on 8-8-10-10-12-12 new stitches on row (= in the side under sleeve) and work the remaining 40-44-46-50-55-60 stitches as before (= front piece). Finish body and sleeves separately. NOW MEASURE PIECE FROM HERE! BODY: = 165-181-193-209-233-253 stitches. Work in stocking stitch back and forth with 5 band stitches in garter stitch in each side towards mid front until piece measures 27 cm from division in all sizes. 4 cm remain until finished measurements. Try the jacket and work to desired length. Now increase stitches to stop the rib from contracting. Knit 1 row from right side while increasing 24-28-28-32-36-38 stitches evenly - remember INCREASE/DECREASE TIP = 189-209-221-241-269-291 stitches. Switch to circular needle size 4 mm. Work next row as follows from wrong side: 5 band stitches in garter stitch, * purl 1, knit 1 *, repeat from *-* until 6 stitches remain on needle, purl 1, and finish with 5 band stitches in garter stitch. Continue rib like this for 4 cm. Cast off stitches with knit over knit and purl over purl - read CAST-OFF TIP. Jacket measures approx. 54-56-58-60-62-64 cm from shoulder and down. SLEEVE: Slip the 48-52-56-62-64-68 stitches from stitch holder in one side of piece back on a short circular needle or double pointed needles size 5 mm – pick in addition up 1 stitch in each of the 8-8-10-10-12-12 stitches cast on under sleeve = 56-60-66-72-76-80 stitches. Insert 1 marker thread mid under sleeve - i.e. In the middle of the 8-8-10-10-12-12 stitches that were cast on under sleeves. Move the marker thread upwards when working; it should be used for decrease mid under sleeve. Begin round at the marker thread, and work stocking stitch in the round. When sleeve measures 3 cm from division in all sizes, decrease 2 stitches mid under sleeve - read DECREASE TIP. Decrease like this every 3 cm a total of 3-3-3-4-4-4 times vertically = 50-54-60-64-68-72 stitches. Continue until sleeve measures 38-36-34-35-33-32 cm from division (shorter measurements in the larger sizes because of wider neck and longer yoke). 6 cm remain until finished measurements. Try the jacket and work to desired length. Knit 1 round while decreasing 12-14-18-20-22-24 stitches evenly - read INCREASE/DECREASE TIP = 38-40-42-44-46-48 stitches. Switch to double pointed needles size 4 mm. Work rib in the round = knit 1/purl 1 for 6 cm. Cast off with knit over knit and purl over purl - remember CAST-OFF TIP. Sleeve measures approx. 44-42-40-40-39-38 cm from division. Work the other sleeve the same way. ASSEMBLY: Sew the buttons on to the left band. |
|||||||||||||||||||
Diagram explanations |
|||||||||||||||||||
|
|||||||||||||||||||
 |
|||||||||||||||||||
 |
|||||||||||||||||||
 |
|||||||||||||||||||
Have you finished this pattern?Tag your pictures with #dropspattern #blackforestmemoriescardigan or submit them to the #dropsfan gallery. Do you need help with this pattern?You'll find 22 tutorial videos, a Comments/Questions area and more by visiting the pattern on garnstudio.com. © 1982-2026 DROPS Design A/S. We reserve all rights. This document, including all its sub-sections, has copyrights. Read more about what you can do with our patterns at the bottom of each pattern on our site. |
|||||||||||||||||||






With over 40 years in knitting and crochet design, DROPS Design offers one of the most extensive collections of free patterns on the internet - translated to 17 languages. As of today we count 333 catalogues and 12525 patterns translated into English (UK/cm). 12525
We work hard to bring you the best knitting and crochet have to offer, inspiration and advice as well as great quality yarns at incredible prices! Would you like to use our patterns for other than personal use? You can read what you are allowed to do in the Copyright text at the bottom of all our patterns. Happy crafting!
Post a comment to pattern DROPS 226-4
We would love to hear what you have to say about this pattern!
If you want to leave a question, please make sure you select the correct category in the form below, to speed up the answering process. Required fields are marked *.