Comments / Questions (5)
![]() Barbara wrote:
Barbara wrote:
Thanks for the very quick and clear reply. I see where I went wrong. After the single knit row with the 1st buttonhole at the end, I started the next row with stockinette stitch which I thought always started with a Knit row. So then I worked an extra knit row which turned the whole piece from right to left. It's not a big deal, as the buttons will now just be on the right instead of the left.
23.06.2023 - 16:13
![]() Barbara Higdon wrote:
Barbara Higdon wrote:
This is a great pattern, seemingly easy and straight forward. But as I interpret the instructions, the buttonholes end up on the left side. If you work the 1st buttonhole on the Knit row immediately following the 2 knit ridges of 4 rows (that would be row 5 and a knit row) and need to work the buttonhole at the end of the row as indicated, for me, that works out to be the front left side of the cardigan (as correct side is facing).
22.06.2023 - 19:29DROPS Design answered:
Dear Mrs Higdon, when you work a jacket top down you start from right side with left front piece and finish with right front piece, reason why the buttonholes will be worked at the end of a row from right side - for the right front piece. Happy knitting !
23.06.2023 - 07:50
![]() Sheryl wrote:
Sheryl wrote:
When knitting in the round the graph shows I need to knit from the wrong side. I am knitting from the right side and not purling from the wrong side. Do I purl the stitches the graph tells me to knit from the wrong side since all stitches are completed from the right side?
24.06.2021 - 20:54DROPS Design answered:
Dear Sheryl, diagrams alwas show the patterns as you would see the stitch from the right side. So if there is a stitch that shows a knit stitch, that should be knitted from the right side and purled from the wrong side. When knitting on the round (always from the right side, always knit as shown in the pattern. Happy Stitching!
24.06.2021 - 21:01
![]() Sheryl wrote:
Sheryl wrote:
Working in the round from a graph. The graph shows knit from the wrong side but in the round all knitting is from the right side. How do I handle this row?
24.06.2021 - 06:41DROPS Design answered:
Hi Sheryl, When working in the round on the sleeves, you work all rows in the diagram straight after each other, so from right to left and as you say all from the right side. Happy knitting!
24.06.2021 - 08:25
![]() Abelia wrote:
Abelia wrote:
Je salue le retour du mannequin senior qui m’avait manqué !
05.02.2021 - 22:20
Sweet Susan Cardigan#sweetsusancardigan |
|||||||||||||||||||||||||
 |
 |
||||||||||||||||||||||||
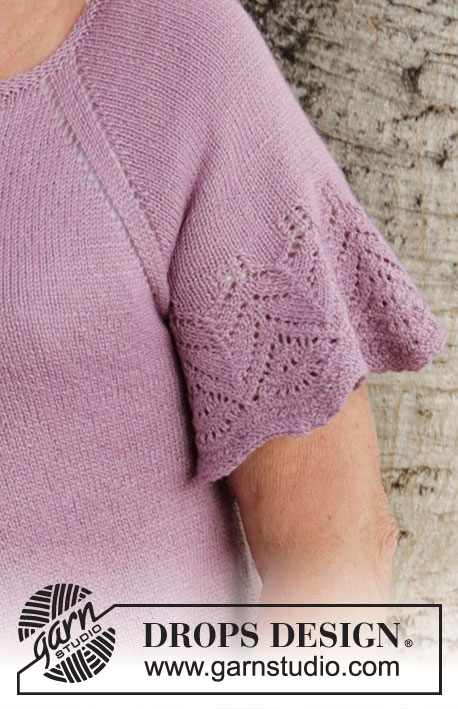
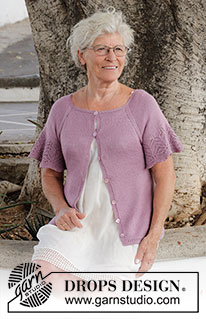
Knitted jacket in DROPS BabyAlpaca Silk. The piece is worked top down with raglan, lace pattern and winged-sleeves. Sizes S - XXXL.
DROPS 220-35 |
|||||||||||||||||||||||||
|
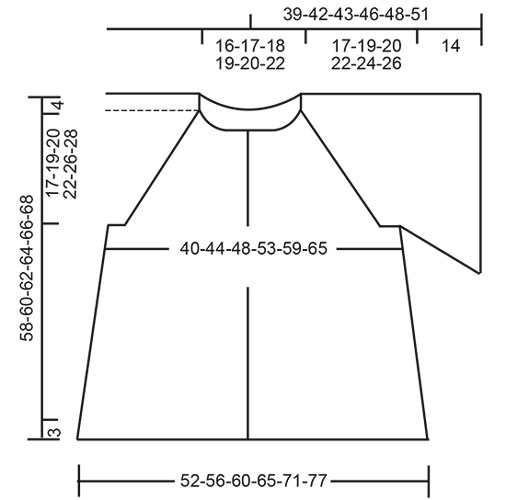
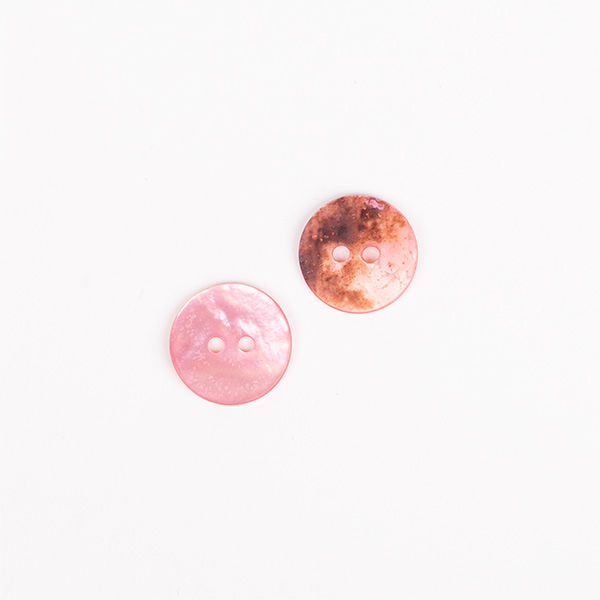
------------------------------------------------------- EXPLANATIONS FOR THE PATTERN: ------------------------------------------------------- RIDGE/GARTER STITCH (worked back and forth): Knit all rows. 1 ridge in height = Knit 2 rows. BUTTONHOLES: The first buttonhole is worked on the first row after the 2 ridges of the neck. The other 6-6-6-7-7-7 buttonholes are then worked with approx. 8-8½-9-8-8-8½ cm between each one. Work the buttonholes on the right band (when garment is worn). Work until there are 3 stitches left on row as follows: Make 1 yarn over, knit 2 together and knit the last stitch. On the next row knit the yarn over to leave a hole. RAGLAN: All increases are worked from the right side! Increase on each side of all marker threads as follows: Work until there are 2 stitches left before the marker thread, 1 yarn over, knit 4 (marker thread sits between these 4 stitches), 1 yarn over. On the next row (wrong side) purl the yarn overs to leave holes. A total of 8 stitches are increased on the row. HOLES WITHOUT INCREASING: When the increases to raglan are finished, work as described here to continue the raglan-line, but without further increases. Work holes on each side of all marker threads as follows: Work from the right side, until there are 4 stitches left before the marker thread, knit 2 together 1 yarn over, knit 4 (marker thread sits between these 4 stitches), 1 yarn over, slip 1 stitch as if to knit, knit 1 and pass the slipped stitch over the knitted stitch, On the next row purl the yarn overs to leave holes. PATTERN: See diagrams A.1 to A.3. The diagrams show all rows in the pattern from the right side. INCREASE TIP (for sides of body): All increases are worked from the right side! Work until there are 2 stitches left before the marker thread, make 1 yarn over, knit 4 (marker thread sits between these 4 stitches) make 1 yarn over, Repeat at the other marker thread; 4 stitches increased on row. On the next row purl the yarn overs twisted to avoid holes. CASTING-OFF TIP: To avoid the cast-off edge being tight you can cast off with a larger size needle. If the edge is still tight, make 1 yarn over after approx. each 4th stitch at the same time as casting off; the yarn overs are cast off as normal stitches. ------------------------------------------------------- START THE PIECE HERE: ------------------------------------------------------- JACKET – SHORT OVERVIEW OF THE PIECE: The neck and yoke are worked back and forth with circular needle from mid front and top down. The yoke is divided for body and sleeves and the body continued back and forth. The sleeves are worked in the round with short circular needle/double pointed needles. YOKE: Cast on 126-130-134-142-146-154 stitches (including 5 band stitches on each side towards mid front) with circular needle size 2.5 mm and BabyAlpaca Silk. Work 2 RIDGES – read description above. Change to circular needle size 3 mm, remember BUTTONHOLE – read description above. Knit 1 row from the right side, AT THE SAME TIME insert 4 marker threads as follows: 5 band stitches in garter stitch, work 19-20-21-23-24-26 stitches in stocking stitch (= front piece), insert 1 marker thread, work 20 stitches in stocking stitch (= sleeve), insert 1 marker thread, work 38-40-42-46-48-52 stitches in stocking stitch (= back piece), insert 1 marker thread, work 20 stitches in stocking stitch (= sleeve), insert 1 marker thread, work 19-20-21-23-24-26 stitches in stocking stitch and finish with 5 band stitches in garter stitch (= front piece). REMEMBER THE KNITTING TENSION! Continue with stocking stitch and band stitches in garter stitch, and increase 1 stitch on each side of all marker threads to RAGLAN – see description above. Increase every 2nd row (each row from the right side) a total of 24-28-31-35-40-44 times. REMEMBER the buttonholes on the right band! After all the increases there are 318-354-382-422-466-506 stitches. Continue working HOLES WITHOUT INCREASING – read description above, until the piece measures 17-19-20-22-26-28 cm from the cast-on edge mid front. Now divide for the body and sleeves on the next row as follows: Work the first 48-53-57-63-69-75 stitches, place the next 68-76-82-90-100-108 stitches on a thread for the sleeve (without working them), cast on 10-10-12-12-14-16 stitches (= under the sleeve), work 86-96-104-116-128-140 stitches, place the next 68-76-82-90-100-108 stitches on a thread for the sleeve (without working them), cast on 10-10-12-12-14-16 stitches (= under the sleeve), work the remaining 48-53-57-63-69-75 stitches. Insert 1 marker thread in the middle of the 10-10-12-12-14-16 new stitches under each sleeve. BODY: = 202-222-242-266-294-322 stitches. THE PIECE IS NOW MEASURED FROM HERE! Continue with stocking stitch and band stitches in garter stitch as before. When the piece measures 3 cm, increase 1 stitch on each side of both marker threads – read INCREASE TIP. Increase like this every 2 cm a total of 14 times = 258-278-298-322-350-378 stitches. When the piece measures 34-34-35-35-33-33 cm, change to circular needle size 2.5 mm. Work 5 band stitches in garter stitch, A.1 until there are 5 stitches left and 5 band stitches in garter stitch. When the diagram has been completed, cast off with circular needle size 3 mm, making sure the cast-off edge is not tight – read CASTING-OFF TIP in explanations above). The jacket measures approx. 37-37-38-38-38-38 cm from the division and 58-60-62-64-66-68 cm from the shoulder. SLEEVES: Place the 68-76-82-90-100-108 stitches from the thread on the one side of the piece on double pointed needles/short circular needle size 3 mm and knit up 1 stitch in each of the 10-10-12-12-14-16 stitches cast on under the sleeve = 78-86-94-102-114-124 stitches. Move the beginning of the round to mid-under the sleeve and work in the round as follows: Work 4-3-2-1-2-2 stitches in A.2, then A.3 (= 10 stitches) over the next 70-80-90-100-110-120 stitches (= 7-8-9-10-11-12 repeats) and finish with 4-3-2-1-2-2 stitches in A.2. Work A.2 and A.3 until there is 1 round left = 141-158-175-192-213-232 stitches. Cast off as shown in the diagrams (make sure the cast-off edge is not tight). Work the other sleeve in the same way. ASSEMBLY: Sew the buttons onto the left band. |
|||||||||||||||||||||||||
Diagram explanations |
|||||||||||||||||||||||||
|
|||||||||||||||||||||||||
 |
|||||||||||||||||||||||||
 |
|||||||||||||||||||||||||
Have you finished this pattern?Tag your pictures with #dropspattern #sweetsusancardigan or submit them to the #dropsfan gallery. Do you need help with this pattern?You'll find 27 tutorial videos, a Comments/Questions area and more by visiting the pattern on garnstudio.com. © 1982-2026 DROPS Design A/S. We reserve all rights. This document, including all its sub-sections, has copyrights. Read more about what you can do with our patterns at the bottom of each pattern on our site. |
|||||||||||||||||||||||||







Post a comment to pattern DROPS 220-35
We would love to hear what you have to say about this pattern!
If you want to leave a question, please make sure you select the correct category in the form below, to speed up the answering process. Required fields are marked *.