
Popular categories
Looking for a yarn?


Comments / Questions (24)
![]() Hélène wrote:
Hélène wrote:
Bonjour je ne comprends pas pour relever les mailles du col : en sachant que j'avais monté 36 mailles pour le dos et 108 mailles pour le devant et donc j'arrive déjà à 144 mailles. Le problème c'est qu'on me demande de relever 100 mailles et ensuite augmenter à 142 mailles. Je tricote la taille XXL. Comment faire ? Merci pour votre réponse et à très bientôt.
25.03.2026 - 15:05DROPS Design answered:
Bonjour Hélène, retrouvez ici, en vidéo comment on va relever les mailles autour de l'encolure avec un empiècement de ce type: vous allez relever les mailles le long des 36 m montées pour le dos + le long des 15 cm de chaque devant avant de les joindre + dans les 24 mailles montées entre les 2 épaules pour l'encolure devant. Comme il faudra plus de mailles pour les côtes (car elles ont tendance à resserrer), on va augmenter au 1er tour pour avoir 142 mailles - si vous avez déjà 144 m dès le début, vous pouvez probablement diminuer 2 mailles au 1er rang (pensez à enfiler la robe pour vérifier que l'encolure a bien la bonne taille). Bon tricot!
25.03.2026 - 16:19
![]() Hélène wrote:
Hélène wrote:
Bonsoir Merci pour votre réponse par rapport aux croisements des mailles pour les fentes sur les côtés de la robe. Bonne fin de journée.
12.03.2026 - 17:19
![]() Hélène wrote:
Hélène wrote:
Bonjour je ne comprends pas pour tricoter A1 au dessus des 12 mailles du milieu et que le fil marqueur se trouve au milieu de ces douze mailles. Or de chaque côté du fil marqueur j'ai douze mailles. Est-ce que je dois tricoter A1 sur 12 mailles de chaque côté du fil marqueur ou bien ? Merci pour votre réponse. A bientôt.
09.03.2026 - 15:43DROPS Design answered:
Bonjour Hélène, le fil marqueur est sur le côté et doit se trouver au milieu des 12 mailles. On va ainsi former une petite torsade = on va croiser les mailles pour que la fente du côté soit plus nette: la dernière maille du dos/du devant va être croisée avec la 1ère maille du devant/du dos. Bon tricot!
09.03.2026 - 16:43
![]() Hélène wrote:
Hélène wrote:
Bonjour je ne comprends pas comment placer les quatres nouveaux marqueurs pour les repères des fentes et il n'y a pas de vidéo pour celà. Merci pour votre aide. Bonne journée
26.02.2026 - 09:58DROPS Design answered:
Bonjour Hélène, les 4 marqueurs se placent en comptant les mailles à partir du début du tour: 1er fil marqueur = début du tour( = au milieu des mailles montées sous une des manches), puis comptez 10-13 m (cf taille), placez le marqueur-1 ici , comptez 56-102 m, placez le marqueur-2 ici, comptez 20-26 m, placez le 3ème marqueur ici, comptez 56-102 m et mettez le 4ème marqueur ici. Il va vous rester 10-13 avant la fin du tour. Ces marqueurs servent de repères pour les augmentations, laissez suivre les fils marqueur (début du tour + autre côté de la robe) pour plus tard. Bon tricot!
26.02.2026 - 10:17
![]() Kirsten wrote:
Kirsten wrote:
Hallo, ich bräuchte die Anleitung für die Konfektionsgröße 58. Kann ich das selber umrechnen? Vielen Dank und herzliche Grüße Kirsten
23.02.2026 - 17:26DROPS Design answered:
Liebe Kirsten, schauen Sie doch mal in der Maßskizze, ob nicht da schon die passende Größe dabei ist. Eine weitere Größe können wir Ihnen leider nicht anbieten. Selbst umrechnen ist bei dieser Konstruktion des Kleides auch nicht ganz einfach. Schauen Sie ansonsten doch noch mal bei den andere Kleidern samt Maßskizzen. Viel Spaß beim Stöbern!
23.02.2026 - 19:49
![]() Hélène wrote:
Hélène wrote:
Bonjour après avoir tricoté mes 10cm pour taille XXL je ne comprends pas même en regardant la vidéo : à quel moment dois-je relever les mailles pour la manche ? Est-ce après avoir augmenté les 6 mailles côté encolure devant ou pendant ? Si pendant, après combien d'augmentations car la vidéo n'est pas claire sur ce point. Merci pour votre aide. A bientôt.
19.02.2026 - 15:44DROPS Design answered:
Bonjour Hélène, à quel niveau précis en êtes vous? Aux 10 premiers cm du devant/de l'épaule gauche? Vous devez alors d'abord augmenter pour l'encolure (12 rangs en XXL), le devant mesure 15 cm, mettez en attente et tricotez l'épaule droite jusqu'aux 15 cm. Montez ensuite les mailles de l'encolure devant entre les 2 épaules et tricotez 1 cm = 16 cm. Au rang suivant, vous allez tricoter le devant (dim. 1 m de chaque côté du devant), relever les m de la 1ère manche, tricoter le dos (et dim. 1 m de chaque côté) et relever les mailles de la 2ème manche. Bon tricot!
20.02.2026 - 07:47
![]() Rita wrote:
Rita wrote:
Guten Tag. Ich brauche Hilfe beim Rippenmuster mit I-Cord-Rand. Die Hinreihe stricke ich so wie beschrieben. Stricke ich die Rückreihe auch so oder die Maschen wie sie erscheinen? Wenn ich die Rückreihe wie beschrieben stricke, bekomme ich kein Rippenmuster. Liebe Grüße
15.01.2026 - 17:38DROPS Design answered:
Liebe Rita, stricken Sie die Maschen von A.1 wie im Diagram beschrieben, dh wie sie ercheinen, so bei den Rückreihen lesen Sie rechts nach links und stricken Sie so: (1 re, 1 li, 1 re, 1 li, 1 re, 2 li, 1 re, 1 li, 1 re, 1 li, 1 re). Viel Spaß beim Stricken!
16.01.2026 - 09:04
![]() Melanie wrote:
Melanie wrote:
Hallo ich glaube beim Ärmel hat sich ein Fehler eingeschlichen. Da steht das ich ab Teilung nach 13 cm 2 Maschen zunehmen soll und dann nach 5 cm noch mal. Somit dann 70 Maschen auf der Nadel habe. Weiter unten heißt es aber dann ich soll für das Bündchen 4 Maschen verteilt zunehmen und hätte dann 66 Maschen?
06.01.2026 - 08:32DROPS Design answered:
Liebe Melanie, Sie sind ja recht, man muss am Ende der Ärmel regelmäßig verteilt abnehmen (und nicht zunehmen), danke für den Hinweis, eine Korrektur erfolgt. Viel Spaß beim Stricken!
06.01.2026 - 09:43
![]() Lisa Westlie wrote:
Lisa Westlie wrote:
Ser ikke noe sted hvor mange m jeg skal legge opp på kjolen
02.01.2026 - 14:43DROPS Design answered:
Hei Lisa. Denne kjolen har et europeisk bærestykke strikket ovenfra og ned. Du starter med bakstykket, så skulderstykkene/forstykkene, deretter settes bakstykket og forstykket sammen, samtidig som det økes masker. mvh DROPS Design
05.01.2026 - 10:12
![]() Cynthia Hallensleben wrote:
Cynthia Hallensleben wrote:
Goedemorgen, Ik wil it patroon gaan maken. Er staat een telpatroon beschreven, maar ik zie in het uitgeschreven patroon dit telpatroon nergens terug komen. Overal staat 'brei in tricotsteek'. Moet ik dit telpatroon nu wel of niet gebruiken en vanaf waar?. Alvast vriendelijk bedankt voor de hulp.
23.12.2025 - 09:27DROPS Design answered:
Dag Cynthia,
Het telpatroon wordt alleen bij de split aan de zijkanten op het pand gebruikt. Verder wordt het werkstuk inderdaad alleen in tricotsteek gebreid.
24.12.2025 - 11:38
|
|||||||||||||
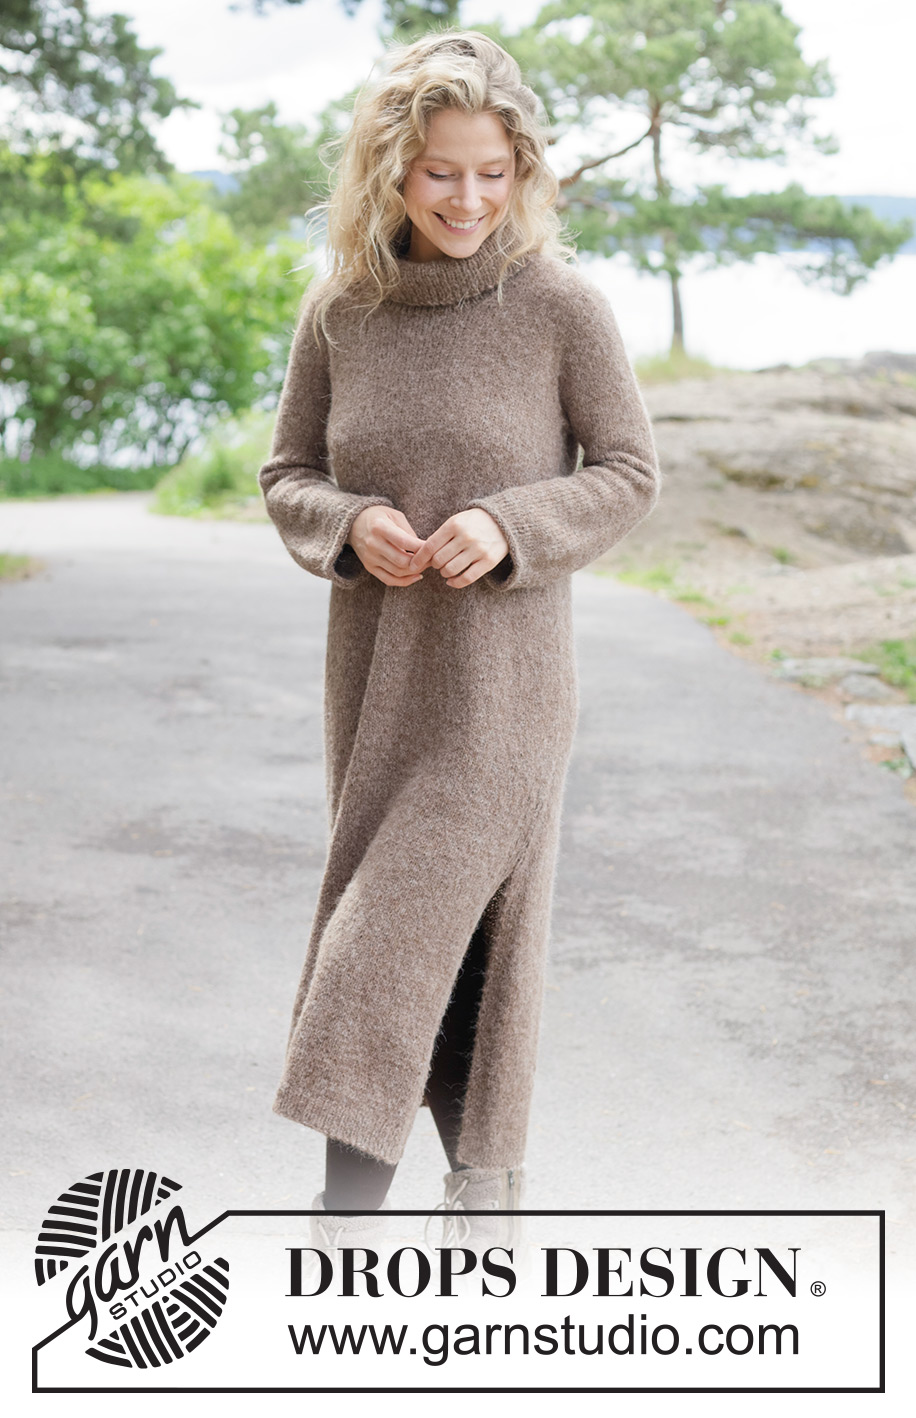
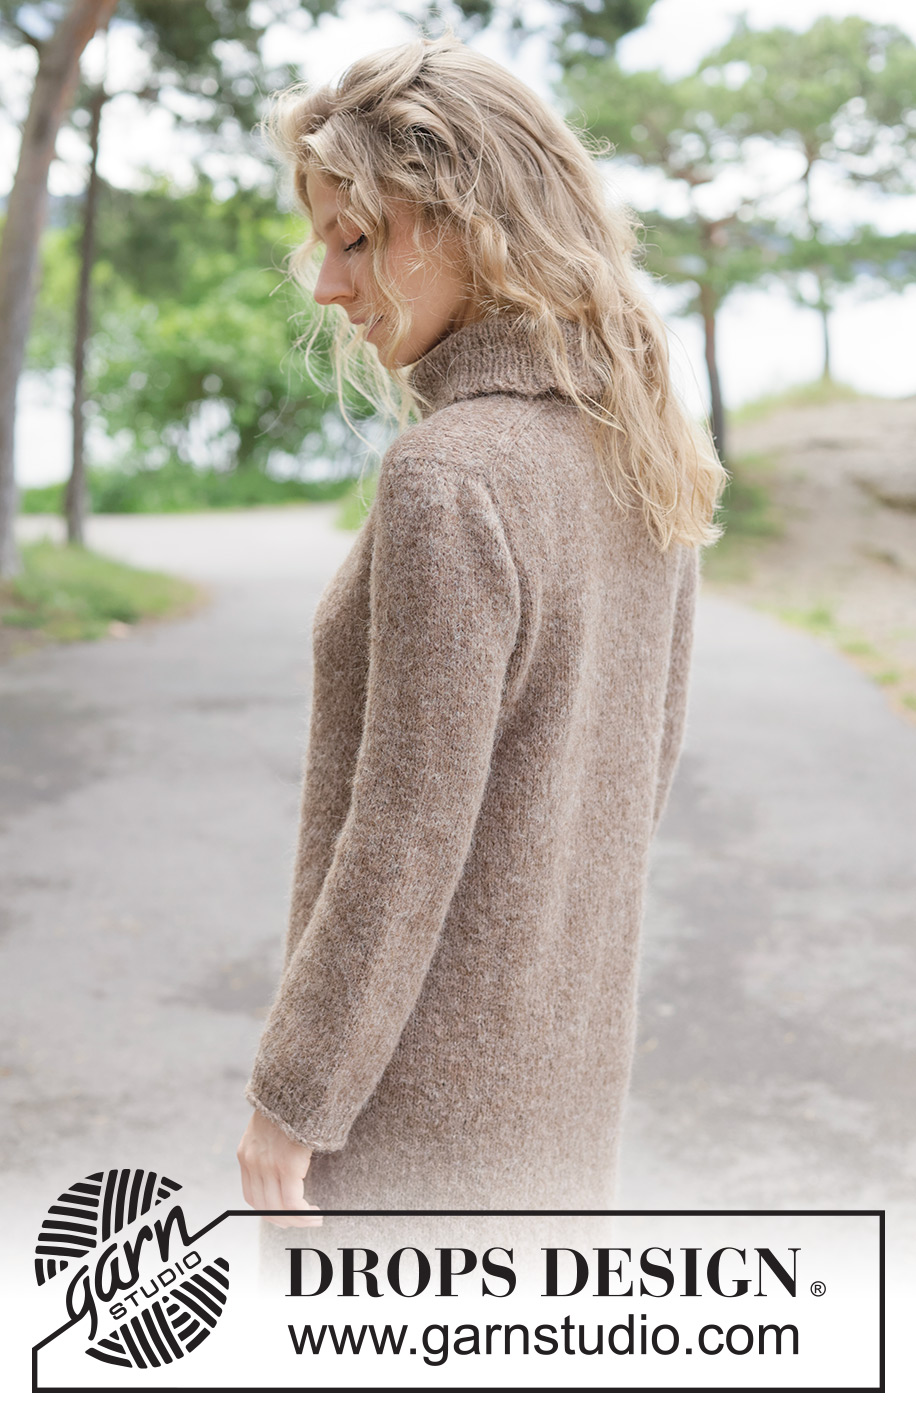
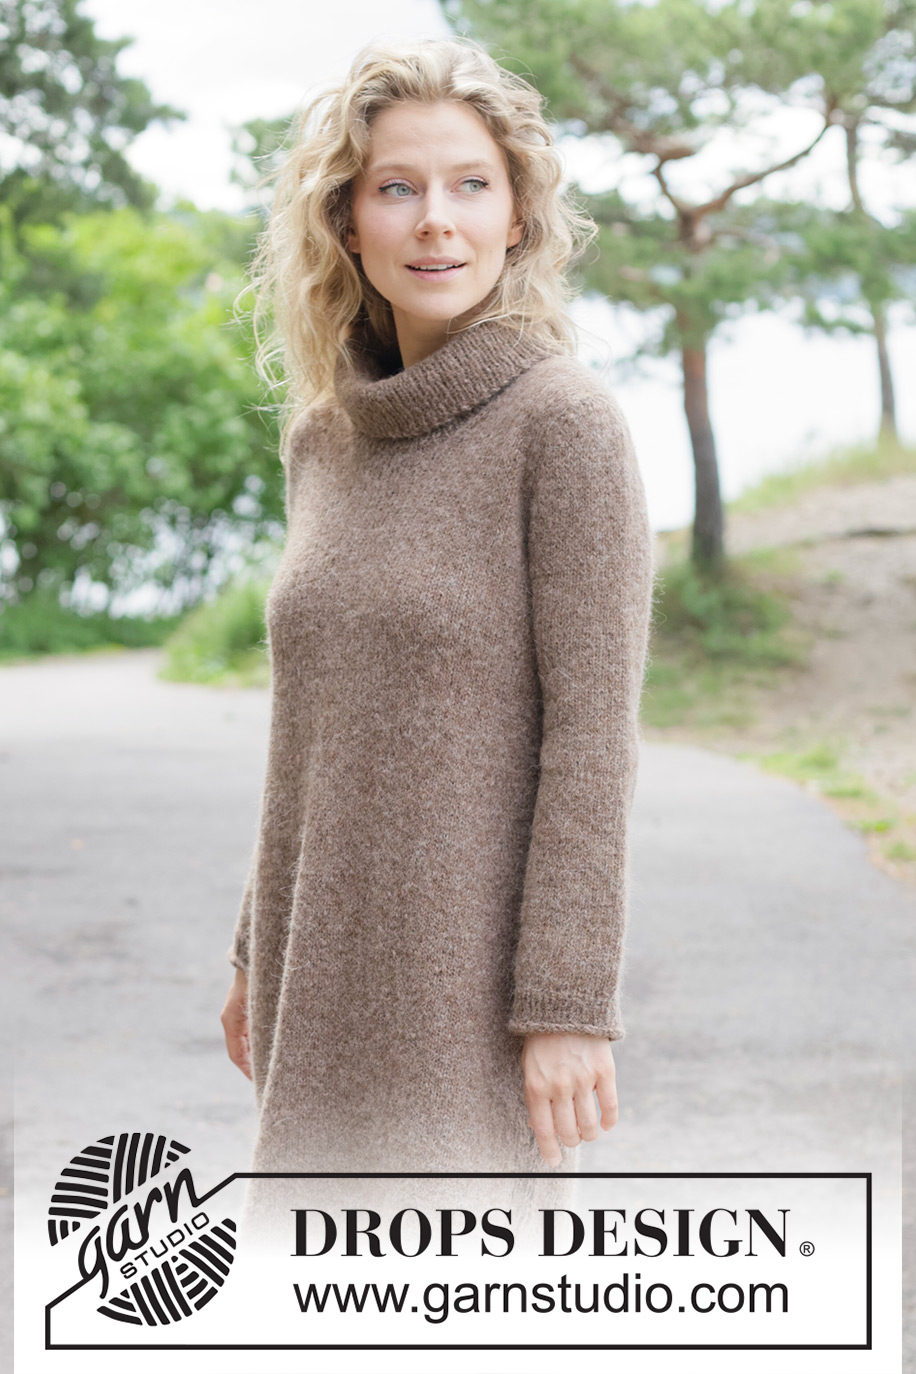
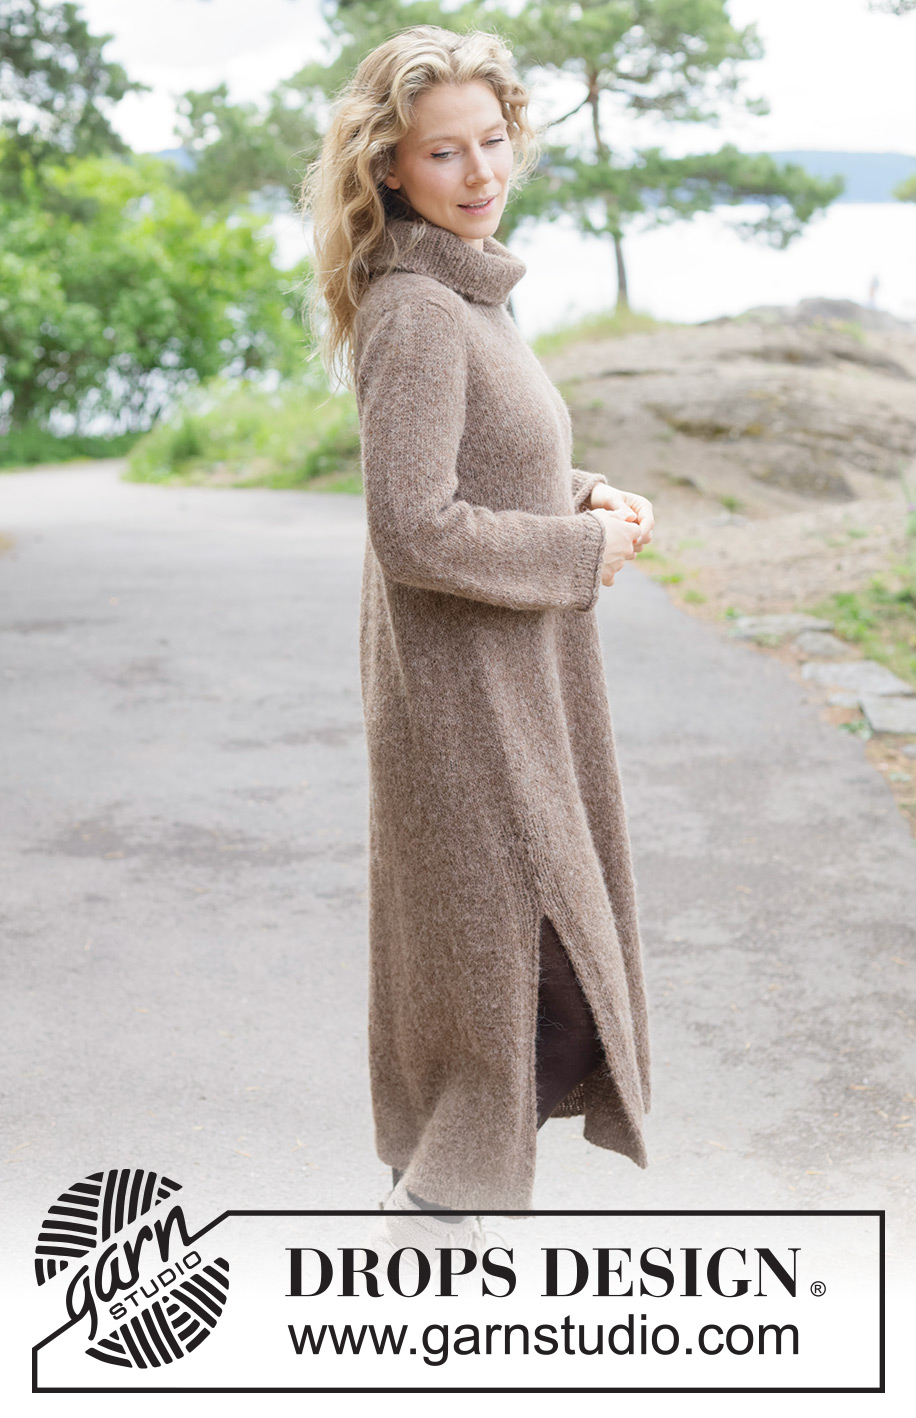
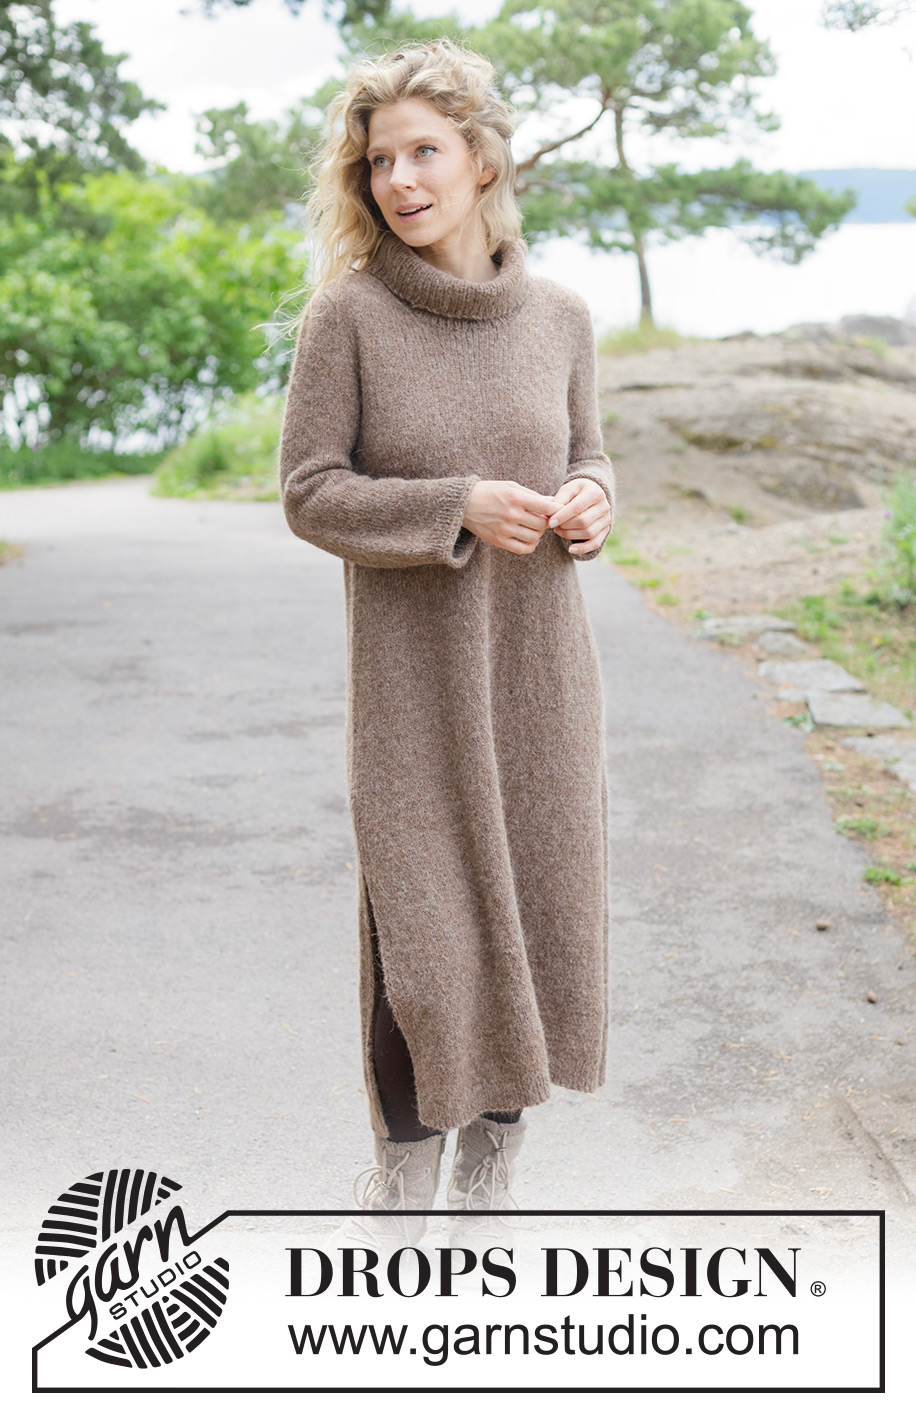
Autumn Walk Dress#autumnwalkdress |
|||||||||||||
 |
 |
||||||||||||
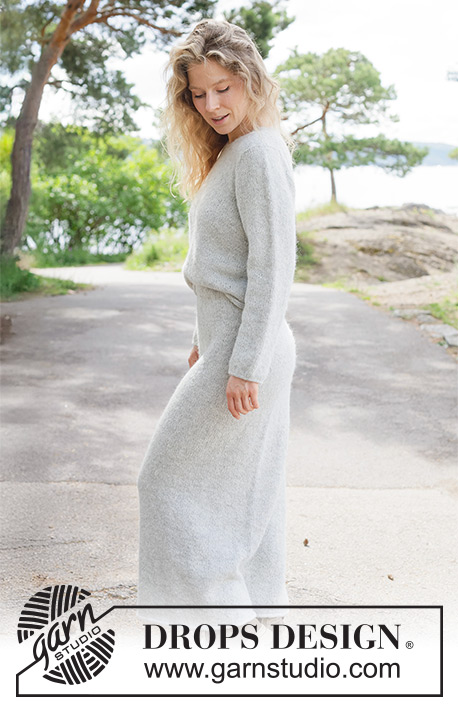
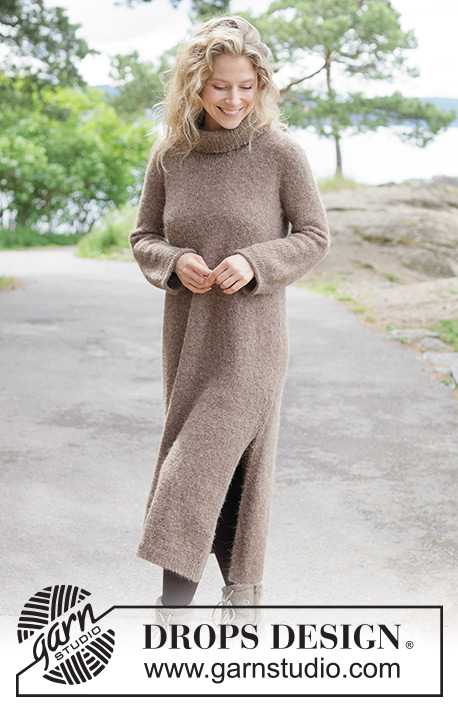
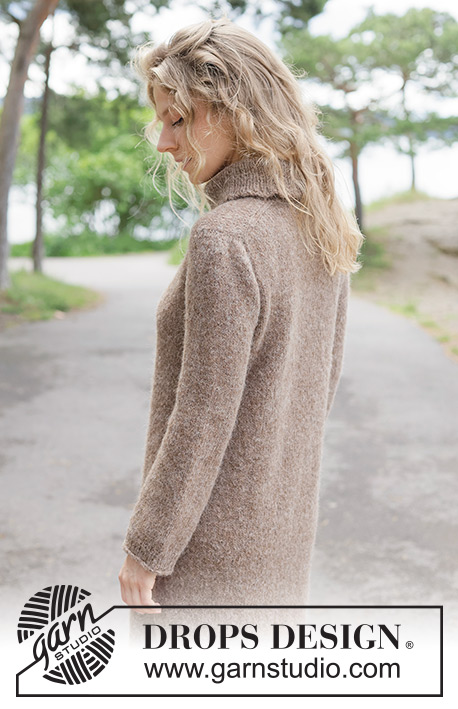
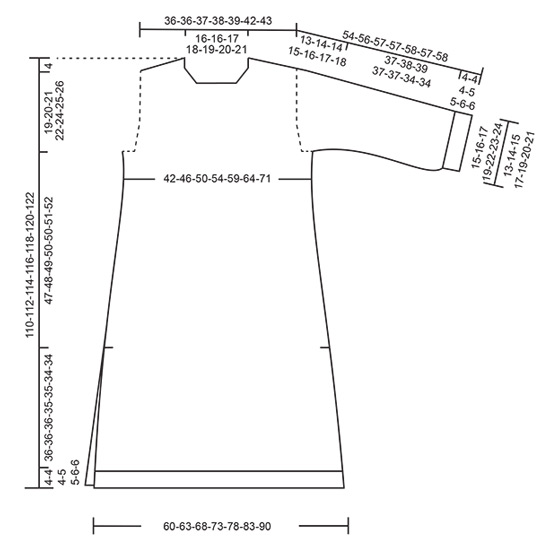
Knitted dress in DROPS Brushed Alpaca Silk and DROPS Alpaca. The piece is worked top down in stocking stitch, with European yoke, split in sides, rolled edge and I-cord. Sizes XS - XXXL.
DROPS 262-4 |
|||||||||||||
|
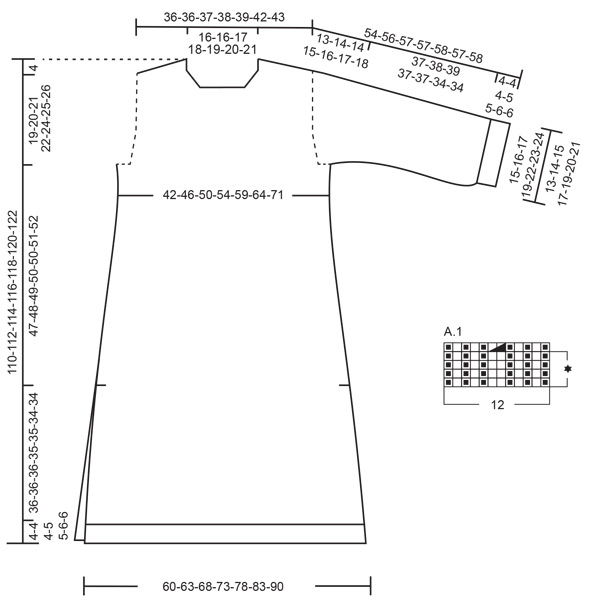
------------------------------------------------------- EXPLANATIONS FOR THE PATTERN: ------------------------------------------------------- INCREASE TIP-1: INCREASE 1 STITCH TOWARDS THE LEFT - from RIGHT SIDE: Use left needle to pick up yarn between 2 stitches from row below, pick up yarn from the front and knit in the stitch loop that is on the back of the needle. INCREASE 1 STITCH TOWARDS THE RIGHT - from RIGHT SIDE: Use left needle to pick up yarn between 2 stitches from row below, pick up yarn from the back and knit in the stitch loop that is on the front side of the needle. . INCREASE TIP-2: INCREASE 1 STITCH TOWARDS THE RIGHT - from WRONG SIDE: Use left needle to pick up yarn between 2 stitches from row below, pick up yarn from the back and purl in the stitch loop that is on the front side of the needle. INCREASE 1 STITCH TOWARDS THE LEFT - from WRONG SIDE: Use left needle to pick up yarn between 2 stitches from row below, pick up yarn from the front and purl in the stitch loop that is on the back side of the needle. PATTERN: See diagram A.1. The diagram shows all rows in the pattern from the right side. RIB WITH I-CORD: START OF ROW: Work the edge as follows: Slip 1 stitch purl-wise with the strand in front, knit 1, purl 1, knit 1, purl 1, knit 1, purl 1. END OF ROW: Work the edge as follows: Work until there are 7 stitches left, purl 1, knit 1, purl 1, knit 1, purl 1, slip 1 stitch purl-wise with the strand in front, knit 1. DECREASE TIP: Decrease 1 stitch on each side of the marker-thread as follows: Work until there are 3 stitches left before the marker-thread, knit 2 together, knit 2 (marker-thread sits between these 2 stitches), slip 1 stitch knit-wise, knit 1 and pass the slipped stitch over the knitted stitch (2 stitches decreased). SLEEVE TIP: When knitting up stitches under the sleeve, you can get a small hole in the transition between stitches on the body and sleeve. This hole can be closed by picking up the strand between 2 stitches and working this strand twisted together with the first stitch between body and sleeve. ------------------------------------------------------- START THE PIECE HERE: ------------------------------------------------------- DRESS - SHORT OVERVIEW OF THE PIECE: The pattern uses both long and short needles; start with the length which fits the number of stitches and change when necessary. Work according to points 1 – 5. 1 BACK PIECE: Cast on stitches for the back of the neck. Work the back piece back and forth, increasing stitches on each side until the shoulder stitch count has been achieved. The back piece has slightly diagonal shoulder. 2 FRONT PIECE: Worked in 2 sections to begin with (each side of neck). You knit up stitches along the back shoulder, working downwards and increasing for the neckline. Repeat on the other shoulder. Then stitches are cast on for the neckline and the 2 shoulders are joined. The front piece is worked back and forth to the correct measurement. 3 YOKE: Place the front and back pieces on the same needle, working first the front piece, knitting up stitches for one sleeve along one side of the front piece, then working the back piece and knitting up stitches for the second sleeve along the other side of the front piece. Continue in the round. 4 INCREASE FOR BODY AND SLEEVES: While working the yoke, you increase stitches first for the sleeves and later for the body. 5 BODY AND SLEEVES: When the yoke is finished, it is divided and the body is continued in the round while the sleeves wait. The body is divided for the split in each side and the front and back pieces are finished separately back and forth. Then the sleeves are worked in the round, top down. Stitches are knitted up around the neckline and the neck is worked in the round to finish. BACK PIECE: Cast on 30-30-32-34-36-38-40 stitches with circular needle size 4 mm, 1 strand DROPS Brushed Alpaca Silk and 1 strand DROPS Alpaca (2 strands). ROW 1 (wrong side): Purl. ROW 2 (right side): Read INCREASE TIP-1. Knit 3, increase 1 stitch towards the left, knit until there are 3 stitches left, increase 1 stitch towards the right, knit 3. ROW 3 (wrong side): Read INCREASE TIP-2. Purl 3, increase 1 stitch towards the right, purl until there are 3 stitches left, increase 1 stitch towards the left, purl 3. Work ROWS 2 and 3 a total of 9-9-9-9-9-10-10 times (18-18-18-18-18-20-20 rows worked) = 66-66-68-70-72-78-80 stitches. Remember to maintain the knitting tension. Cut the strand and place the stitches on a thread/stitch holder. LEFT SHOULDER: Find the left back shoulder as follows: Lay the back piece flat, right side up, with the thread/stitch holder towards you; left side of piece = left shoulder. Start from the right side by the neck and knit up 1 stitch in each row along the back left shoulder inside the outermost stitch (18-18-18-18-18-20-20 stitches), then knit up 1 stitch outermost on the shoulder (edge stitch) = 19-19-19-19-19-21-21 shoulder-stitches. Insert 1 marker by the neck. All lengths on the front piece are measured from here. Work stocking stitch, with the first row from the wrong side, until the piece measures 6-7-7-8-10-10-10 cm. Now increase for the neckline as follows: ROW 1 (right side): Remember INCREASE TIP-1. Knit 3, increase 1 stitch towards the left, work to end of row. ROW 2 (wrong side): Purl. Work ROWS 1 and 2 a total of 4-4-5-5-5-6-6 times (8-8-10-10-10-12-12 rows worked) = 23-23-24-24-24-27-27 stitches. The increases for the neckline are finished. The piece measures approx. 9-10-11-12-14-15-15 cm from the marker. Some of this neckline will lie on the back piece. Neckline in front = 7-8-9-9-10-11-11 cm. Neckline at back = 2-2-2-3-4-4-4 cm. Cut the strand and place the stitches on a thread/stitch holder. Work the right shoulder as follows: RIGHT SHOULDER: Start from the right side by the armhole and knit up 1 stitch outermost on the shoulder (edge stitch), then knit up 1 stitch in each row along the shoulder, inside the outermost stitch = 19-19-19-19-19-21-21 shoulder-stitches. Insert 1 marker by the neck. All lengths on the front piece are measured from here. Work stocking stitch, with the first row from the wrong side, until the piece measures 6-7-7-8-10-10-10 cm. Now increase for the neckline as follows: ROW 1 (right side): Knit until there are 3 stitches left, increase 1 stitch towards the right, knit 3 - remember INCREASE TIP-1. ROW 2 (wrong side): Purl. Work ROWS 1 and 2 a total of 4-4-5-5-5-6-6 times (8-8-10-10-10-12-12 rows worked) = 23-23-24-24-24-27-27 stitches. The increases for the neckline are finished. The piece measures approx. 9-10-11-12-14-15-15 cm from the marker. Some of this neckline will lie on the back piece. Neckline in front = 7-8-9-9-10-11-11 cm. Neckline at back = 2-2-2-3-4-4-4 cm. FRONT PIECE: On the next row from the right side join the 2 shoulders together for the front piece as follows: Knit the 23-23-24-24-24-27-27 stitches on the right front shoulder, cast on 20-20-20-22-24-24-26 stitches for the neckline, knit the 23-23-24-24-24-27-27 stitches from the left front shoulder = 66-66-68-70-72-78-80 stitches. Work stocking stitch back and forth until the piece measures 11-11-12-13-16-16-16 cm from the marker, with the last row from the wrong side. The front and back pieces are now joined for the yoke, and stitches are knitted up for the sleeves as follows: ROW 1 (right side): Knit together the first 2 stitches on the front piece (1 stitch decreased), knit until there are 2 stitches left on the front piece, slip 1 stitch, knit 1 and pass the slipped stitch over (1 stitch decreased), insert 1 marker here, knit up 20-20-22-24-28-28-28 stitches along the left-hand side of the front piece inside the outermost stitch (= sleeve-stitches), insert 1 marker, knit together the first 2 stitches on the back piece (1 stitch decreased), knit until there are 2 stitches left on the back piece, slip 1 stitch, knit 1 and pass the slipped stitch over (1 stitch decreased), insert 1 marker here, knit up 20-20-22-24-28-28-28 stitches along the right-hand side of the front piece inside the outermost stitch (= sleeve-stitches), insert 1 marker here = 168-168-176-184-196-208-212 stitches. YOKE: Continue in the round. ROUND 1: Knit and increase 1 stitch on each side of both sleeves – remember INCREASE TIP-1 – increasing 1 stitch towards the left at the beginning of the sleeve and 1 stitch towards the right at the end of the sleeve, the stitch count on the sleeves increases but remains the same on the front and back pieces = 22-22-24-26-30-30-30 stitches on the sleeves, 64-64-66-68-70-76-78 stitches on the front and back pieces = 172-172-180-188-200-212-216 stitches Continue as follows: ROUND 1: Knit and increase 1 stitch on each side of both sleeves – remember INCREASE TIP-1 – increase 1 stitch towards the left at the beginning of the sleeve and 1 stitch towards the right at the end of the sleeve, the stitch count on the sleeves increases but remains the same on the front and back pieces. ROUND 2: Knit. Work ROUNDS 1 and 2 a total of 12-11-8-8-7-6-3 times (24-22-16-16-14-12-6 rounds worked; a total of 13-12-9-9-8-7-4 increases in height on the sleeves, with 46-44-40-42-44-42-36 sleeve-stitches and 64-64-66-68-70-76-78 stitches on the front and back pieces) = 220-216-212-220-228-236-228 stitches. Continue as follows: ROUND 1: Knit 2, increase 1 stitch towards the left, knit until there are 2 stitches left on the front piece before the first marker, increase 1 stitch towards the right, knit 2, move the marker onto the right needle, increase 1 stitch towards the left, knit to the next marker (= sleeve), increase 1 stitch towards the right, move the marker onto the right needle, knit 2, increase 1 stitch towards the left, knit until there are 2 stitches left on the back piece, before the next marker, increase 1 stitch towards the right, knit 2, move the marker onto the right needle, increase 1 stitch towards the left, knit to the next marker (= sleeve), increase 1 stitch towards the right, move the marker onto the right needle (= 8 increased stitches, with 1 increased stitch on each side of 2 stitches in each transition between body and sleeves). ROUND 2: Knit. Work ROUNDS 1 and 2 a total of 3-5-8-10-12-14-18 times (6-10-16-20-24-28-36 rounds worked. A total of 16-17-17-19-20-21-22 increases in height on the sleeve and 3-5-8-10-12-14-18 increases in height on the body = 52-54-56-62-68-70-72 stitches on each sleeve and 70-74-82-88-94-104-114 stitches on the front and back pieces) = 244-256-276-300-324-348-372 stitches. The sleeve measures approx. 13-14-14-15-16-17-18 cm – NOTE: If the jumper is folded double at the shoulder, it measures approx. 19-20-21-22-24-25-26 cm from the top of the shoulder and down the armhole. If the piece is shorter than this, continue working to the correct measurement without increasing. Now divide for the body and sleeves. DIVIDE FOR BODY AND SLEEVES: Knit the first 70-74-82-88-94-104-114 stitches (= front piece), place the next 52-54-56-62-68-70-72 stitches on a thread for the sleeve, cast on 6-8-8-10-12-12-14 stitches (mid-under the sleeve), knit 70-74-82-88-94-104-114 (= back piece), place the next 52-54-56-62-68-70-72 stitches on a thread for the sleeve, cast on 6-8-8-10-12-12-14 stitches (mid-under the sleeve). The body and sleeves are finished separately. BODY: = 152-164-180-196-212-232-256 stitches. Insert 1 marker-thread in the middle of the 6-8-8-10-12-12-14 cast-on stitches under each sleeve and allow the threads to follow your work onwards, they are used when dividing for the split each side. Work to the first marker; the round now begins here. Insert 4 new markers, without working the stitches, these markers are used when increasing for the body. Start by the marker-thread, count 10-10-11-11-12-12-13 stitches, insert marker-1 before the next stitch, count 56-62-68-76-82-92-102 stitches (= back piece), insert marker-2 before the next stitch, count 20-20-22-22-24-24-26 stitches (marker-thread sits in the middle of these stitches), insert marker-3 before the next stitch, count 56-62-68-76-82-92-102 stitches (= front piece), insert marker-4 before the next stitch, there are 10-10-11-11-12-12-13 stitches left on the round. You now increase and divide for the split each side – read both of the next 2 sections before continuing. INCREASES: When the body measures 7-9-10-11-11-12-13 cm from the cast-on stitches under the sleeve, increase 1 stitch towards the left after markers 1 and 3 and increase 1 stitch towards the right before markers 2 and 4 – remember INCREASE TIP-1 (4 increased stitches). Increase like this every 2½ cm a total of 8-8-8-10-10-10-10 times, then every 4½ cm 8-8-8-7-7-7-7 times (a total of 16-16-16-17-17-17-17 increases by each marker) – the stitch count on the front and back pieces increases but remains the same under each sleeve (= 20-20-22-22-24-24-26 stitches). SPLIT EACH SIDE: AT THE SAME TIME, when the piece measures 35-36-37-38-38-39-40 cm from the division, work A.1 across the middle 12 stitches on each side (the marker-thread sits in the middle of these 12 stitches), continuing the other stitches in stocking stitch. Repeat the first 4 rows in the diagram until the piece measures 46-47-48-49-49-50-51 cm from the division. Now work the last row in A.1, i.e., increase 2 stitches each side. When A.1 is finished, divide for the split each side at the marker-threads in the middle of A.1. Place the front piece stitches on a thread/stitch holder and continue the back piece as follows: BACK PIECE: Work stocking stitch back and forth with 7 stitches RIB WITH I-CORD on each side – read explanation above (remember to continue increasing). When all the increases are finished, there are 110-116-124-134-142-152-164 stitches. Work until the piece measures 83-84-85-85-85-85-86 cm from the division – there is approx. 4-4-4-5-5-6-6 cm left to finished length; try the dress on and work to desired length before the rib. On the next row (right side) start the rib, AT THE SAME TIME increase 13-13-15-15-17-17-19 stitches evenly on the row (do not increase across the 7 outermost stitches each side) = 123-129-139-149-159-169-183 stitches, working as follows: Change to circular needle size 3 mm, work 7 stitches rib with I-cord as before, work rib (knit 1, purl 1 – remember to increase) until there are 8 stitches left, knit 1 and 7 stitches rib with I-cord as before. When the rib measures 4-4-4-5-5-6-6 cm, cast off a little loosely with rib or with Italian cast-off. The dress measures approx. 110-112-114-116-118-120-122 cm from the top of the shoulder. FRONT PIECE: Place the stitches from the thread/stitch holder back on circular needle size 4 mm and work in the same way as the back piece. SLEEVES: Place the 52-54-56-62-68-70-72 sleeve-stitches from one thread on circular needle size 4 mm and knit up 1 stitch in each of the 6-8-8-10-12-12-14 stitches cast on under the sleeve – read SLEEVE TIP = 58-62-64-72-80-82-86 stitches. Insert a marker-thread in the middle of the 6-8-8-10-12-12-14 stitches under the sleeve- the round starts by the marker-thread. Work stocking stitch in the round. AT THE SAME TIME, when the sleeve measures 1 cm from the division, decrease mid-under the sleeve – read DECREASE TIP as follows: Decrease 2 stitches every 2 cm a total of 4-4-3-3-3-2-2 times = 50-54-58-66-74-78-82 stitches. Continue working until the sleeve measures 14-14-13-13-12-12-11 cm from the division. Now increase mid-under the sleeve – read INCREASE TIP and increase 2 stitches every 6-6-6-5-5-5-5 cm a total of 2 times = 54-58-62-70-78-82-86 stitches. Continue working until the sleeve measures 37-38-39-37-37-34-34 cm from the division. Change to double pointed needles size 3 mm. Work rib (knit 1, purl 1), AT THE SAME TIME decrease 4 stitches evenly on the first round = 50-54-58-66-74-78-82 stitches. When the rib measures 4-4-4-5-5-6-6 cm, knit 3 rounds (rolled edge). Change to double pointed needles size 4 mm and cast off slightly loosely with knit. The sleeve measures approx. 41-42-43-42-42-40-40 cm from the division. NECK: Use circular needle size 3 mm and 1 strand of each quality (2 strands). Start from the right side by one shoulder-line and knit up approx. 74-76-82-86-94-100-102 stitches inside 1 stitch. Knit 1 round and increase to 106-110-118-124-134-142-148 stitches (divisible by 2). Work rib in the round (knit 1, purl 1) for 14-14-14-15-15-16-16 cm. Change to circular needle size 4 mm and cast off a little loosely with rib or with Italian cast-off. |
|||||||||||||
Diagram explanations |
|||||||||||||
|
|||||||||||||
 |
|||||||||||||
 |
|||||||||||||
Have you finished this pattern?Tag your pictures with #dropspattern #autumnwalkdress or submit them to the #dropsfan gallery. Do you need help with this pattern?You'll find 41 tutorial videos, a Comments/Questions area and more by visiting the pattern on garnstudio.com. © 1982-2026 DROPS Design A/S. We reserve all rights. This document, including all its sub-sections, has copyrights. Read more about what you can do with our patterns at the bottom of each pattern on our site. |
|||||||||||||


With over 40 years in knitting and crochet design, DROPS Design offers one of the most extensive collections of free patterns on the internet - translated to 17 languages. As of today we count 325 catalogues and 12298 patterns translated into English (UK/cm). 12298
We work hard to bring you the best knitting and crochet have to offer, inspiration and advice as well as great quality yarns at incredible prices! Would you like to use our patterns for other than personal use? You can read what you are allowed to do in the Copyright text at the bottom of all our patterns. Happy crafting!
Post a comment to pattern DROPS 262-4
We would love to hear what you have to say about this pattern!
If you want to leave a question, please make sure you select the correct category in the form below, to speed up the answering process. Required fields are marked *.