
Popular categories
Looking for a yarn?


Comments / Questions (1)
![]() Teresa Wong wrote:
Teresa Wong wrote:
Hello, I’m working on the jumper body after ribbing! Please clarify the portion after Round 2 and before Round 3 where 2 thread markers are placed to mark the sides of the jumper…. Thank you
12.03.2025 - 23:37DROPS Design answered:
Dear Mrs Wong, after you have worked round 2, just count the number of stitches in stocking stitch before first row A.1 then insert the first marker thread = first side of sweater (it might not be the beginning of the round in your size), then count the same number of stitches in stocking stitch after A.3 and insert the 2nd marker thread = you have now marked the sides and should get between 62 and 90 sts stocking stitch in between for back piece. Happy knitting!
13.03.2025 - 15:48
|
|||||||||||||||||||||||||
Irish Sky#irishskysweater |
|||||||||||||||||||||||||
 |
 |
||||||||||||||||||||||||
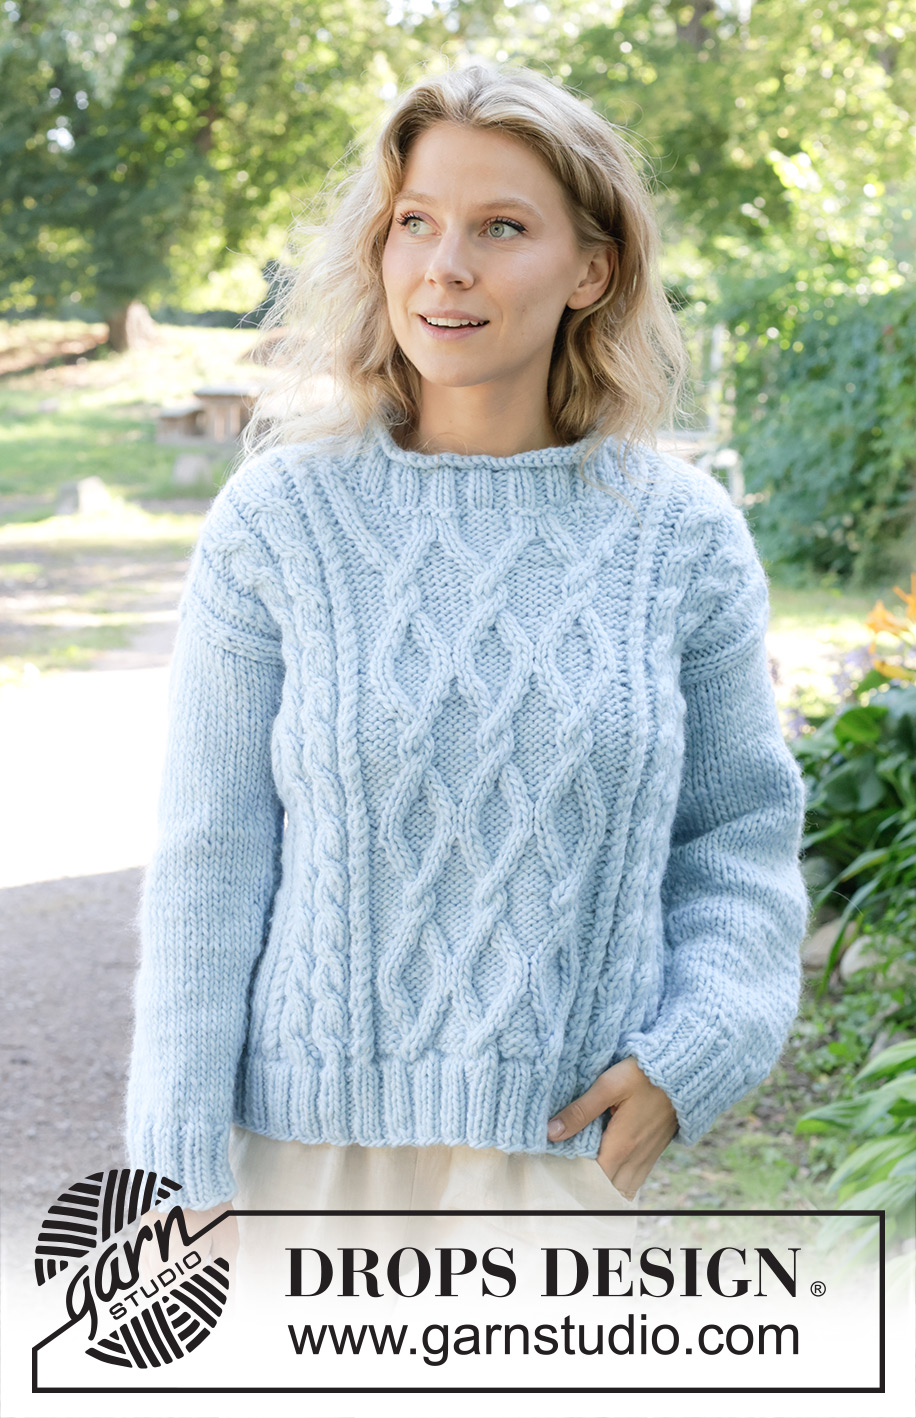
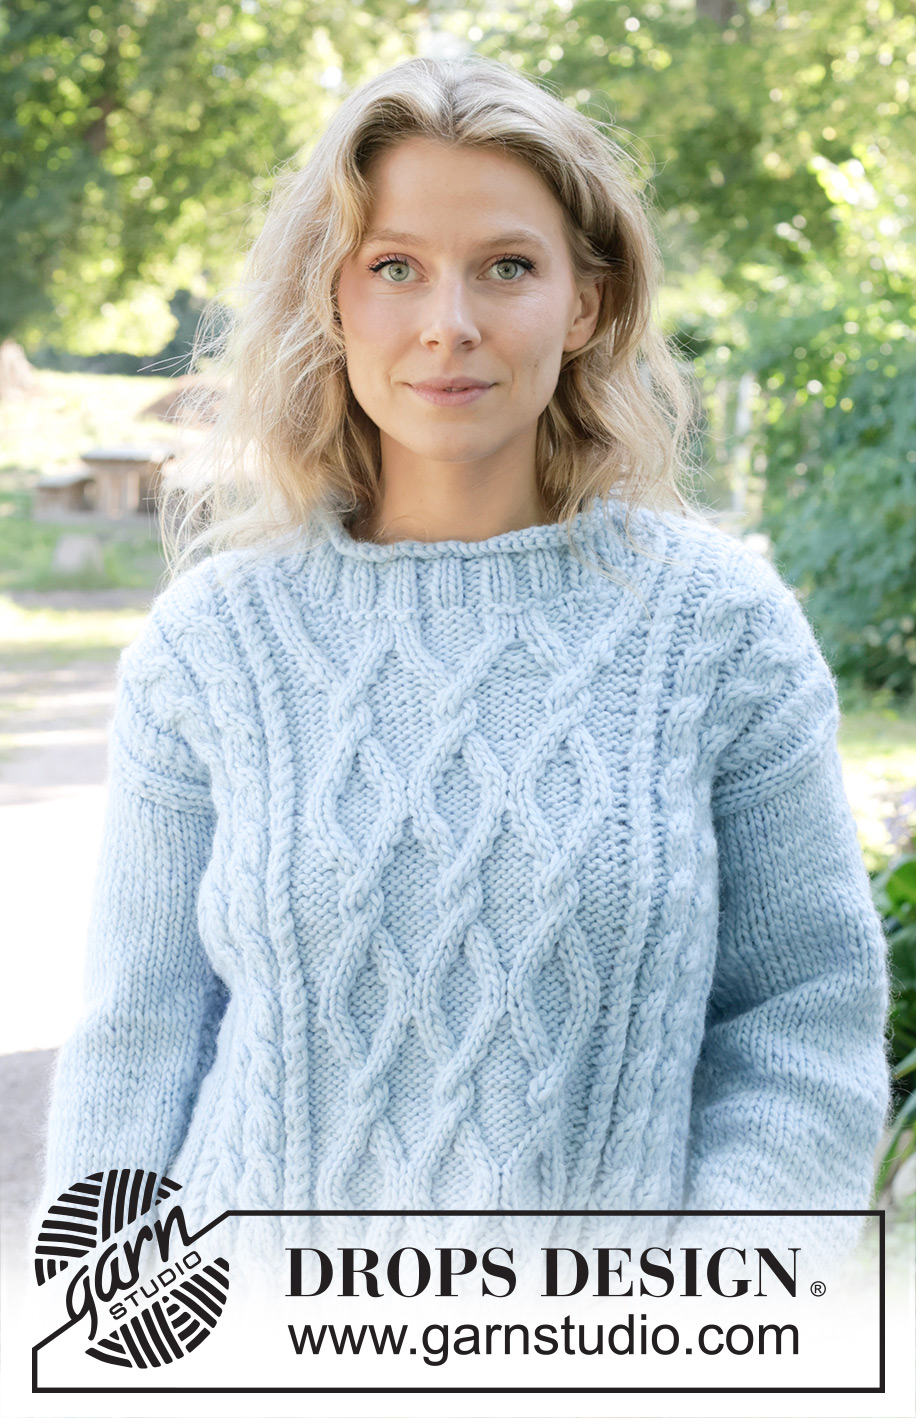
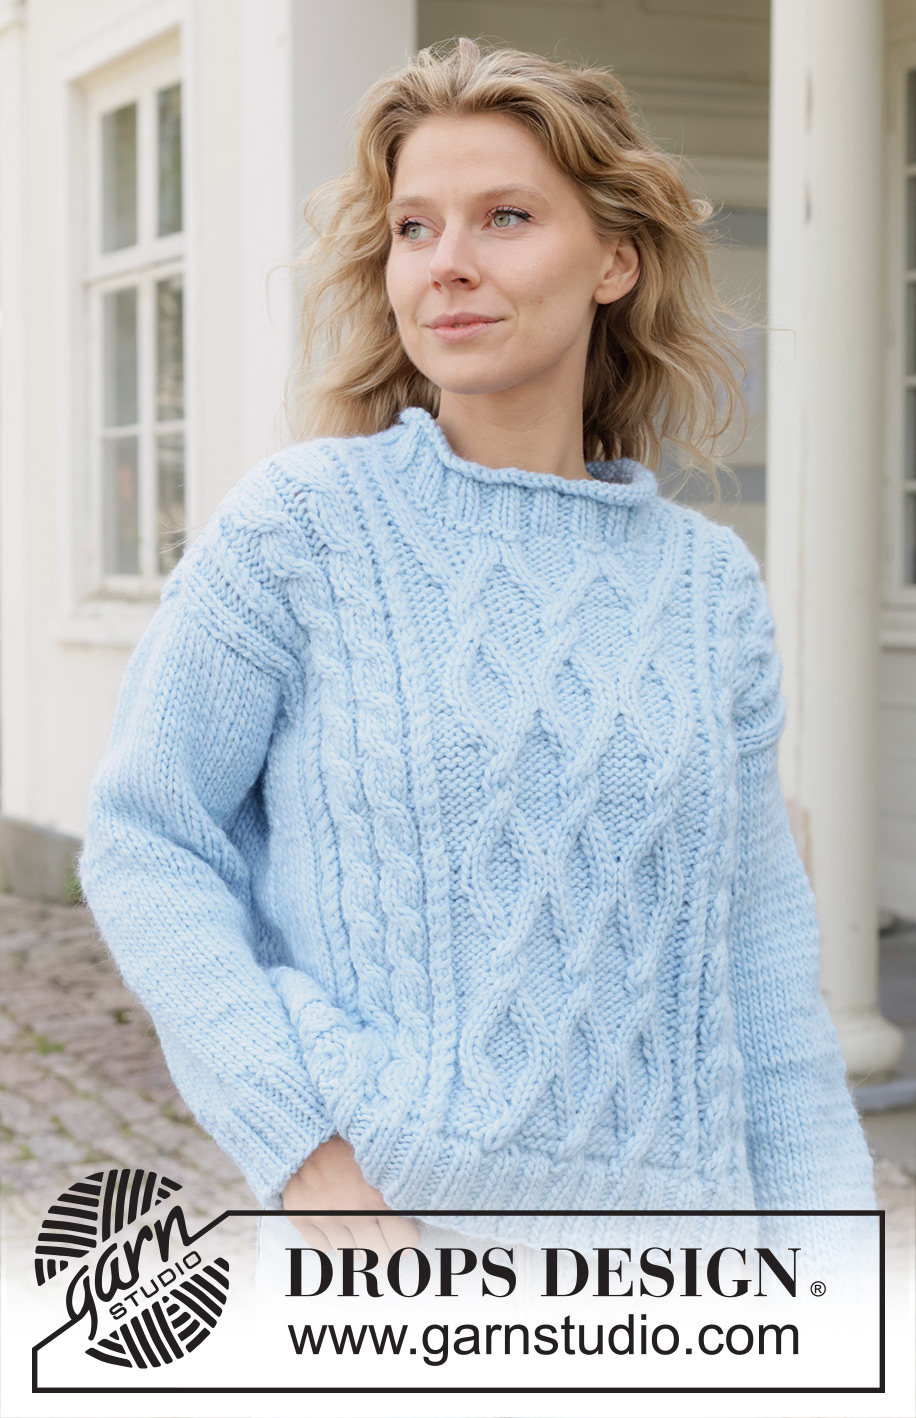
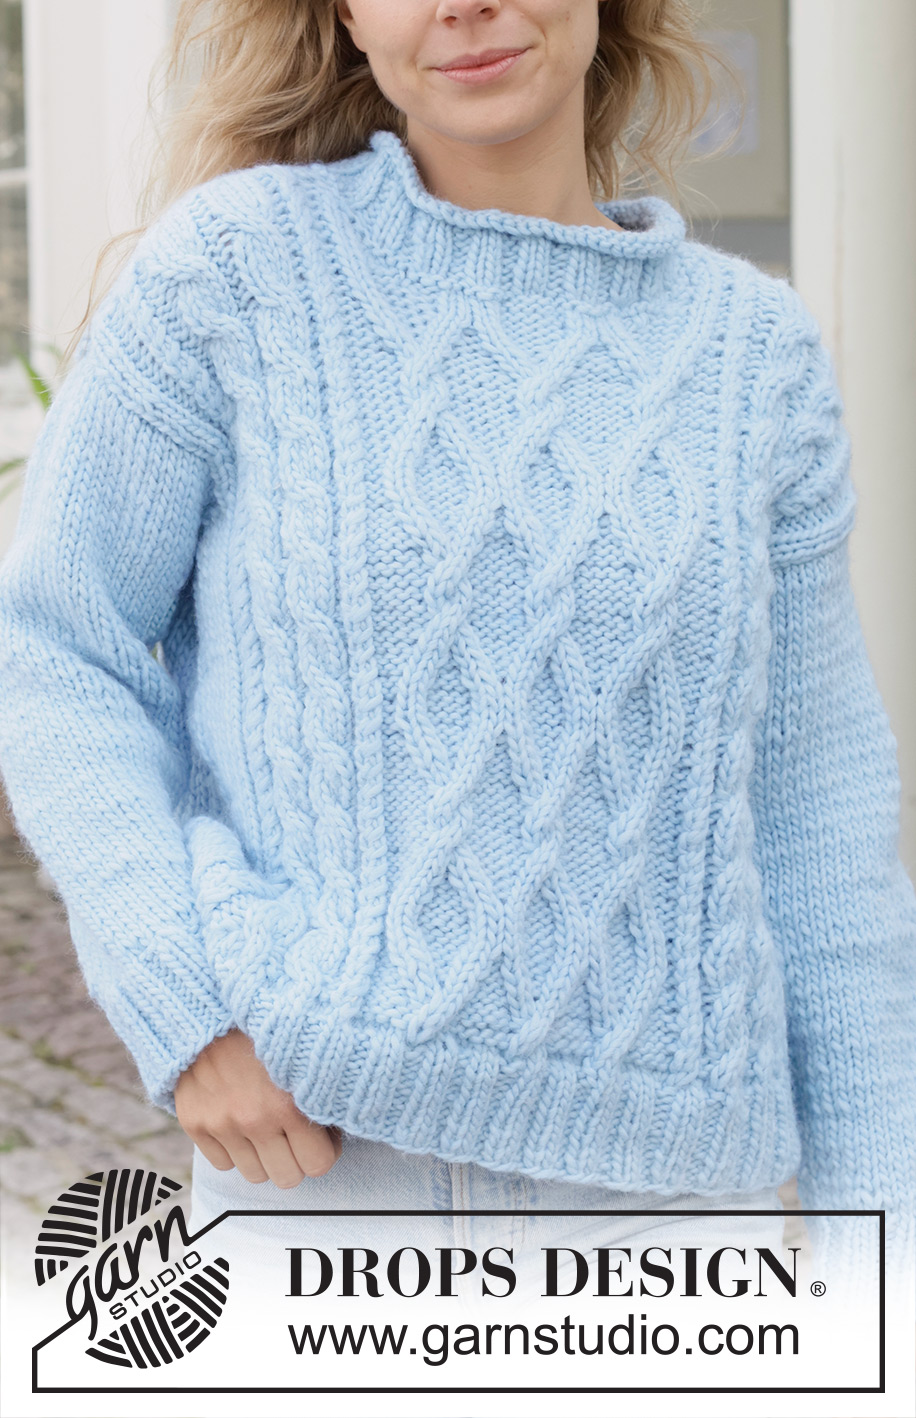
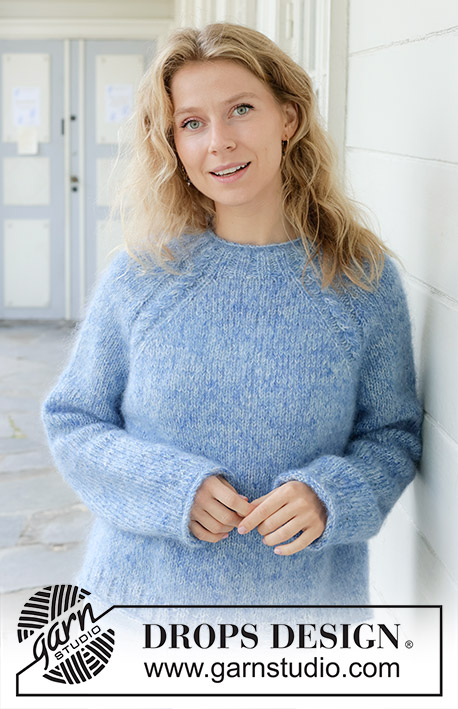
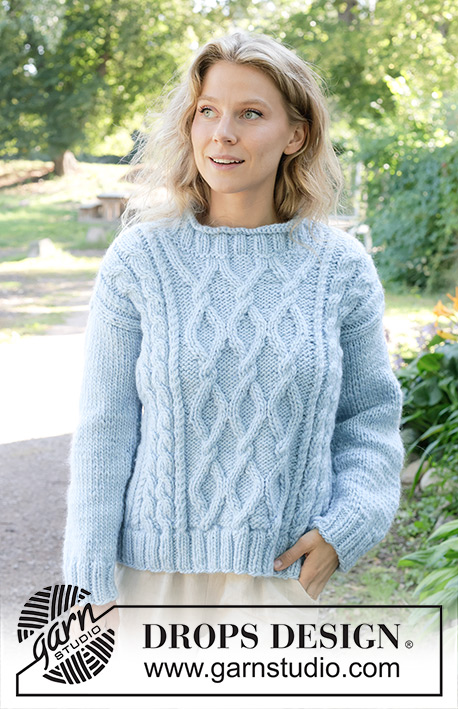
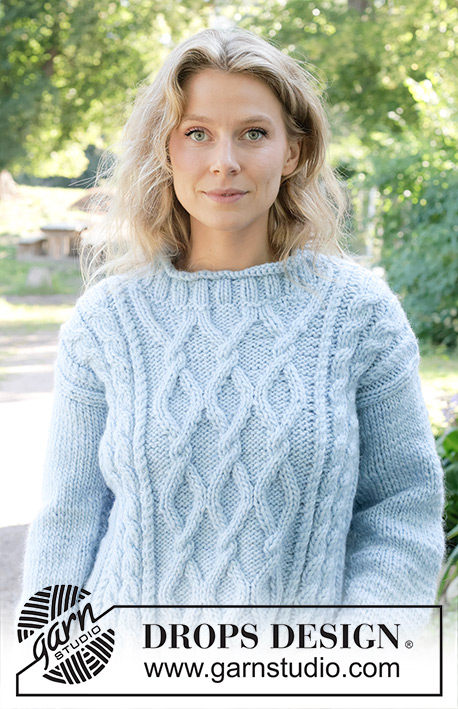
Knitted jumper in DROPS Snow. The piece is worked bottom up with cables, sewn-in sleeves and rolled neck. Sizes S - XXXL.
DROPS 259-16 |
|||||||||||||||||||||||||
|
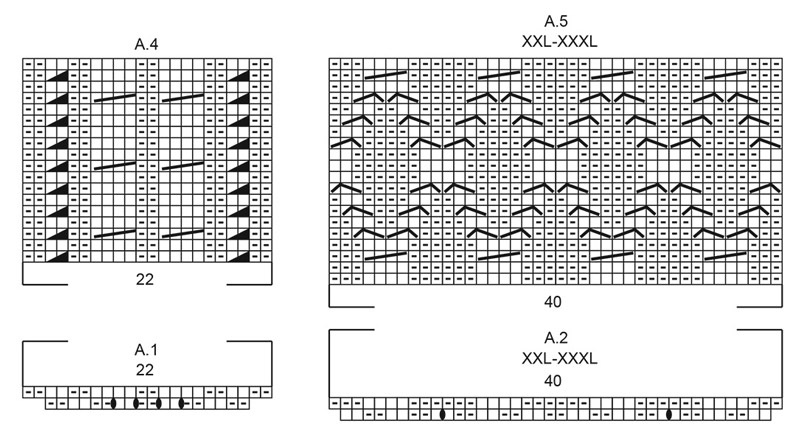
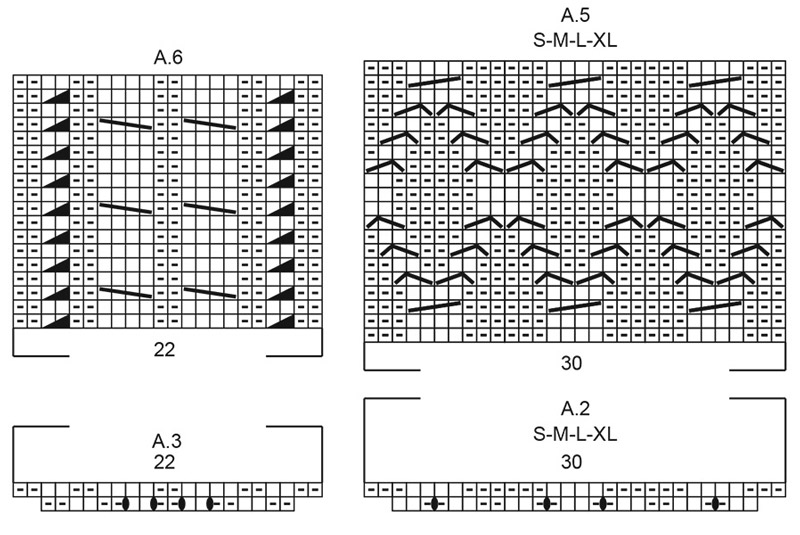
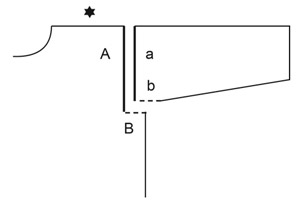
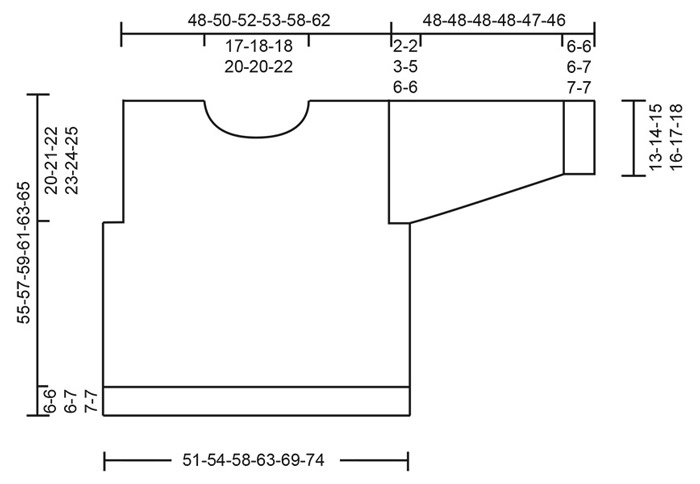
------------------------------------------------------- EXPLANATIONS FOR THE PATTERN: ------------------------------------------------------- PATTERN: See diagrams A.1 to A.6. Choose diagram for your size (applies to A.2 and A.5). The diagrams show the pattern from the right side. DECREASE TIP-1 (evenly spaced): To work out how to decrease evenly, count the total number of stitches on needle (e.g., 78 stitches) and divide by number of decreases to be made (e.g., 12) = 6.5. In this example decrease by knitting together alternately each 5th and 6th and each 6th and 7th stitch. INCREASE TIP (for sleeves): Increase 1 stitch on each side of the marker-thread. Work until there is 1 stitch left before the marker-thread, make 1 yarn over, knit 2 (marker-thread sits between these 2 stitches), make 1 yarn over (2 increased stitches). On the next round knit the yarn overs twisted to avoid holes. Then work the new stitches in stocking stitch. ------------------------------------------------------- START THE PIECE HERE: ------------------------------------------------------- JUMPER – SHORT OVERVIEW OF THE PIECE: The pattern uses both long and short needles; start with the length which fits the number of stitches and change when necessary. The piece is worked in the round, bottom up as far as the armholes. Cables are worked on the front piece, not on the back. The piece is then divided and the front and back pieces are finished separately, back and forth. The sleeves are worked bottom up, first in the round, then finished back and forth for the sleeve cap. The pieces are sewn together. Stitches are knitted up around the neckline and the neck worked in the round to finish. If there is a «0» in your chosen size, skip the information and go straight to the next instruction. BODY: Cast on 144-152-164-180-196-212 stitches with circular needle size 6 mm and DROPS Snow. Work rib in the round (purl 2, knit 2) for 6-6-6-7-7-7 cm. Insert 2 markers (which are used to position the pattern): Count 4-8-8-12-12-16 stitches, insert 1 marker before the next stitch, count 62-62-62-62-74-74 stitches, insert 1 marker before the next stitch. Now increase, decrease and work pattern as follows: ROUND 1: Change to circular needle size 7 mm. Knit 4-8-8-12-12-16 and decrease 0-1-1-1-1-2 stitches evenly over these stitches, marker-1 here, work A.1 across 18 stitches (4 increased stitches), A.2 across 26-26-26-26-38-38 stitches (4-4-4-4-2-2 increased stitches), A.3 across 18 stitches (4 increased stitches), marker-2 here, knit 78-82-94-106-110-122 and decrease 12-13-15-19-15-18 stitches evenly over these stitches – read DECREASE TIP above = 144-150-160-172-190-202 stitches. ROUND 2: Knit 4-7-7-11-11-14, work the next row of A.1, A.2 and A.3 across the next 74-74-74-74-84-84 stitches, knit 66-69-79-87-95-104. Insert 2 marker-threads, marking the sides of the jumper, inserting the threads so there are 4-6-8-12-12-15 knitted stitches on each side of the pattern on the front piece = 82-88-88-96-106-112 stitches on the front piece and 62-62-72-76-84-90 stitches on the back piece. Start the next round by the marker-thread which is before the front piece and work as follows: ROUND 3: Knit to marker-1, work A.4 above A.1, A.5 above A.2 and A.6 above A.3, marker-2 here, knit to end of round. The pattern is now established on the front piece and the markers can be removed; the marker-threads continue to follow your work onwards and are used when casting off for the armholes. Continue working and repeat the diagrams vertically. Remember to maintain the knitting tension. Work until the piece measures 35-36-37-38-39-40 cm, with the next round an odd row in the diagrams (so you cable from the right side when working back and forth). Now divide for the armholes. DIVIDE FOR ARMHOLES: Cast off the first 1-2-3-5-7-8 stitches for the armhole, work 80-82-84-86-94-98 stitches (= front piece), cast off the next 3-4-7-11-13-15 stitches for the armhole, knit 58-60-62-64-70-74 (= back piece), cast off the last 2-2-4-6-6-7 stitches. Cut the strand. The front and back pieces are finished separately, back and forth. BACK PIECE: = 58-60-62-64-70-74 stitches. Continue with stocking stitch back and forth until the piece measures 53-55-57-59-61-63 cm. Cast off the middle 18-20-20-22-22-24 stitches for the neckline and finish each shoulder separately. SHOULDERS: On the next row from the neck, cast off 1 stitch = 19-19-20-20-23-24 shoulder stitches. Cast off when the piece measures 55-57-59-61-63-65 cm. FRONT PIECE: = 80-82-84-86-94-98 stitches. Continue the pattern back and forth until the piece measures 47-48-50-51-53-54 cm. Place the middle 14-14-14-14-18-18 stitches on 1 thread for the neckline, making sure you have not worked cables on the 2 last rows. Finish each shoulder separately according to A.5, with knit over knit and purl over purl as before but without cables. SHOULDERS: = 33-34-35-36-38-40 stitches. Cast off for the neckline every 2nd row as follows: 2 stitches 1 time and 1 stitch 4-5-5-6-6-6 times = 27-27-28-28-30-32 shoulder stitches. When the piece measures 54-56-58-60-62-64 cm, decrease 8-8-8-8-7-8 stitches across the pattern-stitches = 19-19-20-20-23-24 stitches. Cast off when the piece measures 55-57-59-61-63-65 cm. SLEEVES: The sleeve is worked in the round and the sleeve cap is worked back and forth. Cast on 36-40-40-44-48-52 stitches with double pointed needles size 6 mm. Work rib in the round (knit 2, purl 2) for 6-6-6-7-7-7 cm. Change to needle size 7 mm and knit 1 round where you decrease 6-6-4-6-8-10 stitches evenly on the round – remember DECREASE TIP = 30-34-36-38-40-42 stitches. Insert 1 marker-thread at the beginning of the round (mid-under sleeve). Allow the marker-thread to follow your work onwards; it is used when increasing under the sleeve. Continue with stocking stitch. When 3 rounds stocking stitch have been worked after rib, increase 1 stitch on each side of the marker-thread – read INCREASE TIP (2 increased stitches). Repeat the increase every 4½-5-5-4-3½-3½ cm a total of 9-8-8-9-9-9 times = 48-50-52-56-58-60 stitches. Work until the sleeve measures 46-46-45-43-41-40 cm. Now work stocking stitch back and forth from mid-under the sleeve, leaving a split under the sleeve. Work until the split measures 2-2-3-5-6-6 cm. The sleeve measures 48-48-48-48-47-46 cm. Cast off. ASSEMBLY: Sew the shoulder seams. Sew the sleeves into the armholes – NOTE, the split under the sleeve is sewn to the bottom of the armhole - see sketch. NECK: Use circular needle size 6 mm. Start at one shoulder seam and knit up from the right side approx. 56-60-60-68-68-76 stitches (including the stitches on the thread) – stitch number should be divisible by 4. Purl 1 round. Work rib (knit 2, purl 2) for 3-3-3-4-4-4 cm. Knit 3 rounds (= rolled edge). Cast off a little loosely with knit. |
|||||||||||||||||||||||||
Diagram explanations |
|||||||||||||||||||||||||
|
|||||||||||||||||||||||||
 |
|||||||||||||||||||||||||
 |
|||||||||||||||||||||||||
 |
|||||||||||||||||||||||||
 |
|||||||||||||||||||||||||
Have you finished this pattern?Tag your pictures with #dropspattern #irishskysweater or submit them to the #dropsfan gallery. Do you need help with this pattern?You'll find 31 tutorial videos, a Comments/Questions area and more by visiting the pattern on garnstudio.com. © 1982-2026 DROPS Design A/S. We reserve all rights. This document, including all its sub-sections, has copyrights. Read more about what you can do with our patterns at the bottom of each pattern on our site. |
|||||||||||||||||||||||||


With over 40 years in knitting and crochet design, DROPS Design offers one of the most extensive collections of free patterns on the internet - translated to 17 languages. As of today we count 324 catalogues and 12290 patterns translated into English (UK/cm). 12290
We work hard to bring you the best knitting and crochet have to offer, inspiration and advice as well as great quality yarns at incredible prices! Would you like to use our patterns for other than personal use? You can read what you are allowed to do in the Copyright text at the bottom of all our patterns. Happy crafting!
Post a comment to pattern DROPS 259-16
We would love to hear what you have to say about this pattern!
If you want to leave a question, please make sure you select the correct category in the form below, to speed up the answering process. Required fields are marked *.