
Popular categories
Looking for a yarn?


Comments / Questions (24)
![]() Geneviève Miller wrote:
Geneviève Miller wrote:
Comment peut-on tricoter avec I-CORD en tricotant en aller /retour endroit /envers ?
10.06.2024 - 15:28DROPS Design answered:
Bonjour Mme Miller, dans cette vidéo nous montrons comment tricoter 2 mailles de bordure I-cord en début et en fin de rang, cela devrait pouvoir vous aider à visualiser comment faire pour la bordure des devants du gilet - notez que la vidéo correspond aux 2 mailles au bord de chacun des devants, les autres mailles devront être tricotées en côtes comme indiqué sous les BORDURE DEVANT GAUCHE & DROIT. Bon tricot!
11.06.2024 - 07:52
![]() Maribel Muñoz wrote:
Maribel Muñoz wrote:
Creo que debería haber dos versiones del diagrama A.1, una para el delantero derecho y otra para el delantero izquierdo, ya que los puntos no crecen de forma simétrica a ambos lados, y esto depende de qué delantero se trabaje. El diagrama único puede inducir a confusión, y de hecho, tuve que deshacer varias vueltas cuando me di cuenta del problema, y dibujar yo misma las dos versiones de A.1 para que el motivo quedase correcto.
25.05.2024 - 18:03
![]() Lou wrote:
Lou wrote:
Bonjour ! :) Pour le motif A1 : le deuxième rang du diagramme indique 3 mailles à tricoter. Je ne comprends pas pourquoi. Quelqu'un pourrait m'aider s'il vous plaît ? Merci Drops pour les beaux patron !
17.05.2024 - 14:23DROPS Design answered:
Bonjour Lou, effectivement, vous commencez à augmenter pour l'encolure à partir du 5ème rang seulement (après 4 rangs = 2 augmentations pour le raglan), tricotez bien le nombre de mailles que vous avez sur l'aiguille et ajustez le motif si besoin. Bon tricot!
17.05.2024 - 16:26
![]() Anna wrote:
Anna wrote:
Hej! I mönstret står det att det ökas till v hals var fjärde varv och till raglan varannan. Diagram A1 ökar lika mycket på varje sida. ? Mvh Anna
01.05.2024 - 21:20DROPS Design answered:
Hej Anna, udtagningerne er ikke tegnet ind i diagrammerne! Diagrammerne viser kun hvordan mønsteret skal strikkes i forhold til kanten (du har 5 m ret imellem hvert hulmønster) :)
03.05.2024 - 14:42
![]() Ksenija wrote:
Ksenija wrote:
Hello. I can’t figure out when they start making V-neck increases on the 4th row? First they are done on the 2nd row, and when should you start adding on the 4th?
13.04.2024 - 08:28
![]() María wrote:
María wrote:
Espalda. Indican 35 puntos. Al trabajar A.2, A.3 un total de 3-3-3-4-4-4 veces, A.4 (= espalda). Los 35 puntos no son suficientes. A2+A3 = 11puntos. Estos 11puntos 3veces = 33puntos. Estos 33 puntos +A4 = 39puntos necesarios para trabajar como indican. Entonces: Son 28 puntos para la espalda. Repitiendo 2 veces A2,A3. Terminando con A4. O son 39 puntos para trabajar como indica el patrón.
04.04.2024 - 02:54
![]() Jane wrote:
Jane wrote:
I can't have anything with even a small portion of mohair near my skin so could you recommend which Group A yarn would give a reasonable result for this pattern - I know nothing is going to give the same effect as they kid silk. Thank you.
02.04.2024 - 11:39DROPS Design answered:
Dear Jane, if you absolutely cannot have mohair, Try the alpaca yarn. It does have some halo (though not nearly as much as Kid Silk), it is relatively thin, light and airy. Happy Knitting!
02.04.2024 - 23:55
![]() Joanyuan wrote:
Joanyuan wrote:
Dreamscape
19.01.2024 - 18:32
![]() Olga wrote:
Olga wrote:
Dusk mist
19.01.2024 - 09:00
![]() Kelly wrote:
Kelly wrote:
Lilly Lace
18.01.2024 - 21:57
|
||||||||||
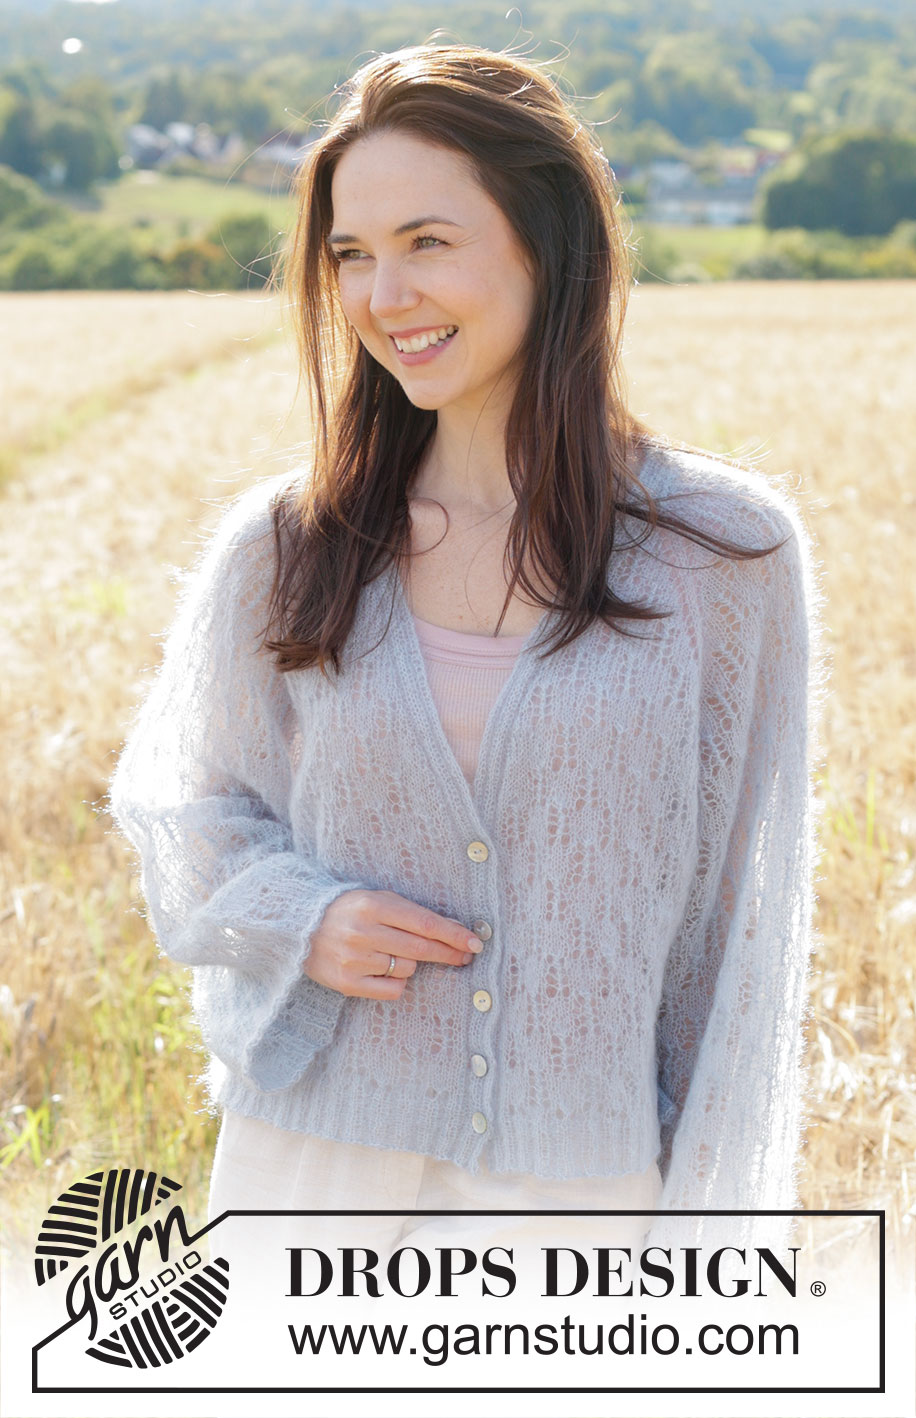
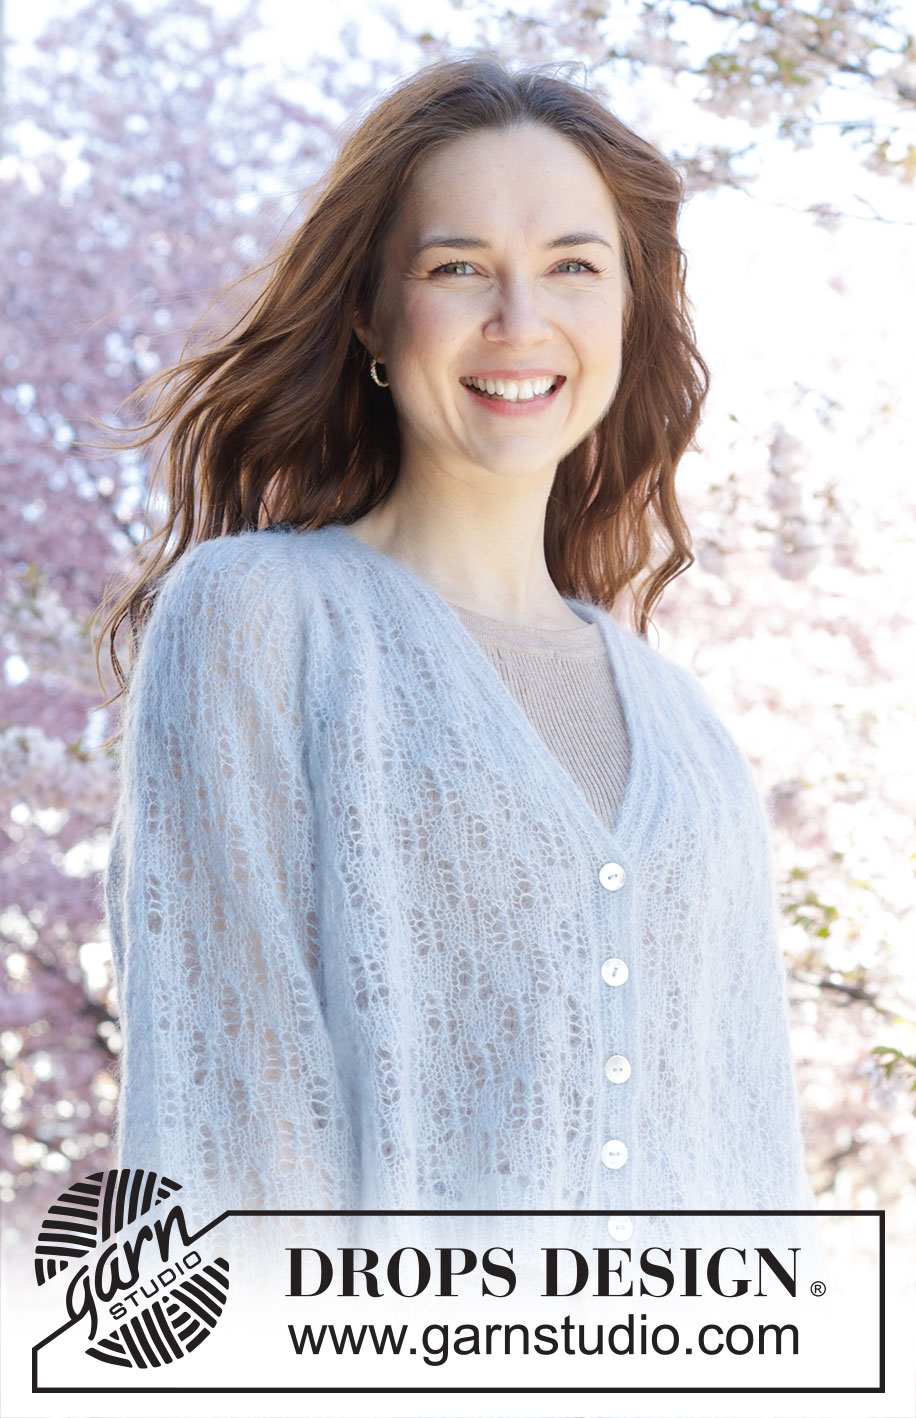
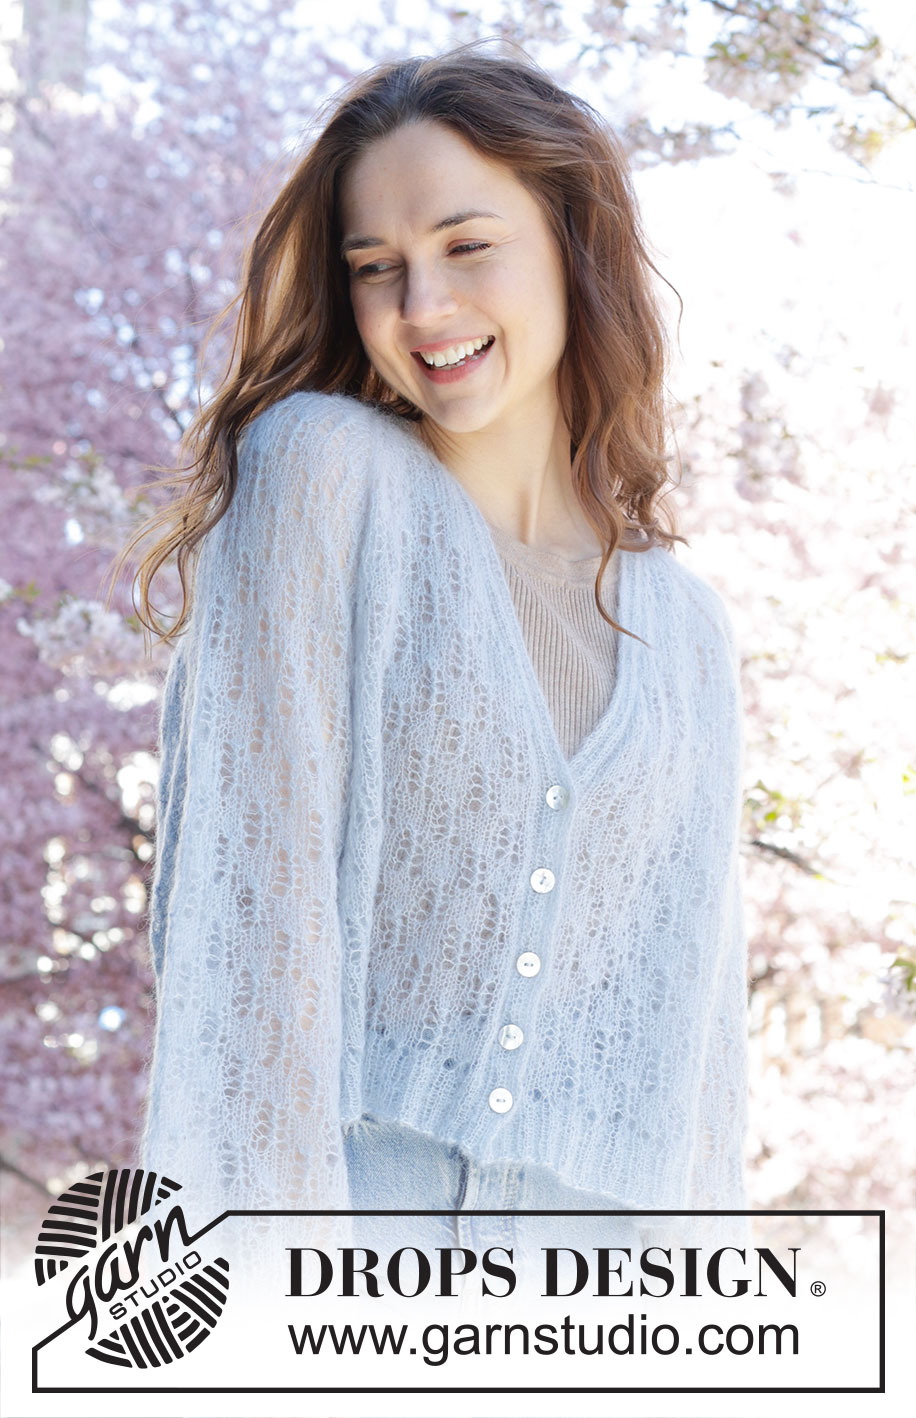
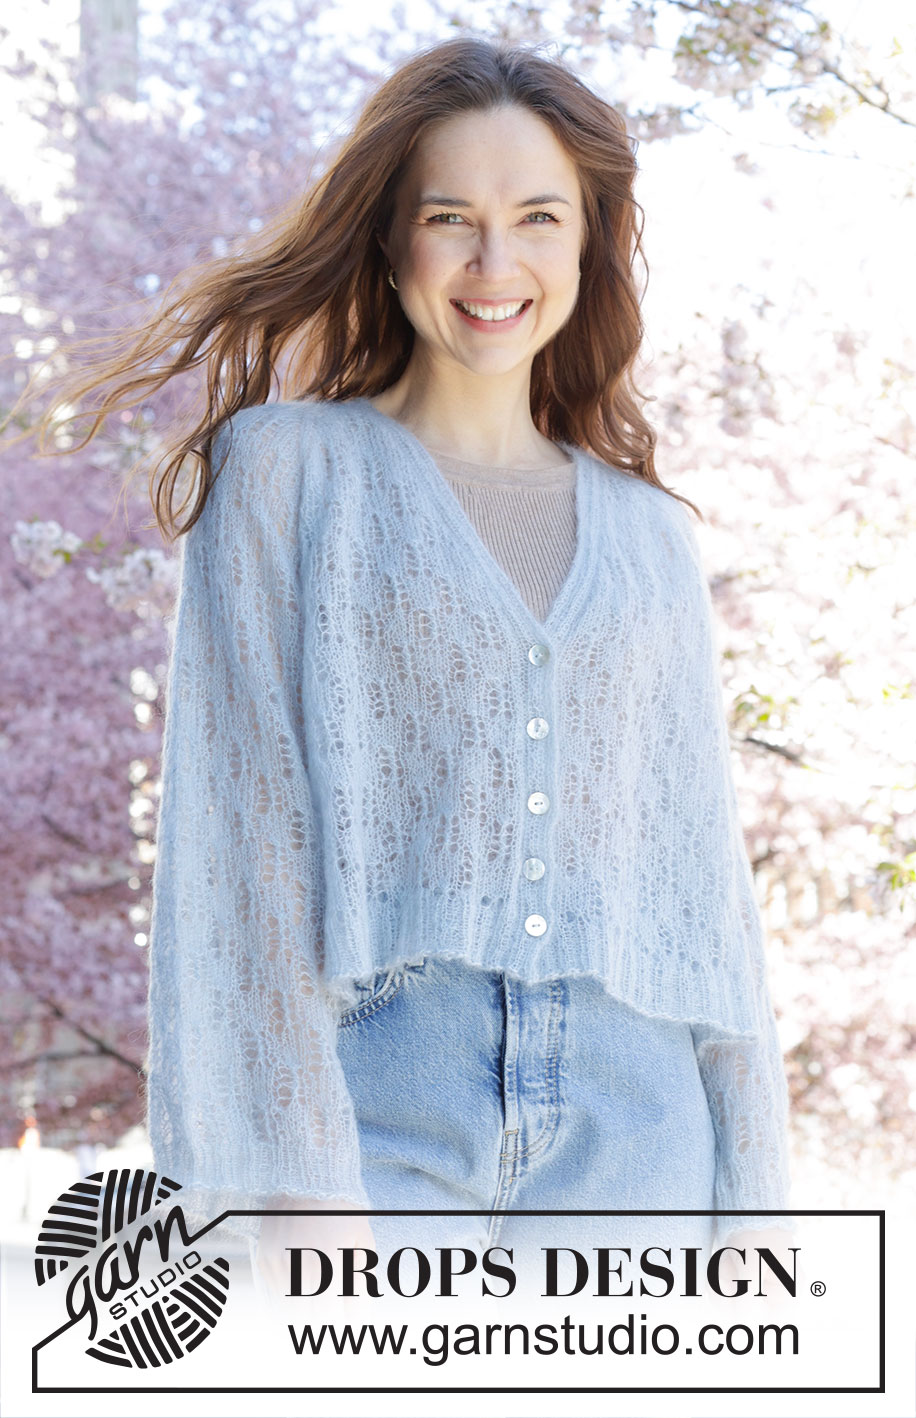
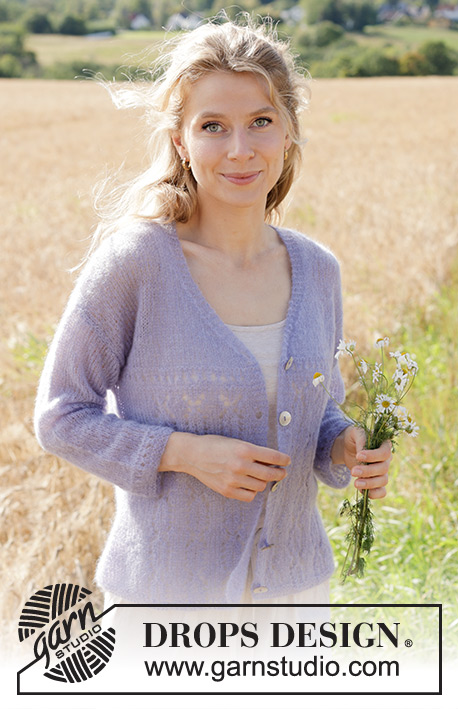
Hazy Dream Cardigan#hazydreamcardigan |
||||||||||
 |
 |
|||||||||
Knitted over-sized jacket in DROPS Kid-Silk. The piece is worked top down with raglan, V-neck, lace pattern and wide sleeves. Sizes XS - XXL.
DROPS 250-18 |
||||||||||
|
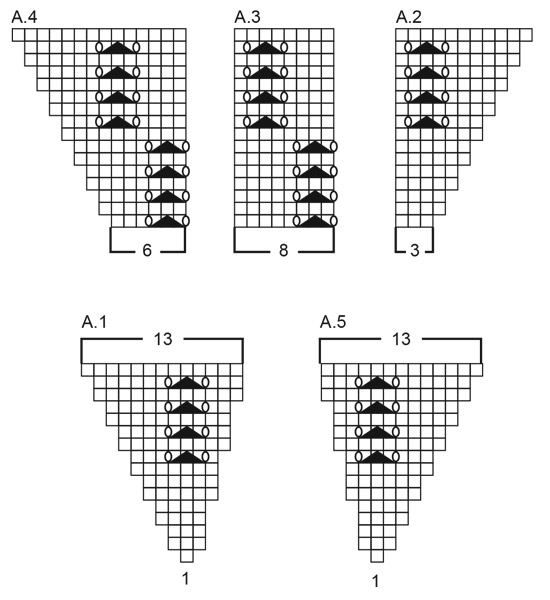
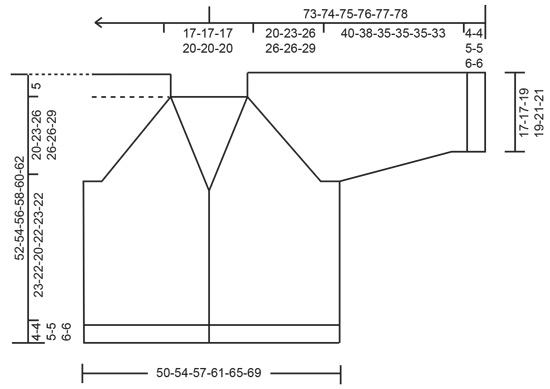
------------------------------------------------------- EXPLANATIONS FOR THE PATTERN: ------------------------------------------------------- PATTERN: See diagrams A.1 to A.5. The diagrams show all rows in the pattern seen from the right side. LEFT BAND WITH I-CORD: RIGHT SIDE: Slip 1 stitch purl-wise, with yarn in front, knit 3, purl 2, knit 2, purl 2. WRONG SIDE: Knit 2, purl 2, knit 2, purl 2, slip 1 stitch purl-wise with yarn in front, knit 1. RIGHT BAND WITH I-CORD: RIGHT SIDE: Purl 2, knit 2, purl 2, knit 2, slip 1 stitch purl-wise with yarn in front, knit 1. WRONG SIDE: Slip 1 stitch purl-wise, with yarn in front, knit 1, purl 2, knit 2, purl 2, knit 2. RAGLAN: All increases are worked from the right side! Increase 1 stitch by making 1 yarn over. On the next row (= wrong side) purl the yarn over to leave a hole. Then work the new stitches into the pattern. V-NECK: All increases are worked from the right side! Increase 1 stitch inside the 10 band stitches by making 1 yarn over. On the next row (= wrong side) purl the yarn over twisted to avoid a hole. Then work the new stitches into the pattern. INCREASE TIP (evenly spaced): Increase 1 stitch by making 1 yarn over, which is worked twisted on the next row to avoid a hole. DECREASE TIP (for sleeves): Decrease 1 stitch on each side of the marker-stitch as follows: Work until there are 3 stitches left before the marker-stitch, knit 2 together, knit 1 (marker-stitch), slip 1 stitch knit-wise, knit 1 and pass the slipped stitch over the knitted stitch (2 stitches decreased). BUTTONHOLES: Work the buttonholes on the right band from the right side. ROW 1: Work until there are 6 stitches left on the row, make 1 yarn over, purl 2 together, work the remaining band-stitches as before. ROW 2: Knit the yarn over to leave a hole. The first buttonhole is worked 1 cm after all the increases for the V-neck are finished (front piece measures approx. 29-30-33-35-36-37 cm, from top of shoulder), Then work the other buttonholes when the piece measures: XS: 33-38-43-48 cm S: 35-40-45-50 cm M: 37-42-46-51 cm L: 39-44-48-53 cm XL: 40-45-49-54 cm XXL: 41-46-51-56 cm (The bottom buttonhole is worked in the transition between the stocking stitch and rib). ------------------------------------------------------- START THE PIECE HERE: ------------------------------------------------------- JACKET – SHORT OVERVIEW OF THE PIECE. The pattern uses both long and short needles; start with the length which fits the number of stitches and change when necessary. Start by working 2 loose bands, then cast on stitches between them for the neckline. The yoke is worked back and forth with circular needle, top down. When the yoke is finished, it is divided for body and sleeves and the body continued back and forth, while the sleeves wait. The sleeves are worked in the round, top down. The bands are sewn together mid-back, then sewn to the neckline. If there is a «0» in your chosen size, skip the information and go straight to the next instruction. LEFT BAND: Cast on 10 stitches with circular needle size 3.5 mm and DROPS Kid-Silk. Work LEFT BAND WITH I-CORD – read description above, back and forth for 17-17-17-19-19-19 cm with the last row from the right side. Cut the strand, place the stitches on a stitch holder. RIGHT BAND: Cast on 10 stitches with circular needle size 3.5 mm and DROPS Kid-Silk. Work RIGHT BAND WITH I-CORD – read description above, back and forth for 17-17-17-19-19-19 cm, with the last row from the wrong side. You now cast on stitches between the 2 bands for the yoke as follows. YOKE: Keep the 10 stitches from the right band on the needle (last row from wrong side), cast on 77-77-77-85-85-85 stitches, place the left band stitches on the left needle and work the stitches from the wrong side as before = 97-97-97-105-105-105 stitches. Insert 4 marker-threads from the right side, without working the stitches, which are used when increasing for raglan: Count 12 stitches (= left front piece), insert 1 marker-thread before the next stitch, count 19 stitches (= sleeve), insert 1 marker-thread before the next stitch, count 35-35-35-43-43-43 stitches (= back piece), insert 1 marker-thread before the next stitch, count 19 stitches (= sleeve), insert 1 marker-thread before the next stitch. There are 12 stitches left after the last marker-thread (= right front piece). Now work PATTERN back and forth, AT THE SAME TIME increase for RAGLAN on each side of all 4 marker-threads (= on both sides of 2 stocking stitches) and increase for V-NECK inside the front band stitches – read description above. Work the first row from the right side as follows: Work the left band with I-cord as before, increase 1 stitch for V-neck, work A.1, increase 1 stitch for raglan, work 2 stocking stitches (marker-thread sits between these 2 stitches), increase 1 stitch for raglan, work A.2, A.3, A.4 (= sleeve), increase 1 stitch for raglan, work 2 stocking stitches, increase 1 stitch for raglan, work A.2, A.3 a total of 3-3-3-4-4-4 times, A.4 (= back piece), increase 1 stitch for raglan, work 2 stocking stitches, increase 1 stitch for raglan, work A.2, A.3, A.4 (= sleeve), increase 1 stitch for raglan, work 2 stocking stitches, increase 1 stitch for raglan, work A.5, increase 1 stitch for V-neck, work the right band with I-cord = 107-107-107-115-115-115 stitches. INFORMATION BEFORE CONTINUING: Continue this pattern back and forth, with lace pattern on the front/back pieces and on the sleeves, 2 stocking stitches in each transition between the body and sleeves and 10 band stitches on each side. When A.1 and A.5 are finished in height on the front pieces, continue working lace pattern as shown in A.2, A.3 and A.4 over these stitches, but stitches that cannot be worked into the lace pattern when increasing for V-neck should be worked in stocking stitch. On sleeves and back piece, there are room for 2 extra repeats of A.3 in width between A.2 and A.4 each time you finish A.2, A.3 and A.4 in height. In addition, continue increasing for raglan and the V-neck as follows: Increase for raglan every 2nd row a total of 28-32-36-36-36-40 times (including the first increase above) and and increase for the V-neck every 4th row 16-14-10-20-18-16 times (including increase worked on first row), then every 6th row 0-2-6-0-2-4 times on each side REMEMBER THE KNITTING TENSION! After the last increase for raglan, the piece measures approx. 20-23-26-26-26-29 cm from the cast-on edge between the bands – NOTE! increases for V-neck are not finished. On the next row after the last increase for raglan (= wrong side), divide for the body and sleeves. DIVIDE FOR BODY AND SLEEVES: Continue the increases for the V-neck. Start from the wrong side and work as before to the first marker-thread (= right front piece), place the next 75-83-91-91-91-99 stitches on 1 thread for the sleeve, cast on 13-13-13-13-21-21 stitches (= in side under sleeve), work 91-99-107-115-115-123 stitches (= back piece), place the next 75-83-91-91-91-99 stitches on 1 thread for the sleeve, cast on 13-13-13-13-21-21 stitches (= in side under sleeve), work the last stitches as before (= left front piece). The body and sleeves are finished separately. The piece is now measured from here! BODY: Continue the pattern back and forth, with 10 band stitches on each side, continuing the increases for the V-neck (make sure the pattern matches and continues from the yoke). When the last increase for the V-neck is finished, there are 229-245-261-277-293-309 stitches. Continue the pattern – the stitches which do not fit the pattern mid-front on each side are worked in stocking stitch. Remember the BUTTONHOLES – read description above. Work until the body measures 23-22-20-22-23-22 cm from the division. On the next row (= right side) begin the rib, AT THE SAME TIME increase 73-77-77-85-93-97 stitches evenly on the first row – read INCREASE TIP = 302-322-338-362-386-406 stitches, as follows: Change to circular needle size 2.5 mm, work the band as before, rib (knit 2, purl 2 – remember the increases) until there are 12 stitches left, knit 2 and work the band as before. When the rib measures 4-4-5-5-6-6 cm, cast off with 2 strands DROPS Kid-Silk. The jacket measures approx. 52-54-56-58-60-62 cm from the shoulder. SLEEVES: Place the 75-83-91-91-91-99 sleeve-stitches from the thread on one side of the piece on short circular needle size 3.5 mm and knit up 1 stitch in each of the 13-13-13-13-21-21 stitches cast on under the sleeve = 88-96-104-104-112-120 stitches. Insert a marker in the middle stitch of the 13-13-13-13-21-21 stitches under the sleeve, which is used when decreasing under the sleeve. Start before the marker-stitch and continue the pattern in the round. When the sleeve measures 4-3-3-3-3-3 cm, decrease 2 stitches under the sleeve – read DECREASE TIP. Decrease like this every 4-3-2½-2½-2½-1½ cm a total of 8-12-12-12-12-16 times (the stitches which do not fit the pattern under the sleeve are worked in stocking stitch) = 72-72-80-80-88-88 stitches. Continue working until the sleeve measures 40-38-35-35-35-33 cm from the division. Change to double pointed needles size 2.5 mm. Work rib (knit 2, purl 2), AT THE SAME TIME increase 24-24-28-28-28-28 stitches evenly on the first round = 96-96-108-108-116-116 stitches. When the rib measures 4-4-5-5-6-6 cm, cast off with 2 strands. The sleeve measures approx. 44-42-40-40-41-39 cm. ASSEMBLY: Sew the bands together mid-back, then sew the bands to the neckline. Sew the buttons onto the left band. |
||||||||||
Diagram explanations |
||||||||||
|
||||||||||
 |
||||||||||
 |
||||||||||
Have you finished this pattern?Tag your pictures with #dropspattern #hazydreamcardigan or submit them to the #dropsfan gallery. Do you need help with this pattern?You'll find 29 tutorial videos, a Comments/Questions area and more by visiting the pattern on garnstudio.com. © 1982-2026 DROPS Design A/S. We reserve all rights. This document, including all its sub-sections, has copyrights. Read more about what you can do with our patterns at the bottom of each pattern on our site. |
||||||||||


With over 40 years in knitting and crochet design, DROPS Design offers one of the most extensive collections of free patterns on the internet - translated to 17 languages. As of today we count 324 catalogues and 12290 patterns translated into English (UK/cm). 12290
We work hard to bring you the best knitting and crochet have to offer, inspiration and advice as well as great quality yarns at incredible prices! Would you like to use our patterns for other than personal use? You can read what you are allowed to do in the Copyright text at the bottom of all our patterns. Happy crafting!
Post a comment to pattern DROPS 250-18
We would love to hear what you have to say about this pattern!
If you want to leave a question, please make sure you select the correct category in the form below, to speed up the answering process. Required fields are marked *.