
Popular categories
Looking for a yarn?


































Comments / Questions (53)
 Samantha wrote:
About the front piece, it says when I reach X cm to finish neatly in relation to the pattern. What exactly does this mean?
17.06.2026 - 08:47DROPS Design answered:
Hi Samantha, The pattern in A.2 needs to have at least a couple of kniited rows after the 3 rows of pattern before you finish. Regards, Drops Team.
18.06.2026 - 05:56
Samantha wrote:
What exactly do you mean by "on the next row from the RS" when referring to transferring the sts onto a thread for the back piece? I presume that after I reach 45cm the last row I'd have done would need to be WS making the one where I need to separate the sts a RS row. But by the looks of it it may turn out to be the opposite for me; I'll have reached 45cm by finishing a RS row making the one where I have to separate the sts a WS row. Is that a problem?
14.06.2026 - 21:00DROPS Design answered:
Dear Samantha, the piece need to measure approx. 45cm, but you need to ensure that the row in which you slip the sts for the neck is a row from the right side. Since the specific row in which you end may vary according to your personal gauge, you can work 1 more or 1 less row and the divide the shoulders; according to the desired measurements, your gauge and which row is closer to measuring 45cm. Happy knitting!
15.06.2026 - 02:00
Samantha wrote:
What exactly do you mean by "on the next row from the RS" when referring to transferring the sts onto a thread for the back piece? I presume that after I reach 45cm the last row I'd have done would need to be WS making the one where I need to separate the sts a RS row. But by the looks of it it may turn out to be the opposite for me; I'll have reached 45cm by finishing a RS row making the one where I have to separate the sts a WS row. Is that a problem?
14.06.2026 - 21:00DROPS Design answered:
Dear Samantha, the piece need to measure approx. 45cm, but you need to ensure that the row in which you slip the sts for the neck is a row from the right side. Since the specific row in which you end may vary according to your personal gauge, you can work 1 more or 1 less row and the divide the shoulders; according to the desired measurements, your gauge and which row is closer to measuring 45cm. Happy knitting!
15.06.2026 - 01:59
Samantha wrote:
The instructions for the right shoulder on the back confuse me. Do I continue in stocking (until I reach a length not mentioned), then cast off on WS rows and lastly cast off completely OR do I first cast off on WS rows then continue in stocking till I reach 52cm? By "cast off 1 st twice" do you mean cast off 1 st on two consecutive WS rows? Also it says to cast off on EVERY row but the original and final stitch counts won't match up to the ones given if I were to do that.
11.06.2026 - 17:17DROPS Design answered:
Dear Samantha, are you working 3rd size? Then after you have divided for neck on back piece you continue each shoulder separately, on first row starting from neck (from WS on right shoulder) you cast off 1 st for neck, then work 1 row from RS and cast off 1 more st at the beg of next row from neck = 19 sts left. Then work until piece measures 52 cm and cast off the 19 sts. Happy knitting!
12.06.2026 - 16:01
Samantha wrote:
For the back piece it says when I reach 32cm to cast off 4sts at the beginning of the next 2 rows for the armholes. Should the first row I start casting off on be a RS row or does it not matter?
11.06.2026 - 17:02DROPS Design answered:
Hi Samantha, As you cast off on 2 consecutive rows, it does not matter if the first row is from the right side or the wrong side. Regards, Drops Team.
12.06.2026 - 06:10
 Esther wrote:
Klopt de hoeveelheid garen bij dit patroon wel? 300 gram lijkt me zo weinig voor een zo te zien best lijvige trui.
12.01.2026 - 13:55DROPS Design answered:
Dag Esther,
Ja, de hoeveelheid klopt. DROPS Air is heel licht garen, vandaar.
14.01.2026 - 19:28
Nadia wrote:
Wat is de kleurnummer van de wol op de afbeelding?
20.11.2025 - 09:34DROPS Design answered:
Dag Nadia,
Dit is dezelfde als de aangegeven kleur bij de materialen: kleur 24, pink.
20.11.2025 - 22:08
 Sofia wrote:
Inget bra mönster alls. Ärmhålet och ärmen passar inte ihop. Ärmhål större så stramar jättekonstigt trots att jag strykt och ångat och sträckt. Ärmen är absolut inte ballong. Både kort och tight. Väldigt konstigt också med beskrivning på hals. Man får ta hur många maskor man vill. Tog max antal maskor i beskrivningen, men blev för lite så ser inte snyggt ut.
03.11.2025 - 21:58
Vanessa wrote:
Hello. What is the purpose of decreasing after knitting the jumper rib? It seems very odd to me, and I worry the rib will now flare?
16.06.2025 - 11:40DROPS Design answered:
Hi Vanessa, We recommend extra stitches in the rib so that the rib is not tight, and these extra stitches are then decreased before starting the body. However, feel free to adjust the stitch count on the rib/body if you wish. Regards, Drops Team.
17.06.2025 - 06:41
Vanessa wrote:
I'd really like the pattern on the back too. Would that work?
15.06.2025 - 21:42DROPS Design answered:
Dear Vanessa, yes, you should be able to work the pattern on the back too. Happy knitting!
16.06.2025 - 00:45
|
||||||||||||||||||||||
Seaside Watcher#seasidewatchersweater |
||||||||||||||||||||||
 |
 |
|||||||||||||||||||||
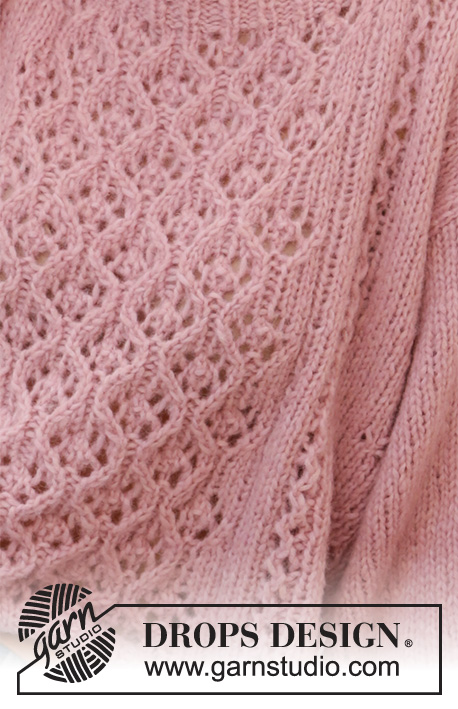
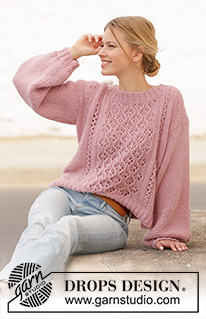
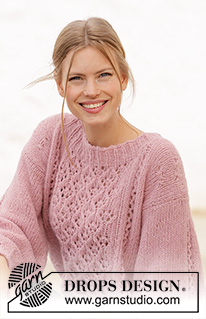
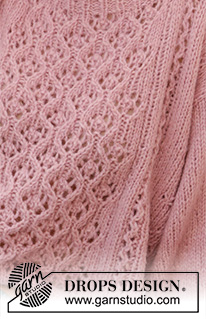
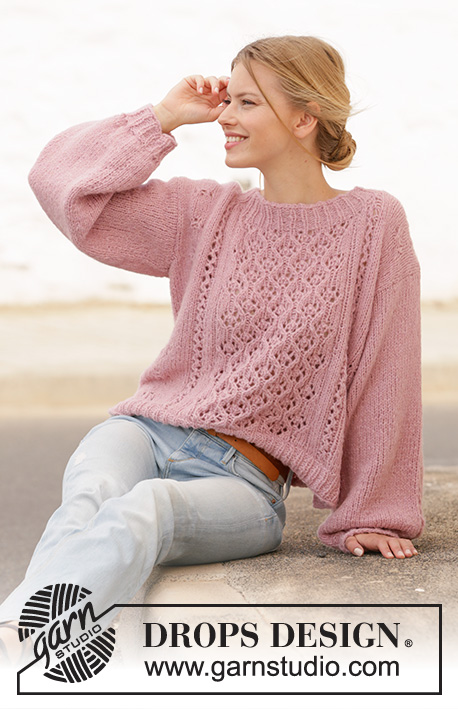
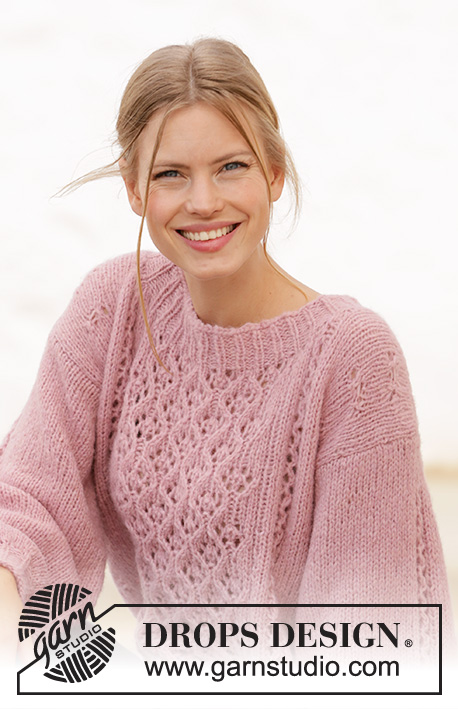
Knitted jumper in DROPS Air. The piece is worked with lace pattern and balloon sleeves. Sizes XS - XXL.
DROPS 212-43 |
||||||||||||||||||||||
|
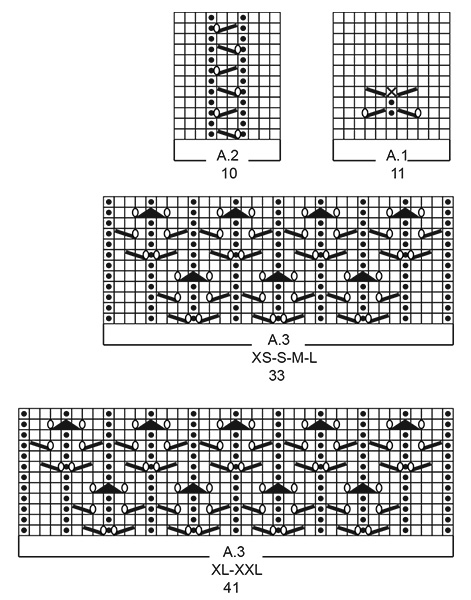
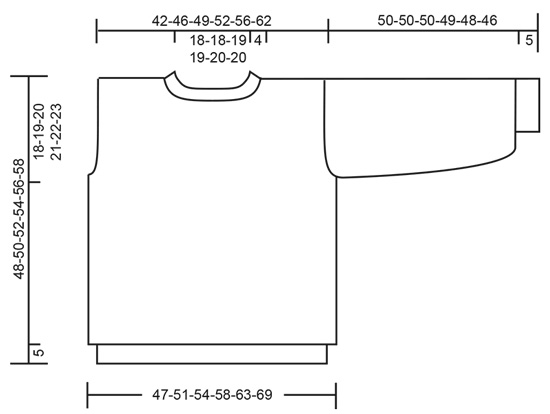
------------------------------------------------------- EXPLANATIONS FOR THE PATTERN: ------------------------------------------------------- RIDGE/GARTER STITCH (worked back and forth): Knit all rows. 1 ridge in height = Knit 2 rows. PATTERN: See diagrams A.1 to A.3. Choose diagram for your size (applies to A.3). The diagrams show all rows in the pattern seen from the right side. DECREASE TIP-1 (evenly spaced): To work out how to decrease evenly, count the total number of stitches on needle (e.g. 100 stitches) and divide by number of decreases to be made (e.g. 11) = 9.09. In this example decrease by knitting approx. each 8th and 9th stitch together. INCREASE TIP: All increases are worked from the right side. Increase by making 1 yarn over on the inside of the 1 edge stitch on each side of the piece (= 2 stitches increased). On the next row the yarn overs are purled twisted. CASTING-OFF TIP: To avoid the cast-off edge being tight you can cast off with a larger size needle. If the edge is still tight, make 1 yarn over after approx. each 4th stitch at the same time as casting off and the yarn overs are cast off as normal stitches. ------------------------------------------------------- START THE PIECE HERE: ------------------------------------------------------- JUMPER – SHORT OVERVIEW OF THE PIECE:. The front and back pieces are worked separately back and forth with circular needle. Stiches are cast off for the armholes and neck and each shoulder is finished separately. The sleeves are worked back and forth with circular needle. The neck is worked after the garment has been sewn together. BACK PIECE: Cast on 88-94-100-106-115-124 stitches (including 1 edge stitch on each side of the piece) with circular needle size 4.5 mm and Air. Purl 1 row from the wrong side. Then work rib from the right side as follows: 1 edge stitch in GARTER STITCH – read description above, * purl 2, knit 1 *, work from *-* until there are 3 stitches left, purl 2 and finish with 1 edge stitch in garter stitch. When the rib measures 5 cm, knit 1 row from the right side where you decrease 11-11-11-11-12-11 stitches evenly spaced – read DECREASE TIP = 77-83-89-95-103-113 stitches. Purl 1 row from the wrong side. Change to circular needle size 5.5 mm. Work stocking stitch with 1 edge stitch in garter stitch on each side of the piece. REMEMBER THE KNITTING TENSION! When the piece measures 30-31-32-33-34-35 cm from the cast-on edge, cast off 4-4-4-5-6-6 stitches at the beginning of the next 2 rows for the armholes = 69-75-81-85-91-101 stitches. Continue with stocking stitch and 1 edge stitch in garter stitch on each side. When the piece measures 41-43-45-47-49-51 cm, place the middle 37-37-39-39-41-41 stitches on a thread for the neck, on the next row from the right side, and each shoulder is finished separately = 16-19-21-23-25-30 stitches on each shoulder. RIGHT SHOULDER: Continue with stocking stitch and 1 edge stitch in garter stitch on each side. Cast off on every row from the neck (i.e. at the beginning of each row from the wrong side) as follows: Cast off 1 stitch 2 times = 14-17-19-21-23-28 stitches. Cast off with knit from the right side when the piece measures 48-50-52-54-56-58 cm from the cast-on edge. LEFT SHOULDER: Work as for the right shoulder but when casting off for the neck, cast off at the beginning of each row from the right side. FRONT PIECE: Cast on 87-93-99-105-114-123 stitches (including 1 edge stitch on each side of the piece) with circular needle size 4.5 mm and Air. Purl 1 row from the wrong side. Then work rib from the right side as follows: 1 edge stitch in garter stitch, knit 1, * purl 2, knit 1 *, work from *-* until there is 1 stitch left and finish with 1 edge stitch in garter stitch. When the rib measures 5 cm, knit 1 row from the right side and decrease 10-10-10-10-11-10 stitches evenly spaced = 77-83-89-95-103-113 stitches. Purl 1 row from the wrong side. Change to circular needle size 5.5 mm. Then continue with pattern as follows: Work 1 edge stitch in garter stitch, 0-3-6-9-9-14 stitches in stocking stitch, A.1 (= 11 stitches), A.2 (= 10 stitches), A.3 (= 33-33-33-33-41-41 stitches), A.2 over 10 stitches, A.1 over 11 stitches, 0-3-6-9-9-14 stitches in stocking stitch and 1 edge stitch in garter stitch. When the piece measures 30-31-32-33-34-35 cm from the cast-on edge, decrease 4-4-4-5-6-6 stitches at the beginning of the next 2 rows for the armholes = 69-75-81-85-91-101 stitches. Continue with the pattern as before with the outermost stitch on each side worked in garter stitch. When the piece measures 38-39-41-42-43-44 cm, (finish neatly in relation to the pattern), place the middle 33-33-33-33-41-41 stitches on a thread for the neck on the next row from the right side and each shoulder is finished separately = 18-21-24-26-25-30 stitches on each shoulder. RIGHT SHOULDER: Continue with stocking stitch, A.1 and A.2 as before and the outermost stitch on each side worked in garter stitch. Cast off on each row from the neck (i.e. the beginning of each row from the right side) as follows: Cast off 2 stitches 1-1-1-1-0-0 time, then 1 stitch 2-2-3-3-2-2 times = 14-17-19-21-23-28 stitches. In sizes XS-S-M-L stop working pattern A.2; continue with purl over purl and stocking stitch over the other stitches. In sizes XL-XXL continue the pattern as before. The outermost stitch on each side is worked in garter stitch. Cast off with knit from the right side when the piece measures 48-50-52-54-56-58 cm from the cast-on edge. LEFT SHOULDER: Work as for the right shoulder but when casting off stitches for the neck, cast off at the beginning of each row from the wrong side. SLEEVE: Cast on 35-35-38-38-41-41 stitches (including 1 edge stitch in garter stitch on each side) with circular needle size 4.5 mm and Air. Purl 1 row from the wrong side. Then work as follows from the right side: Work 1 edge stitch in garter stitch, * purl 2, knit 1 *, work from *-* until there is 1 stitch left and finish with 1 edge stitch in garter stitch. When the rib measures 5 cm, knit 1 row from the right side and increase as follows: Work 1 edge stitch in garter stitch, knit 4-3-4-4-6-5, * 1 yarn over, knit 1 *, work from *-* until there are 5-4-5-5-7-6 stitches left, knit 4-3-4-4-6-5 and finish with 1 edge stitch in garter stitch = 60-62-66-66-68-70 stitches. Purl 1 row from the wrong side. Change to circular needle size 5.5 mm. Continue with pattern as follows: 1 edge stitch in garter stitch, 24-25-27-27-28-29 stitches in stocking stitch, A.2 over the next 10 stitches, 24-25-27-27-28-29 stitches in stocking stitch and 1 edge stitch in garter stitch. Repeat A.2 in height. When the sleeve measures 10 cm, increase 0-0-0-1-1-1 stitch inside the 1 edge stitch on each side of the piece – read INCREASE TIP. Increase like this every 8 cm a total of 0-0-0-2-2-3 times = 60-62-66-70-72-76 stitches. When the sleeve measures 47-47-47-46-44-42 cm from the cast-on edge, insert 1 marker inside the 1 edge stitch at the beginning of the row – it marks the bottom of the armhole. Work until the sleeve measures 50-50-50-49-48-46 cm. Cast off – read CASTING-OFF TIP! Work the other sleeve in the same way. ASSEMBLY: Sew the shoulder seams inside the cast-off edge. Sew the sleeve seams but leave a split of 3-3-3-3-4-4 cm at the top (i.e. from the marker). Sew the split to the bottom of the armhole and then sew the sleeves into the body. Sew the side seams inside the 1 edge stitch. NECK: Start on the one shoulder and knit up 75 to 96 stitches around the neck (number of stitches must be divisible by 3) with short circular needle size 4.5 mm and Air. Make sure the neck is neither tight nor loose in relation to the neck-line. Work rib in the round (= knit 1, purl 2) for 4 cm. Cast off with knit. |
||||||||||||||||||||||
Diagram explanations |
||||||||||||||||||||||
|
||||||||||||||||||||||
 |
||||||||||||||||||||||
 |
||||||||||||||||||||||
Have you finished this pattern?Tag your pictures with #dropspattern #seasidewatchersweater or submit them to the #dropsfan gallery. Do you need help with this pattern?You'll find 20 tutorial videos, a Comments/Questions area and more by visiting the pattern on garnstudio.com. © 1982-2026 DROPS Design A/S. We reserve all rights. This document, including all its sub-sections, has copyrights. Read more about what you can do with our patterns at the bottom of each pattern on our site. |
||||||||||||||||||||||






With over 40 years in knitting and crochet design, DROPS Design offers one of the most extensive collections of free patterns on the internet - translated to 17 languages. As of today we count 333 catalogues and 12525 patterns translated into English (UK/cm). 12525
We work hard to bring you the best knitting and crochet have to offer, inspiration and advice as well as great quality yarns at incredible prices! Would you like to use our patterns for other than personal use? You can read what you are allowed to do in the Copyright text at the bottom of all our patterns. Happy crafting!
Post a comment to pattern DROPS 212-43
We would love to hear what you have to say about this pattern!
If you want to leave a question, please make sure you select the correct category in the form below, to speed up the answering process. Required fields are marked *.