
Popular categories
Looking for a yarn?


Comments / Questions (14)
![]() Jane Ellegaard wrote:
Jane Ellegaard wrote:
Skønne opskrifter.der mangler mål på denne opskrift me 184.Mandal Jacket.😀
29.07.2019 - 17:22
![]() Emalie wrote:
Emalie wrote:
Muy bonito, los dibujos geométricos parecen fáciles pero muy vistosos.
23.06.2019 - 12:02
![]() Ellis wrote:
Ellis wrote:
This is nice1 and also nice from designers to put 2 models in 1 pattern (sweater+cardigan=twinset or adaptable pattern)
09.06.2019 - 20:20
![]() Godard wrote:
Godard wrote:
Evoque les runes nordiques. couleurs qui vont avec tout
05.06.2019 - 20:18
|
||||||||||
Mandal Jacket#mandaljacket |
||||||||||
 |
 |
|||||||||
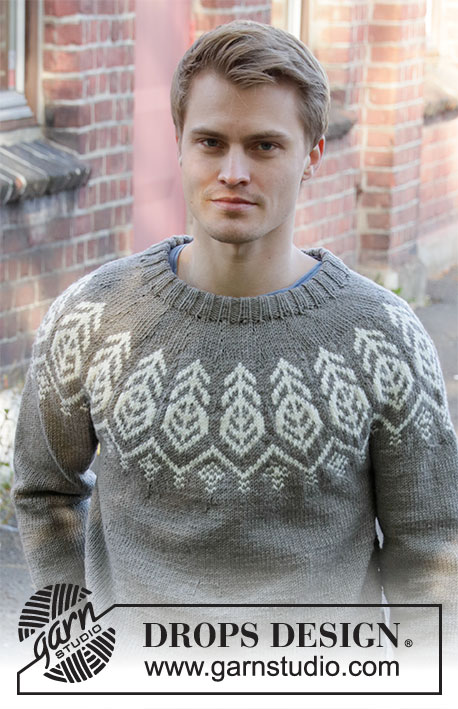
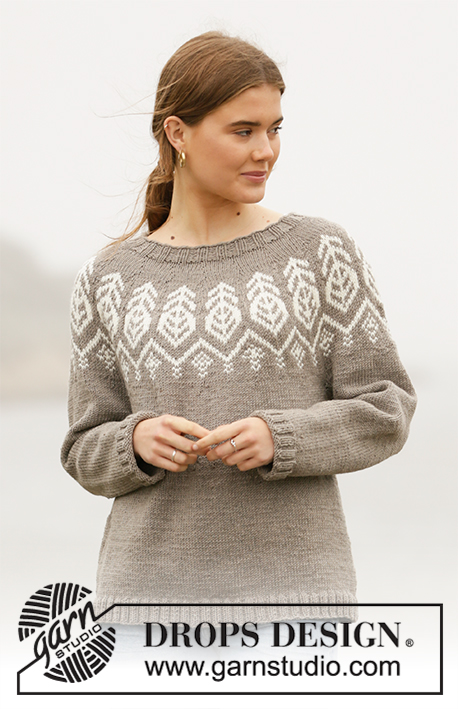
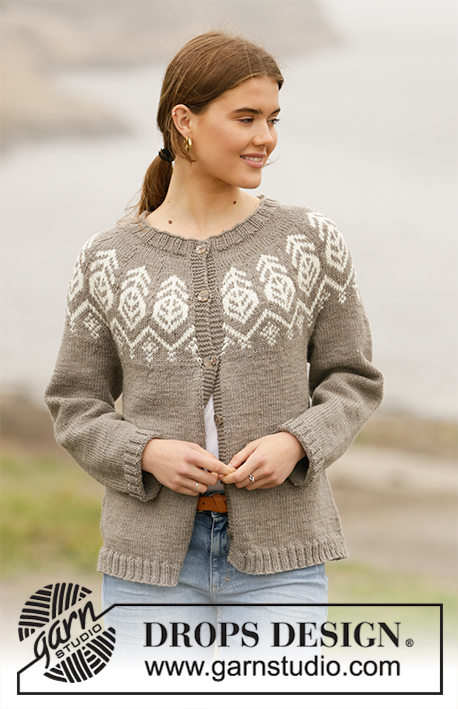
Knitted jacket with round yoke and Nordic pattern in DROPS Merino Extra Fine. The piece is worked top down. Sizes S - XXXL.
DROPS 207-6 |
||||||||||
|
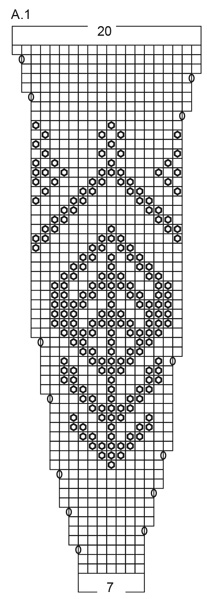
------------------------------------------------------- EXPLANATIONS FOR THE PATTERN: ------------------------------------------------------- PATTERN: See diagram A.1. The diagram is worked in stocking stitch. RIDGE/GARTER STITCH (worked back and forth): Knit all rows. 1 ridge in height = Knit 2 rows. INCREASE TIP-1 (evenly spaced): To work out how to increase evenly, count the total number of stitches on the needle (e.g. 104 stitches) minus bands (e.g. 10 stitches) and divide the remaining stitches by the number of increases to be made (e.g. 18) = 5.2. In this example, increase by making 1 yarn over after approx each 5th stitch. On the next row purl the yarn overs twisted to avoid holes. INCREASE TIP-2 (for sides of body): Work until there are 2 stitches left before the marker thread, make 1 yarn over, knit 4 (marker thread sits between these 4 stitches) make 1 yarn over (= 2 stitches increased at each marker thread; 4 stitches increased on row). On the next row purl the yarn overs twisted to avoid holes. Then work the new stitches in stocking stitch. DECREASE TIP (for sleeves): Decrease 1 stitch on each side of the marker thread as follows: Work until there are 3 stitches left before the marker thread, knit 2 together, knit 2 (marker thread sits between these 2 stitches), slip 1 stitch as if to knit, knit 1 and pass the slipped stitch over the knitted stitch = 2 stitches decreased. BUTTONHOLE: Work buttonholes on right band (when garment is worn). Work from the right side when there are 3 stitches left on row as follows: Make 1 yarn over, knit 2 together and knit the last stitch. On the next row (wrong side) knit the yarn over to leave a hole. The first buttonhole is worked when the neck measures approx. 2 cm. Then work the other 5-6-6-7-7-7 buttonholes with approx. 8-8-8-8-8-9 cm between each one. ------------------------------------------------------- START THE PIECE HERE: ------------------------------------------------------- JACKET – SHORT OVERVIEW OF THE PIECE: The neck and yoke are worked back and forth with circular needle, top down from mid front. The yoke is divided for body and sleeves and the body continued back and forth with circular needle. The sleeves are worked in the round with short circular needle/double pointed needles, top down. NECK: Cast on 104-108-112-116-124-128 stitches (including 5 band stitches on each side towards mid front) with circular needle size 3.5 mm and light brown. Purl 1 row (= wrong side). The next row is worked as follows from the right side: 5 band stitches in GARTER STITCH – read description above, * knit 2, purl 2 *, work from *-* until there are 7 stitches left on the row, knit 2 and finish with 5 band stitches in garter stitch. Continue this rib for 3 cm. When the rib is finished knit 1 row from the right side where you increase 18-21-24-34-33-43 stitches evenly spaced – read INCREASE TIP-1 = 122-129-136-150-157-171 stitches. Change to circular needle size 4 mm and purl 1 row from the wrong side (bands are knitted). Then work the yoke as described below. YOKE: Work as follows from the right side: 5 band stitches in garter stitch, A.1 over the next 112-119-126-140-147-161 stitches (= 16-17-18-20-21-23 repeats of 7 stitches) and finish with 5 band stitches in garter stitch. Work and increase as shown in A.1; the bands are continued in garter stitch. When A.1 has been completed there are 330-350-370-410-430-470 stitches on the needle. Continue with light brown until the piece measures 22-24-25-27-29-31 cm from the cast-on edge; on the last row increase 0-16-12-0-4-0 stitches evenly spaced = 330-366-382-410-434-470 stitches. The next row is worked as follows from the wrong side: Work the first 50-55-58-63-68-75 stitches in garter stitch and stocking stitch as before (= front piece), place the next 70-78-80-84-86-90 stitches on 1 thread for sleeve, cast on 6-6-8-8-10-10 new stitches on the needle (= in side under sleeve), work 90-100-106-116-126-140 stitches in stocking stitch as before (= back piece), place the next 70-78-80-84-86-90 stitches on 1 thread for sleeve, cast on 6-6-8-8-10-10 new stitches on the needle (= in side under sleeve) and work the remaining 50-55-58-63-68-75 stitches in stocking stitch and garter stitch as before (= front piece). Body and sleeves are finished separately. THE PIECE IS NOW MEASURED FROM HERE! BODY: = 202-222-238-258-282-310 stitches. Insert 1 marker thread 53-58-62-67-73-80 stitches in from each side (= 96-106-114-124-136-150 stitches between marker threads on the back piece). Allow the threads to follow your work onwards; they will be used when increasing in the sides. Work stocking stitch back and forth with light brown and 5 band stitches in garter stitch on each side. When the piece measures 4 cm from the division, increase 1 stitch on each side of both marker threads – read INCREASE TIP-2. Increase like this every 4 cm a total of 7 times on each side = 230-250-266-286-310-338 stitches. Continue working until the piece measures 37-37-38-38-38-38 cm from the division in all sizes (or to desired length; there is 4 cm left to finished length). Knit 1 row from the right side where you increase 46-50-54-58-62-70 stitches evenly spaced = 276-300-320-344-372-408 stitches. Change to circular needle size 3.5 mm and work the next row as follows from the wrong side: 5 band stitches in garter stitch, * purl 2, knit 2 *, work from *-* until there are 7 stitches left on the row, purl 2 and finish with 5 band stitches in garter stitch. Continue this rib for 4 cm. Loosely cast off with garter stitch over garter stitch, knit over knit and purl over purl. The jacket measures approx. 63-65-67-69-71-73 cm from the shoulder down. SLEEVE: Place the 70-78-80-84-86-90 stitches from the thread on the one side of the piece on short circular needle/double pointed needles size 4 mm and knit up 1 stitch in each of the 6-6-8-8-10-10 stitches cast on under the sleeve = 76-84-88-92-96-100 stitches. Insert 1 marker thread in the middle of the 6-6-8-8-10-10 stitches under the sleeve. Allow the thread to follow your work onwards; it will be used when decreasing mid under sleeve. Start the round at the marker thread and work stocking stitch in the round with light brown. When the piece measures 3 cm from the division decrease 2 stitches mid under sleeve – read DECREASE TIP. Decrease like this every 2½-2-1½-1½-1½-1 cm a total of 12-15-16-17-18-19 times = 52-54-56-58-60-62 stitches. Continue working until the sleeve measures 38-37-36-35-34-33 cm from the division (shorter measurements in larger sizes due to wider neck and longer yoke). Knit 1 round where you increase 8-10-8-10-8-10 stitches evenly spaced = 60-64-64-68-68-72 stitches. Change to double pointed needles size 3.5 mm and work rib (= knit 2 / purl 2) for 3 cm. Loosely cast off with knit over knit and purl over purl. The sleeve measures approx. 41-40-39-38-37-36 cm from the division. Work the other sleeve in the same way. ASSEMBLY: Sew buttons onto left band. |
||||||||||
Diagram explanations |
||||||||||
|
||||||||||
 |
||||||||||
 |
||||||||||
Have you finished this pattern?Tag your pictures with #dropspattern #mandaljacket or submit them to the #dropsfan gallery. Do you need help with this pattern?You'll find 27 tutorial videos, a Comments/Questions area and more by visiting the pattern on garnstudio.com. © 1982-2026 DROPS Design A/S. We reserve all rights. This document, including all its sub-sections, has copyrights. Read more about what you can do with our patterns at the bottom of each pattern on our site. |
||||||||||


With over 40 years in knitting and crochet design, DROPS Design offers one of the most extensive collections of free patterns on the internet - translated to 17 languages. As of today we count 324 catalogues and 12290 patterns translated into English (UK/cm). 12290
We work hard to bring you the best knitting and crochet have to offer, inspiration and advice as well as great quality yarns at incredible prices! Would you like to use our patterns for other than personal use? You can read what you are allowed to do in the Copyright text at the bottom of all our patterns. Happy crafting!
Post a comment to pattern DROPS 207-6
We would love to hear what you have to say about this pattern!
If you want to leave a question, please make sure you select the correct category in the form below, to speed up the answering process. Required fields are marked *.