
Popular categories
Looking for a yarn?


Comments / Questions (12)
![]() Carina wrote:
Carina wrote:
Pues la parte que dices que va por dentro es lana desperdiciada y no estamos para desperdiciar
09.03.2026 - 17:23
![]() Carina wrote:
Carina wrote:
Pero hacer el dobladillo antes de terminar con A3? Lo veo un poco raro, yo he hecho el dobladillo cuando ya he terminado con A1, A2 y A3 si no el dobladillo va a quedar a mitad de dibujo y no se va a poder doblar, no?
27.02.2026 - 00:53DROPS Design answered:
Hola Carina, A.3 es la parte del dobladillo que va a quedar dentro. El dibujo no se interrumpe, ya que el final de la falda, con los picos y agujeritos, se trabaja al terminar A.2. Después de este borde de doblaje trabajas A.3 y luego metes la sección en A.3 hacia dentro, doblando por la fila de doblaje. Puedes ver en una de las fotos que el dibujo por dentro de la falda no se corresponde con el final de la falda en A.2. Esto es porque por dentro de la falda tenemos el patrón A.3.
09.03.2026 - 00:12
![]() Carina wrote:
Carina wrote:
Pero hacer el dobladillo antes de terminar con A3? Lo veo un poco raro, yo he hecho el dobladillo cuando ya he terminado con A1, A2 y A3 si no el dobladillo va a quedar a mitad de dibujo y no se va a poder doblar, no?
19.02.2026 - 23:43DROPS Design answered:
Hola Carina, A.3 es la parte del dobladillo que va a quedar dentro. El dibujo no se interrumpe, ya que el final de la falda, con los picos y agujeritos, se trabaja al terminar A.2. Después de este borde de doblaje, trabajas A.3 y luego metes la sección en A.3 hacia dentro, doblando por la fila de doblaje. Puedes ver en una de las fotos que el dibujo por dentro de la falda no se corresponde con el final de la falda en A.2. Esto es porque por dentro de la falda tenemos el patrón A.3.
09.03.2026 - 00:12
![]() Carina wrote:
Carina wrote:
Hola No entiendo lo del dobladillo, quedan agujeros antes de tejer A3? Si luego se cose hacia dentro para qué sirve entonces? No entiendo las ideas, si me lo puedes explicar te lo agradecería Muchas gracias
12.02.2026 - 18:08DROPS Design answered:
Hola Carina, las hebras nos ayudan a que se formen agujeritos en el borde de doblaje ( los 2 puntos juntos son el "pico" de la parte inferior, mientras que la lazada es el hueco entre los picos). Así que, al doblar el borde y coser hacia dentro, estas hebras no retorcidas nos van a permitir obtener los picos de la falda.
16.02.2026 - 14:09
![]() Carina wrote:
Carina wrote:
Hola No entiendo lo del dobladillo, quedan agujeros antes de tejer A3? Si luego se cose hacia dentro para qué sirve entonces? No entiendo las ideas, si me lo puedes explicar te lo agradecería Muchas gracias
30.01.2026 - 22:04DROPS Design answered:
Hola Carina, las hebras nos ayudan a que se formen agujeritos en el borde de doblaje ( los 2 puntos juntos son el "pico" de la parte inferior, mientras que la lazada es el hueco entre los picos). Así que, al doblar el borde y coser hacia dentro, estas hebras no retorcidas nos van a permitir obtener los picos de la falda.
16.02.2026 - 14:09
![]() Carina wrote:
Carina wrote:
Ah, vale, ya la he encontrado Gracias
29.01.2026 - 16:46
![]() Carina wrote:
Carina wrote:
Hola El patrón de la muñeca no está disponible? Estaría bien que lo publicárais, es bonita, y para los que no sabemos hacer ganchillo nos vendría genial porque casi todos los amigurumis están en ganchillo Gracias
29.01.2026 - 16:42DROPS Design answered:
Hola Carina, el patrón de la muñeca está disponibleAQUI. Saludos!
29.01.2026 - 17:01
![]() Aneta wrote:
Aneta wrote:
Wzór piękny. Szkoda że nie ma zdjęcia tyłu sukienki, by zobaczyć jak wygląda zapięcie na guzik.
15.08.2023 - 14:24
![]() Edith Kristensen wrote:
Edith Kristensen wrote:
Der kommer så mange fine opskrifter på dukke tøj men hvad med dukken. kan man ikke få opskrift på den . M.V.H. Edith Kristensen
13.12.2021 - 19:55
![]() Edith wrote:
Edith wrote:
Hvordan får jeg selve dukken ???
04.12.2021 - 14:07DROPS Design answered:
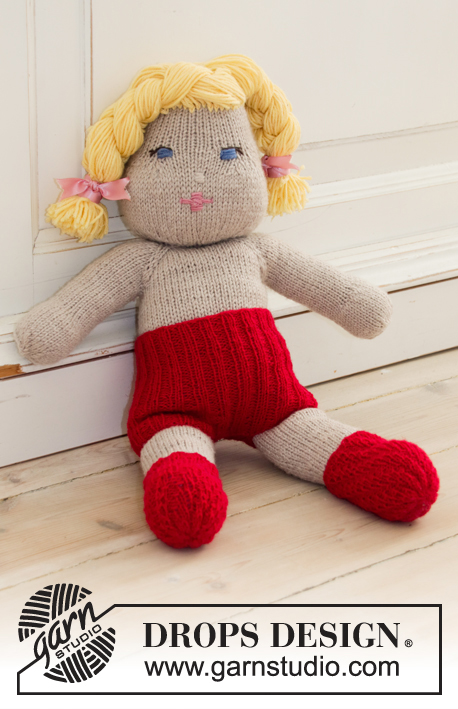
Hei Edit. Da kan du ta en titt på oppskrift DROPS Children 35-12. Der er oppskriften på strikket dukke med kortbukser og tubesokker. mvh DROPS Design
07.12.2021 - 12:52
|
|||||||||||||
Christmas Cora#dropschristmascora |
|||||||||||||
 |
 |
||||||||||||
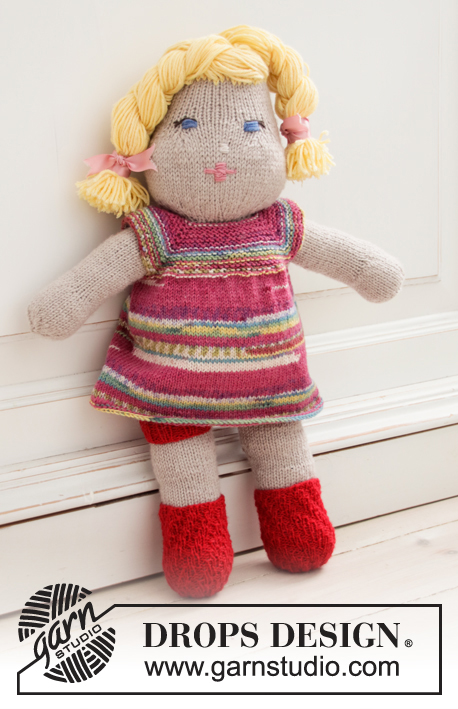
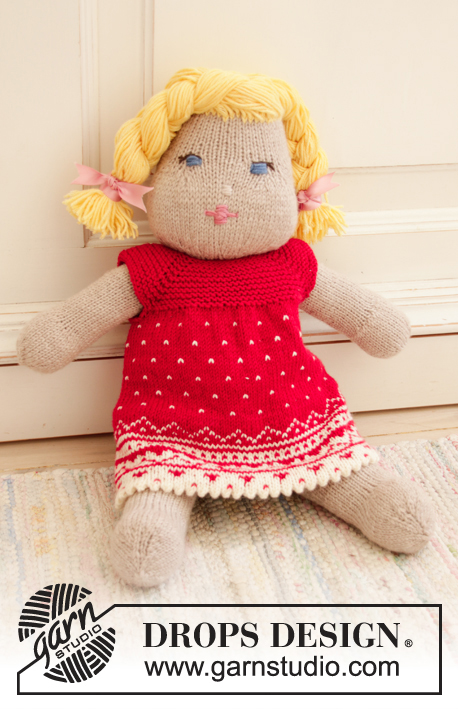
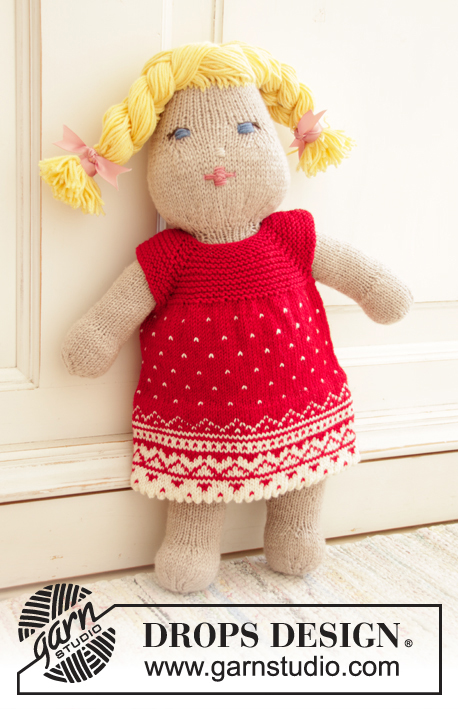
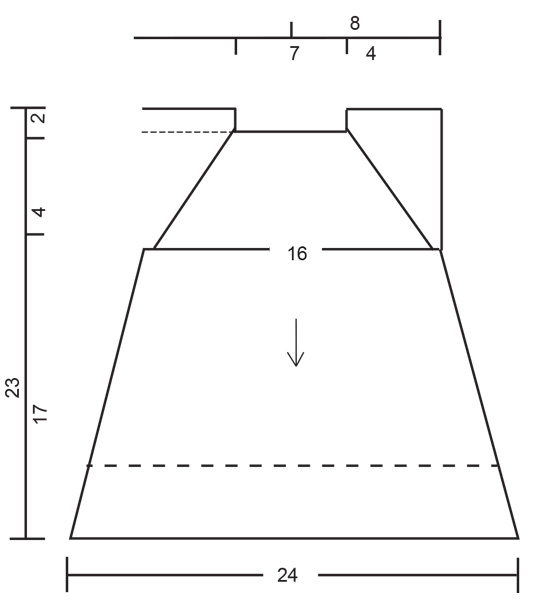
Knitted dress for doll in DROPS BabyMerino. Piece is knitted top down with raglan, Nordic pattern and garter stitch.
DROPS Children 35-15 |
|||||||||||||
|
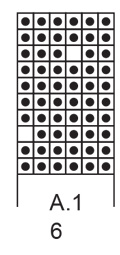
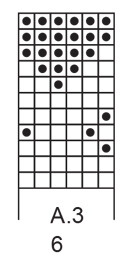
---------------------------------------------------------- EXPLANATION FOR THE PATTERN: ---------------------------------------------------------- GARTER STITCH (back and forth): 1 ridge = knit 2 rows. PATTERN: Dress: See diagrams A.1 to A.3. INCREASE TIP-1 (applies to raglan): Work until 1 stitch remains before marker, 1 yarn over (= 1 stitch increased), knit 2 (marker is between these stitches), 1 yarn over (= 1 stitch increased). Increase like this at all 4 markers (= 8 stitches increased in total). On next row work yarn overs twisted to avoid holes. INCREASE TIP-2 (evenly): To calculate how to increase evenly, use the total number of stitches to be increased over (e.g. 17 stitches) and divide stitches by number of increases to be done (e.g. 9) = 1.9. In this example increase by making 1 yarn over after approx. every other stitch. On next round knit yarn overs twisted to avoid holes. BUTTONHOLE (top down): When 1 ridge has been worked, decrease for 1 buttonhole on next row from right side as follows: Work until 3 stitches remain on needle, knit 2 together, 1 yarn over, knit 1. ---------------------------------------------------------- START THE PIECE HERE: ---------------------------------------------------------- DRESS - SHORT OVERVIEW OF THE PIECE: Worked top down. Work first a yoke back and forth in garter stitch. Increase stitches evenly for skirt, then work in the round on circular needle for pattern, before knitting a folding edge and a hem with pattern. YOKE: Cast on 52 stitches on circular needle size 3 mm with red. Work in GARTER STITCH - see explanation above. Work from mid back. On first row insert 4 markers for raglan as follows: Work 8 stitches (= half back piece), insert 1 marker, work 10 stitches (= sleeve), insert 1 marker, work 16 stitches (= front piece), insert 1 marker, work 10 stitches (= sleeve), insert 1 marker and finish with 8 stitches (= half back piece). On next row increase 2 stitches evenly over each sleeve = 56 stitches (= 12 stitches on each sleeve). On next row (= right side) decrease for BUTTONHOLE - read explanation above, at the same time: increase for raglan as follows: Increase 1 stitch on each side of every marker - read INCREASE TIP-1, on every row from right side 9 times in total = 128 stitches. REMEMBER THE KNITTING TENSION! Piece measures approx. 4 cm from cast-on edge, if not: work until piece measures 4 cm. Now divide piece for body and sleeves, and increase stitches evenly for skirt as follows: Knit 17 stitches while in addition increasing 9 stitches evenly – read INCREASE TIP-2 (= half back piece = 26 stitches), cast off the next 30 stitches for sleeve, knit 34 stitches while in addition increasing 19 stitches evenly (= front piece = 53 stitches), cast off the next 30 stitches for sleeve, knit 17 stitches while in addition increasing 10 stitches evenly (= half back piece = 27 stitches) = 106 stitches. Continue piece in the round. Knit 1 round and cast on 4 stitches under each sleeve = 114 stitches. SKIRT: Then work pattern according to A.1 (= 6 stitches = 19 repetitions in width). When piece measures 9½ cm from where skirt was divided from sleeves (approx. 7½ cm remain on length of dress – or work to desired length), work A.2 (= 6 stitches) over all stitches (= 19 times in width). When A.2 has been worked 1 time vertically, piece measures approx. 17 cm from where skirt was divided from sleeves. Now work a folding edge with off white as follows: * Knit 2 together, 1 yarn over *, work from *-* over all stitches. HEM: NOW MEASURE PIECE FROM HERE! Do not knit yarn overs twisted on next round to make holes. Work A.3 (= 6 stitches) over all stitches (= 19 times in width). When A.3 has been worked 1 time vertically, continue in red. Work until hem measures 8 cm from folding edge, cast off by knitting. Piece measures approx. 31 cm in total (including hem) from cast-on edge. ASSEMBLY: Fold hem at the bottom of dress towards wrong side of dress and sew dress with red. Sew on button mid back. |
|||||||||||||
Diagram explanations |
|||||||||||||
|
|||||||||||||
 |
|||||||||||||
 |
|||||||||||||
 |
|||||||||||||
 |
|||||||||||||
Have you finished this pattern?Tag your pictures with #dropspattern #dropschristmascora or submit them to the #dropsfan gallery. Do you need help with this pattern?You'll find 23 tutorial videos, a Comments/Questions area and more by visiting the pattern on garnstudio.com. © 1982-2026 DROPS Design A/S. We reserve all rights. This document, including all its sub-sections, has copyrights. Read more about what you can do with our patterns at the bottom of each pattern on our site. |
|||||||||||||


With over 40 years in knitting and crochet design, DROPS Design offers one of the most extensive collections of free patterns on the internet - translated to 17 languages. As of today we count 324 catalogues and 12290 patterns translated into English (UK/cm). 12290
We work hard to bring you the best knitting and crochet have to offer, inspiration and advice as well as great quality yarns at incredible prices! Would you like to use our patterns for other than personal use? You can read what you are allowed to do in the Copyright text at the bottom of all our patterns. Happy crafting!
Post a comment to pattern DROPS Children 35-15
We would love to hear what you have to say about this pattern!
If you want to leave a question, please make sure you select the correct category in the form below, to speed up the answering process. Required fields are marked *.