
Popular categories
Looking for a yarn?


Comments / Questions (84)
![]() Lucia wrote:
Lucia wrote:
Jeg glæder mig til og strikke denne smukke cardigan. Jeg kan ikke se, der står noget om en strikkeprøve ifht.og vælge størrelse. Vh. Lucia
28.04.2026 - 09:01DROPS Design answered:
Hej Lucia, jo, du skal have 13 masker og 15 pinde = 10x10 cm i perlestrik. Størrelserne finder du i måleskitsen nederst i opskriften :)
28.04.2026 - 14:50
![]() Han Essers wrote:
Han Essers wrote:
Zijn er ook patronen die van onder naar boven gebreid worden.Andersom zijn de halsmethodes erg lelijk. Veel te ruim of te hoog. Je kunt als je hiermee begint niets meer veranderen. Groeten Han
09.08.2025 - 10:45
![]() Sabine wrote:
Sabine wrote:
Hallo, ich stricke gerade diese schöne Jacke und frage mich, welche Größe die gelbe Jacke in der Anleitung hat. Vielen Dank!
21.04.2025 - 17:46
![]() Mia wrote:
Mia wrote:
Hej Jeg vil gerne strikke modellen i Drops Melody garn. Er det korrekt jeg så skal bruge 5 nøgler i str L? Tak :-)
26.03.2025 - 11:33DROPS Design answered:
Hej Mia, da skal du bruge 300 gram DROPS Melody :)
27.03.2025 - 13:48
![]() Marisa wrote:
Marisa wrote:
Mi piacerebbe lavorare un cardigan con ferri diritti.......trovo sempre modelli lavorati con ferri circolari....io nn so usarli .....grazie
17.03.2025 - 06:29DROPS Design answered:
Buonasera Marisa, i cardigan sono lavorati in piano, per cui può utilizzare anche i ferri dritti. Buon lavoro!
18.03.2025 - 20:24
![]() Antonella wrote:
Antonella wrote:
Salve, sono alle prime armi. Cosa vuol dire che il cardigan è lavorato con 3 capi?
26.02.2025 - 18:03DROPS Design answered:
Buongiorno Antonella, significa che deve utilizzare 3 fili del filato indicato. Buon lavoro!
28.02.2025 - 15:34
![]() Tina Kjærsgaard wrote:
Tina Kjærsgaard wrote:
Hej Drops Jeg har købt det anviste garn i opskriften. Lavet strikkeprøve på pind 7. Det var alt for småt. Prøvet med pind 8. Det var også for småt. Ca 9 x 9 cm. Jeg har regnet ud at hvis jeg strikker på pind 8 og strikker XXL i stedet for XL vil det passe. Jeg vil bare sikre mig at det ikke er fordi der er anført forkert maske antal for strikkeprøve. Har I erfaring med deenne opskrift mht til det?
19.02.2025 - 09:36DROPS Design answered:
Hej Tina, det lyder til at du strikker mere fast end hvad vi gør. Vi få 13 masker på 10 cm og strikker ganske løst :)
20.02.2025 - 11:41
![]() Suzy Lunders wrote:
Suzy Lunders wrote:
Hallo, ik had graag deze vest gebreid maar met 1 draad Drops Melody, kan dit en hoeveel bollen zou ik dan nodig hebben? Alvast bedankt! Gr Suzy
26.01.2025 - 17:21
![]() Pat Van Menk wrote:
Pat Van Menk wrote:
My breast measurement is 94 centimeters wat size would you suggest I knit
02.12.2024 - 16:52DROPS Design answered:
Dear Pat, the L size is exactly a 94cm bust. Since these are the measurements for the garment, it would be too tight for someone with the same bust measurement as the garment; as a jacket it should have some ease. So we recommend working the next size, at the very least (with a 102 cm bust). You can also measure your favourite garments, check their bust measurement and compare them to the measurements in the schematic; when in doubt, it's always recommended to go for the larger size being considered. Happy knitting!
07.12.2024 - 23:07
![]() Patricia Van Menk wrote:
Patricia Van Menk wrote:
If you have a 94 cm breast which size would you knit for the jacket
01.12.2024 - 11:01DROPS Design answered:
Dear Patricia, the L size is exactly a 94cm bust. Since these are the measurements for the garment, it would be too tight for someone with the same bust measurement as the garment; as a jacket it should have some ease. So we recommend working the next size, at the very least (with a 102 cm bust). You can also measure your favourite garments, check their bust measurement and compare them to the measurements in the schematic; when in doubt, it's always recommended to go for the larger size being considered. Happy knitting!
07.12.2024 - 21:17
|
|||||||
Le Conquet#leconquetcardigan |
|||||||
 |
 |
||||||
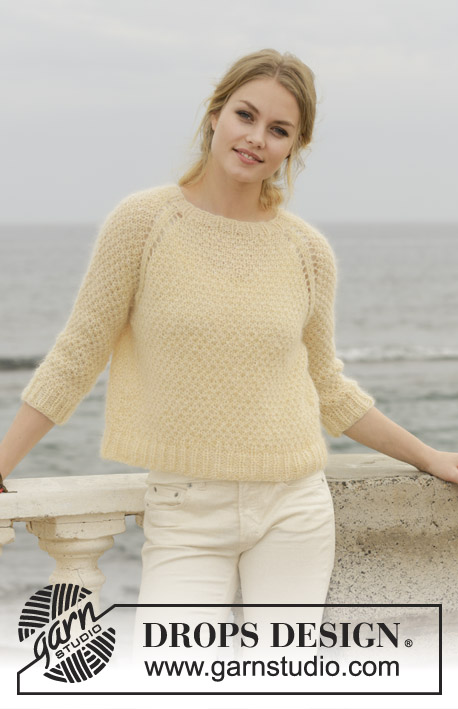
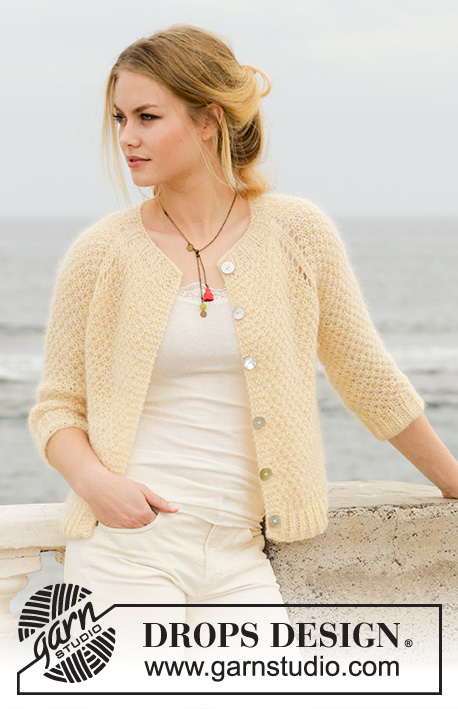
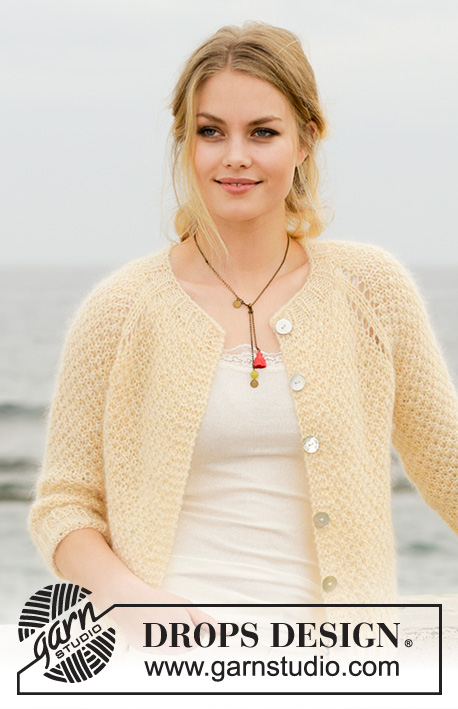
Jacket with raglan, moss stitch and ¾ sleeves, knitted top down. Size: S - XXXL Piece is knitted in 1 strand DROPS Alpaca or DROPS Flora and 2 strands DROPS Kid-Silk.
DROPS 191-8 |
|||||||
|
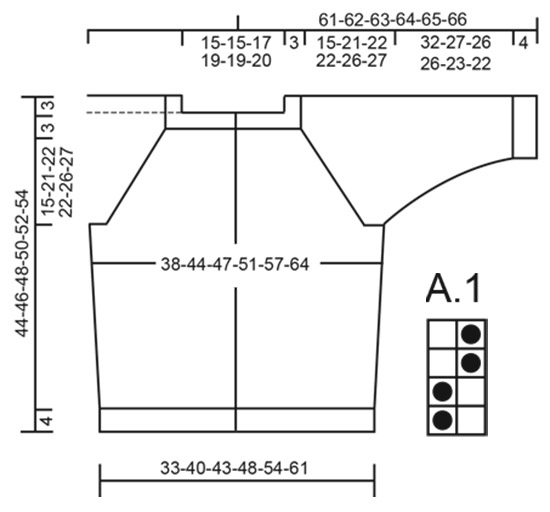
---------------------------------------------------------- INFORMATION FOR PATTERN: GARTER STITCH (back and forth): 1 ridge = knit 2 rows. INCREASE TIP: To calculate how to increase evenly, use the total number of stitches on row (e.g. 63 stitches), minus bands (e.g. 8 stitches) and divide the remaining stitches by number of increases to be done (e.g. 12) = 4.6. In this example increase after alternately approx. every 4th and 5th stitch. Increase 1 stitch by making 1 yarn over, on next row work yarn over twisted to avoid holes. PATTERN: See diagram A.1 (moss stitch). Diagrams show all rows in pattern seen from the right side. RAGLAN: All increases are done from the right side. Increase on every other row (i.e. every row from right side) as follows: Begin 1 stitch before marker thread, make 1 yarn over, work 2 stitches in stocking stitch (marker thread is in the middle of these two stitches), make 1 yarn over (= 2 stitches increased). Increase on each side of the 4 marker threads. On next row (wrong side) purl yarn overs to make holes, then work the increased stitch in pattern. The 2 stitches along each raglan line are worked in stocking stitch until yoke is done. DECREASE TIP (applies to sides on body and mid under sleeves): Work until 1 stitch remains before stitch with marker thread, slip 2 stitches as if to knit together, work next stitch as shown in A.1 and pass the 2 slipped stitches over. This way A.1 will continue nicely over decrease on next row/round. BUTTONHOLES: Decrease for buttonholes on right band (when garment is worn). Decrease from right side when 3 stitches remain on row as follows: Make 1 yarn over, knit the next 2 stitches together, knit last stitch. On next row knit yarn over to make holes. Decrease first buttonhole when neck edge measures approx. 1½-2 cm. Then decrease the next 5-5-5-6-6-6 buttonholes approx. 7½-8-8-7-7½-8 cm apart. ---------------------------------------------------------- JACKET: Work back and forth on circular needle from mid front, work top down. Sleeves are worked in the round on a short circular needle top down, switch to double pointed needles when needed. NECK EDGE: Cast on 63-63-69-75-78-81 stitches (including 4 band stitches in each side towards mid front) on circular needle size 6 mm with 1 strand Alpaca/Flora + 2 strands Kid-Silk (= 3 strands). Purl 1 row (= wrong side). Work next row as follows from right side: 4 band stitches in GARTER STITCH - see explanation above - * knit 1, purl 2 *, repeat from *-* until 5 stitches remain, knit 1 and finish with 4 band stitches in garter stitch. Continue rib like this for 3 cm – remember BUTTONHOLES on right band – see explanation above. After rib purl 1 row from wrong side while increasing 12-12-14-14-11-10 stitches evenly - read INCREASE TIP = 75-75-83-89-89-91 stitches. Now insert 4 marker threads in the piece as follows (without working the stitches): Insert first marker thread after the first 16-16-18-20-20-20 stitches (= front piece), insert 2nd marker thread after the next 9 stitches (= sleeve), insert 3rd marker thread after the next 25-25-29-31-31-33 stitches (= back piece), and insert 4th marker thread after the next 9 stitches (= sleeve). There are 16-16-18-20-20-20 stitches after last marker thread on front piece. Then work yoke as explained below. YOKE: Switch to circular needle size 7 mm and work first row from right side as follows: 4 band stitches in garter stitch, work A.1 over the next 11-11-13-15-15-15 stitches (begin and end with knit 1), make 1 yarn over, work 2 stitches in stocking stitch (marker thread is in the middle of these two stitches), make 1 yarn over, work A.1 over the next 7 stitches (begin and end with knit 1), make 1 yarn over, work 2 stitches in stocking stitch, make 1 yarn over, work A.1 over the next 23-23-27-29-29-31 stitches (begin and end with knit 1), make 1 yarn over, work 2 stitches in stocking stitch, make 1 yarn over, work A.1 over the next 7 stitches (begin and end with knit 1), make 1 yarn over, work 2 stitches in stocking stitch, make 1 yarn over, work A.1 over the next 11-11-13-15-15-15 stitches (begin and end with knit 1) and finish with 4 band stitches in garter stitch (= 8 stitches increased). Continue A.1 back and forth with 4 band stitches in garter stitch in each side towards mid front and 2 stitches in stocking stitch along each raglan line. AT THE SAME TIME continue increase in RAGLAN on each side of the 4 marker threads – see explanation above, until 11-15-16-16-19-20 increases have been done in total along each raglan line (including increase on first row after neck edge). REMEMBER THE KNITTING TENSION! After last increase there are 163-195-211-217-241-251 stitches on needle. Continue pattern with 2 stitches in stocking stitch along each raglan line until piece measures 18-24-25-25-29-30 cm from cast-on edge mid front. Work next row as follows from wrong side: Work the first 26-30-32-34-38-40 stitches as before, slip the next 33-41-45-45-49-49 stitches on 1 stitch holder for sleeve, cast on 5-5-5-7-7-11 new stitches on needle (= in the side under sleeve), work the next 45-53-57-59-67-73 stitches as before, slip the next 33-41-45-45-49-49 stitches on a stitch holder for sleeve, cast on 5-5-5-7-7-11 new stitches on needle and work the last 26-30-32-34-38-40 stitches as before. Then finish body and sleeves separately. NOW MEASURE THE PIECE FROM HERE! BODY: = 107-123-131-141-157-175 stitches. Insert 1 marker thread in the middle of the 5-5-5-7-7-11 stitches cast on under sleeve in each side and move the marker threads upwards when working. Continue A.1 back and forth with 4 band stitches in garter stitch in each side. When piece measures 4 cm from division, decrease 2 stitches in each side - read DECREASE TIP (= 4 stitches decreased). Decrease like this every 6-4-4-8-8-8 cm a total of 3-3-3-2-2-2 times in each side = 95-111-119-133-149-167 stitches. When piece measures 19-15-16-18-16-17 cm from division, knit 1 row from right side while increasing 13-12-13-17-19-19 stitches evenly = 108-123-132-150-168-186 stitches. Switch to circular needle size 6 mm. Work next row as follows from wrong side: 4 band stitches in garter stitch, * purl 1, knit 2 *, repeat from *-* until 5 stitches remain, purl 1 and 4 band stitches in garter stitch. Continue rib like this for 4 cm. Switch back to circular needle size 7 mm and cast off with knit over knit and purl over purl - make sure to avoid a tight cast-off edge. Jacket measures approx. 44-46-48-50-52-54 cm from shoulder and down. SLEEVE: Slip the 33-41-45-45-49-49 stitches from stitch holder in one side of piece on a short circular needle size 7 mm and pick in addition up 1 stitch in each of the 5-5-5-7-7-11 stitches cast on under sleeve = 38-46-50-52-56-60 stitches. Insert 1 marker thread in the middle stitch of the 5-5-5-7-7-11 stitches under sleeve. Continue A.1 in the round. When piece measures 3 cm from division, decrease 2 stitches mid under sleeve - read DECREASE TIP. Decrease like this every 13-3½-3-3-2-1½cm 3-7-8-8-10-11 times in total = 32-32-34-36-36-38 stitches. Continue until sleeve measures 32-27-26-26-23-22 cm from division (shorter measurements in the larger sizes because of wider neck and longer yoke). Knit 1 round while increasing 4-4-5-3-3-4 stitches evenly = 36-36-39-39-39-42 stitches. Switch to double pointed needles size 6 mm. Work rib in the round = knit 1/purl 2 for 4 cm. Cast off with knit over knit and purl over purl but to avid at tight cast-off edge make 1 yarn over after every 6th stitch at the same time cast off (cast off yarn overs as stitches). Sleeve measures approx. 36-31-30-30-27-26 cm from division. Work the other sleeve the same way. ASSEMBLY: Sew the buttons on to the left band. |
|||||||
Diagram explanations |
|||||||
|
|||||||
 |
|||||||
Have you finished this pattern?Tag your pictures with #dropspattern #leconquetcardigan or submit them to the #dropsfan gallery. Do you need help with this pattern?You'll find 27 tutorial videos, a Comments/Questions area and more by visiting the pattern on garnstudio.com. © 1982-2026 DROPS Design A/S. We reserve all rights. This document, including all its sub-sections, has copyrights. Read more about what you can do with our patterns at the bottom of each pattern on our site. |
|||||||


With over 40 years in knitting and crochet design, DROPS Design offers one of the most extensive collections of free patterns on the internet - translated to 17 languages. As of today we count 324 catalogues and 12290 patterns translated into English (UK/cm). 12290
We work hard to bring you the best knitting and crochet have to offer, inspiration and advice as well as great quality yarns at incredible prices! Would you like to use our patterns for other than personal use? You can read what you are allowed to do in the Copyright text at the bottom of all our patterns. Happy crafting!
Post a comment to pattern DROPS 191-8
We would love to hear what you have to say about this pattern!
If you want to leave a question, please make sure you select the correct category in the form below, to speed up the answering process. Required fields are marked *.