
Popular categories
Looking for a yarn?


Comments / Questions (11)
![]() DUVAL MT wrote:
DUVAL MT wrote:
Je ne comprends pas le sens des symboles utilisés dans les diagrammes, pouvez-vous m'aider svp ? Merci
26.09.2025 - 10:15DROPS Design answered:
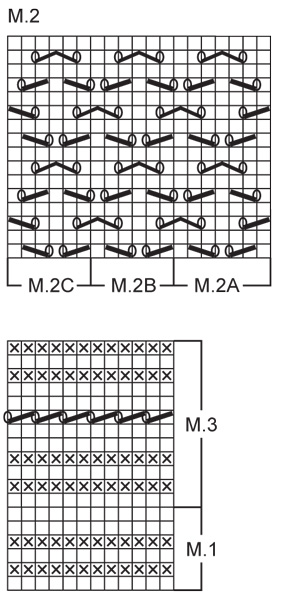
Bonjour Mme Duval, vous trouverez la légende des symboles juste au-dessus des diagrammes; pour M.1 et M.3 suivez bien les instructions des mailles en fonction du rang sur l'endroit ou sur l'envers. Les rangs sur l'envers dans M.2 se tricotent tous en mailles envers. Bon tricot!
26.09.2025 - 16:54
![]() Anja wrote:
Anja wrote:
Bei der Erklärung für die Krausrippe stimmt etwas nicht. Müsste es nicht heißen: 2 Reihen kraus rechts, also Hin- und Rückreihe rechts stricken. Was soll das mit den Nadeln bedeuten?
22.03.2025 - 18:06DROPS Design answered:
Liebe Anja, ja stimmt, mit "Nadel" ist hier "Reihen" gemeint. Viel Spaß beim Stricken!
24.03.2025 - 10:09
![]() Patty Walk wrote:
Patty Walk wrote:
Could you please further explain the back section directions that read" Knit pattern 2 two times then knit pattern 3 once change back to larger needles and knit stockinette st to finished measurements." Is this all one row ? So part of the row has pattern and the rest is stockinette? The picture of the sweater doesn't look like that.
21.07.2024 - 14:17DROPS Design answered:
Dear Patty, previously you had: K 1 (edge st), Pattern 2A (7 sts), Pattern 2B over 72-78-90-96 sts, Pattern 2C (6 sts), K 1 (edge st). So continue working Pattern 2 upwards, with the second row of 2A, 2B and 2C, e.t.c. Work all Pattern 2 rows twice (so 16x2 = 32 rows in Pattern 2). Then work Pattern 3 over the Pattern 2 stitches (don't forget the edge stitch on each side). Work all 12 rows of Pattern 3. Now change to larger needles and continue working the rest of the garment in stocking stitch. To better understand our charts you can read the following lesson: https://www.garnstudio.com/lesson.php?id=68&cid=19. Happy knitting!
22.07.2024 - 01:59
![]() Ann Woodward wrote:
Ann Woodward wrote:
I am knitting the back: The pattern says Knit Pattern 2, two times. The directions say to bind off a designated number of stitches for the armhole at each side, every other row when the piece measures 34 cm.. I have reached 34 cm, but am still knitting Pattern 2 on the Diagram. How do I adjust and right side rows so that the Pattern 2 stays intact, if I am decreasing at each side? The pattern only called for one edge stitch. Your help would be greatly appreciated. Thank you.l
08.02.2023 - 08:50DROPS Design answered:
Dear Mrs Woodward, if you have to decrease the stitches in diagram M.2A and M.2 C make sure to always have the correct number of stitches, ie for the lace pattern you should always have 1 stitch decreased for 1 yarn over, if you cannot work the decrease, then don't do the yarn over, if you cannot do the yarn over, then don't decrease, just work these stitches in stocking stitch, then continue lace pattern as before. Happy knitting!
08.02.2023 - 09:23
![]() Inger Johansson wrote:
Inger Johansson wrote:
Varför ska ska jag inte avmaska lika många maskor för ärmhålet på framstycket som på bakstycket?
07.10.2018 - 20:32DROPS Design answered:
Hei Inger. Det felles litt ulikt i 2 av størrelsene for at masketallet skal gå opp - slik at det er like mange masker på forstykke og bakstykke når du feller av og monterer. God fornøyelse.
19.10.2018 - 10:26
![]() Evelinee wrote:
Evelinee wrote:
Leider bin ich als erfahrene Strickerin an der Musterschrift für dies Lochmuster gescheitert. Schon ab der 3. Reihe stellte sich heraus, dass es nicht aufgeht. Ich habe dann im Internet ein ähnliches Muster gefunden und dies verwendet und so ist die Jacke nun sehr schön geworden. Das Garn hat ein schönes Maschenbild, aber meine gewählte Farbe Korall ist greller als ich erwartet habe.
19.05.2016 - 18:53DROPS Design wrote:
We have updated the diagrams so that they are now larger. Happy knitting!
15.04.2015 - 10:29
![]() Dana wrote:
Dana wrote:
Ok so this is my second message. I have now realised why chuncks of the pattern are missing. They are in the tiny graphs at the bottom of the page, but why are they? How do we know which parts are pattern 1,2,or 3 and what do the other m's and numbers mean? Which are the back,sleeves and fronts?
13.04.2015 - 20:59DROPS Design answered:
Dear Dana, "Pattern 1, 2, 3" in written pattern refer to the diagrams M.1, M.2 and M.3 - in M.2 start with M.2A over the first 7 sts, repeat the 6 sts in M2B and finish with the 6 sts in M2C. Happy knitting!
14.04.2015 - 10:28
![]() Dana wrote:
Dana wrote:
I would love to knit this but the way it has been written is hard to understand. Its as though whoever wrote it was talking to themselves rather than using the correct terms for a knitting pattern. I cant explain which parts do not make sense because every time I try to send this message I'm told its to long. Can you change it so that it is like UK patterns please?
13.04.2015 - 20:36
![]() DROPS Design wrote:
DROPS Design wrote:
The translations for the Diagrams for all Garnstudio patterns are included within the text of the Pattern itself. If you look you will find lines starting with an = sign. These are the translations, and they are given in the same vertical order as the chart symbols within the diagram.
06.03.2008 - 22:42
|
|||||||||||||||||||
English Miss |
|||||||||||||||||||
 |
 |
||||||||||||||||||
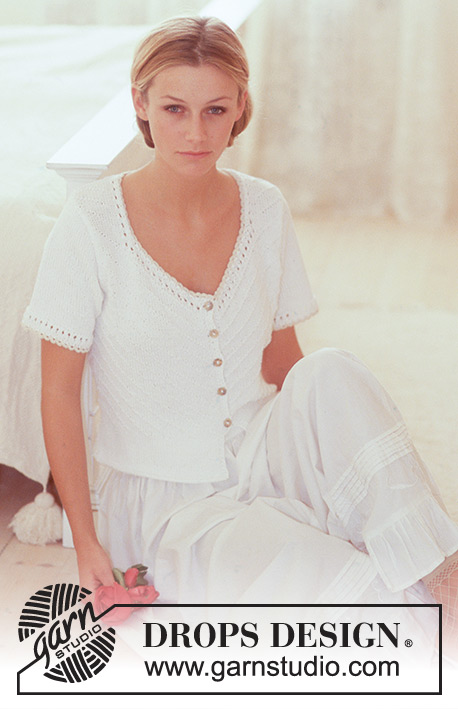
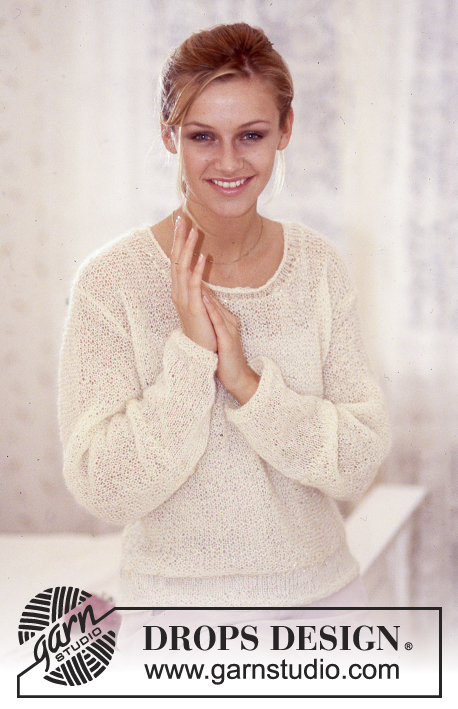
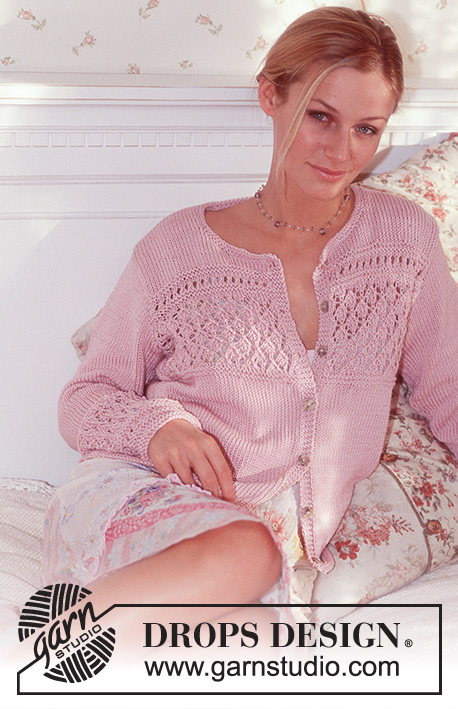
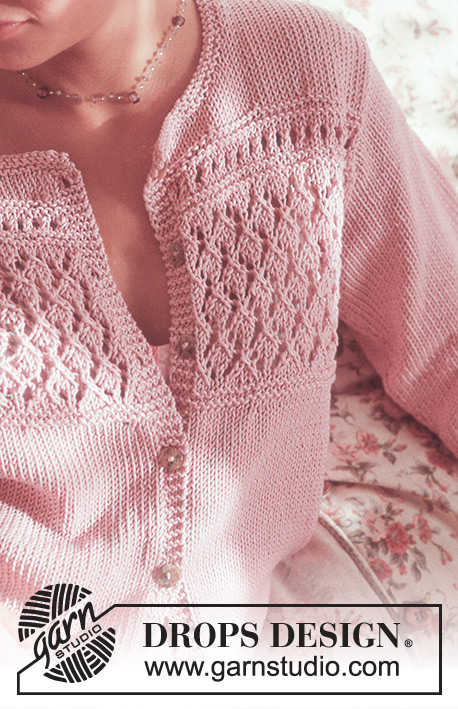
DROPS Cardigan in Muskat
DROPS 74-3 |
|||||||||||||||||||
|
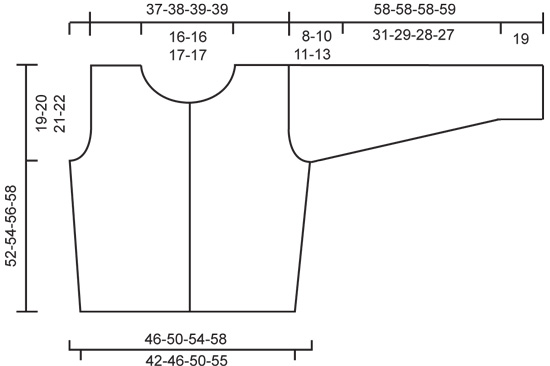
Gauge: 19 sts x 25 rows = 10 x 10 cm on larger needles in stockinette st. To obtain the same gauge in Pattern 2 and Pattern 3 you may need to knit on smaller needles. Pattern: See charts. The patterns are seen from the right side. Garter st, when knitting flat: Knit all sts, all rows. Back: Cast on 81-89-97-107 sts on smaller needles. Knit 4 rows garter st, change to larger needles and stockinette st. When the piece measures 8-8-9-10 cm inc 1 st at each side every 5-6-6-7 cm a total of 4-4-4-3 times = 89-97-105-113 sts. When the piece measures 26-27-28-29 cm knit Pattern 1 (6 rows) – decreasing 2-4-0-2 sts evenly distributed on the last row = 87-93-105-111 sts. Change to smaller needles and knit the next row as follows: K 1 (edge st), Pattern 2A (7 sts), Pattern 2B over 72-78-90-96 sts, Pattern 2C (6 sts), K 1 (edge st). Read the entire next section before knitting: Knit Pattern 2 two times, then knit Pattern 3 once, change back to larger needles and knit stockinette st to finished measurements. At the same time when the piece measures 33-34-35-36 cm bind off for armhole at each side every other row: 4 sts 0-0-1-1 times, 3 sts 1-1-1-1 times, 2 sts 1-2-2-4 times and 1 st 3-3-4-3 times = 71-73-75-75 sts - bind off in stockinette st rather than in Pattern 3. When the piece measures 50-52-54-56 cm bind off the center 29-29-31-31 sts for the neck. On the next row dec 1 st at each neck edge = 20-21-21-21 sts remain on each shoulder. Bind off when the piece measures 52-54-56-58 cm. Left front: Cast on 45-50-53-58 sts on smaller needles. Knit 4 rows garter st. Change to larger needles and stockinette st, but keep the 4 edge sts at the center front edge in garter st throughout. When the piece measures 8-8-10-10 cm inc 1 st at the side every 5-6-6-7 cm a total of 4-4-4-3 times = 49-54-57-61 sts. When the piece measures 26-27-28-29 cm knit Pattern 1 (6 rows) decreasing 1-0-3-1 sts evenly distributed on the last row = 48-54-54-60 sts. Change to smaller needles and knit the next row as follows: K 1 (edge st), Pattern 2A (7 sts), Pattern 2B over 30-36-36-42 sts, Pattern 2C (6 sts), K 4 (garter st edge sts). Read the entire next section before knitting: Knit Pattern 2 two times, then knit Pattern 3 once, change back to larger needles and knit stockinette st to finished measurements. At the same time when the piece measures 33-34-35-36 cm bind off for armhole at side every other row: 4 sts 0-1-1-1 times, 3 sts 1-0-0-1 times, 2 sts 1-3-2-4 times and 1 st 3-3-4-3 times = 40-41-42-42 sts - bind off in stockinette st rather than in Pattern 3. When the piece measures 42-44-45-47 cm bind off 10-10-11-11 sts at center front edge for neck. Then bind off at neck edge every other row: 3 sts 1 time, 2 sts 1 time and 1 st 5 times = 20-21-21-21 sts remain on each shoulder. Bind off when the piece measures 52-54-56-58 cm. Right front: Cast on and knit the same as the left reversing all shaping. At the same time, make buttonholes in the 4 garter st edge sts (1 buttonhole = bind off the third st from edge and cast on 1 new st on the next row). The last buttonhole will be made when 2 rows of garter st remain in the neck shaping. Make buttonholes when the piece measures: size S: 2, 10, 18, 26, 34 cm size M: 2, 11, 19, 28, 36 cm size L: 2, 11, 20, 29, 37 cm size XL: 2, 11, 20, 29, 38 cm Sleeve: Cast on 39-45-45-51 sts on smaller needles. Knit 4 rows garter st (row 1 = right side), 2 rows stockinette st and then knit Pattern 3 once. After Pattern 3 knit the next row as follows: K 1 (edge st), Pattern 2A (7 sts), Pattern 2B over 24-30-30-36 sts, Pattern 2C (6 sts), K 1 (edge st). Knit Pattern 2 two times, then change to larger needles, knit Pattern 1, then knit stockinette st to finished measurements. At the same time when the piece measures 19 cm inc 1 st at each side: Sizes S and M: alternately every 5th and 6th row. Sizes L and XL: alternately every 4th and 5th rows a total of 14-13-15-14 times = 67-71-75-79 sts. When sleeve measures 50-48-47-46 cm bind off for sleeve cap at each side every other row: 4 sts 1 time, 3 sts 1 time, 2 sts 2-2-2-1 times, 1 st 2-6-7-10 times, then bind off 2 sts at each side until the piece measures 57-57-57-58 cm and then bind off 3 sts 1 time. The piece measures approx. 58-58-58-59 cm. Bind off the remaining sts. Assembly: Sew shoulder seams. Neckband: Pick up approx. 80-90 sts around the neck (including over button bands) on smaller needles. Knit 4 rows garter st (make last buttonhole above the others on the 2nd row of garter st), bind off. Sew in sleeves. Sew sleeve and side seams using edge sts as a seam allowance. Sew on buttons. |
|||||||||||||||||||
Diagram explanations |
|||||||||||||||||||
|
|||||||||||||||||||
 |
|||||||||||||||||||
 |
|||||||||||||||||||
Have you finished this pattern?Tag your pictures with #dropspattern or submit them to the #dropsfan gallery. Do you need help with this pattern?You'll find 22 tutorial videos, a Comments/Questions area and more by visiting the pattern on garnstudio.com. © 1982-2026 DROPS Design A/S. We reserve all rights. This document, including all its sub-sections, has copyrights. Read more about what you can do with our patterns at the bottom of each pattern on our site. |
|||||||||||||||||||


With over 40 years in knitting and crochet design, DROPS Design offers one of the most extensive collections of free patterns on the internet - translated to 17 languages. As of today we count 324 catalogues and 12290 patterns translated into English (UK/cm). 12290
We work hard to bring you the best knitting and crochet have to offer, inspiration and advice as well as great quality yarns at incredible prices! Would you like to use our patterns for other than personal use? You can read what you are allowed to do in the Copyright text at the bottom of all our patterns. Happy crafting!
Post a comment to pattern DROPS 74-3
We would love to hear what you have to say about this pattern!
If you want to leave a question, please make sure you select the correct category in the form below, to speed up the answering process. Required fields are marked *.