
Popular categories
Looking for a yarn?







































Comments / Questions (10)
 Sanna wrote:
Resorin ohjevideo (resori tasona) ja sanallinen ohje menee minusta nyt ristiin
27.10.2026 - 16:38DROPS Design answered:
Hei, videossa neulottava joustinneule poikkeaa jakussa neulottavasta joustinneuleesta, mutta saat kuitenkin yleiskuvan siitä, miten tämä joustinneule neulotaan.
28.10.2026 - 14:19
 Lisa wrote:
Noch eine Frage: kann ich statt Alpaca + Kid-silk auch 2 x Alpaca nehmen? Danke
18.10.2026 - 15:43DROPS Design answered:
Liebe Lisa, ja sicher da Alpaca und Kid-Silk selbe Garngruppe gehören, die Textur wird etwas unterschiedlich sein, da beide Garnkombinationen dann unterschiedlich sind. Viel Spaß beim Stricken!
19.10.2026 - 11:00
Lisa wrote:
Hi, Kann man Baby Merino schwarz mit Kid-Silk schwarz kombinieren? Danke
17.10.2026 - 18:10DROPS Design answered:
Liebe Lisa, ja die Kombination von Baby Merino mit Kid-Silk ist ja in der Anleitung genannt und Sie können alle Farben kombinieren, wie Sie das möchten - bei Ihrer Wahl haben Sie eine schwarze Jacke, eventuell mit einem ganz leicht silbrigen Schimmer von Kid-Silk. Viel Spaß beim Stricken!
17.10.2026 - 21:15
Diana wrote:
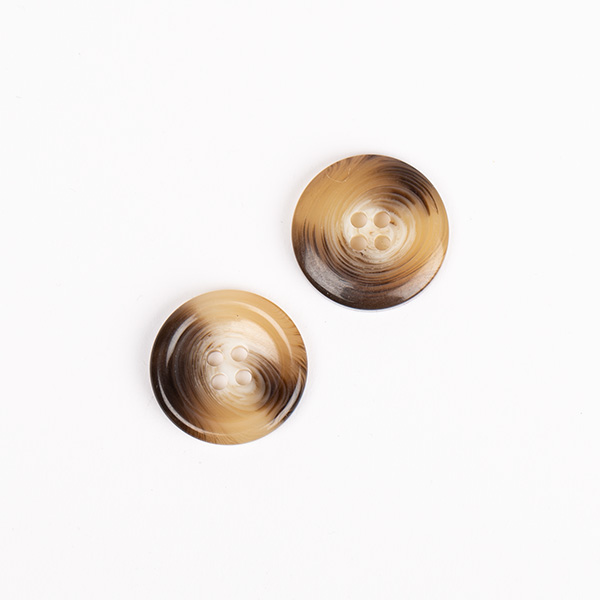
Welchen Durchmesser haben die Knöpfe?
22.09.2026 - 14:14DROPS Design answered:
Hallo Diana, die Knöpfe für dieses Modell haben einen Durchmesser von 20 mm. Viel Spaß beim Stricken!
23.09.2026 - 04:04
Diana wrote:
Welchen Durchmesser haben die Knöpfe?
22.09.2026 - 14:13DROPS Design answered:
Liebe Diana, die Knöpfe sind ca 20 mm Durchmesser - siehe hier. Viel Spaß beim Stricken!
23.09.2026 - 08:02
 Wendy wrote:
Pattern 271-6 do I use 1 strand of baby merino with 1 strand of kid-silk or 1 strand of baby merino with 2 strands of kid- silk? Thanks
20.09.2026 - 13:00DROPS Design answered:
Dear Wendy, you always work with 2 strands; one of them is DROPS Kid-silk and the other one can be DROPS Alpaca or DROPS Baby Merino. That's why it states that you work with 2 strands. Happy knitting!
21.09.2026 - 00:26
 Gina wrote:
Hej! Jag undrar varför ni på nästan alla koftor har första knapphålet under resåren? Det ser konstigt ut tycker jag!
19.09.2026 - 14:38DROPS Design answered:
Hei Gina. Noen syns det kanskje ser konstigt ut, mens andre syns det er mer konstigt å ha 1. knappehull på resåren. Det er smak og behag og hvordan en resåren er designet, stor, liten, bred eller smal osv. mvh DROPS Design
28.09.2026 - 11:16
Therese wrote:
Undrar om det verkligen är ”Havsdimma” Alpaca 7323 som är använd? Älskar färgen på denna koftan men när jag tittar på garnfärg n 7323 så är den en mix med mycket gult i? Tacksam för förtydligande
11.09.2026 - 06:34DROPS Design answered:
Hei Therese. Ja, det er riktig farge. På fargekartet ser man fargen tydligere (nærbildet), men på bildet av jakken er det også brukt DROPS Kid-Silk , en salviegrønn farge som demper gulfargen som man ser på bildet. mvh DROPS Design
14.09.2026 - 11:02
 Andreea wrote:
So it will be same lenght(meters) not weight when replacing 2 strands of A with one of C. Thanks
08.09.2026 - 14:08DROPS Design answered:
Dear Andrea, you can use the yarn converter to see alternatives and new matching yarn amount; read more here. Happy knitting!
09.09.2026 - 07:25
Andreea wrote:
Hi, for S and M sizes, what is the quantity of Air is needed(C yarn)? Thanks and regards, Andreea
04.09.2026 - 15:39DROPS Design answered:
Hi Andrea, You will need the same quantities of yarn (as stated in the pattern), whether you work with 2 strands of the yarn from yarn group A or 1 strand of Drops Air (from yarn group C). Regards, Drops Team.
05.09.2026 - 06:48
|
|
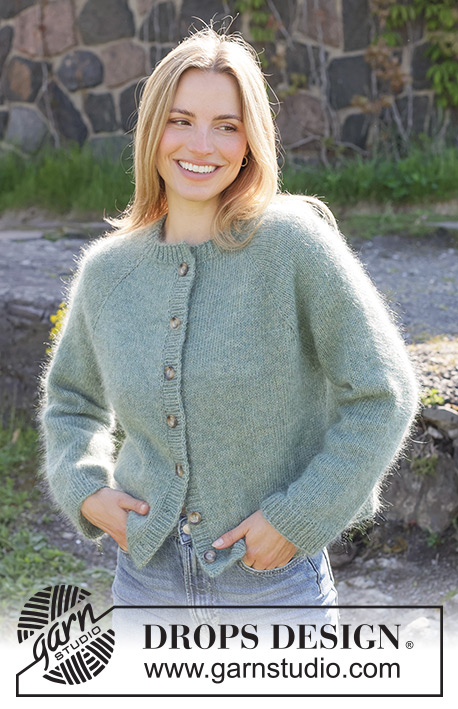
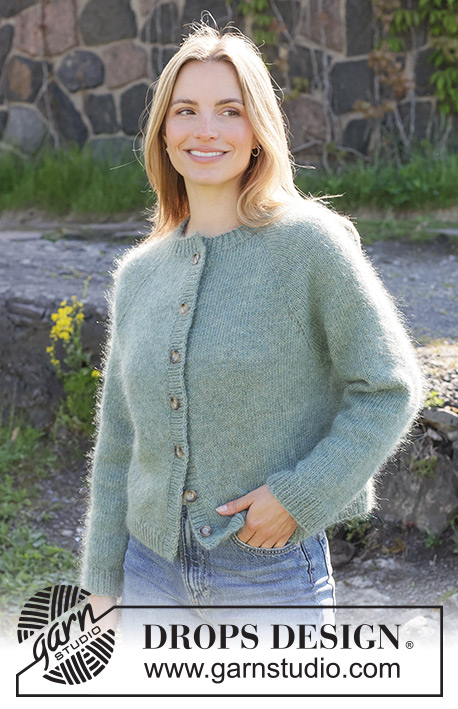
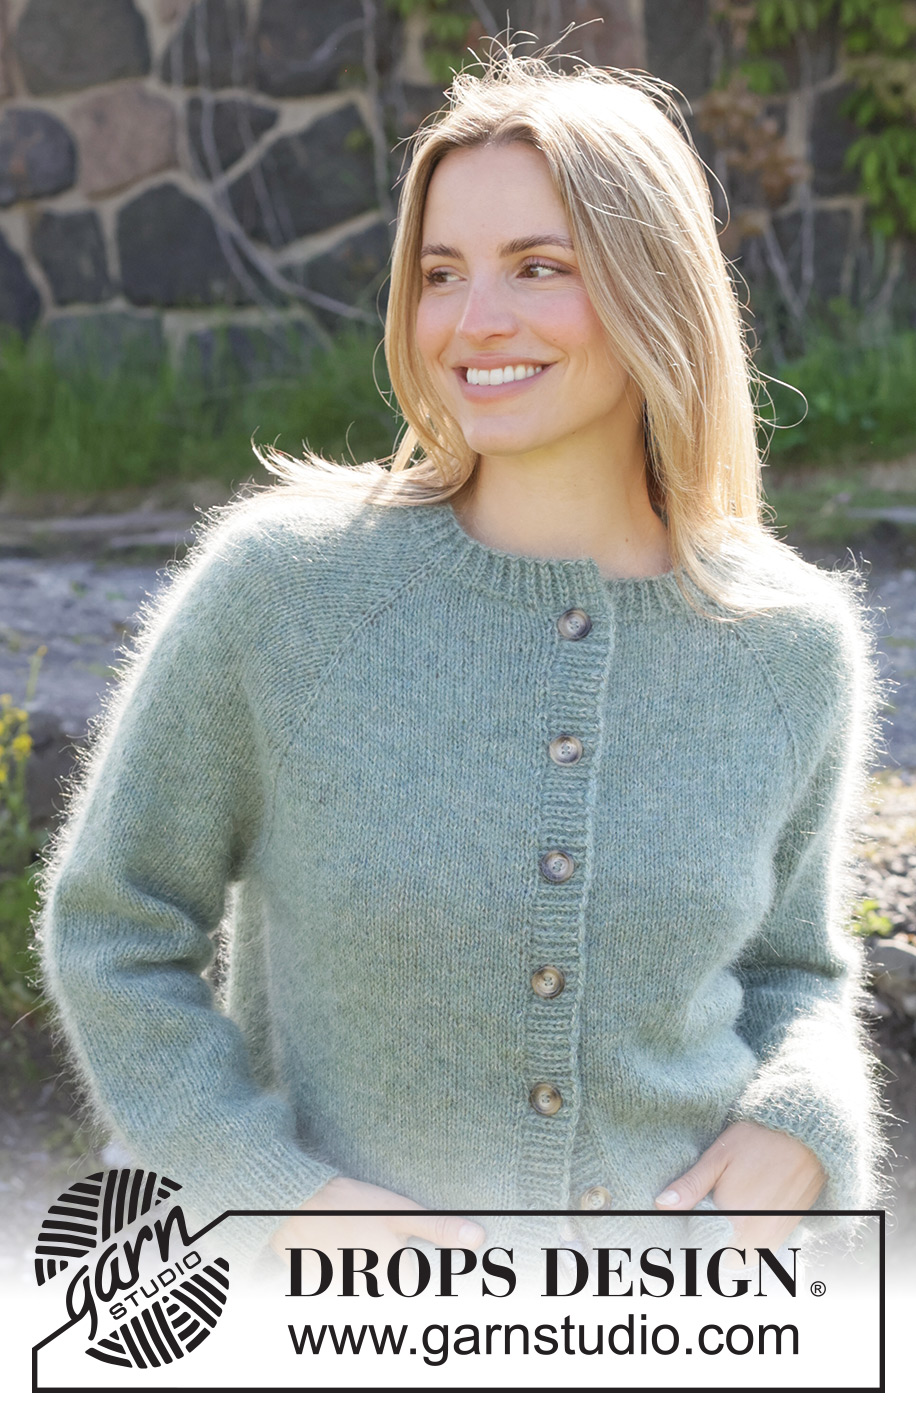
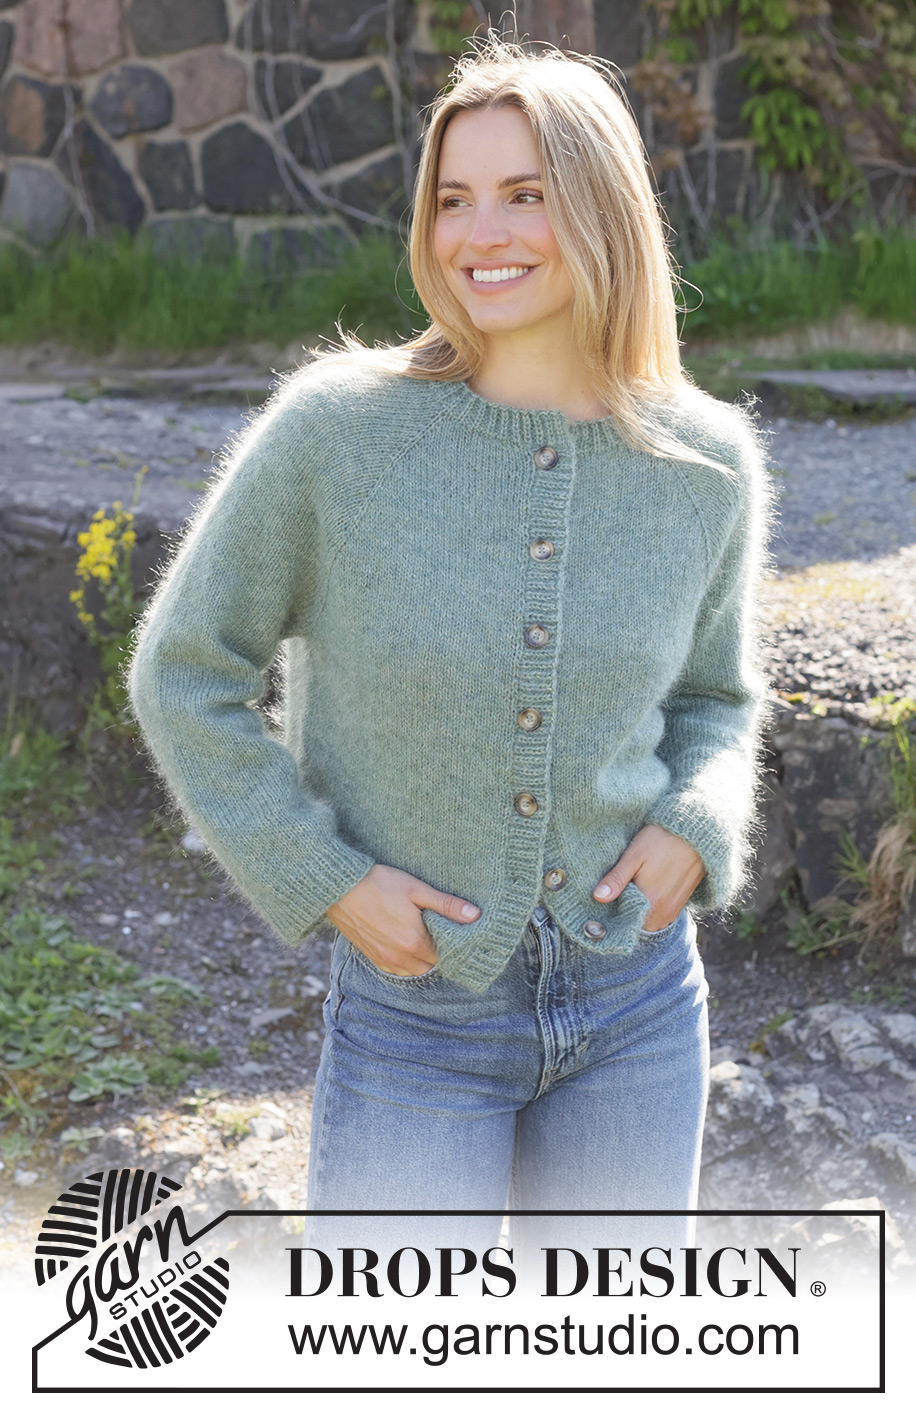
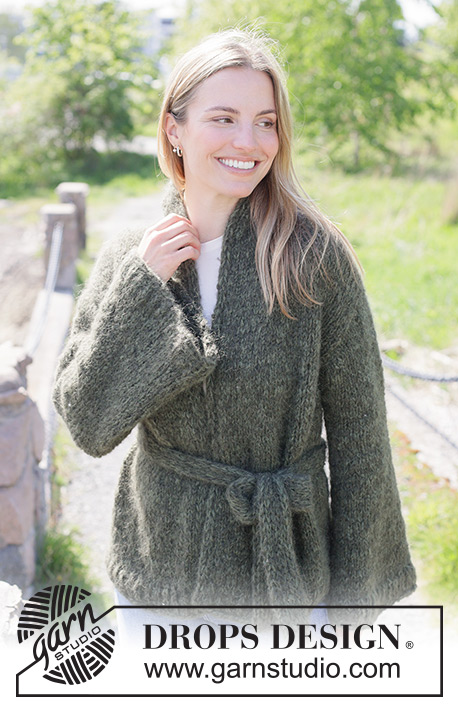
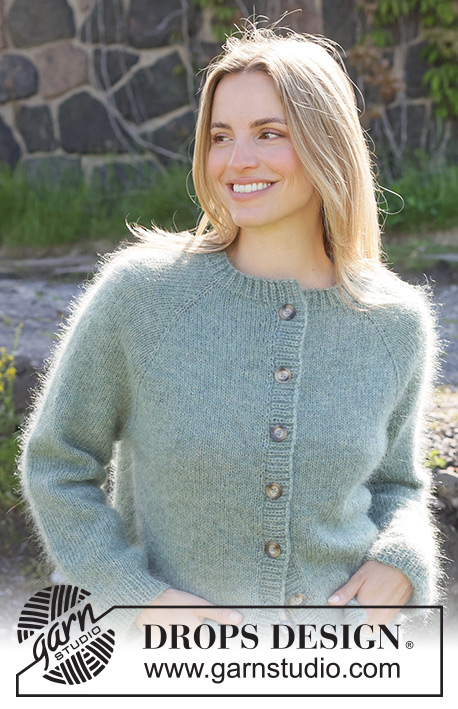
Sage Leaf Cardigan#sageleafcardigan |
|
 |
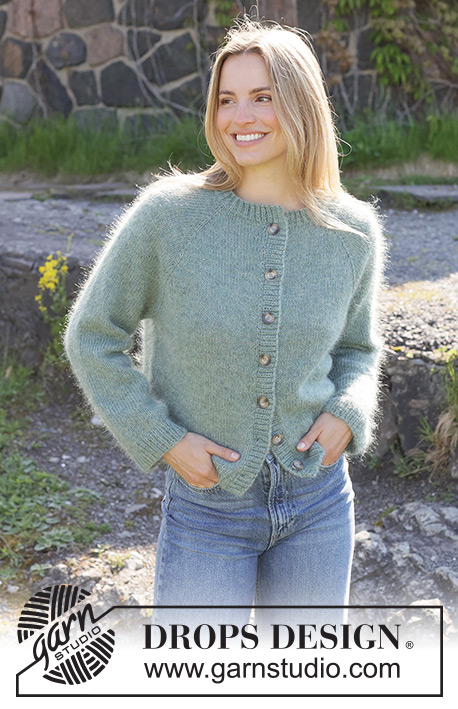 |
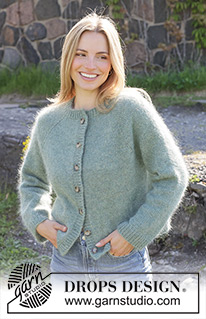
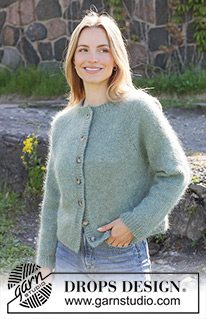
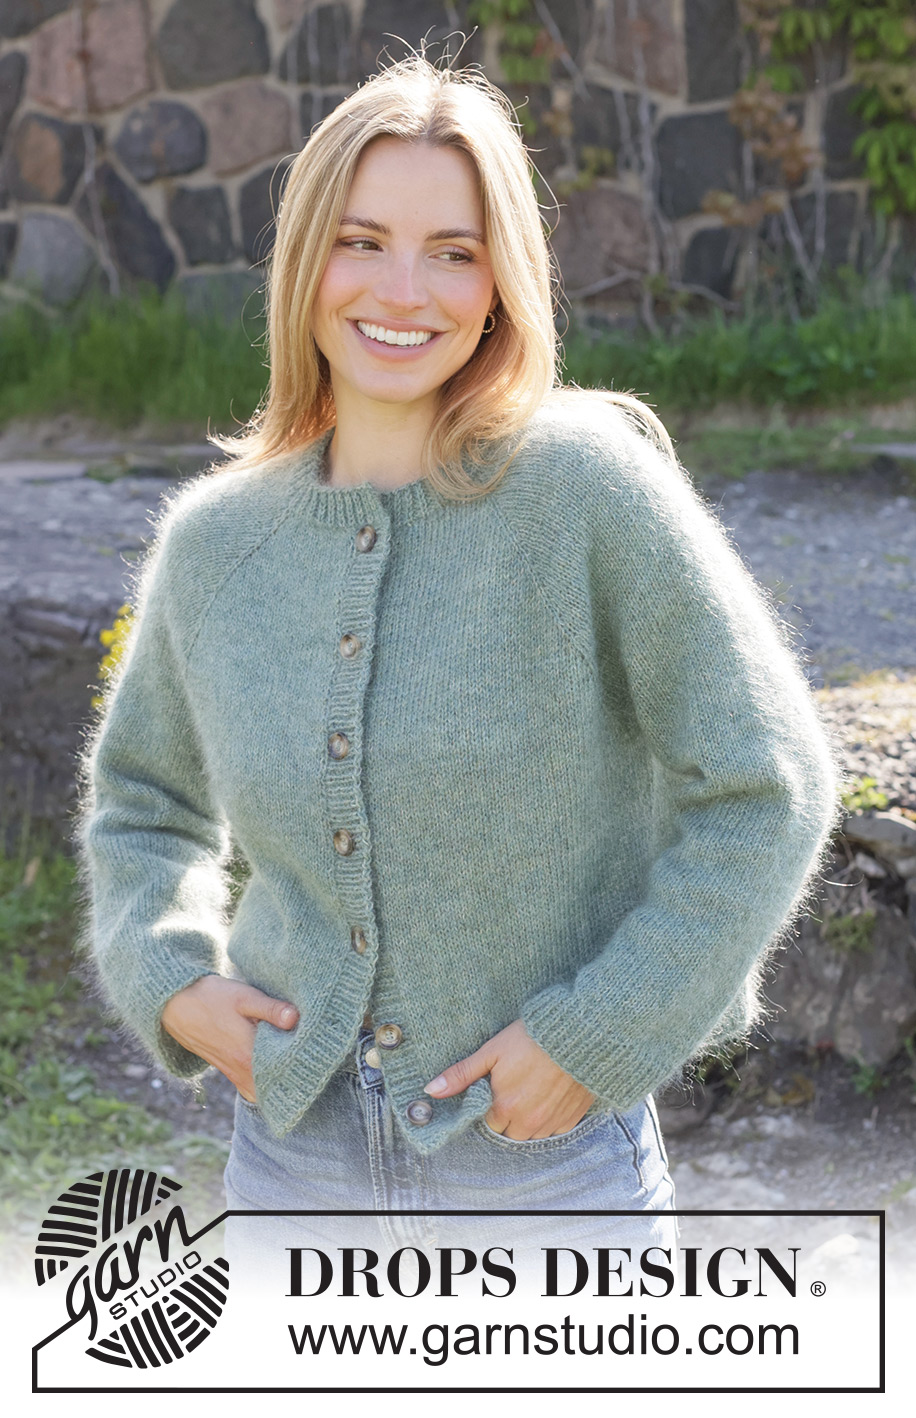
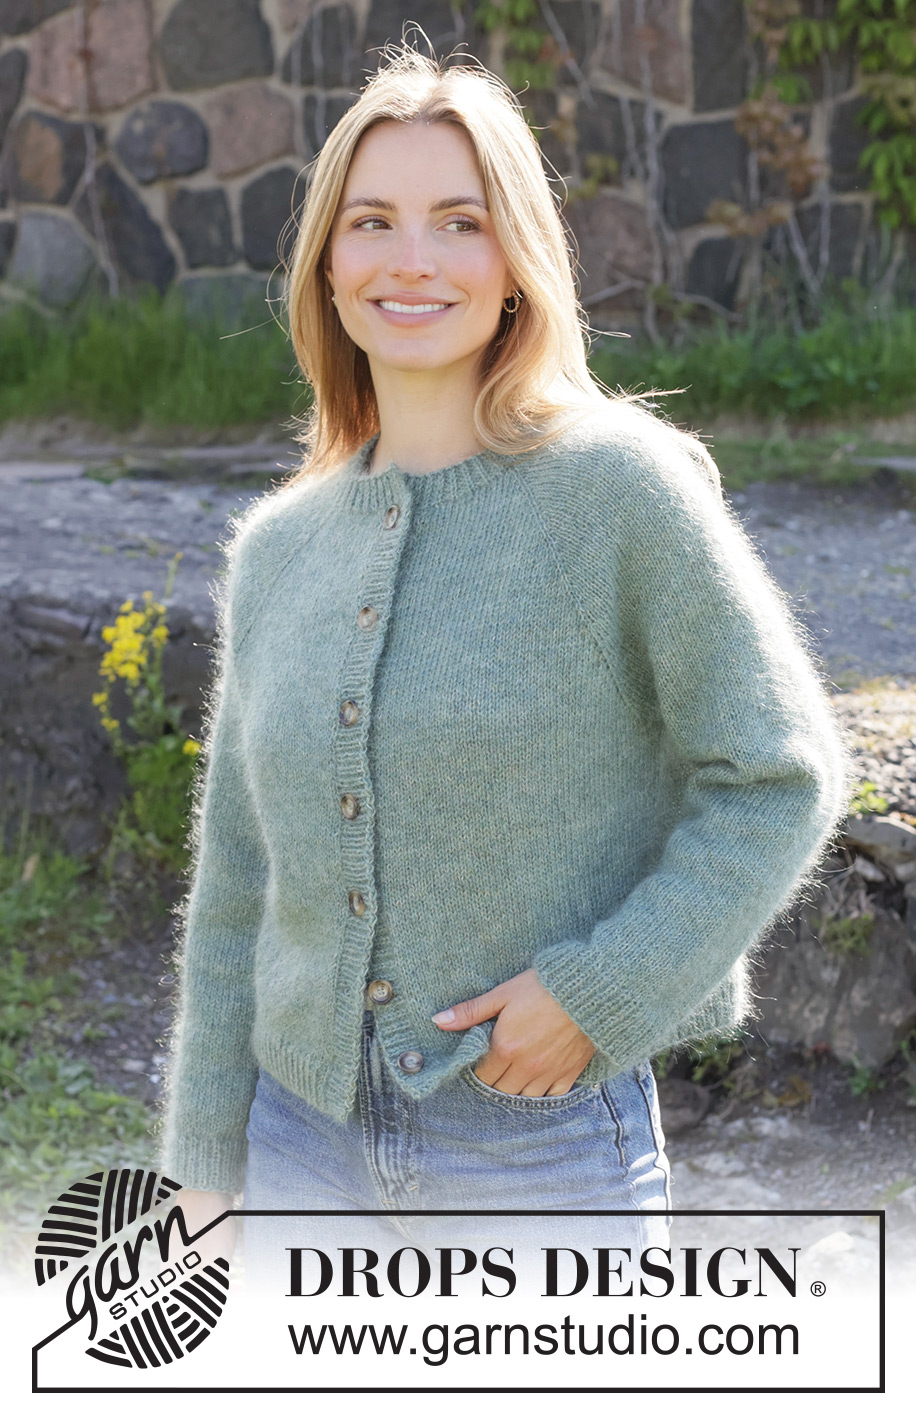
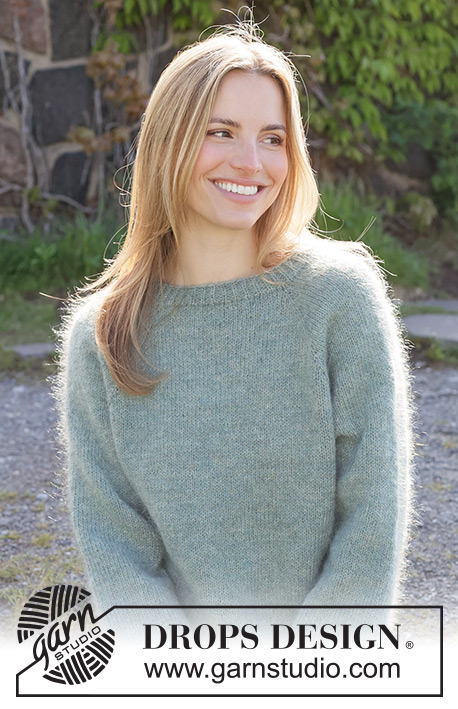
Knitted jacket in DROPS Alpaca and DROPS Kid-Silk or DROPS BabyMerino and DROPS Kid-Silk. The piece is worked top down with raglan and edges in English rib. Sizes XS – XXXL.
DROPS 271-6 |
|
|
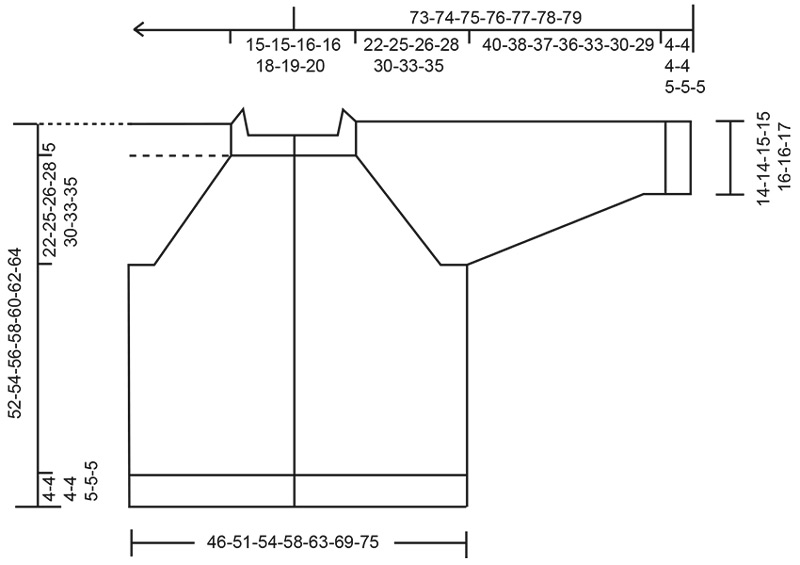
------------------------------------------------------- EXPLANATIONS FOR THE PATTERN: ------------------------------------------------------- GARTER STITCH: Knit all rows, from both the right and wrong side. 1 ridge in height = knit 2 rows. RAGLAN: All increases are worked from the right side! Increase 1 stitch by making 1 yarn over, which is worked as follows on the next row: BEFORE RAGLAN-STITCH (yarn over twists to the left): Purl through the stitch loop that lies on the back of the needle (avoids a hole). Work the new stitches in stocking stitch. AFTER RAGLAN-STITCH (yarn over twists to the right): Slip the yarn over from the left needle to the right needle purl-wise, then replace it by inserting the left needle through the back (the yarn over is the other way round). Purl through the stitch loop that lies on the front of the needle (avoids a hole). Work the new stitches in stocking stitch. DECREASE TIP: Decrease 1 stitch on each side of the marker-thread as follows: Work until there are 3 stitches left before the marker-thread, knit 2 together, knit 2 (marker-thread sits between these 2 stitches), slip 1 stitch knit-wise, knit 1 and pass the slipped stitch over the knitted stitch (2 stitches decreased). SLEEVE TIP: When knitting up stitches under the sleeve, you can get a small hole in the transition between stitches on the body and sleeve. This hole can be closed by picking up the strand between 2 stitches and working this strand twisted together with the first stitch between body and sleeve. BUTTONHOLES: Work 7-7-7-7-8-8-8 buttonholes on the right band. 1 buttonhole = knit 2 together, make 1 yarn over. On the next row knit the yarn over to leave a hole. The top buttonhole is worked 1 cm below the top edge, the bottom buttonhole 4 cm above the bottom edge. The other 5-5-5-6-6-6-6 buttonholes are worked evenly between, with approx. 7-7½-8-7-7-7½-7½ cm between each one. ------------------------------------------------------- START THE PIECE HERE: ------------------------------------------------------- JACKET – SHORT OVERVIEW OF THE PIECE. The pattern uses both long and short needles; start with the length which fits the number of stitches and change when necessary. The yoke is worked back and forth with circular needle, from mid front and top down while increasing for raglan. When the yoke is finished, it is divided for body and sleeves and the body continued back and forth, while the sleeves wait. The sleeves are worked in the round, top down. Stitches are knitted up along each front piece for the bands and stitches are knitted up along the neckline for the neck, which is worked back and forth. YOKE: Cast on 94-94-98-98-106-110-114 stitches with circular needle size 4 mm, 1 strand DROPS Alpaca and 1 strand DROPS Kid-Silk, or DROPS Baby Merino and DROPS Kid-Silk (2 strands). Insert 4 markers as follows, without working the stitches and inserting each marker in a stitch (raglan-stitches). You increase for raglan on each side of the raglan-stitches. Count 14-14-15-15-17-18-19 stitches (= left front piece), insert marker-1 in the next stitch, count 18 stitches (= sleeve), insert marker-2 in the next stitch, count 26-26-28-28-32-34-36 stitches (= back piece), insert marker-3 in the next stitch, count 18 stitches (= sleeve), insert marker-4 in the next stitch. There are 14-14-15-15-17-18-19 stitches left after the last marker (= right front piece). Work as follows: ROW 1 (right side): Work stocking stitch with 1 GARTER STITCH on each side, increasing for RAGLAN on each side of the raglan-stitches – read explanation above, (8 increased stitches). ROW 2 (wrong side): Work stocking stitch and edge-stitches (remember to work the yarn overs as described under RAGLAN). Work ROWS 1 and 2 a total of 9-13-16-17-17-15-14 times (18-26-32-34-34-30-28 rows worked) = 166-198-226-234-242-230-226 stitches. Remember to maintain the knitting tension. Continue increasing for raglan as follows: ROW 1 (right side): Work stocking stitch and edge-stitches, increasing for raglan on each side of the raglan-stitches (8 increased stitches). ROW 2 (wrong side): Work stocking stitch and edge-stitches (remember to work the yarn overs as described under RAGLAN). ROW 3 (right side): Work stocking stitch and edge-stitches, increasing for raglan only on the front and back pieces, i.e., increase before markers 1 and 3 and after markers 2 and 4; do not increase on the sleeves (4 increased stitches). ROW 4 (wrong side): Work stocking stitch and edge-stitches. Work ROWS 1 to 4 a total of 9-9-8-9-10-13-15 times (36-36-32-36-40-52-60 rows worked: 9-9-8-9-10-13-15 increases in height on the sleeves and 18-18-16-18-20-26-30 increases in height on the front and back pieces) = 274-306-322-342-362-386-406 stitches. All increases for raglan are finished; a total of 27-31-32-35-37-41-44 increases in height on the front and back pieces and 18-22-24-26-27-28-29 increases in height on the sleeves. Continue stocking stitch and edge-stitches, without further increases, until the yoke measures 22-25-26-28-30-33-35 cm from the cast-on edge mid-back. Now divide for the body and sleeves. DIVIDE FOR BODY AND SLEEVES: Work 42-46-48-51-55-60-64 stitches as before (= front piece), place the next 54-62-66-70-72-74-76 stitches on a thread/stitch holder for the sleeve, cast on 6-6-8-10-12-14-16 stitches (mid-under the sleeve), work 82-90-94-100-108-118-126 stitches (= back piece), place the next 54-62-66-70-72-74-76 stitches on a thread/stitch holder for the sleeve, cast on 6-6-8-10-12-14-16 stitches (mid-under the sleeve), work the last 42-46-48-51-55-60-64 stitches as before (= front piece). The body and sleeves are finished separately. BODY: = 178-194-206-222-242-266-286 stitches. Continue stocking stitch with 1 edge-stitch on each side until the piece measures 43-45-47-49-50-52-54 cm from the cast-on edge mid-back, finishing after a row from the right side, and decreasing 1 stitch on the last row = 177-193-205-221-241-265-285 stitches. Change to circular needle size 2.5 mm. Now work English rib as follows: ROW 1 (wrong side): 1 edge-stitch as before, * make 1 yarn over, slip 1 stitch purl-wise, knit 1 *, work from *-* until there are 2 stitches left, make 1 yarn over, slip 1 stitch purl-wise, 1 edge-stitch. ROW 2 (right side): 1 edge-stitch, * knit together the yarn over and slipped stitch, purl 1 *, work from *-* until there are 2 stitches left, knit together the yarn over and slipped stitch, 1 edge-stitch. Work ROWS 1 and 2 for 4-4-4-4-5-5-5 cm, finishing after a row from the wrong side. Cast off with knit from the right side. The jacket measures approx. 47-49-51-53-55-57-59 cm mid-back and 52-54-56-58-60-62-64 cm from the shoulder. SLEEVES: Place the 54-62-66-70-72-74-76 sleeve-stitches from one thread/stitch holder onto circular needle size 4 mm and knit up 1 stitch in each of the 6-6-8-10-12-14-16 cast-on stitches under the sleeve – read SLEEVE TIP = 60-68-74-80-84-88-92 stitches. Insert a marker-thread in the middle of the 6-6-8-10-12-14-16 new stitches under the sleeve. The round starts by the marker-thread. Work stocking stitch in the round. AT THE SAME TIME, after 1 cm, decrease mid-under the sleeve – read DECREASE TIP as follows: Decrease 2 stitches 3-7-9-11-12-13-14 times every 4½-4-4-2½-2-2-2 cm = 54-54-56-58-60-62-64 stitches. Continue working until the sleeve measures 40-38-37-36-33-30-29 cm from the division. Change to double pointed needles size 2.5 mm. Work English rib as follows: ROUND 1: * Make 1 yarn over, slip 1 stitch purl-wise, purl 1 *, work from *-* to end of round. ROUND 2: * Knit together the yarn over and slipped stitch, purl 1 *, work from *-* to end of round. Work ROUNDS 1 and 2 for 4-4-4-4-5-5-5 cm, adjusting to finish after round 2. Cast off with knit. The sleeve measures approx. 44-42-41-40-38-35-34 cm from the division. LEFT BAND: Use circular needle size 2.5 mm. From the right side and by the neck, knit up 83 to 105 stitches down the left front piece (knit up inside the 1 edge-stitch). The stitch count should be an odd number. Work as follows: ROW 1 (wrong side): 1 edge stitch, * make 1 yarn over, slip 1 stitch purl-wise, knit 1 *, work from *-* until there are 2 stitches left, make 1 yarn over, slip 1 stitch purl-wise, 1 edge-stitch. ROW 2 (right side): 1 edge-stitch, * knit together the yarn over and slipped stitch, purl 1 *, work from *-* until there are 2 stitches left, knit together the yarn over and slipped stitch, 1 edge-stitch. Work ROWS 1 and 2 for 3-3-3-3-4-4-4 cm, finishing after a row from the wrong side. Cast off with knit from the right side. RIGHT BAND: Use circular needle size 2.5 mm. From the right side and the bottom of the right front piece, knit up 83 to 105 stitches up to the neckline (knit up the same number of stitches as on the left band, inside the 1 edge-stitch). Work as follows: ROW 1 (wrong side): 1 edge stitch, * make 1 yarn over, slip 1 stitch purl-wise, knit 1 *, work from *-* until there are 2 stitches left, make 1 yarn over, slip 1 stitch purl-wise, 1 edge-stitch. ROW 2 (right side): 1 edge-stitch, * knit together the yarn over and slipped stitch, purl 1 *, work from *-* until there are 2 stitches left, knit together the yarn over and slipped stitch, 1 edge-stitch. Work ROWS 1 and 2 for 1½-1½-1½-1½-2-2-2 cm. Now work the BUTTONHOLES – read explanation above. Continue the rib until the band measures 3-3-3-3-4-4-4 cm, finishing after a row from the wrong side. Cast off with knit from the right side. NECK: Use circular needle size 2.5 mm. From the right side and from mid-front, knit up 107 to 137 stitches along the neckline (knit up a few extra stitches across the bands so the rib does not tighten them; the stitch count should be an odd number). Work as follows: ROW 1 (wrong side): 1 edge stitch, * make 1 yarn over, slip 1 stitch purl-wise, knit 1 *, work from *-* until there are 2 stitches left, make 1 yarn over, slip 1 stitch purl-wise, 1 edge-stitch. ROW 2 (right side): 1 edge-stitch, * knit together the yarn over and slipped stitch, purl 1 *, work from *-* until there are 2 stitches left, knit together the yarn over and slipped stitch, 1 edge-stitch. Work ROWS 1 and 2 for 3 cm. Cast off with knit from the right side. ASSEMBLY: Sew the buttons onto the left band. |
|
 |
|
Have you finished this pattern?Tag your pictures with #dropspattern #sageleafcardigan or submit them to the #dropsfan gallery. Do you need help with this pattern?You'll find 24 tutorial videos, a Comments/Questions area and more by visiting the pattern on garnstudio.com. © 1982-2026 DROPS Design A/S. We reserve all rights. This document, including all its sub-sections, has copyrights. Read more about what you can do with our patterns at the bottom of each pattern on our site. |
|





With over 40 years in knitting and crochet design, DROPS Design offers one of the most extensive collections of free patterns on the internet - translated to 17 languages. As of today we count 333 catalogues and 12536 patterns translated into English (UK/cm). 12525
We work hard to bring you the best knitting and crochet have to offer, inspiration and advice as well as great quality yarns at incredible prices! Would you like to use our patterns for other than personal use? You can read what you are allowed to do in the Copyright text at the bottom of all our patterns. Happy crafting!
Post a comment to pattern DROPS 271-6
We would love to hear what you have to say about this pattern!
If you want to leave a question, please make sure you select the correct category in the form below, to speed up the answering process. Required fields are marked *.