
Popular categories
Looking for a yarn?


Comments / Questions (18)
![]() Anna wrote:
Anna wrote:
Hei, neuloin ohjeen mukaan. Lopussa sanotaan, että i-cord pätkät jotka neulottiin ihan alussa liitetään yhteen ja kiinnitetään niskan taakse kaulukseksi. Kaulus on paljon leveämpi, kuin ohjeessa i-cordien pituus. Neulon lisäpalan. Mutta eroa on lähemmäs 10 cm joten pohdin onko tuossa alussa i-cordien pituudessa virhe? Esim koossa S pituus on 15 cm.
01.04.2026 - 13:54DROPS Design answered:
Hei, i-cordin pituus tulee olla 15 cm, mutta reunusta venytetään hieman samalla kun se kiinnitetään pääntien reunaan. Seuraavasta videosta näet, miten i-cord-reunus kiinnitetään pääntiehen: Pääntien reunuksen neulominen kahtena osana.
10.04.2026 - 17:02
![]() Fidan wrote:
Fidan wrote:
Hi, can I make the increase stitches as M1R and M1L?
13.03.2026 - 16:14DROPS Design answered:
Dear Mrs Fidan, yes sure you can use the desired technique for increase. Happy knitting!
16.03.2026 - 07:05
![]() Doyeon wrote:
Doyeon wrote:
The cardigan is so pretty but it is really difficult to knit. I cannot understand the description. Could you upload video tutorial showing the process to knit? Thank you!
10.03.2026 - 04:03DROPS Design answered:
Hi Doyeon, The relevant videos can be found by clicking on "Videos" at the top of the page. We do not have a video which is specifically for this cardigan, but the tutorials show you how to work the different techniques used in the pattern. Regards, Drops Team.
10.03.2026 - 06:36
![]() San wrote:
San wrote:
Hallo, ja ich habe jetzt verstanden wie mit der i-cord Blende bearbeitet wird.
01.03.2026 - 13:35
![]() San wrote:
San wrote:
Hi, wird die icord Blende so gelassen beim Zunahme von v-Ausschnitt und am Ende dann angenäht? Ich habe mir das Video angeschaut aber ist nicht was ich suche.
28.02.2026 - 20:39DROPS Design answered:
Liebe San, man strickt zuerst die beiden Blende separat, dann schlägt die Maschen der Passe dazwischen, dann strickt man die Blenden wie zuvor und gleichzeitig wird man für den V-Halsausschnitt (und Raglan) zunehmen. Die BlendenMaschen werden wie zuvor gestrickt. Oder misverstehe ich Ihre Frage?
02.03.2026 - 09:26
![]() Constance wrote:
Constance wrote:
Bonjour, j'ai une interrogation concernant le bas des volants. Il est écrit que nous devons tricoter un rang en côtes 1/1 en augmentant en même temps 1m (pour la taille S). Où faut-il augmenter cette maille exactement...? Et quel est le rôle de cette maille ? Merci encore.
08.02.2026 - 14:08DROPS Design answered:
Bonjour Constance, peu importe, vous pouvez l'augmenter au milieu dos par ex, on a besoin d'augmenter 1 maille ici juste pour que le nombre de mailles soit bien impair et qu'ainsi les côtes commencent et se terminent par 1 maille endroit. Bon tricot!
09.02.2026 - 08:54
![]() Constance wrote:
Constance wrote:
Bonjour, je reste bloquée à l'indication concernant les augmentations pour l'encolure V. Comment comprendre "augmenter ainsi 3 fois tous les 4 rangs" ? Faut-il augmenter 3 mailles de chaque côté de ma 5ème maille ? Donc créer 3 nouvelles mailles à partir d'une seule ? Idem pour la suite des augmentations... Lorsqu'on a réalisé les 12 fois augmentations, combien de mailles a-t-on créé ? Merci !
08.01.2026 - 21:47DROPS Design answered:
Bonjour Constance, vous devez augmenter pour l'encolure comme indiqué au tout début des explications sous ENCOLURE V:, autrement dit, 1 m par devant, après les 5 premières mailles et avant les 5 dernières mailles. Tricotez ainsi: (1 rang avec augmentations, 3 rangs sans), tricotez ces 4 rangs 3 fois au total, puis tricotez 7 fois ainsi: (1 rang avec augmentations, 1 rang sans) et enfin, tricotez 2 fois (1 rang avec augmentations, 3 rangs sans), vous avez augmenté 3+7+2=12 mailles pour l'encolure sur chaque devant. Bon tricot!
09.01.2026 - 10:51
![]() Cherri Jones wrote:
Cherri Jones wrote:
A1 increase for flounce don't understand
18.12.2025 - 17:08
![]() Marcella wrote:
Marcella wrote:
Ik begrijp het telpatroon niet omdat de onderste rij maar 4 steken is, en hier om de steek een omslag wordt gemaakt. Maar dan kom ik op veel meer steken dan waar ik totaal op moet uitkomen (want dat is een verdubbeling van steken). Of moet ik uitgaan van de 7 steken (bovenste naald) en binnen die 7 steken 2 omslagen maken?
13.10.2025 - 14:27DROPS Design answered:
Dag Marcella,
De eerste naald bestaat inderdaad uit 4 steken waar. Je breit eerst 1 steek, dan maak je een omslag en dan maak je steeds na 2 steken weer een omslag. Dus op de eerste naald van het patroon aan het begin en ende 1 steek en tussen de omslagen steeds 2 steken.
22.10.2025 - 19:42
![]() Sietske wrote:
Sietske wrote:
Ik kom er niet aan uit waar de markers bij dd hals moeten komen. Zou u mij dat kunnen uitleggen? Er staat markeerdraad maar ik kan toch ook markers gebruiken? Wat is het verschil? Bvd voor de antwoorden
10.09.2025 - 11:04
|
|||||||
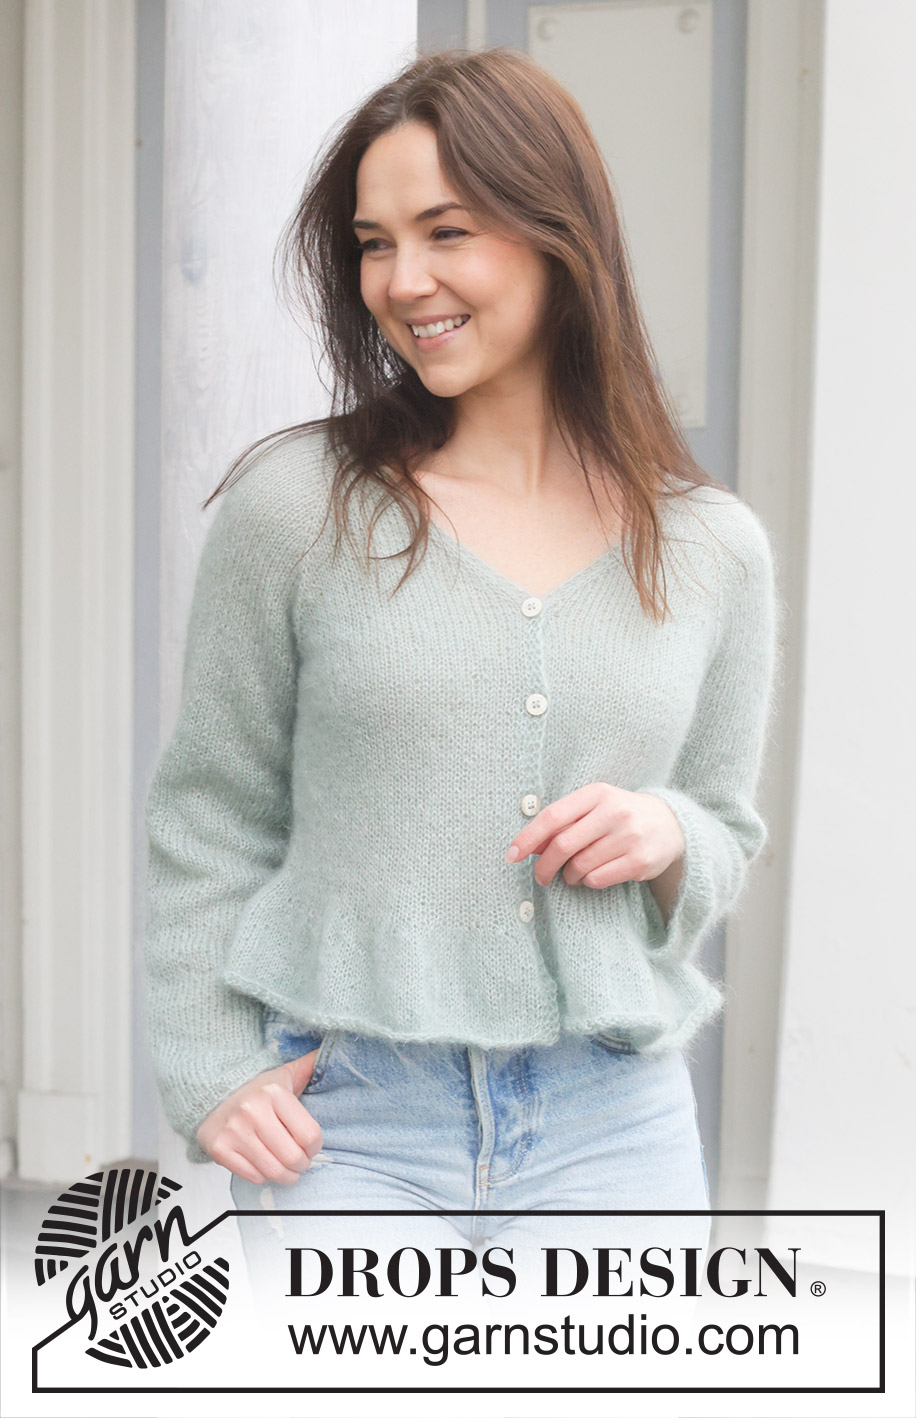
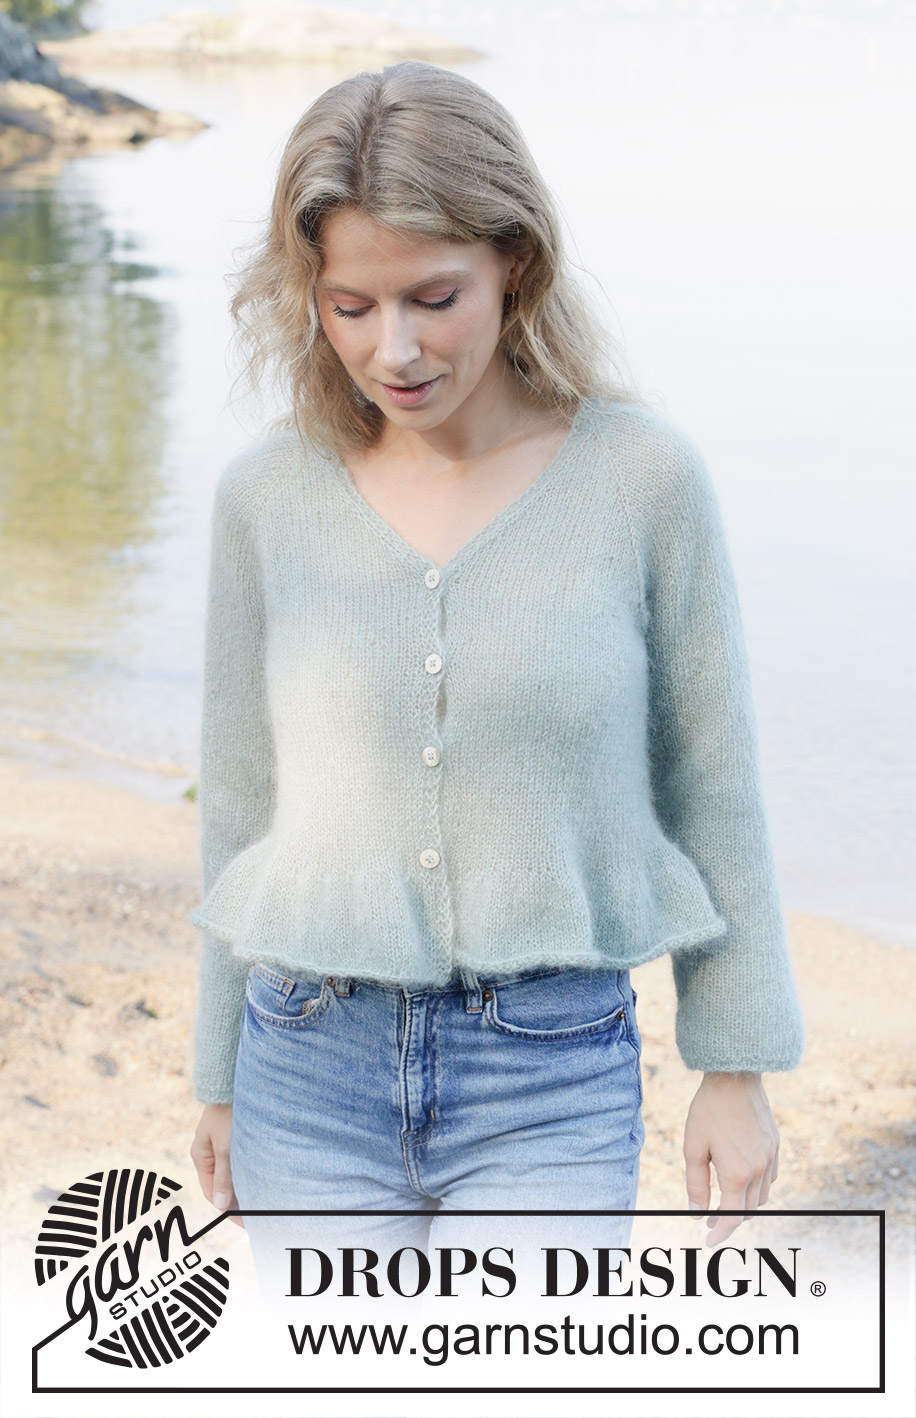
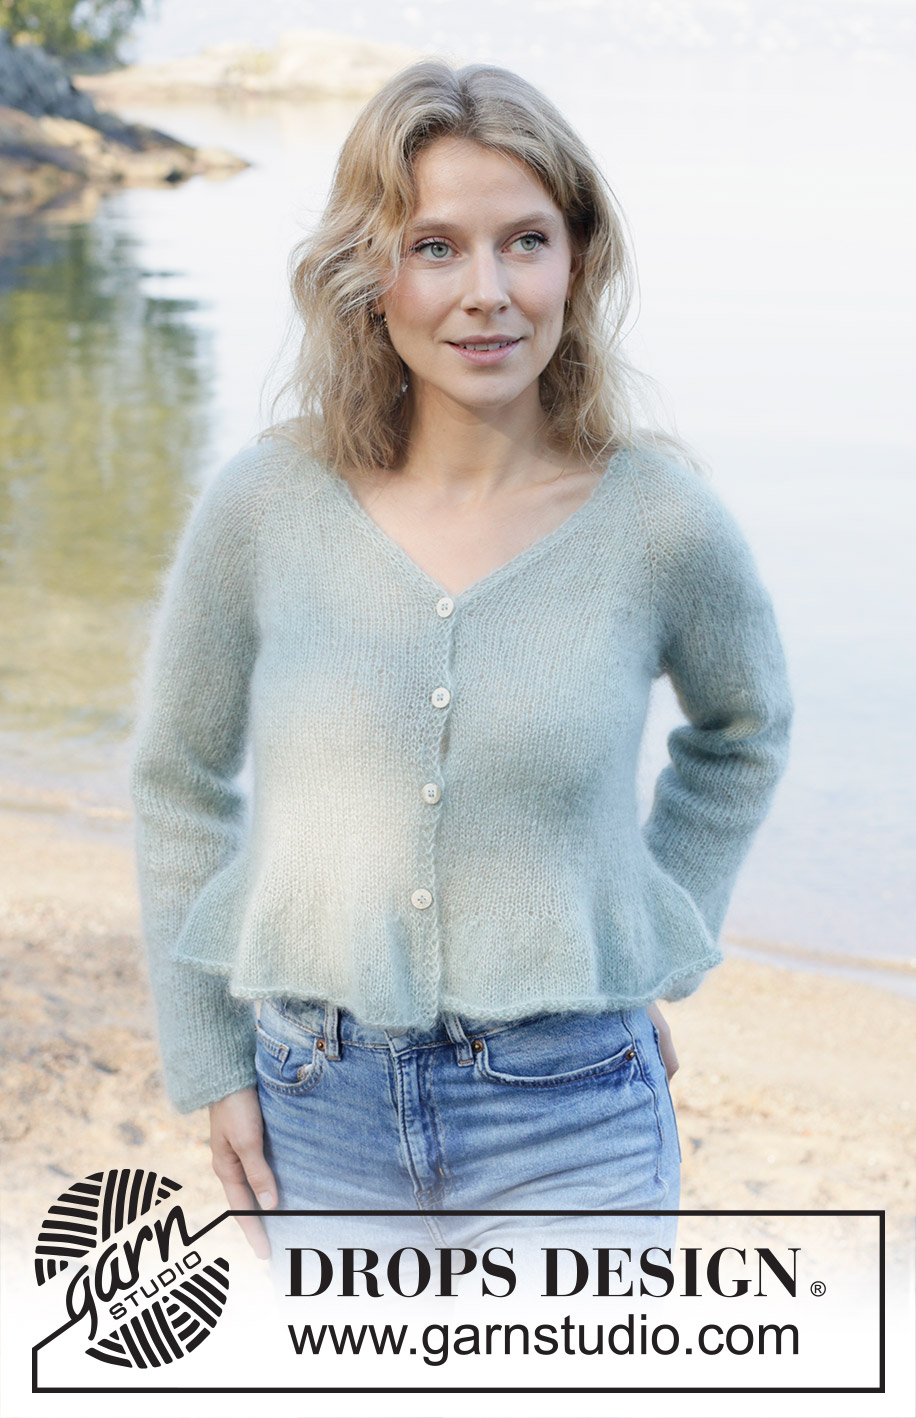
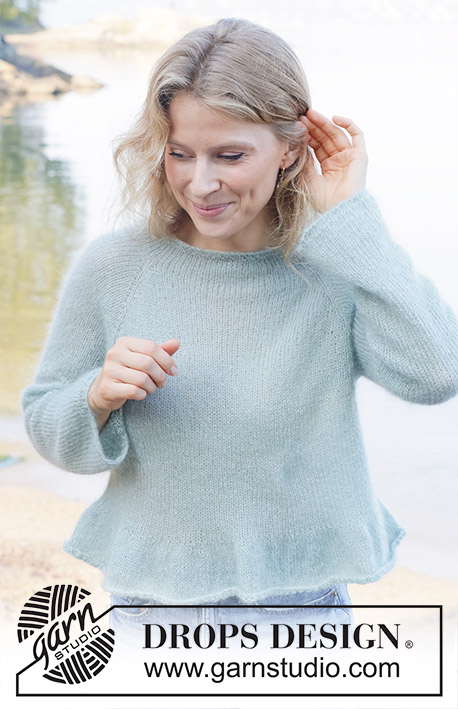
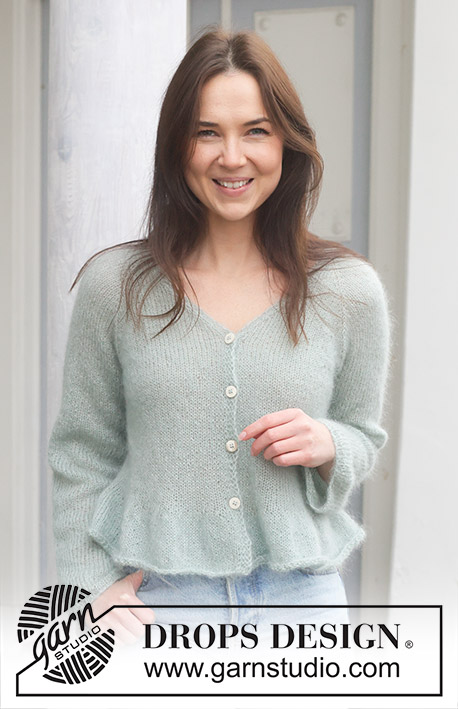
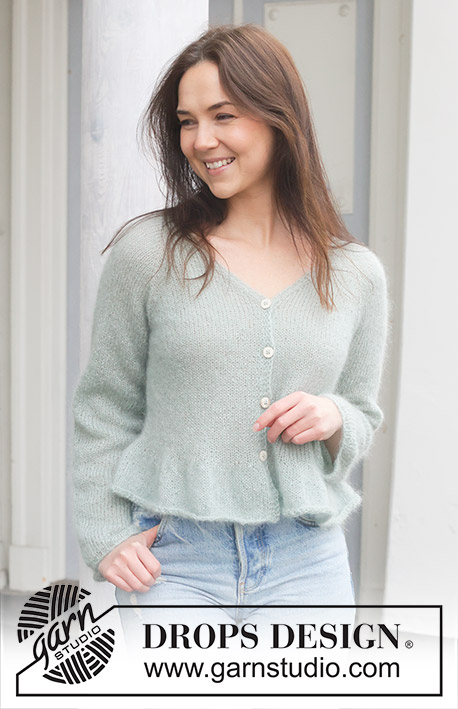
Sweet Bell Cardigan#sweetbellcardigan |
|||||||
 |
 |
||||||
Knitted jacket in 2 strands DROPS Kid-Silk. Piece is knitted top down in stocking stitch with raglan, V-neck, i-cord and flounce. Size: S - XXXL.
DROPS 258-5 |
|||||||
|
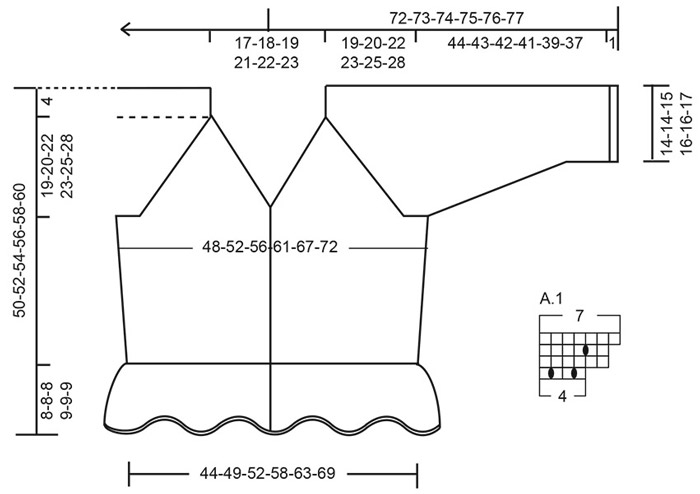
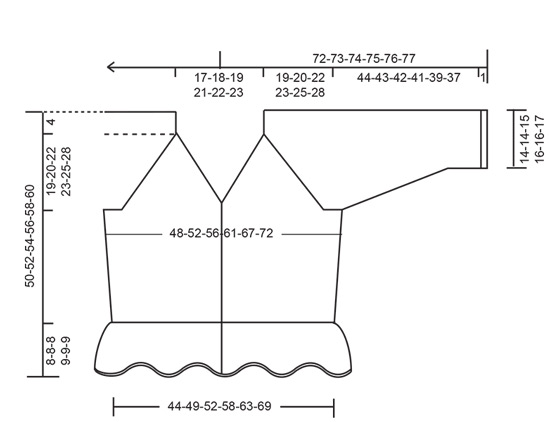
---------------------------------------------------------- EXPLANATION FOR THE PATTERN: ---------------------------------------------------------- PATTERN: See diagram A.1. Diagrams show all rows in pattern seen from the right side. DOUBLE YARN: When switching ball try to switch the strands in different places to make the thread fastening less visible. When working with 2 strand and only 1 ball remains, use the strand on both inside and outside of ball. GARTER STITCH (when working back and forth): Knit on all rows, i.e. knit from right side and knit from wrong side. 1 ridge vertically = knit 2 rows. RIGHT BAND WITH I-CORD: RIGHT SIDE: Work 2 stitches in garter stitch, slip 1 stitch purlwise with strand in front of piece, knit 1. WRONG SIDE: Slip 1 stitch purlwise with strand in front of piece, knit 1 and work 2 stitches in garter stitch. LEFT BAND WITH I-CORD: RIGHT SIDE: Slip 1 stitch purlwise with strand in front of piece, knit 1 and work 2 stitches in garter stitch. WRONG SIDE: Work 2 stitches in garter stitch, slip 1 stitch purlwise with strand in front of piece, knit 1. RAGLAN: All increases are done from the right side. Increase 1 stitch by making 1 yarn over, on next row (= wrong side) work yarn overs as follows: BEFORE MARKER: Purl yarn overs in back loop of stitches to avoid holes. Then work the new stitches in stocking stitch. AFTER MARKER: Slip stitch off left needle and put it back on left needle but the opposite way (insert left needle in from behind when slipping it back on needle). Purl yarn overs in front loop of stitches to avoid holes. Then work the new stitches in stocking stitch. V-NECK: All increases are done from the right side. Increase 1 stitch by making 1 yarn over, on next row (= wrong side) work yarn overs as follows: AFTER RIGHT BAND: Slip stitch off left needle and put it back on left needle but the opposite way (insert left needle in from behind when slipping it back on needle). Purl yarn overs in front loop of stitches to avoid holes. Then work the new stitches in stocking stitch. BEFORE LEFT BAND: Purl yarn overs in back loop of stitches to avoid holes. Then work the new stitches in stocking stitch. BUTTONHOLES: Decrease for buttonholes on right band (when garment is worn). Decrease from right side when 4 stitches remain on row as follows: ROW 1 (= right side): Make 1 yarn over, knit 2 together, slip 1 stitch purlwise with strand in front of piece, knit 1. ROW 2 (= wrong side): Work band as before and knit yarn over to make a buttonhole. Decrease for first buttonhole on first row from right side after increases for V-neck are done. Then decrease the next 3-3-4-4-4-4 buttonholes, approx. 8-8-6½-6½-7-7 cm apart. Place bottom buttonhole in the transition between body and flounce. SLEEVE TIP: When picking up stitches mid under sleeve, there will be a small hole in the transition between stitches on body and sleeves. The holes can be closed by picking up the strand between two stitches - work this strand twisted together with the first stitch between body and sleeve so that the holes closes. DECREASE TIP: Decrease 1 stitch on each side of marker thread as follows: Work until 4 stitches remain before marker thread and knit 2 together, knit 4 (marker thread is in the middle of these 4 stitches), slip 1 stitch knitwise, knit 1, pass slipped stitch over stitch worked (= 2 stitches decreased). ---------------------------------------------------------- START THE PIECE HERE: ---------------------------------------------------------- JACKET - SHORT OVERVIEW OF THE PIECE: In this pattern needles of different length have been used, begin with fitting length for number of stitches and switch as needed. First work two bands, then cast on stitches for yoke between bands. Work yoke back and forth on circular needle from mid front, work top down. When yoke is done, divide piece for body and sleeves. Work body downwards back and forth on circular needle while putting the sleeves aside. Then work sleeves downwards in the round on needle. Sew bands together, seam = mid back, then sew bands along yoke at the back of neck. If 0 stitches is given for the chosen size, it means that you skip the information and jump to next information. RIGHT BAND: Cast on 4 stitches on circular needle size 4.5 mm with 2 strands DROPS Kid-Silk - read DOUBLE YARN in explanation above. Work RIGHT BAND WITH I-CORD - read explanation above - first row is worked from right side. Continue back and forth like this until band measures 15-16-16-17-18-18 cm, finish after a row from wrong side. Cut the yarn and slip stitches on a stitch holder, first work over band when picking up stitches for yoke. LEFT BAND: Cast on 4 stitches on circular needle size 4.5 mm. Work LEFT BAND WITH I-CORD - read explanation above - first row is worked from right side. Continue back and forth like this until band measures 15-16-16-17-18-18 cm, finish after a row from wrong side. Do not cut the yarn, work next row with this strand from right side as explained below. YOKE: Now cast on stitches for yoke between bands. Turn and work on circular needle size 4.5 mm from the right side as follows: Work left band as before from right side (= 4 stitches), cast on 64-66-68-72-74-76 new stitches on row, work right band as before from right side (= 4 stitches) = 72-74-76-80-82-84 stitches. Insert 1 marker on the inside of band in one side of piece (= at the front), measure piece from this marker. Insert 4 new markers in piece while AT THE SAME TIME as next row is worked, insert markers in a stitch and these stitches are called raglan stitches and worked in stocking stitch. Work next row from wrong side as follows: Work 4 stitches band as before, purl 2 (= right front piece), insert 1 marker in next stitch and purl this stitch (= raglan stitch), purl 14 (= sleeve), insert 1 marker in next stitch and purl this stitch (= raglan stitch), purl 28-30-32-36-38-40 (= back piece), insert 1 marker in next stitch and purl this stitch (= raglan stitch), purl 14 (= sleeve), insert 1 marker in next stitch and purl this stitch (= raglan stitch), purl 2 and finish with 4 stitches band as before (= left front piece). Now work stocking stitch and bands as before while AT THE SAME TIME increasing both for RAGLAN and V-NECK - read explanations above and read both sections before continuing. Remember to follow the knitting tension! V-NECK: Increase for V-neck from right side in both sides of piece inside 5 stitches, i.e. 4 stitches band and 1 stitch in stocking stitch (= 1 stitch increased in each side) - remember to increase for raglan at the same time. Increase every 4th row 3 times in all sizes, then every other row 7-8-9-11-12-13 times, and then every 4th row 2 times in all sizes. You have increased 12-13-14-16-17-18 times in total for V-neck. When all increases for V-neck are done, decrease for BUTTONHOLES - read explanation above. RAGLAN: Increase for raglan as follows from right side - remember to increase for V-neck at the same time: ROW 1 (= right side): Work stocking stitch and band as before and increase for raglan before and after every raglan stitch (= 8 stitches increased). ROW 2 (= wrong side): Work stocking stitch and bands as before, work the new stitches in stocking stitch. Work 1st and 2nd ROW 10-10-13-17-16-13 times (= 20-20-26-34-32-26 rows have been worked) = 80-80-104-136-128-104 stitches increased for raglan. Remember to follow the knitting tension! Then work and increase for raglan as follows: ROW 1 (= right side): Work stocking stitch and band as before and increase for raglan before and after every raglan stitch (= 8 stitches increased). ROW 2 (= wrong side): Work stocking stitch and bands as before, work the new stitches in stocking stitch. ROW 3 (= right side): Work stocking stitch and band as before and increase for raglan before 1st and 3rd raglan stitch and after 2nd and 4th raglan stitch (= 4 stitches increased) - do not increase on sleeves. ROW 4 (= wrong side): Work stocking stitch and bands as before, work the new stitches in stocking stitch. Work 1st to 4th ROW 6-7-6-5-7-10 times (= 24-28-24-20-28-40 rows have been worked = you have increased 6-7-6-5-7-10 times on sleeves and 12-14-12-10-14-20 times on front pieces/back piece) = 72-84-72-60-72-120 stitches increased for raglan. All increases for raglan are done, you have increased 22-24-25-27-30-33 times in total on front pieces/back piece and 16-17-19-22-23-23 times on sleeves. When all increases for both raglan and V-neck are done, there are 248-264-280-308-328-344 stitches on round. Work without increase until piece measures 19-20-22-23-25-28 cm measured straight down from marker at the front (i.e. do not measure diagonally along V-neck) - remember BUTTONHOLES. Now divide yoke for body and sleeves. DIVIDING FOR BODY AND SLEEVES: AT THE SAME as next row is worked divide yoke for body and sleeves as follows: Work 4 stitches band as before, work 37-40-42-46-50-54 stitches in stocking stitch (= front piece), slip the next 46-48-52-58-60-60 stitches on a thread for sleeve, cast on 12-14-16-18-20-22 new stitches on needle (= in the side mid under sleeve), work 74-80-84-92-100-108 stitches in stocking stitch (= back piece), slip the next 46-48-52-58-60-60 stitches on a thread for sleeve, cast on 12-14-16-18-20-22 new stitches on needle (= in the side mid under sleeve), work 37-40-42-46-50-54 stitches in stocking stitch, finish with 4 stitches band as before (= front piece). Finish body and sleeves separately. BODY: = 180-196-208-228-248-268 stitches. Insert 1 marker thread in each side on body, in the middle of the 12-14-16-18-20-22 stitches cast on under each sleeve and move the marker threads when working, use the marker threads when decreasing in the sides on body. Work stocking stitch and bands as before until piece measures 5 cm from division. Now decrease 1 stitch on each side of both marker threads – read DECREASE TIP (= 4 stitches decreased). Decrease like this every 5 cm 3 times in total in all sizes = 168-184-196-216-236-256 stitches. Work until piece measures 38-40-42-43-45-47 cm from marker at the front, finish with a row from wrong side. Now increase for flounce, work next row from the right side as follows: Work 4 stitches band as before, work A.1 40-44-47-52-57-62 times in total, finish with 4 stitches band as before. When A.1 has been worked, there are 288-316-337-372-407-442 stitches on needle. Continue with stocking stitch and bands until piece measures 45-47-49-51-53-55 cm from marker at the front. Work next row as follows from right side: 4 stitches band as before, work rib (= knit 1/purl 1) until 5 stitches remain on needle AT THE SAME TIME increase 1-1-0-1-0-1 stitches over these stitches, knit 1, finish with 4 stitches band as before = 289-317-337-373-407-443 stitches. Work 2 rows in stocking stitch (= purl from wrong side, knit from right side) and cast off somewhat loosely from wrong side. Jacket measures 46-48-50-52-54-56 cm from marker at the front and approx. 50-52-54-56-58-60 cm from the top of shoulder. SLEEVES: Slip 46-48-52-58-60-60 sleeve stitches from one thread on to circular needle size 4.5 mm and pick in addition up 1 stitch in each of the 12-14-16-18-20-22 stitches cast on under sleeve - read SLEEVE TIP = 58-62-68-76-80-82 stitches. Insert 1 marker thread in the middle of the 12-14-16-18-20-22 new stitches under sleeve - round begins at the marker thread. Work in stocking stitch in the round on needle - AT THE SAME TIME when sleeve measures 2 cm from division, decrease mid under sleeve – remember DECREASE TIP and decrease as follows: Decrease 2 stitches every 12-9-6-4-3-3 cm 4-5-7-10-11-11 times in total = 50-52-54-56-58-60 stitches. Work until sleeve measures 44-43-42-41-39-37 cm from division. Work 1 round rib (knit = 1/purl 1). Knit 2 rounds. Loosely cast off. Sleeve measures approx. 45-44-43-42-40-38 cm from division. ASSEMBLY: Sew buttons on to left front piece. Sew bands from each front piece together - seam = mid back, fasten band to stitches at the back of the neck. |
|||||||
Diagram explanations |
|||||||
|
|||||||
 |
|||||||
 |
|||||||
Have you finished this pattern?Tag your pictures with #dropspattern #sweetbellcardigan or submit them to the #dropsfan gallery. Do you need help with this pattern?You'll find 33 tutorial videos, a Comments/Questions area and more by visiting the pattern on garnstudio.com. © 1982-2026 DROPS Design A/S. We reserve all rights. This document, including all its sub-sections, has copyrights. Read more about what you can do with our patterns at the bottom of each pattern on our site. |
|||||||


With over 40 years in knitting and crochet design, DROPS Design offers one of the most extensive collections of free patterns on the internet - translated to 17 languages. As of today we count 324 catalogues and 12290 patterns translated into English (UK/cm). 12290
We work hard to bring you the best knitting and crochet have to offer, inspiration and advice as well as great quality yarns at incredible prices! Would you like to use our patterns for other than personal use? You can read what you are allowed to do in the Copyright text at the bottom of all our patterns. Happy crafting!
Post a comment to pattern DROPS 258-5
We would love to hear what you have to say about this pattern!
If you want to leave a question, please make sure you select the correct category in the form below, to speed up the answering process. Required fields are marked *.