
Popular categories
Looking for a yarn?


Comments / Questions (12)
![]() Magda wrote:
Magda wrote:
Sotto le braccia il lavoro non combacia. Quindi è corretto fare così: Faccio combaciare il davanti e dietro con lo schema arrivo con l’ultima maglia prima della maglia centrale, quella centrale la faccio con lo sfondo e dopo aggiusto in modo che combaci il disegno dietro, grazie mille per la risposta
23.01.2026 - 12:29
![]() Donatella Loss wrote:
Donatella Loss wrote:
Sono arrivata alla divisione per il corpo e le maniche, le istruzioni dicono di tagliare il filo e continuare partendo da sotto la manica. Non capisco il significato di questa operazione, non si può continuare dove si è? Grazie per una risposta
20.11.2024 - 13:58DROPS Design answered:
Buonasera Donatella, con la divisione si finisce a lavorare al centro dietro. Mentre dopo la divisione si comincia sotto la manica. Buon lavoro!
13.12.2024 - 23:18
![]() Laura Stel wrote:
Laura Stel wrote:
Petra, Nepal ist die gleiche Qualität wie Lima aber categorie C, leichter umzusetzen
13.10.2024 - 13:39
![]() Petra wrote:
Petra wrote:
Ich würde gerne diesen Norwegerpullover Winter Swirl mit der Drops Lima in diesen Farben nachstricken. Ich weiß, dass dies dann eine andere Garngruppe ist. Von C nach B! So werde ich die Garnmenge ändern müssen. Dies ist das kleinere Problem! Aber wie ändere ich das Norwegermuster auf das neue Garn? Kann mir da irgend Jemand weiterhelfen??? :-)
12.10.2024 - 22:21DROPS Design answered:
Liebe Petra, hier finden Sie unsere Pullover (von oben nach unten mit Rundpasse und Garngruppe B), damit können Sie sich inspirieren um diese Anleitung umzurechnen und anzupassen. Viel Spaß beim Stricken!
14.10.2024 - 08:24
![]() Janette Langendoen wrote:
Janette Langendoen wrote:
Rij 14 van A1 is niet symmetrisch?
28.09.2024 - 11:46
![]() Carol S wrote:
Carol S wrote:
Sweet Snowflakes
10.08.2024 - 11:43
![]() Fabiola wrote:
Fabiola wrote:
Frosty Princess
09.08.2024 - 16:52
![]() Hanna-Ingrid wrote:
Hanna-Ingrid wrote:
November Frost
09.08.2024 - 13:19
![]() Jesse wrote:
Jesse wrote:
Winter Morning
09.08.2024 - 00:20
![]() Rae wrote:
Rae wrote:
Snow drifts
08.08.2024 - 22:13
|
|||||||||||||||||||||||||
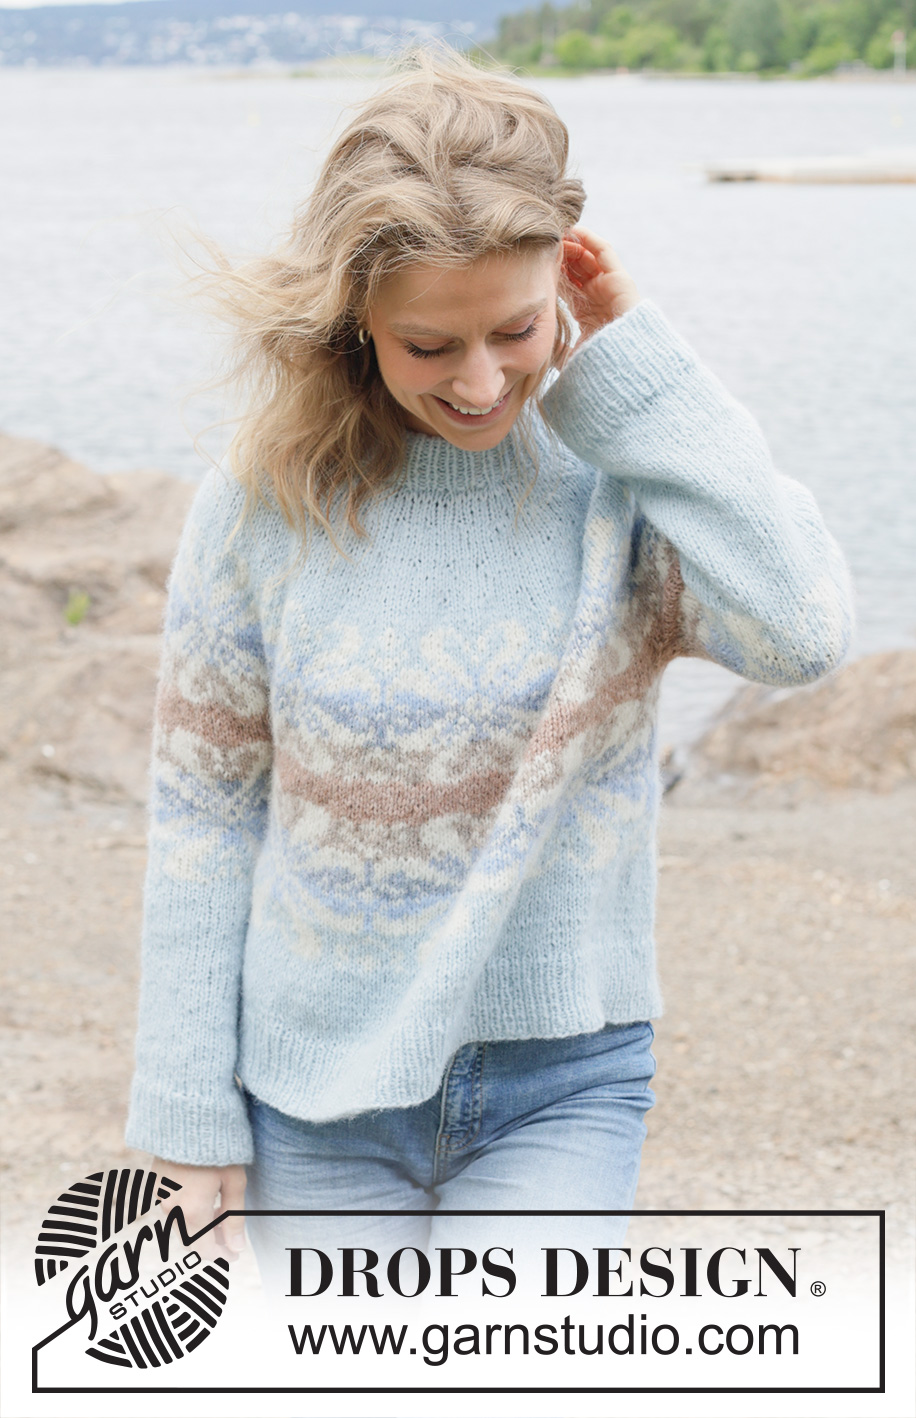
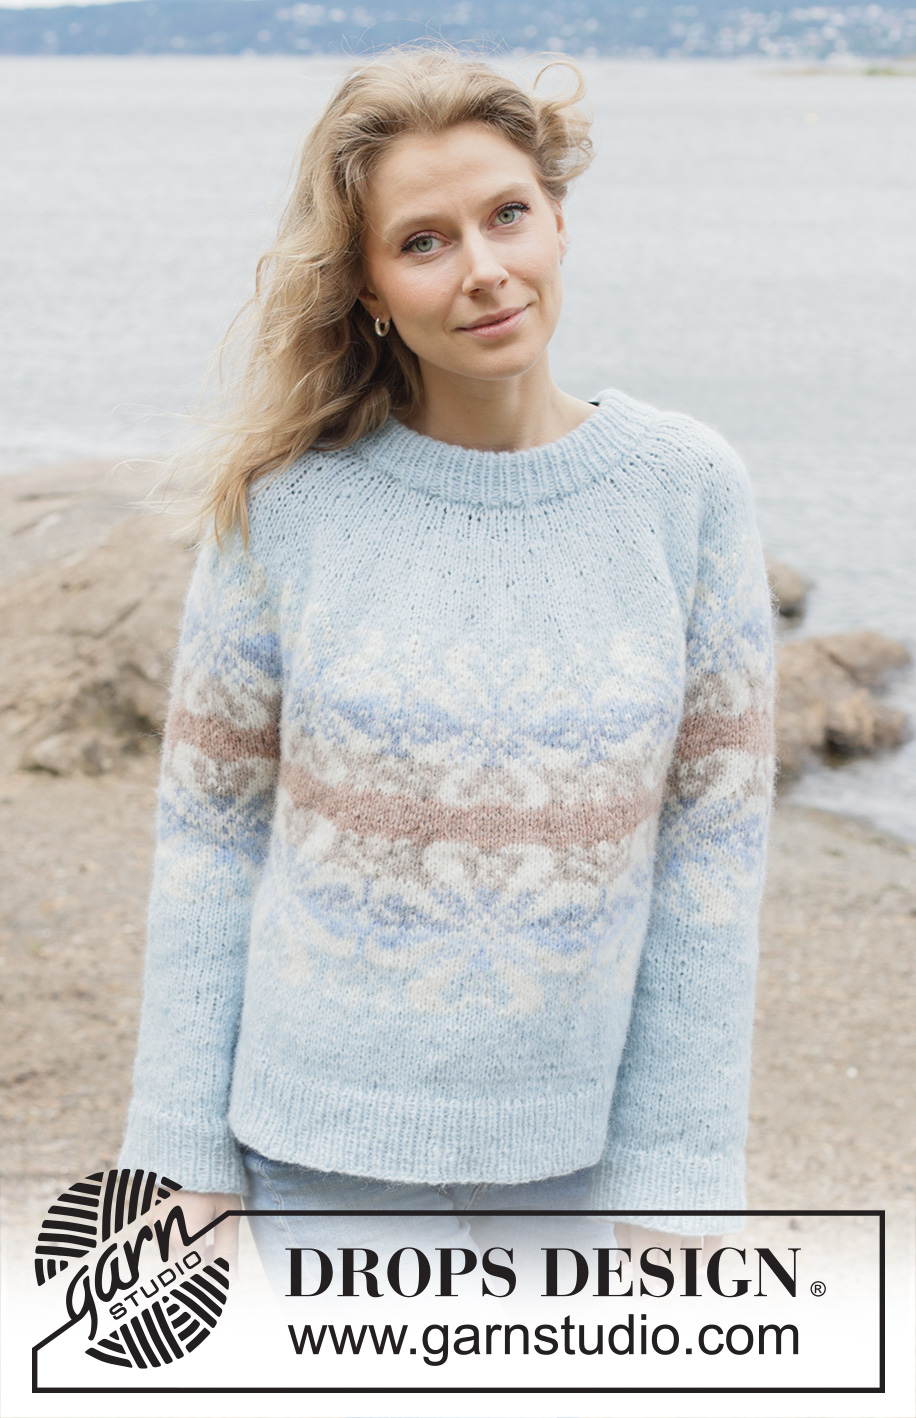
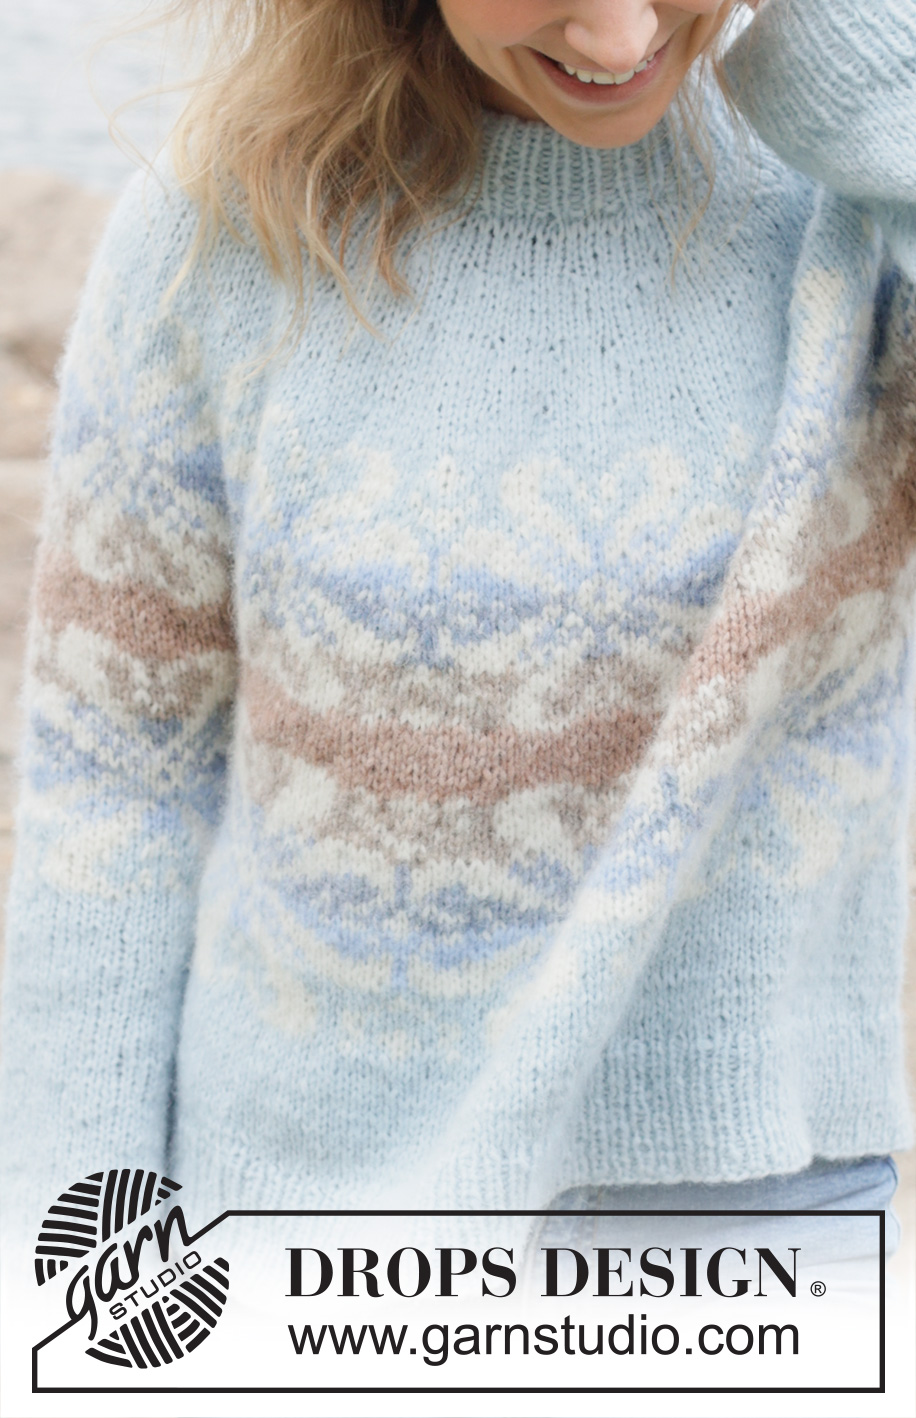
Winter Swirl#winterswirlsweater |
|||||||||||||||||||||||||
 |
 |
||||||||||||||||||||||||
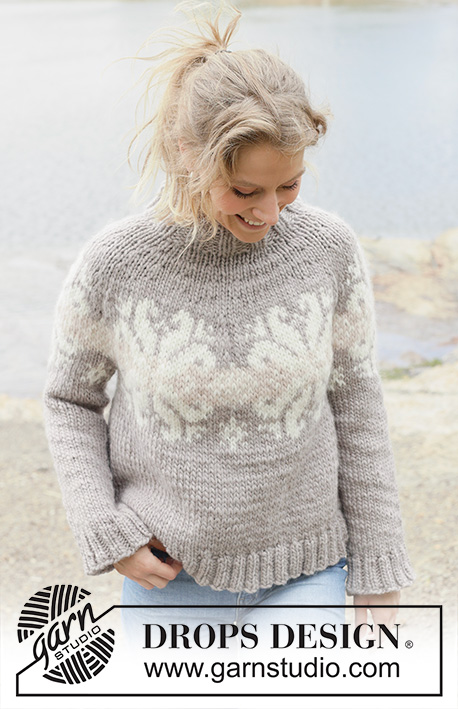
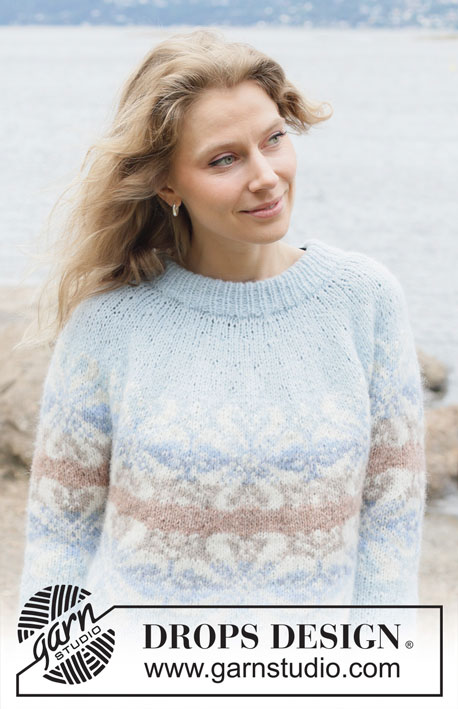
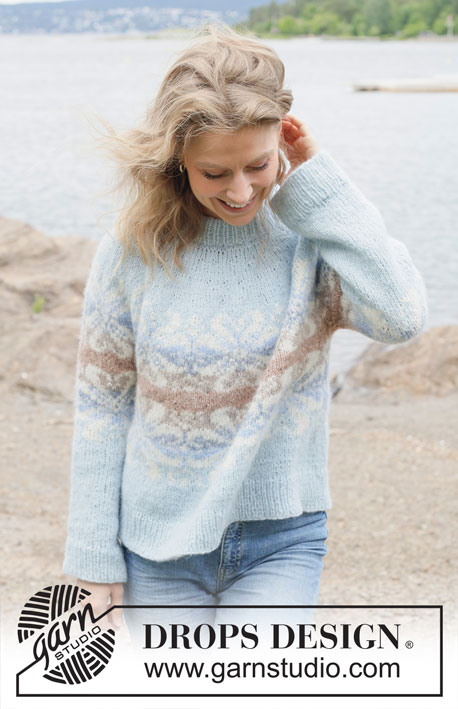
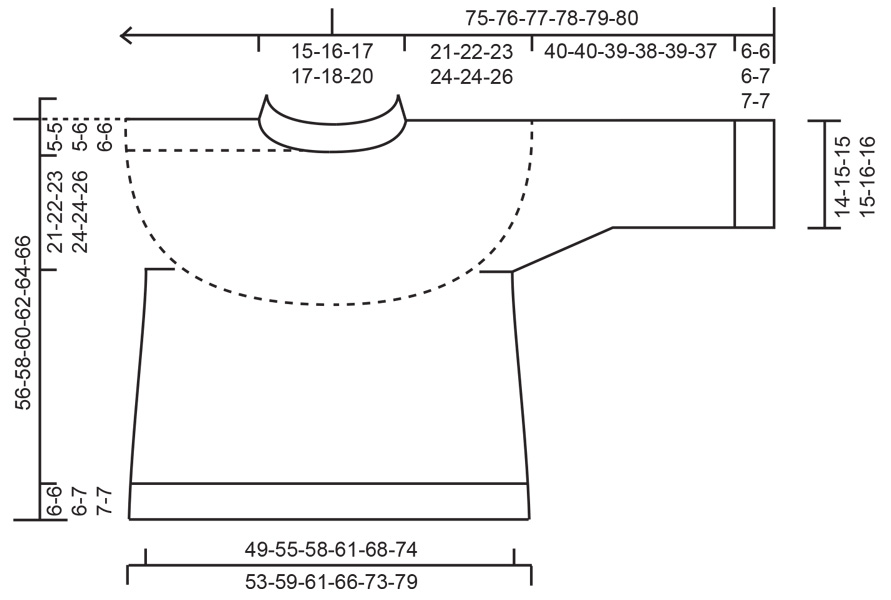
Knitted jumper in DROPS Air. The piece is worked top down with round yoke, Nordic pattern with large stars and double neck. Sizes S - XXXL.
DROPS 254-27 |
|||||||||||||||||||||||||
|
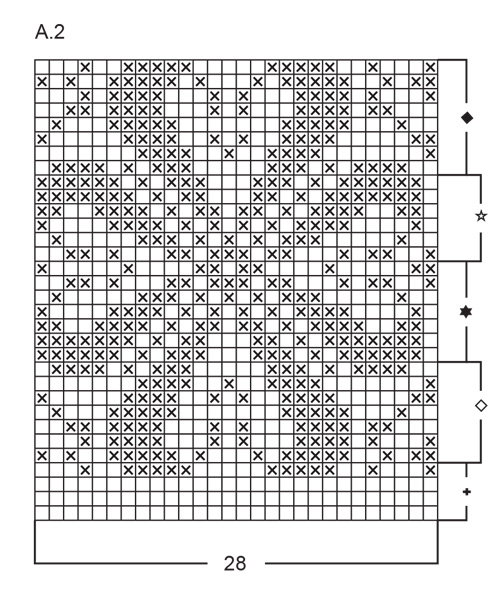
------------------------------------------------------- EXPLANATIONS FOR THE PATTERN: ------------------------------------------------------- INCREASE TIP (evenly spaced): To work out how to increase evenly, count the total number of stitches on the needle (e.g., 90 stitches) and divide by the number of increases to be made (e.g., 20) = 4.5. In this example, increase by making 1 yarn over after alternately each 4th and 5th stitch. On the next round knit the yarn overs twisted to avoid holes. PATTERN: See diagrams A.1 and A.2. The pattern is worked in stocking stitch. To avoid the knitting tension losing its elasticity when working colour-pattern, it is important that the strands at the back are not tight. Use a larger size needle when working pattern if the piece becomes tight. STRIPE TIP: To get a neat transition when changing stripe-colours: Change to the new colour and work 1 round. Work the first stitch on round 2 as follows: Pick up the first stitch from the round 1 and knit it together with the first stitch on this round DECREASE TIP: Decrease 1 stitch on each side of the marker as follows: Work until there are 2 stitches left before the marker, knit 2 together, knit 1 with background colour (marker sits in this stitch), slip 1 stitch knit-wise, knit 1 and pass the slipped stitch over the knitted stitch (2 stitches decreased). ------------------------------------------------------- START THE PIECE HERE: ------------------------------------------------------- JUMPER – SHORT OVERVIEW OF THE PIECE: The pattern uses both long and short needles; start with the length which fits the number of stitches and change when necessary. The neck and yoke are worked in the round with circular needle, top down and from mid-back. When the yoke is finished, it is divided for the body and sleeves and the body continued in the round, while the sleeves wait. The sleeves are worked top down, in the round. The neck is folded double and fastened to the inside. NECK: Cast on 90-94-98-104-108-114 stitches with circular needle size 5 mm and colour morning mist DROPS Air. Change to circular needle size 3.5 mm (casting on with a larger needle size makes the cast-on edge elastic). Work rib in the round (knit 1, purl 1) for 11-11-12-12-13-13 cm. The neck is folded double later to give a neck-height of approx. 5-5-5½-5½-6-6 cm. Insert 1 marker at the beginning of the round (mid-back), the piece is now measured from here. YOKE: Change to circular needle size 5 mm. Knit 1 round and increase 20-24-26-28-28-30 stitches evenly spaced – read INCREASE TIP = 110-118-124-132-136-144 stitches. Continue with stocking stitch. Remember to maintain the knitting tension. When the yoke measures 2-2-2-2-2-2 cm from the marker, increase 24-28-26-24-28-31 stitches evenly spaced – remember INCREASE TIP = 134-146-150-156-164-175 stitches. When the yoke measures 4-4-4-4-4-4½ cm from the marker, increase 24-28-26-24-28-31 stitches evenly spaced = 158-174-176-180-192-206 stitches. When the yoke measures 6-6-6-6-6-7 cm from the marker, increase 24-28-26-24-28-31 stitches evenly spaced = 182-202-202-204-220-237 stitches. When the yoke measures 7-8-8-8-8-9½ cm from the marker, increase 25-28-28-24-28-31 stitches evenly spaced = 207-230-230-228-248-268 stitches. These increases are finished in sizes S, M and L. Increase in the other sizes as follows. SIZES XL, XXL AND XXXL: When the yoke measures 10-10-12 cm from the marker, increase 25-28-31 stitches evenly spaced = 253-276-299 stitches. ALL SIZES: = 207-230-230-253-276-299 stitches. When the yoke measures 8-9-10-11-11-13 cm from the marker begin working PATTERN – read description above and STRIPE TIP, as follows: Work A.1 a total of 9-10-10-11-12-13 times around the yoke, increasing as shown in the diagrams. Work until the yoke measures 21-22-23-24-24-26 cm from the marker. Now divide for the body and sleeves – NOTE: Adjust so that you are at a point in the pattern where you have increased 5 times in each repeat of A.1 (i.e., 2 increases left in each A.1 - these increases are worked on the body) = 252-280-280-308-336-364 stitches. If your knitting tension is correct vertically, the piece will divide in the middle of a stripe with background colour pink marble. The pattern is finished on the body and sleeves. DIVIDE FOR BODY AND SLEEVES: Work 39-44-44-47-53-58 stitches (= half back piece), place the next 49-53-53-61-63-67 stitches on a thread for the sleeve, cast on 7-7-11-11-11-11 stitches (in side mid-under sleeve), work 77-87-87-93-105-115 stitches (= front piece), place the next 49-53-53-61-63-67 stitches on a thread for the sleeve, cast on 7-7-11-11-11-11 stitches (in side mid-under sleeve), work the last 38-43-43-46-52-57 stitches (= half back piece). Cut the yarn. The body and sleeves are finished separately. BODY: = 168-188-196-208-232-252 stitches. Insert 1 marker in the middle of the 7-7-11-11-11-11 cast-on stitches under each sleeve. Start the round at one marker and continue the pattern in the round as before – NOTE: The pattern will not fit under the sleeves, work pattern as far as each marker-stitch and work the marker-stitches with the background colour. When A.1 is finished in height there are 180-200-208-224-248-268 stitches. Continue with stocking stitch and colour morning mist until the piece measures 45-47-49-49-51-53 cm from the marker mid-back. Change to circular needle size 3.5 mm, work rib (knit 1, purl 1) AT THE SAME TIME increase 32-36-36-40-44-48 stitches evenly spaced on round 1 = 212-236-244-264-292-316 stitches. When the rib measures 6-6-6-7-7-7 cm, cast off. The jumper measures approx. 51-53-55-56-58-60 cm from the marker and 56-58-60-62-64-66 cm from top of shoulder. SLEEVES: Place the 49-53-53-61-63-67 sleeve-stitches from one thread on circular needle size 5 mm. In addition, knit up 1 stitch in each of the 7-7-11-11-11-11 cast-on stitches under the sleeve = 56-60-64-72-74-78 stitches. Insert 1 marker in the middle stitch under the sleeve; this marker is used when decreasing under the sleeve. You now continue PATTERN and DECREASE under the sleeve. Read the next 2 sections before continuing. PATTERN: Remember to continue the decreases. Start the round at the marker under the sleeve and continue pattern from the yoke, i.e., finish A.1 up to and including the round marked with an arrow in A.1, then work A.2 in the round – NOTE: The stars are not symmetrical on the sleeve, but the star in A.2 should be directly above the star in A.1 – The pattern will not fit under the sleeve, work pattern as far as the marker-stitch and work the marker-stitch with the background colour. When A.2 is finished in height, continue with stocking stitch and colour morning mist. DECREASE: When the sleeve measures 2 cm from the division, decrease 2 stitches mid-under the sleeve- -read DECREASE TIP. Decrease like this every 2-1½-1½-1-1-1 cm a total of 4-5-7-10-10-11 times = 48-50-50-52-54-56 stitches. Continue working until the sleeve measures 40-40-39-38-39-37 cm from the division. Change to double pointed needles size 3.5 mm. Work rib (knit 1, purl 1), AT THE SAME TIME increase 8-8-8-10-10-10 stitches evenly on the first round = 56-58-58-62-64-66 stitches. When the rib measures 6-6-6-7-7-7 cm, cast off. The sleeve measures approx. 46-46-46-45-46-44 cm. ASSEMBLY: Fold the neck double to the inside and sew down. To avoid the neck being tight and rolling outwards, it is important that the seam is elastic. |
|||||||||||||||||||||||||
Diagram explanations |
|||||||||||||||||||||||||
|
|||||||||||||||||||||||||
 |
|||||||||||||||||||||||||
 |
|||||||||||||||||||||||||
 |
|||||||||||||||||||||||||
Have you finished this pattern?Tag your pictures with #dropspattern #winterswirlsweater or submit them to the #dropsfan gallery. Do you need help with this pattern?You'll find 28 tutorial videos, a Comments/Questions area and more by visiting the pattern on garnstudio.com. © 1982-2026 DROPS Design A/S. We reserve all rights. This document, including all its sub-sections, has copyrights. Read more about what you can do with our patterns at the bottom of each pattern on our site. |
|||||||||||||||||||||||||


With over 40 years in knitting and crochet design, DROPS Design offers one of the most extensive collections of free patterns on the internet - translated to 17 languages. As of today we count 324 catalogues and 12290 patterns translated into English (UK/cm). 12290
We work hard to bring you the best knitting and crochet have to offer, inspiration and advice as well as great quality yarns at incredible prices! Would you like to use our patterns for other than personal use? You can read what you are allowed to do in the Copyright text at the bottom of all our patterns. Happy crafting!
Post a comment to pattern DROPS 254-27
We would love to hear what you have to say about this pattern!
If you want to leave a question, please make sure you select the correct category in the form below, to speed up the answering process. Required fields are marked *.