
Popular categories
Looking for a yarn?


Comments / Questions (20)
![]() Milena Ziebura wrote:
Milena Ziebura wrote:
Hallo, vielen Dank für die tolle kostenlose Anleitung! Mit welcher Nadelstärke soll ich die Maschenprobe durchführen? Vielen Dank!
01.04.2026 - 15:16DROPS Design answered:
Hallo Milena, die Maschenprobe ist mit Nadelstärke 3,5 gestrickt. Viel Spaß beim Stricken!
04.04.2026 - 20:41
![]() Anneli Andreasen wrote:
Anneli Andreasen wrote:
Hej ska sticka storlek L. Efter hals och ök är det 170 m. Nästa varv ska ökas en m på var sida om de 2 m, därefter olika ök på fram o bakst. Men i mönstret står 182 m efter första raglan ök varvet men det blir bara 8 m ök. Ska det stämma börjar man direkt med olika ök?????
26.03.2026 - 21:28DROPS Design answered:
Hej Anneli, i størrelse L starter du med at øge 1 maske både før og efter hver af de 4 mærketråde = totalt 8 m taget ud = 170+8=178m. Nu fortsættes det forskelligt på ærmerne ifølge opskriften :)
09.04.2026 - 10:23
![]() Christine wrote:
Christine wrote:
Bonjour, j'aurai besoin d'aide pour les diminutions des manches. Si je comprends bien le modèle ça donne(S): 2 cm -> moins 2 mailles , 4 tours -> moins 2 mailles, 4 tours-> moins 2 mailles, puis 11 cm -> moins 2 mailles, 11 cm -> moins 2 mailles, 11 cm -> moins 2 mailles, 11 cm -> moins 2 mailles.... donc j'arrive à plus de 44cm, hors c'est indiqué "Tricoter jusqu'à ce que la manche mesure 42 cm"... où est mon erreur? Merci d'avance!
01.12.2025 - 22:27
![]() Christine wrote:
Christine wrote:
Bonjour, Je pense qu'une erreur s'est glissée dans les chiffres de votre échantillon, je pense que c'est 24 mailles sur 32 rangs (et non pas 22 rangs)... Par contre petite question, lorsque le raglan est terminé pour les manches mais pas pour le devant et dos, nous devons donc continuer d'augmenter uniquement sur un seul côté du marqueur (côté devant ou dos), juste? Merci d'avance
05.11.2025 - 22:36DROPS Design answered:
Bonjour Christine, merci pour votre retour sur l'échantillon, la correction a été faite. Effectivement, on augmente d'abord pour les manches/le dos/le devant et ensuite on va augmenter seulement pour le devant et le dos, plus pour les manches; augmentez à la fin du devant gauche, au début du dos + à la fin du dos et au début du devant droit (plus dans le point ajouré). Bon tricot!
06.11.2025 - 09:30
![]() Susanne wrote:
Susanne wrote:
Kunne opskrift ikke bare beskrive arbejdsgang fra start til slut !?!? Man kan ikke en gang finde hvor mange masker man skal starte med at slå op!
11.10.2024 - 07:18DROPS Design answered:
Hej Susanne. Själva opskriften startar där det står HALSKANT. Mvh DROPS Design
11.10.2024 - 14:14
![]() Concetta La Scala wrote:
Concetta La Scala wrote:
Quindi, si comincia da un 32 cm di collo. Grazie
06.10.2024 - 22:45
![]() Concetta La Scala wrote:
Concetta La Scala wrote:
Da quale misura del collo partite? Dalla più piccola alla più grande. Grazie
06.10.2024 - 22:24DROPS Design answered:
Buonasera Concetta, può verificare le misure del modello sullo schema in fondo alla pagina. Buon lavoro!
06.10.2024 - 22:31
![]() Anne Marie Orvik wrote:
Anne Marie Orvik wrote:
Etter beskrivelse av raglanøkning (størrelse S) står det at det er 118 m bakstykke, 65m hvert forstykke ,79 m hvert erme. Dette blir tilsammen 406m. Så kommer avsnittet ALLE STØRRELSER, og forteller at det tilsammen er 342m, og dette tallet er også utgangspunkt når en skal dele bol og ermer. Det må bli helt feil? Jeg er en erfaren strikker - hva er det jeg ikke har forstått?
02.09.2024 - 12:26DROPS Design answered:
Hej Anne Marie, det er afsnittet ovenfor som hører til størrelse S (første af de to størrelser) : Fortsett økningene på forstykke/bakstykke på hver 2.pinne totalt 2-1 gang til, det er økt totalt 22-25 ganger på ermene og 24-26 ganger på forstykke/bakstykke = 342-366 masker. Det er 96-102 masker på bakstykket, 54-57 masker på hvert forstykke og 69-75 masker på hvert erme.
06.09.2024 - 10:18
![]() Concetta La Scala wrote:
Concetta La Scala wrote:
Quindi avviate più maglie per il collo proprio perché poi lavorando a coste si restringono .E per il corpo poi vanno bene?
18.06.2024 - 18:22DROPS Design answered:
Buonasera Concetta, per il corpo deve procedere come indicato. Buon lavoro!
18.06.2024 - 20:56
![]() Concetta La Scala wrote:
Concetta La Scala wrote:
Grazie mille. Però le 154 maglie corrispondono a 64cm ,giusto. Quindi devo avviare le maglie per 64 cm che corrispondono a 154 stando al campione. E poi nello schema del modello a lavoro finito ho 18 maglie dietro e 18 davanti. Ma questo quando è finita la maglia. Grazie ancora
18.06.2024 - 17:17
|
|||||||||||||
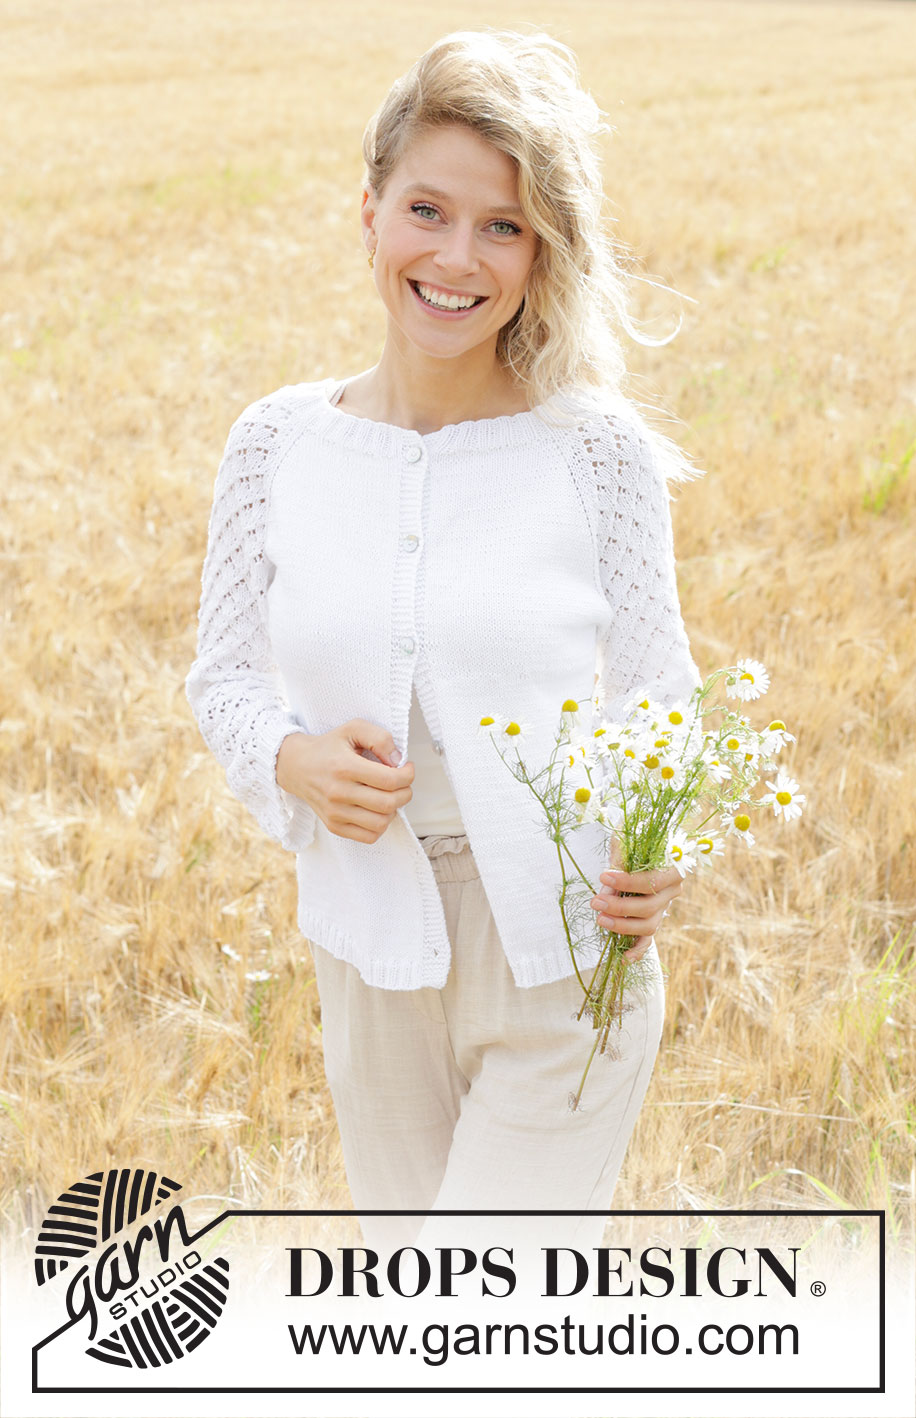
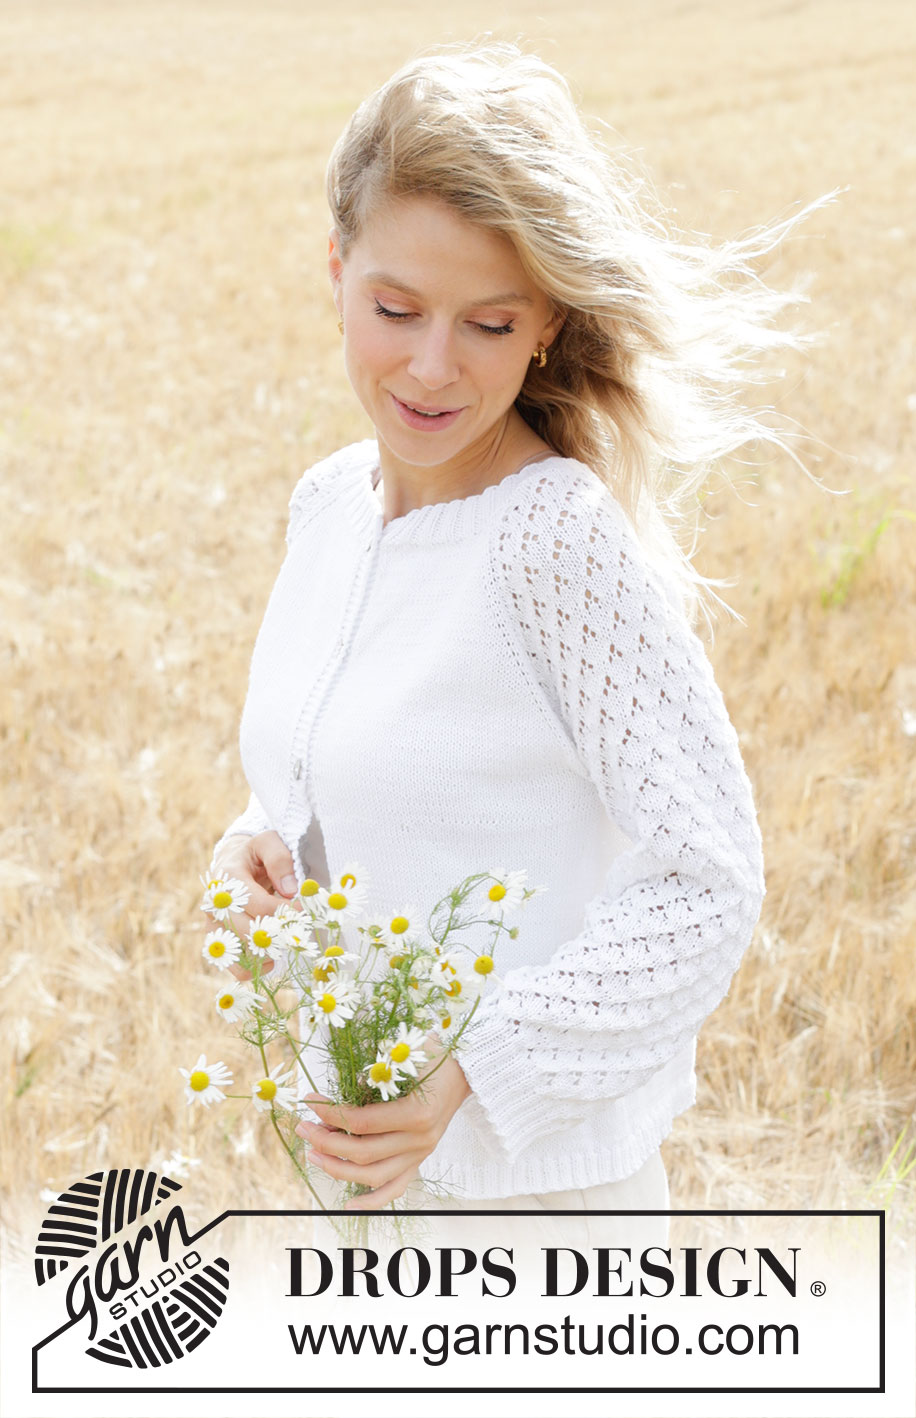
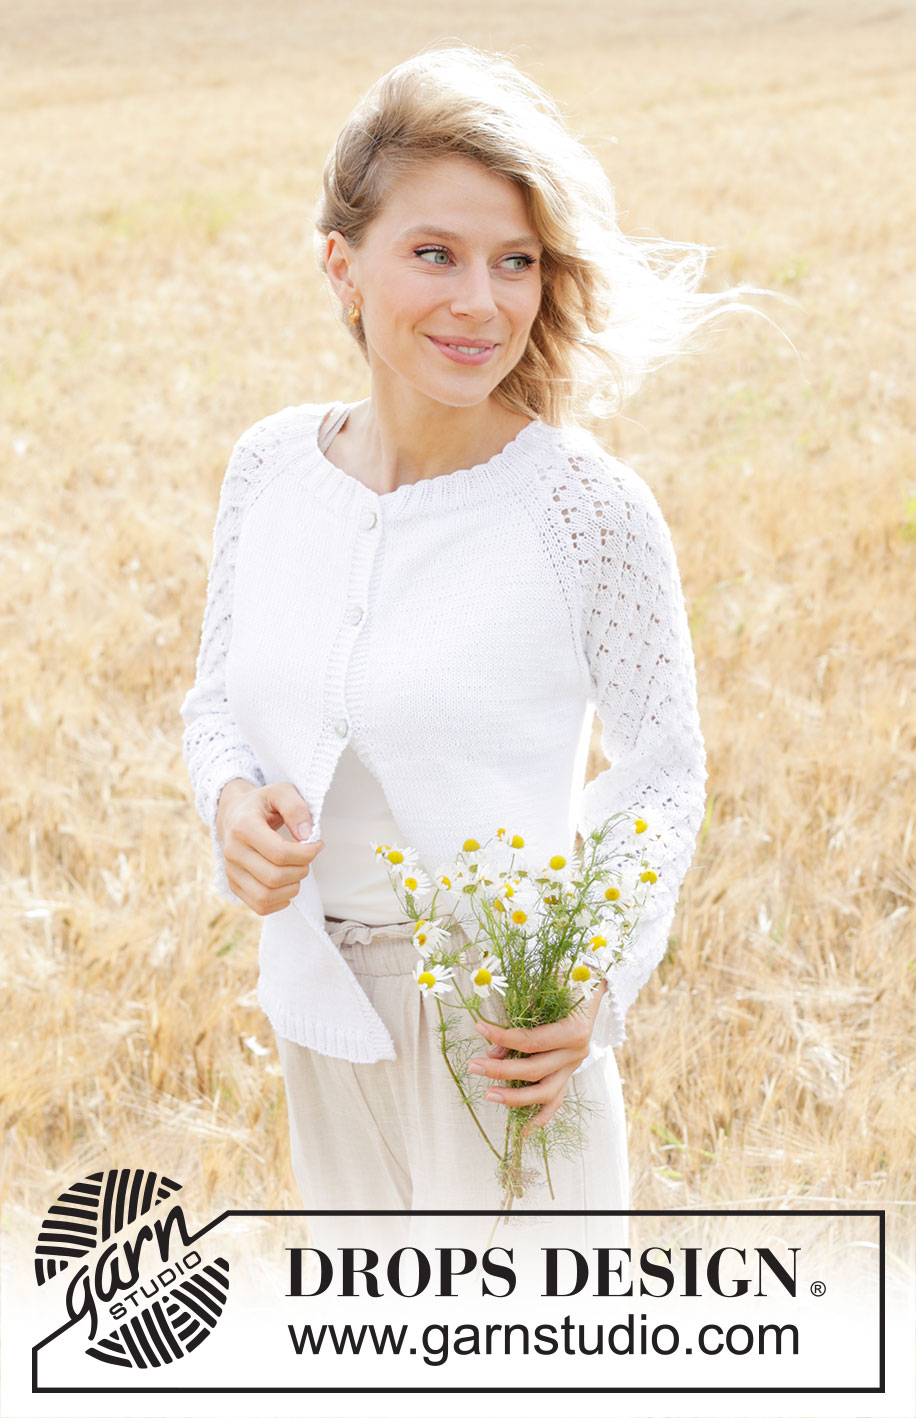
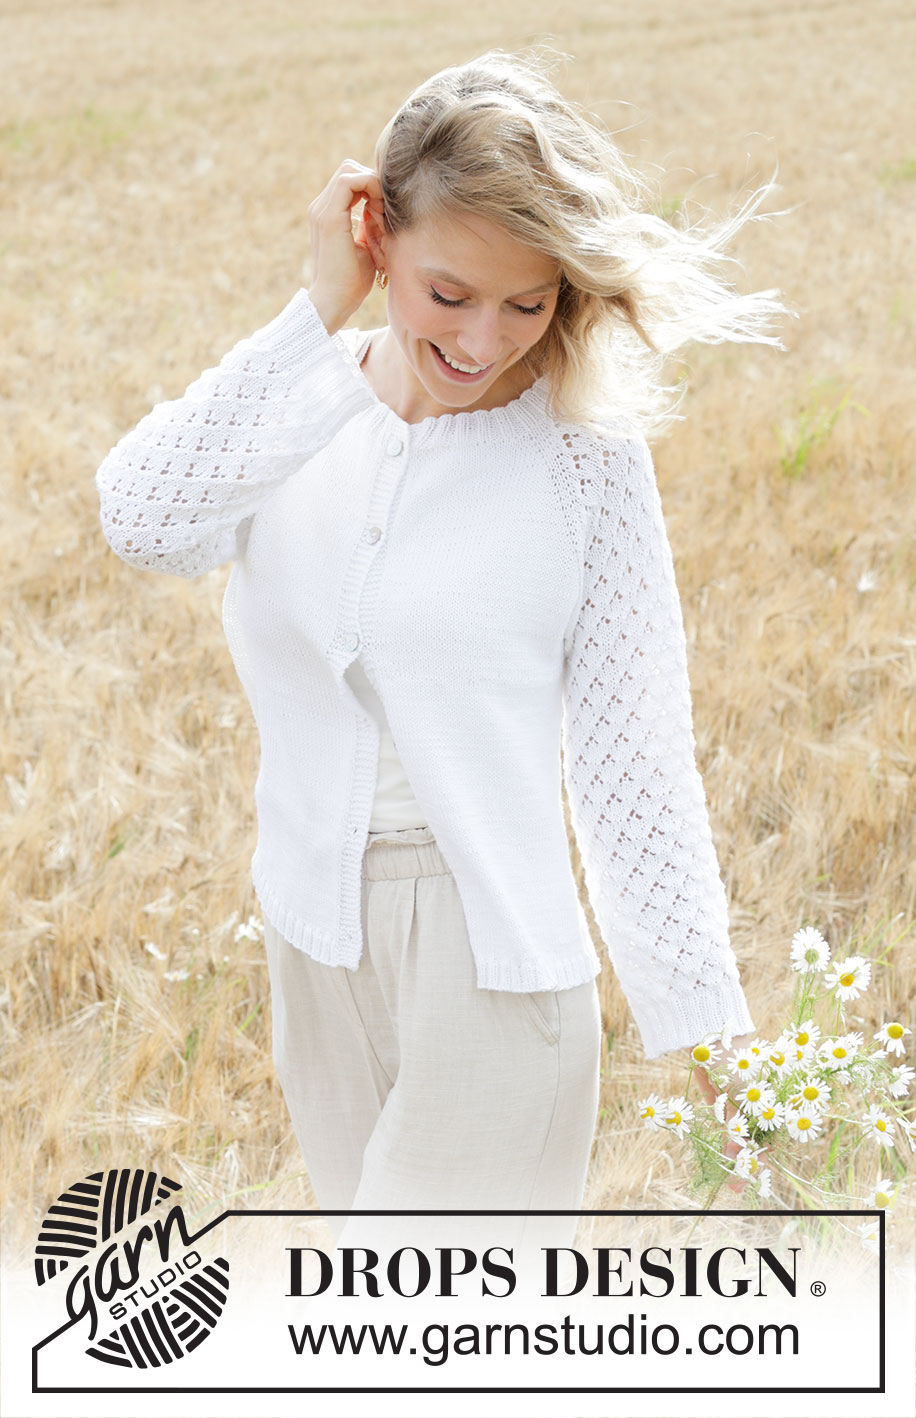
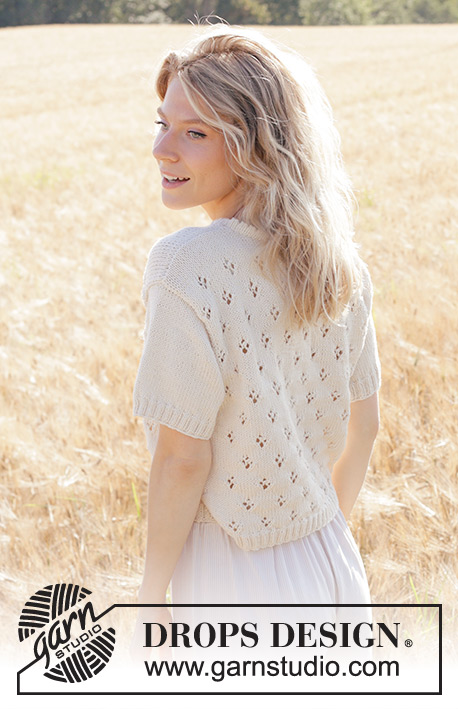
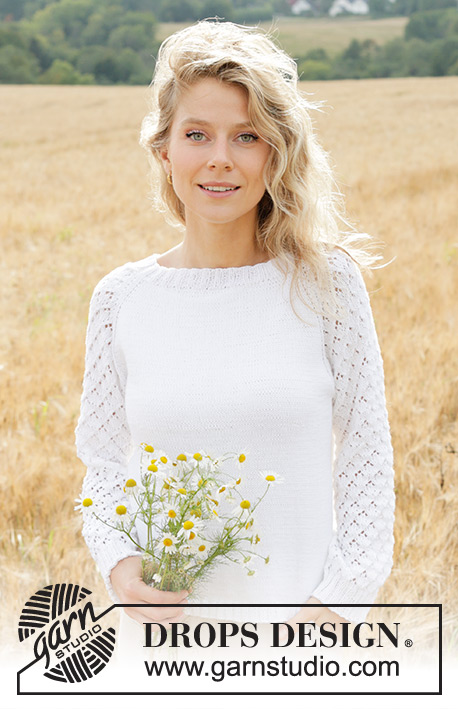
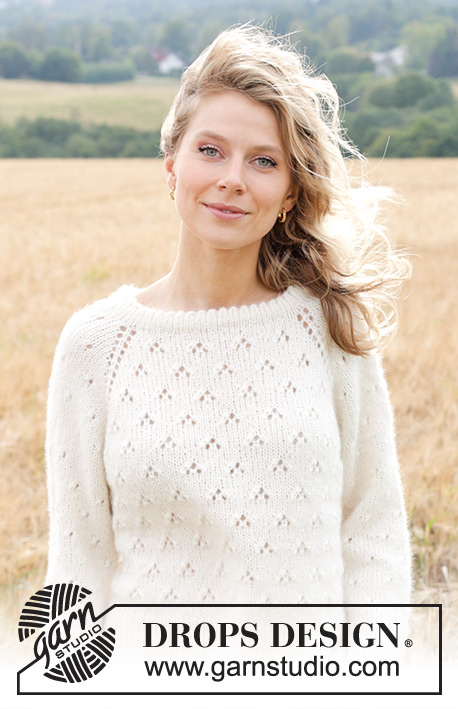
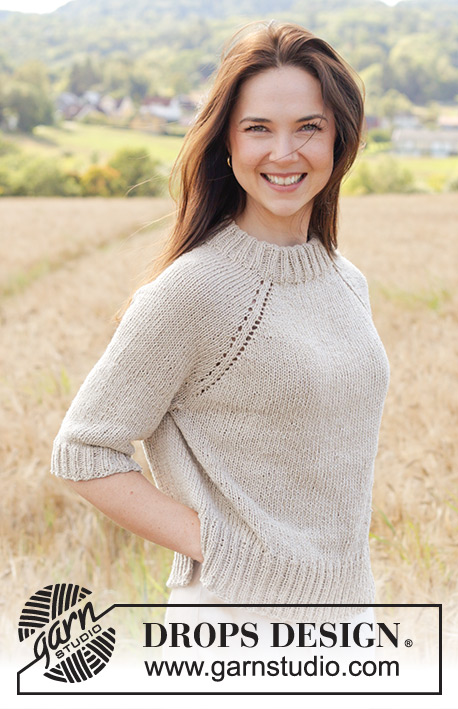
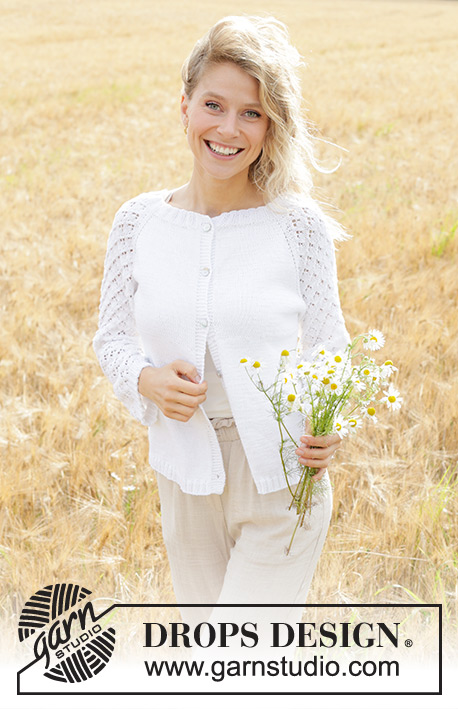
Daisy Fields Cardigan#daisyfieldscardigan |
|||||||||||||
 |
 |
||||||||||||
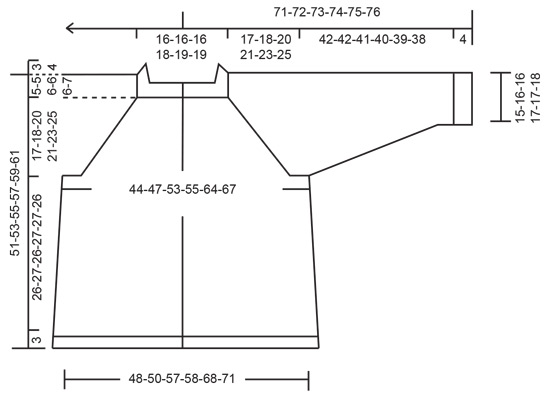
Knitted jacket in DROPS Safran or DROPS BabyMerino. The piece is worked top down with raglan and lace pattern. Sizes S - XXXL.
DROPS 249-8 |
|||||||||||||
|
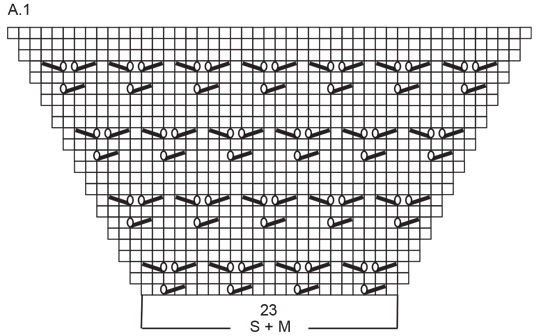
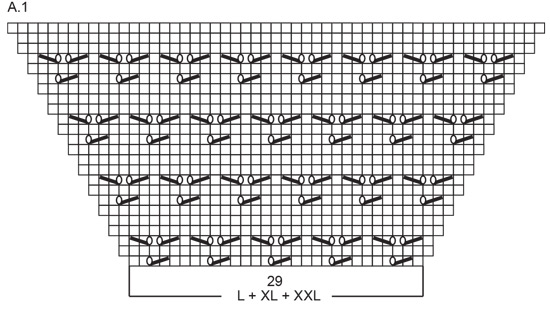
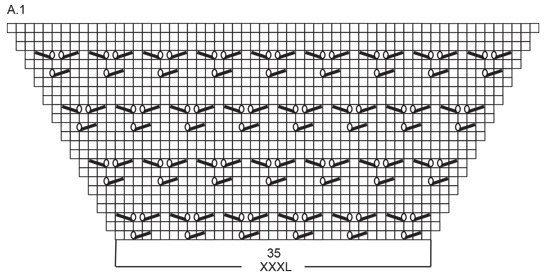
------------------------------------------------------- EXPLANATIONS FOR THE PATTERN: ------------------------------------------------------- GARTER STITCH (worked back and forth): Knit all rows, from both the right and wrong side. 1 ridge in height = knit 2 rows. PATTERN: See diagram A.1. Choose pattern for your size. The diagram shows all the rows in the pattern, seen from the right side. As you increase for raglan on the sleeves, work the new stitches in pattern as shown in A.1; i.e., work the stitches in stocking stitch until there is room for a complete pattern repeat. Stitches which do not fit into the pattern are worked in stocking stitch. INCREASE TIP-1 (increasing evenly spaced): Increase 1 stitch by making 1 yarn over, which is purled twisted on the next row to avoid a hole. INCREASE TIP-2 (sides of body): All increases are worked from the right side! Increase 1 stitch on each side of marker-thread as follows: Work until there are 2 stitches left before the marker thread, make 1 yarn over, knit 4 (marker thread sits in the middle of these 4 stitches) make 1 yarn over. On the next row purl the yarn overs twisted to avoid holes. Then work the new stitches in stocking stitch. RAGLAN: Increase for raglan before/after 2 stocking stitches (raglan-stitches) in each transition between the body and sleeves (marker-thread sits between these 2 stitches) as follows: INCREASE 1 STITCH: Before raglan-stitches: Work until there is 1 stitch left before the marker-thread, pick up from the back the strand between 2 stitches, place it on the left needle and knit it (= 1 increased stitch). After raglan-stitches: Work to 1 stitch past the marker-thread, pick up from the front the strand between 2 stitches, place it on the left needle and knit it twisted (= 1 increased stitch). INCREASE 2 STITCHES: Before raglan-stitches: Work until there are 2 stitches left before the marker thread, pick up from the back the strand between 2 stitches, place it on the left needle and knit it. Knit 1, pick up from the back the strand between 2 stitches, place it on the left needle and knit it (= 2 increased stitches). After raglan-stitches: Work to 1 stitch past the marker-thread, pick up from the front the strand between 2 stitches, place it on the left needle and knit it twisted. Knit 1, pick up from the front the strand between 2 stitches, place it on the left needle and knit it twisted (= 2 increased stitches). DECREASE TIP (for sleeves): Decrease 1 stitch on each side of the marker-thread as follows: Work until there are 3 stitches left before the marker-thread, knit 2 together, knit 2 (marker-thread sits between these 2 stitches), slip 1 stitch knit-wise, knit 1 and pass the slipped stitch over the knitted stitch. BUTTONHOLES: Work buttonholes on the right band (when the garment is worn). Work from the right side when there are 3 stitches left on the row as follows: Make 1 yarn over, knit 2 together and knit 1. On the next row (wrong side), knit the yarn over to leave a hole. The first buttonhole is worked on the first row after the neck. The other 5-5-5-6-6-6 buttonholes are then worked with approx. 8½-9-9-8-8-8½ cm between each one. The bottom buttonhole is worked in the transition between the stocking stitch and rib. ------------------------------------------------------- START THE PIECE HERE: ------------------------------------------------------- JACKET – SHORT OVERVIEW OF THE PIECE. The pattern uses both long and short needles; start with the length which fits the number of stitches and change when necessary. The neck and yoke are worked back and forth with circular needle, top down. When the yoke is finished, it is divided for body and sleeves and the body continued back and forth, while the sleeves wait. The sleeves are worked in the round. NECK: Cast on 138-138-146-154-162-170 stitches with circular needle size 2.5 mm and DROPS Safran or DROPS Baby Merino. Work rib as follows, with the first row from the wrong side: 6 band stitches in GARTER STITCH – read description above, rib (purl 2, knit 2) until there are 8 stitches left, purl 2 and 6 band stitches in garter stitch. Continue this rib back and forth for 3-3-3-4-4-4 cm, with the next row from the right side. Insert 1 marker after the band on one side; the yoke is measured from here. YOKE: Read INCREASE TIP-1 and BUTTONHOLES in explanations above. Change to circular needle size 3.5 mm, starting from the right side and inserting 4 marker-threads as follows: Work 6 band stitches in garter stitch, stocking stitch and increase 3-4-7-4-1-1 stitches evenly over the next 20-20-16-20-24-24 stitches, 2 stocking stitches and insert 1 marker-thread between these 2 stitches, work stocking stitch and increase 5-5-3-3-3-5 stitches evenly over the next 18-18-26-26-26-30 stitches, 2 stocking stitches and insert 1 marker-thread between these 2 stitches, work stocking stitch and increase 4-6-4-6-8-8 stitches evenly over the next 42 stitches, 2 stocking stitches and insert 1 marker-thread between these 2 stitches, work stocking stitch and increase 5-5-3-3-3-5 stitches evenly over the next 18-18-26-26-26-30 stitches, 2 stocking stitches and insert 1 marker-thread between these 2 stitches, work stocking stitch and increase 3-4-7-4-1-1 stitches evenly over the next 20-20-16-20-24-24 stitches, 6 band stitches in garter stitch. There are 158-162-170-174-178-190 stitches (48-50-48-50-52-52 stitches between marker-threads on the back piece, 30-31-30-31-32-32 stitches on each front piece and 25-25-31-31-31-37 stitches between the marker-threads on the sleeves). Work back from the wrong side as follows: 6 band stitches in garter stitch, stocking stitch until there are 6 stitches left, 6 band stitches in garter stitch. Continue with stocking stitch on the front and back pieces and pattern on the sleeves, increasing for raglan as follows in the different sizes. The increases are also different on the body and sleeves. SIZES S and M: Read RAGLAN in explanations above and the rest of the section before continuing. On the next row (= right side) work stocking stitch on the front and back pieces and diagram A.1 on the sleeves. At the same time increase 1 stitch on each side of the 2 raglan-stitches (= 8 increased stitches on each increase-row). Work the first row as follows: 6 band stitches in garter stitch, stocking stitch until there is 1 stitch left before the first marker-thread (= left front piece), INCREASE 1 STITCH for raglan before and after the raglan-stitches – read description above, work A.1 (= sleeve), INCREASE 1 STITCH before and after the raglan-stitches, work stocking stitch until there is 1 stitch left before the next marker-thread (= back piece), INCREASE 1 STITCH before and after the raglan-stitches, work A.1 (= sleeve), INCREASE 1 STITCH before and after the raglan-stitches, work stocking stitch until there are 6 stitches left, 6 band stitches in garter stitch (= right front piece) = 166-170 stitches. Work back from the wrong side. Continue with stocking stitch and pattern, increasing on each side of the raglan-stitches every 2nd row. REMEMBER THE KNITTING TENSION! When you have increased 22-25 times for raglan, the increases are finished on the sleeves. NOTE! When the diagram is finished in height, continue the pattern, The stitches which do not fit into a complete pattern on each side are worked in stocking stitch. Continue increasing on the front and back pieces every 2nd row 2-1 more times, a total of 22-25 times on the sleeves and 24-26 times on the front and back pieces = 342-366 stitches. There are 96-102 stitches on the back piece, 54-57 stitches on each front piece and 69-75 stitches on each sleeve. SIZES L, XL, XXL and XXXL: Read RAGLAN in explanations above and the rest of the section before continuing. On the next row (= right side) work stocking stitch on the front and back pieces and diagram A.1 on the sleeves. At the same time increase on each side of the 2 raglan-stitches. Work the first row as follows: 6 band stitches in garter stitch, stocking stitch until there is 1 stitch left before the first marker-thread (= left front piece), INCREASE 1 STITCH for raglan before and after the raglan-stitches – read description above, work A.1 (= sleeve), INCREASE 1 STITCH before and after the raglan-stitches, work stocking stitch until there is 1 stitch left before the next marker-thread (= back piece), INCREASE 1 STITCH before and after the raglan-stitches, work A.1 (= sleeve), INCREASE 1 STITCH before and after the raglan-stitches, work stocking stitch until there are 6 stitches left, 6 band stitches in garter stitch (= right front piece) = 178-182-186-198 stitches. Work back from the wrong side. REMEMBER THE KNITTING TENSION. Now the raglan-increases are worked differently on the front/back pieces and sleeves. Read both sections before continuing! SLEEVE-INCREASES: Continue increasing 1 stitch for raglan every 2nd row until you have increased a total of 18-28-27-22 times (including the increases described above). Now increase 1 stitch every 4th row 6-2-4-7 times. You have increased a total of 24-30-31-29 times on the sleeves. NOTE! When the diagram is finished in height, continue the pattern, The stitches which do not fit into a complete pattern on each side are worked in stocking stitch. BODY-INCREASES: On the next row (= right side) INCREASE 2 STITCHES for raglan on the front and back pieces – read description above. Then INCREASE 1 STITCH for raglan every 2nd row as before but every 10th-12th-6th-6th row (i.e., every 5th-6th-3rd-3rd increase), INCREASE 2 STITCHES instead of 1 stitch. Continue like this until you have increased a total of 29-30-34-36 times (6-5-11-12 times with 2 increased stitches) = 406-434-482-498 stitches. There are 118-120-142-148 stitches on the back piece, 65-66-77-80 stitches on each front piece and 79-91-93-95 stitches on each sleeve. ALL SIZES: = 342-366-406-434-482-498 stitches. Continue working without further increases until the yoke measures 17-18-20-21-23-25 cm from the marker, with the next row from the right side. DIVIDE FOR BODY AND SLEEVES: Work the first 55-58-66-67-78-81 stitches as before (= left front piece), place the next 67-73-77-89-91-93 stitches on 1 thread for the sleeve, cast on 8-8-8-10-10-12 stitches (= in side under sleeve), work 98-104-120-122-144-150 stitches (= back piece), place the next 67-73-77-89-91-93 stitches on 1 thread for the sleeve, cast on 8-8-8-10-10-12 stitches (= in side under sleeve), work the last 55-58-66-67-78-81 stitches as before (= right front piece). The body and sleeves are finished separately. The piece is now measured from here. BODY: = 224-236-268-276-320-336 stitches. Insert 1 marker-thread in the middle of the 8-8-8-10-10-12 stitches cast on under each sleeve; allow the threads to follow your work onwards, they are used when increasing in the sides. Work back and forth with stocking stitch and 6 band stitches in garter stitch on each side. When the body measures 5 cm from the division, increase 1 stitch on each side of both marker-threads - read INCREASE TIP-2. Increase like this every 4½-5-4½-5-5-4½ cm a total of 4 times = 240-252-284-292-336-352 stitches. Work until the body measures 26-27-26-27-27-26 cm and the next row is from the right side. Start the rib at the same time as you increase 38-38-46-46-54-54 stitches evenly on the first round = 278-290-330-338-390-406 stitches, working as follows: Change to circular needle size 2.5 mm, work 6 band stitches in garter stitch, rib (knit 2, purl 2 – remember the increases) until there are 8 stitches left, knit 2 and 6 band stitches in garter stitch. When the rib measures 3 cm, cast off with rib a little loosely. The jacket measures approx. 51-53-55-57-59-61 cm from the shoulder. SLEEVES: Place the 67-73-77-89-91-93 sleeve-stitches from the thread on one side of the piece on short circular needle/double pointed needles size 3.5 mm and knit up 1 stitch in each of the 8-8-8-10-10-12 stitches cast on under the sleeve = 75-81-85-99-101-105 stitches. Insert a marker-thread in the middle of the 8-8-8-10-10-12 stitches under the sleeve. Start at the marker-thread and work pattern in the round, making sure to continue the pattern from the yoke. The new stitches under the sleeve are worked in stocking stitch. When you decrease under the sleeve, adjust the pattern as you go. When the sleeve measures 2 cm, decrease 2 stitches under the sleeve – read DECREASE TIP. Decrease like this every 4th round a total of 3-5-5-7-7-8 times, then every 8-8-6-3-3-2½ cm 4-4-5-9-9-9 times = 61-63-65-67-69-71 stitches. Continue working until the sleeve measures 42-42-41-40-39-38 cm – adjust so you have worked at least 1 round without pattern. Change to double pointed needles size 2.5 mm. Work rib (knit 2, purl 2), AT THE SAME TIME increase 3-5-7-5-7-5 stitches evenly on the first round = 64-68-72-72-76-76 stitches. When the rib measures 4 cm, cast off with rib a little loosely. The sleeve measures approx. 46-46-45-44-43-42 cm. ASSEMBLY: Sew buttons onto the left front piece. |
|||||||||||||
Diagram explanations |
|||||||||||||
|
|||||||||||||
 |
|||||||||||||
 |
|||||||||||||
 |
|||||||||||||
 |
|||||||||||||
Have you finished this pattern?Tag your pictures with #dropspattern #daisyfieldscardigan or submit them to the #dropsfan gallery. Do you need help with this pattern?You'll find 29 tutorial videos, a Comments/Questions area and more by visiting the pattern on garnstudio.com. © 1982-2026 DROPS Design A/S. We reserve all rights. This document, including all its sub-sections, has copyrights. Read more about what you can do with our patterns at the bottom of each pattern on our site. |
|||||||||||||


With over 40 years in knitting and crochet design, DROPS Design offers one of the most extensive collections of free patterns on the internet - translated to 17 languages. As of today we count 324 catalogues and 12290 patterns translated into English (UK/cm). 12290
We work hard to bring you the best knitting and crochet have to offer, inspiration and advice as well as great quality yarns at incredible prices! Would you like to use our patterns for other than personal use? You can read what you are allowed to do in the Copyright text at the bottom of all our patterns. Happy crafting!
Post a comment to pattern DROPS 249-8
We would love to hear what you have to say about this pattern!
If you want to leave a question, please make sure you select the correct category in the form below, to speed up the answering process. Required fields are marked *.