
Popular categories
Looking for a yarn?


Comments / Questions (61)
![]() DELANGLE FRANCOISE wrote:
DELANGLE FRANCOISE wrote:
J'aimerais faire ce modèle avec des rayures de 4/5 couleurs différentes, auriez-vous des conseils? Merci
31.03.2026 - 09:43DROPS Design answered:
Bonjour Mme Delangle, vous trouverez ici différents modèles de gilets rayés, peut être que l'un d'entre eux pourra vous inspirer. Bon tricot!
07.04.2026 - 14:39
![]() Fanny wrote:
Fanny wrote:
Les aiguilles double pointe sont elles vraiment indispensable ?
02.10.2025 - 19:17DROPS Design answered:
Bonjour Fanny, vous pouvez utiliser la technique du magic loop pour faire les manches et une aiguille circulaire. Les aiguilles double pointe ne sont pas indispensables. Bon tricot!
02.10.2025 - 20:17
![]() JENNY wrote:
JENNY wrote:
Hej. Under rubriken Ökning till v-hals står det att man först stickar varv 1 och 2 10 ggr, inga problem. Men sedan ska det stickas fyra varv med ökning på varv 3. Och det står att man ska sticka varv 1 OCH 4 totalt fem ggr. Menar ni varv 1 TILL 4 totalt fem ggr? Om ni menar 1 OCH 4 blir det inga ökningar eftersom det endast sker på varv 3. Tacksam för förtydligande. Mvh/ Jenny
18.09.2025 - 07:34
![]() Ewa wrote:
Ewa wrote:
Już wiem, chodzi o rękaw :-) Przepraszam.
09.09.2025 - 13:04
![]() Ewa wrote:
Ewa wrote:
Dzień dobry, proszę napisać po co w opisie znajduje się wskazówka o rzędach skróconych? Nie znalazłam dla niej zastosowania. Czyżbym coś przeoczyla? Pozdrawiam
09.09.2025 - 13:00DROPS Design answered:
Witaj Ewo, główka/góra rękawa jest wykonywana rzędami skróconymi. Serdecznie pozdrawiamy!
12.09.2025 - 12:10
![]() Ursula wrote:
Ursula wrote:
Warum kann ich Modell 248-4 nicht ausdrucken???? Gerne höre ich von Ihnen. Eine freundliche strickerin :)
29.08.2025 - 21:07DROPS Design answered:
Liebe Ursula, versuchen Sie die Cookies/das Cache zu leeren, aktualisieren Sie die Seite und versuchen Sie noch einmal, das sollte funktionnieren. Viel Spaß beim Stricken!
01.09.2025 - 16:58
![]() Silke wrote:
Silke wrote:
Guten Tag, könnte man die Jacke auch mit brushed alpaca silk stricken?
07.06.2025 - 16:25DROPS Design answered:
Liebe Silke, Brushed Alpaca Silk könnten Sie anstatt stricken, da die Maschenprobe gleich sein würden, beachten Sie nur, daß die Textur dann verschieden wird, da die Garne verschiedene Zusammensetzung haben. Viel Spaß beim Stricken!
09.06.2025 - 09:45
![]() Monica Norén wrote:
Monica Norén wrote:
Hej! Håller på att sticka denna kofta. Har gjort vänster framkant inga problem, men hur får jag höger framkant lika? Kvittar hur jag vänder och vrider så blir den "upp och ner" Mvh Monica
15.04.2025 - 11:56DROPS Design answered:
Hei Monica. Usikker på hvor det blir feil hos deg, men ta en titt på hjelpevideoene, blant annet: Hvordan strikke en europeisk skulder med økning til ermhull – Forstykkene. Selv om den er til en genser, så er begynnelsen for forstykkene like. mvh DROPS Design
28.04.2025 - 10:26
![]() Bodenhorst Davesne wrote:
Bodenhorst Davesne wrote:
Ne pourriez-vous pas faire en sorte que nous puissions avoir la traduction des questions posées par les autres tricoteuses ! Nous aurions peut-être la réponse a notre problème !
13.02.2025 - 13:43DROPS Design answered:
Bonjour Mme Bodenhorst Davesne, nous ne sommes pas en mesure de pouvoir traduire chaque commentaire/question/réponse dans chaque langue (vous pouvez utiliser un traducteur en ligne si vous le souhaitez), toutefois, vous pouvez volontiers poser votre question ici, nous ferons notre possible pour vous aider. Bon tricot!
13.02.2025 - 15:18
![]() Bodenhorst Davesne wrote:
Bodenhorst Davesne wrote:
C’est vraiment dommage que nous ne pouvions pas avoir la traduction des commentaires ou des questions ! Cela éviterait de poser des questions qui sont peut-être déjà posées 😏
13.02.2025 - 13:36
|
|
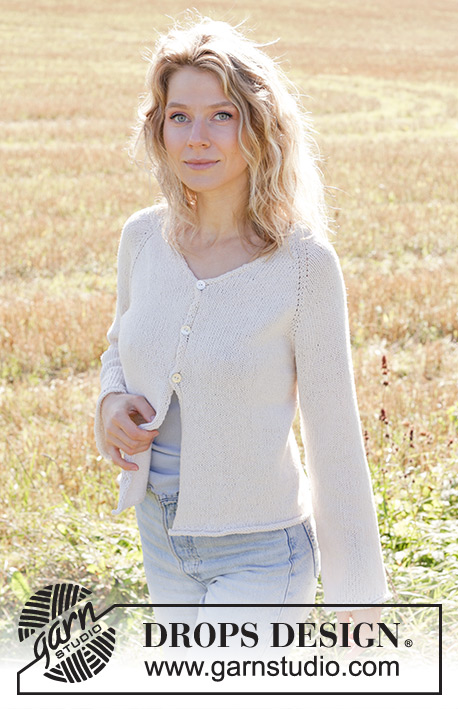
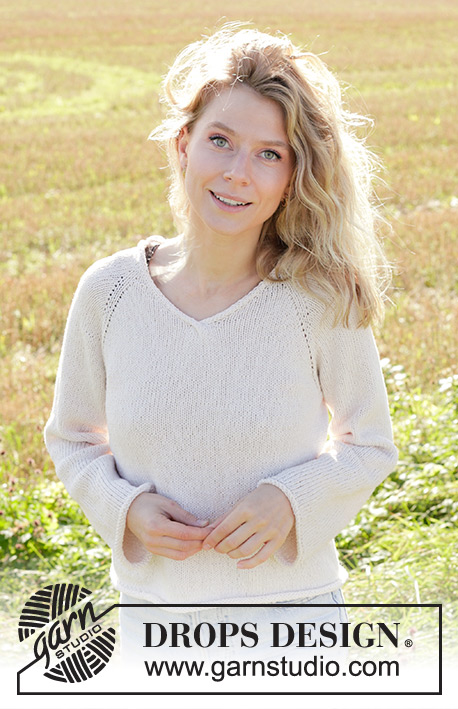
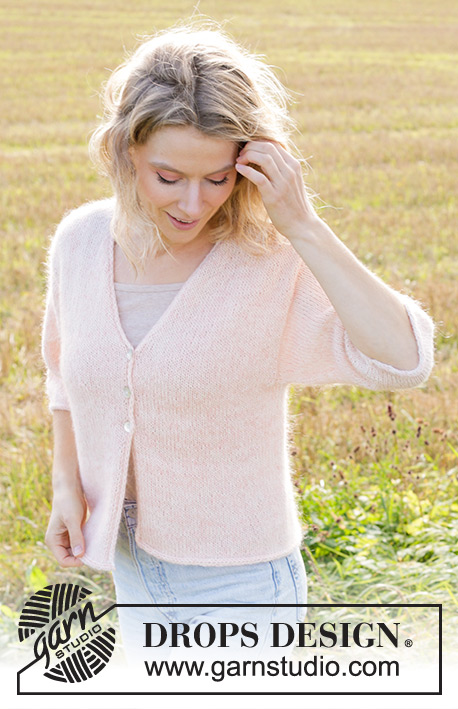
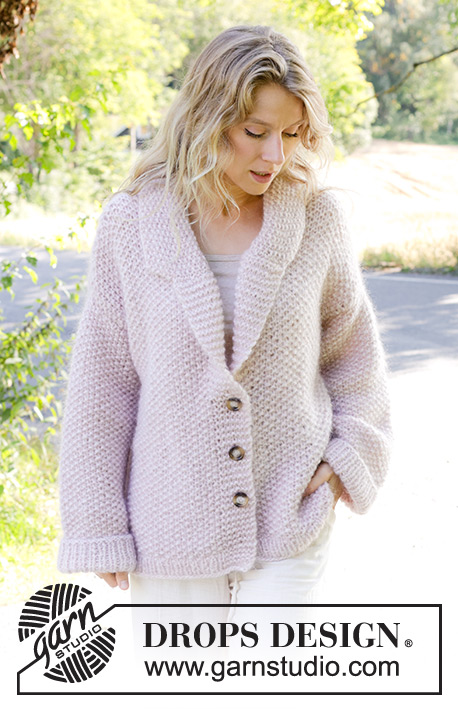
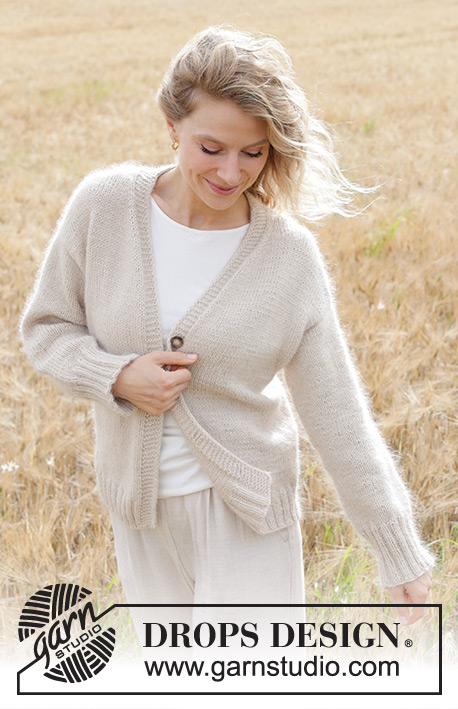
Gentle Wind Cardigan#gentlewindcardigan |
|
 |
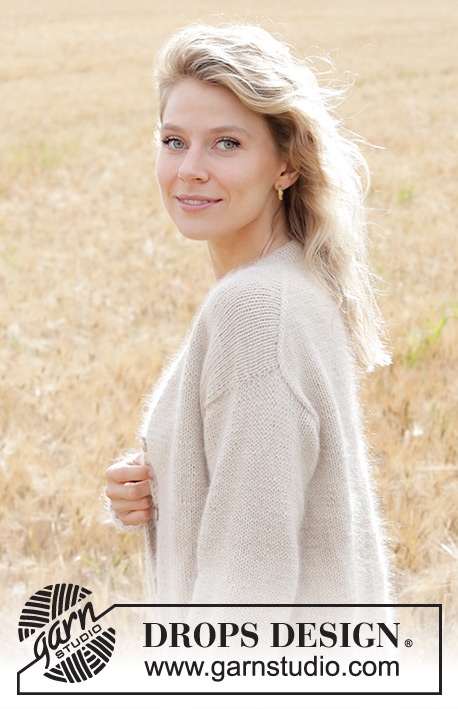 |
Knitted jacket in DROPS Daisy and DROPS Kid-Silk. The piece is worked top down with stocking stitch, European/diagonal shoulders, V-neck and I-cord. Sizes S - XXXL.
DROPS 248-4 |
|
|
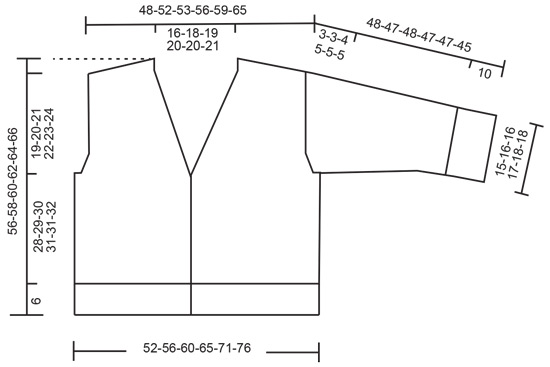
------------------------------------------------------- EXPLANATIONS FOR THE PATTERN: ------------------------------------------------------- GARTER STITCH (worked back and forth): Knit all rows. 1 ridge = knit 2 rows. INCREASE TIP-1: INCREASE 1 STITCH TOWARDS THE LEFT - from RIGHT SIDE: Use left needle to pick up yarn between 2 stitches from row below, pick up yarn from the front and knit in the stitch loop that is on the back of the needle. INCREASE 1 STITCH TOWARDS THE RIGHT - from RIGHT SIDE: Use left needle to pick up yarn between 2 stitches from row below, pick up yarn from the back and knit in the stitch loop that is on the front side of the needle. INCREASE TIP-2: INCREASE 1 STITCH TOWARDS THE RIGHT - from WRONG SIDE: Use left needle to pick up yarn between 2 stitches from row below, pick up yarn from the back and purl in the stitch loop that is on the front side of the needle. INCREASE 1 STITCH TOWARDS THE LEFT - from WRONG SIDE: Use left needle to pick up yarn between 2 stitches from row below, pick up yarn from the front and purl in the stitch loop that is on the back side of the needle. LEFT BAND WITH I-CORD: RIGHT SIDE: Slip 1 stitch purl-wise with strand in front, knit 1, work 5 garter stitches. WRONG SIDE: Work 5 garter stitches, slip 1 stitch purl-wise with strand in front, knit 1. RIGHT BAND WITH I-CORD: RIGHT SIDE: Work 5 garter stitches, slip 1 stitch purl-wise with strand in front, knit 1. WRONG SIDE: Slip 1 stitch purl-wise with strand in front, knit 1, work 5 garter stitches. BUTTONHOLES: Work buttonholes on the right band (when the garment is worn). Work from the right side when there are 5 stitches left on the row as follows: Make 1 yarn over, knit 2 together, work to end of row as before. On the next row (wrong side), knit the yarn over to leave a hole. The first buttonhole is worked 1 cm after the last increase for the V-neck. The other 3 buttonholes are then worked with approx. 9½-9½-10-10-10-10½ cm between each one. The bottom buttonhole is worked in the transition between the stocking stitch and rib. KNITTING TIP: When working the short rows, there will be a small hole when the piece is turned – the hole can be closed by tightening the strand or using the German Short rows technique as follows: Slip the first stitch as if to purl, place the strand over the right needle and tighten the strand tightly at the back (this should result in two loops on the needle). These loops are knitted together on the next row. DECREASE TIP (for sleeves): Decrease 1 stitch on each side of the marker-thread as follows: Work until there are 3 stitches left before the marker-thread, knit 2 together, knit 2 (marker-thread sits between these 2 stitches), slip 1 stitch knit-wise, knit 1 and pass the slipped stitch over the knitted stitch. ------------------------------------------------------- START THE PIECE HERE: ------------------------------------------------------- JACKET – SHORT OVERVIEW OF THE PIECE: The pattern uses needles of different lengths; start with the length which fits the number of stitches and change when necessary. Stitches are cast on for the back of the neck, then the back piece is worked back and forth, top down, increasing on each side for the shoulders until the correct number of stitches is reached. The back piece now has slightly diagonal shoulders. Continue working as far as the armholes. The back piece then waits while the front pieces are worked. The front pieces are worked separately, first the band (which is later sewn to the back neckline). Stitches are then knitted up along the shoulder on the back piece and the front piece is worked down as far as the armholes at the same time as stitches are increased for the neckline. The front and back pieces are joined and the body continued back and forth with circular needle. Stitches are knitted up around each armhole. The sleeve cap is worked back and forth with short rows, then the sleeve is continued in the round. The bands from the front pieces are sewn together (mid-back), then sewn to the neckline. BACK PIECE: Cast on 30-32-34-36-36-38 stitches with circular needle size 5 mm and 1 strand of each quality (2 strands). ROW 1 (= wrong side): Purl. ROW 2 (= right side): Read INCREASE TIP-1, knit 3, increase 1 stitch towards the left, knit until there are 3 stitches left, increase 1 towards the right, knit 3. ROW 3 (= wrong side): Read INCREASE TIP-2, purl 3, increase 1 stitch towards the right, purl until there are 3 stitches left, increase 1 stitch towards the left, purl 3. Work ROWS 2 and 3 a total of 13-14-14-15-16-18 times (= 26-28-28-30-32-36 worked rows), after the last increase, there are 82-88-90-96-100-110 stitches. Insert 1 marker outermost on one side. The piece is now measured from here! REMEMBER THE KNITTING TENSION! Continue with stocking stitch until the piece measures 13-14-14-14-13-14 cm, from the marker measured along the armhole. Now increase for the armholes. INCREASE FOR ARMHOLES: ROW 1 (= right side): Remember INCREASE TIP-1, knit 3, increase 1 stitch towards the left, knit until there are 3 stitches left, increase 1 stitch towards the right, knit 3. ROW 2 (= wrong side): Purl. Work ROWS 1 and 2 a total of 1-1-2-3-4-4 times (= 2-2-4-6-8-8 worked rows) = 84-90-94-102-108-118 stitches. Continue working until the piece measures 14-15-16-17-17-18 cm, from the marker measured along the armhole, finishing with a row from the right side. Cut the strand, place the stitches on a stitch holder and work the left band and front piece along the left back shoulder as follows. LEFT BAND: Cast on 7 stitches with circular needle size 5 mm and 1 strand of each quality (= 2 strands). Work LEFT BAND WITH I-CORD – read description above, until the band measures 8-9-9-10-10-10 cm, finishing with a row from the wrong side. Now work the left front piece as follows: LEFT FRONT PIECE: Find the left back shoulder as follows: Lay the back piece flat, right side up, with the stitches on the stitch holder towards you. The left side of the back piece is the left shoulder. Knit up stitches along the left back shoulder, starting from the right side by the neck and working to the shoulder as follows: ROW 1 (= right side): Work the 7 band stitches, then knit up 1 stitch in each row along the left back shoulder, inside the outermost stitch (knit up 26-28-28-30-32-36 stitches) = 33-35-35-37-39-43 stitches. All measurements on the front piece are taken from the knitted-up stitches. ROW 2 (= wrong side): Purl until there are 7 stitches left, work 7 band stitches as before. ROW 3 (= right side): Work 7 band stitches, knit to end of row. ROW 4 (= wrong side): Purl until there are 7 stitches left, work 7 band stitches. Repeat ROWS 3 and 4 until the piece measures 7-7-7-7-8-8 cm. OVERVIEW OF THE NEXT SECTION: Now start to increase for the V-neck. You will also increase for the armhole before the increases for the V-neck are finished. Read both next 2 sections before continuing, so you know when to begin increasing for the armhole. INCREASE FOR V-NECK: ROW 1 (= right side): Work 7 band stitches, knit 2, increase 1 stitch towards the left - remember INCREASE TIP-1, knit to end of row. ROW 2 (= wrong side): Purl until there are 7 stitches left, work 7 band stitches. Work ROWS 1 and 2 a total of 10-11-12-13-13-14 times (= 20-22-24-26-26-28 worked rows). Then increase as follows: ROW 1 (= right side): Work 7 band stitches, knit to end of row. ROW 2 (= wrong side): Purl until there are 7 stitches left, work 7 band stitches. ROW 3 (= right side): Work 7 band stitches, knit 2, increase 1 stitch towards the left - remember INCREASE TIP-1, knit to end of row. ROW 4 (= wrong side): Purl until there are 7 stitches left, work 7 band stitches. Work ROWS 1 to 4 a total of 5 times (= 20 worked rows) = 15-16-17-18-18-19 increases for V-neck. Continue with stocking stitch and the bands. INCREASE FOR ARMHOLE: AT THE SAME TIME, when the piece measures 23-24-24-24-25-26 cm, increase for the armhole as follows (remember the increases for V-neck are not finished): ROW 1 (= right side): Work 7 band stitches, knit until there are 3 stitches left, increase 1 stitch towards the right - remember INCREASE TIP-1, knit 3. ROW 2 (= wrong side): Purl until there are 7 stitches left, work 7 band stitches. Work ROWS 1 and 2 a total of 1-1-2-3-4-4 times (= 2-2-4-6-8-8 worked rows). When all the increases for V-neck and armhole are finished, there are 49-52-54-58-61-66 stitches. Continue working until the piece measures 24-25-26-27-29-30 cm, from the knitted-up stitches. Finish after a row from the right side. Cut the strand, place the stitches on a stitch holder and work the right band and front piece along the right back shoulder as follows: RIGHT BAND: Cast on 7 stitches with circular needle size 5 mm and 1 strand of each quality (= 2 strands). Work RIGHT BAND WITH I-CORD – read description above, until the band measures 8-9-9-10-10-10 cm, finishing with a row from the wrong side. Cut the thread and put the stitches on a thread or another needle, it should be worked from the band stitches when knitting up stitches for the right front piece. RIGHT FRONT PIECE: Knit up stitches along the right back shoulder, starting from the right side by the shoulder and working towards the neck: Knit up 1 stitch in each row, inside the outermost stitch (knit up 26-28-28-30-32-36 stitches along the right back shoulder), then work the 7 stitches from the right band as before = 33-35-35-37-39-43 stitches. All measurements on the front piece are taken from the knitted-up stitches. ROW 1 (= wrong side): Work 7 band stitches as before, purl to end of row. ROW 2 (= right side): Knit until there are 7 stitches left, work 7 band stitches. Repeat ROWS 1 and 2 until the piece measures 7-7-7-7-8-8 cm. OVERVIEW OF THE NEXT SECTION: Now start to increase for the V-neck. You will also increase for the armhole before the increases for the V-neck are finished. Read both next 2 sections before continuing, so you know when to begin increasing for the armhole. INCREASE FOR V-NECK: ROW 1 (= right side): Knit until there are 9 stitches left, increase 1 stitch towards the right - remember INCREASE TIP-1, knit 2, work 7 band stitches. ROW 2 (= wrong side): Work 7 band stitches, purl to end of row. Work ROWS 1 and 2 a total of 10-11-12-13-13-14 times (= 20-22-24-26-26-28 worked rows). Now increase as follows: ROW 1 (= right side): Knit until there are 7 stitches left, work 7 band stitches. ROW 2 (= wrong side): Work 7 band stitches, purl to end of row. ROW 3 (= right side): Knit until there are 9 stitches left, increase 1 stitch towards the right, knit 2, work 7 band stitches. ROW 4 (= wrong side): Work 7 band stitches, purl to end of row. Work ROWS 1 to 4 a total of 5 times (= 20 worked rows) = 15-16-17-18-18-19 increases for V-neck. 1 cm after the last increase, start working the BUTTONHOLES – read description above. Continue with stocking stitch and the bands. INCREASE FOR ARMHOLE: AT THE SAME TIME, when the piece measures 23-24-24-24-25-26 cm, increase for the armhole as follows (remember the increases for V-neck are not finished): ROW 1 (= right side): Knit 3, increase 1 stitch towards the left – remember INCREASE TIP-1, knit until there are 7 stitches left, work 7 band stitches. ROW 2 (= wrong side): Work 7 band stitches, purl to end of row. Work ROWS 1 and 2 a total of 1-1-2-3-4-4 times (= 2-2-4-6-8-8 worked rows). When all the increases for V-neck and armhole are finished, there are 49-52-54-58-61-66 stitches. Continue working until the piece measures 24-25-26-27-29-30 cm, from the knitted-up stitches. Finish after a row from the right side. Now join all the pieces for the body as follows: BODY: The piece is now measured from here! Work from the wrong side over the 49-52-54-58-61-66 stitches on the right front piece, cast on 4-6-8-8-12-12 stitches (in side under sleeve), work from the wrong side over the 84-90-94-102-108-118 stitches on the back piece, cast on 4-6-8-8-12-12 stitches (in side under sleeve), work from the wrong side over the 49-52-54-58-61-66 stitches from the left front piece = 190-206-218-234-254-274 stitches. Continue back and forth with stocking stitch and the bands on each side until the piece measures 28-29-30-31-31-32 cm from the armhole. On the next row from the right side, begin the rib at the same time as you increase 22-22-22-26-26-26 stitches evenly spaced (do not increase over the bands) = 212-228-240-260-280-300 stitches. Work as follows: Change to circular needle size 4 mm. Work the band as before, work rib (knit 2, purl 2 – remember the increases) until there are 9 stitches left, knit 2 and work the band stitches as before. When the rib measures 6 cm, cast off. The front piece measures 58-60-62-64-66-68 cm measured from the knitted-up stitches, the jacket measures 56-58-60-62-64-66 cm. The front piece is approx. 2 cm longer, as the knitted-up stitches are not on the top of the shoulder but slightly down the back piece. SLEEVES: Lay the piece flat and insert 1 marker at the top of the armhole (NOTE! This is not where stitches were knitted up but approx. 5-6 cm down the front piece = mid-top of shoulder). Using circular needle size 5 mm and 1 strand of each quality (= 2 strands), start in the middle of the cast-on stitches under the sleeve and knit up 68-74-80-82-90-94 stitches around the armhole – make sure you have equal numbers of stitches on each side of the marker. Work stocking stitch in short rows, back and forth for the sleeve cap (to give the sleeve a better fit). Start mid-under the sleeve: ROW 1 (right side): Work 9-10-10-10-11-11 stitches past the marker, turn – read KNITTING TIP. ROW 2 (wrong side): Work 9-10-10-10-11-11 stitches past the marker, turn. ROW 3 (right side): Work 10-11-8-6-5-5 stitches past the previous turn, turn. ROW 4 (wrong side): Work to 10-11-8-6-5-5 stitches past the previous turn, turn. Repeat rows 3 and 4 until you have turned 3-3-4-5-6-6 times on each side. AFTER THE LAST TURN: After row 4 has been worked for the last time, turn and knit to the beginning of the round (mid-under sleeve). Insert 1 marker-thread here, which is used when decreasing under the sleeve. Allow the thread to follow your work onwards. Work stocking stitch in the round. When the sleeve measures 4-4-5-6-6-6 cm, from the knitted-up stitches (all lengths measured mid-top of sleeve), decrease 2 stitches under the sleeve – read DECREASE TIP. Decrease like this every 2nd round 2-2-3-3-4-4 times, then every 4½-3½-2½-2½-2-1½ cm, 6-8-9-9-11-12 times (a total of 8-10-12-12-15-16 times) = 52-54-56-58-60-62 stitches. Work until the sleeve measures 38-37-38-37-37-35 cm. Change to double pointed needles size 4 mm. Work rib (knit 2, purl 2) at the same time as you increase 16-18-16-18-20-18 stitches evenly on the first round = 68-72-72-76-80-80 stitches. When the rib measures 10-10-10-10-10-10 cm, cast off. The sleeve measures approx. 48-47-48-47-47-45 cm. ASSEMBLY: Sew the buttons onto the left band. Sew together the bands from the front pieces (mid-back), then sewn them to the neckline. |
|
 |
|
Have you finished this pattern?Tag your pictures with #dropspattern #gentlewindcardigan or submit them to the #dropsfan gallery. Do you need help with this pattern?You'll find 40 tutorial videos, a Comments/Questions area and more by visiting the pattern on garnstudio.com. © 1982-2026 DROPS Design A/S. We reserve all rights. This document, including all its sub-sections, has copyrights. Read more about what you can do with our patterns at the bottom of each pattern on our site. |
|


With over 40 years in knitting and crochet design, DROPS Design offers one of the most extensive collections of free patterns on the internet - translated to 17 languages. As of today we count 324 catalogues and 12290 patterns translated into English (UK/cm). 12290
We work hard to bring you the best knitting and crochet have to offer, inspiration and advice as well as great quality yarns at incredible prices! Would you like to use our patterns for other than personal use? You can read what you are allowed to do in the Copyright text at the bottom of all our patterns. Happy crafting!
Post a comment to pattern DROPS 248-4
We would love to hear what you have to say about this pattern!
If you want to leave a question, please make sure you select the correct category in the form below, to speed up the answering process. Required fields are marked *.