
Popular categories
Looking for a yarn?


Comments / Questions (14)
![]() Inge wrote:
Inge wrote:
Hallo Ein sehr schöner Pullover, habe mich jetzt über die Farbe gewundert, weil ich u.a. orange (Nr. 38) zur Auswahl bestellt habe. In der Anleitung für den Pullover steht: GARN: DROPS AIR von Garnstudio (gehört zur Garngruppe C) *Farbe Nr. 13, orange* Die Farbe Nr. 13 ist Rost (nicht Orange). Sollte bei Gelegenheit vielleicht korrigiert werden 😊.
28.02.2026 - 21:25
![]() Ava Gerdes wrote:
Ava Gerdes wrote:
I am also having trouble with the left neck displacement. I have read your remarks to other people, but I am still very confused about NOTE and increase 1 extra stitch as described in neck displacement 4 times. I don't know where the extra stitch is in the pattern. Please help
29.10.2025 - 04:14
![]() Nora wrote:
Nora wrote:
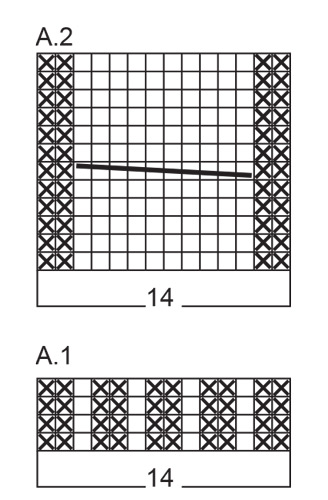
Hallo. Ich habe Probleme mit dem Muster A.2 beim Vorderteil. Ich dachte das Muster zeigt nur die Hinmaschen, aber dann sind die Zöpfe zu weit auseinander und nicht wie auf dem Bild. Wenn das Muster A.2 Hin und Rückreise zeigt, dann wäre die Reihe mit dem Zopfmuster allerdings eine Rückreihe. Was mache ich falsch?.
14.04.2025 - 19:19DROPS Design answered:
Liebe Nora, die Anleitung ist nicht ganz korrekt - demgemäß würde die Verzopfung tatsächlich in der Rück-Reihe landen. Sie müssen am Anfang eine Reihe mehr stricken, dann kommt die Verzopfung in die Hin-Reihe. Danach stricken Sie dann immer 11 Reihen zwischen den Verzopfungen wie im Diagramm gezeigt. Viel Spaß beim Weiterstricken!
17.04.2025 - 22:54
![]() Sue Millbabnk wrote:
Sue Millbabnk wrote:
Hello. I am still having difficulty with this pattern and the instructions for the neck displacement. I have asked others for advice, and it has been suggested the pattern is incorrect. I have done a spreadsheet setting out each row for the neck displacement section on the left front (ie wrong side; right side), with each stitch, and was hoping I could upload it so you could check if this is correct. Is this possible.
27.06.2024 - 04:41DROPS Design answered:
Dear Mrs Millbabnk, on the left front piece, you will work from RS: 1 edge st in garter stitch, stocking stitch, A.2 as before, K2, P3, K1, 7 sts in garter stitch. Then yu will decrease 1 st before A.2 (work until 3 sts remain before A.2 and K2 tog, K1), work now A.2 and knit 2 sts then increase 1 stitch and finish row as before. Work the new stitches in rib K1, P3, seen from RS. Increase/decrase as explained on row 1-12. Happy knitting!
27.06.2024 - 08:49
![]() Sue Millbank wrote:
Sue Millbank wrote:
I have come to a standstill with this pattern, at the point when the front divides and the neck displacement begins. I can understand how the decrease works at the sleeve side of the piece, but I can't understand how the section between the cable and the split in the middle work after casting on the extra 4 stitches at the end of the row (middle neck). Grateful for any advice.
25.04.2024 - 01:09DROPS Design answered:
Dear Mrs Millbank, to displace the pattern, ie to increase to rib pattern at the beg of left front piece, you will decrease 1 stitch before K1 and A.2 and increase 1 st after A.2 + K2, ie at the transition between rib and A.2 to increase the rib pattern and decrease the cable pattern. Happy knitting!
25.04.2024 - 08:24
![]() Corrine Lawrence wrote:
Corrine Lawrence wrote:
Hi there I want to knit this jumper using Alpaca and Kid-Silk held together (both of which are from the yarn group A. Air is classed as 10 ply but Alpaca (5 ply) and Kid-Silk (2 ply) add up to only 7 ply. Will this be ok or will it throw out the pattern's tension/gauge? Would it be better to hold 2 strands of Kid-Silk and Alpaca (to give 9 ply)? Many thanks
14.03.2024 - 15:04DROPS Design answered:
Dear Mrs Lawrence, you can replace 1 strand yarn group C (Air here) with 2 strands yarn group A (Alpaca + Kid-Silk), you should get same tension, but of course as these yarns are different the texture will be different too; See an example of this combination here. And remember (as always) to check your tension and adjust needle size if needed. Happy knitting!
14.03.2024 - 16:21
![]() Hanne wrote:
Hanne wrote:
Jeg forstår ikke opskriften. Hva betyr A. 1 og A.2. Og finner ingen forklaring. Vennlig hilsen Hanne
13.03.2024 - 22:02DROPS Design answered:
Hei Hanne, A.1 og A.2 er diagrammene som du finner på bunnen av oppskriften, med symbolforklaringer ved siden av hvert diagram. God fornøyelse!
14.03.2024 - 12:29
![]() Wilma Strijbosch wrote:
Wilma Strijbosch wrote:
In telpatroon A2 staat volgens mij een fout. Het kabelen staat op naald 6, terwijl dat normaal gesproken een teruggaande naald is. Moet dit niet naald 7 zijn?
22.01.2024 - 20:25DROPS Design answered:
Dag Wilma,
Ja, ik denk dat je gelijk hebt. Je zou de kabel 1 naald op kunnen schuiven, zodat je hij steeds aan de goede kant komt. Ik zal het doorgeven aan de ontwerpafdeling om na te kijken.
24.01.2024 - 09:49
![]() Christel wrote:
Christel wrote:
Zu Anfang wird 5,5 Rundnadel und 5,5 Nadelspiel angegeben. In der Anleitung werden Nadeln Nr. 5 verwendet. Ist die Maschenprobe dann mit Nr. 5 gestrickt? Toller Pullover.
13.01.2024 - 10:51DROPS Design answered:
Liebe Christel, danke für den Hinweis, eine Korrektur erfogt, hier werden die Nadeln Nr 5,5 benutzt. Viel Spaß beim stricken!
15.01.2024 - 09:39
![]() Marleen Boumans wrote:
Marleen Boumans wrote:
Bij het opnemen van de steken van het achterpand(om de hals te breien)heb ik last van de twee iets hogere schouderdelen. In de beschrijving staat niet dat je die steken ook moet opnemen.
07.11.2023 - 09:53DROPS Design answered:
Dag Marleen,
In het schuine stukje van de schouder moet je inderdaad ook steken opnemen. Mocht er een hiaat ontstaan in de overgang van het rechte naar het schuine deel, dan kun je de draad tussen 2 steken opnemen en deze samen breien met de volgende steek.
13.11.2023 - 06:45
|
|||||||||||||
Autumn Blaze#autumnblazesweater |
|||||||||||||
 |
 |
||||||||||||
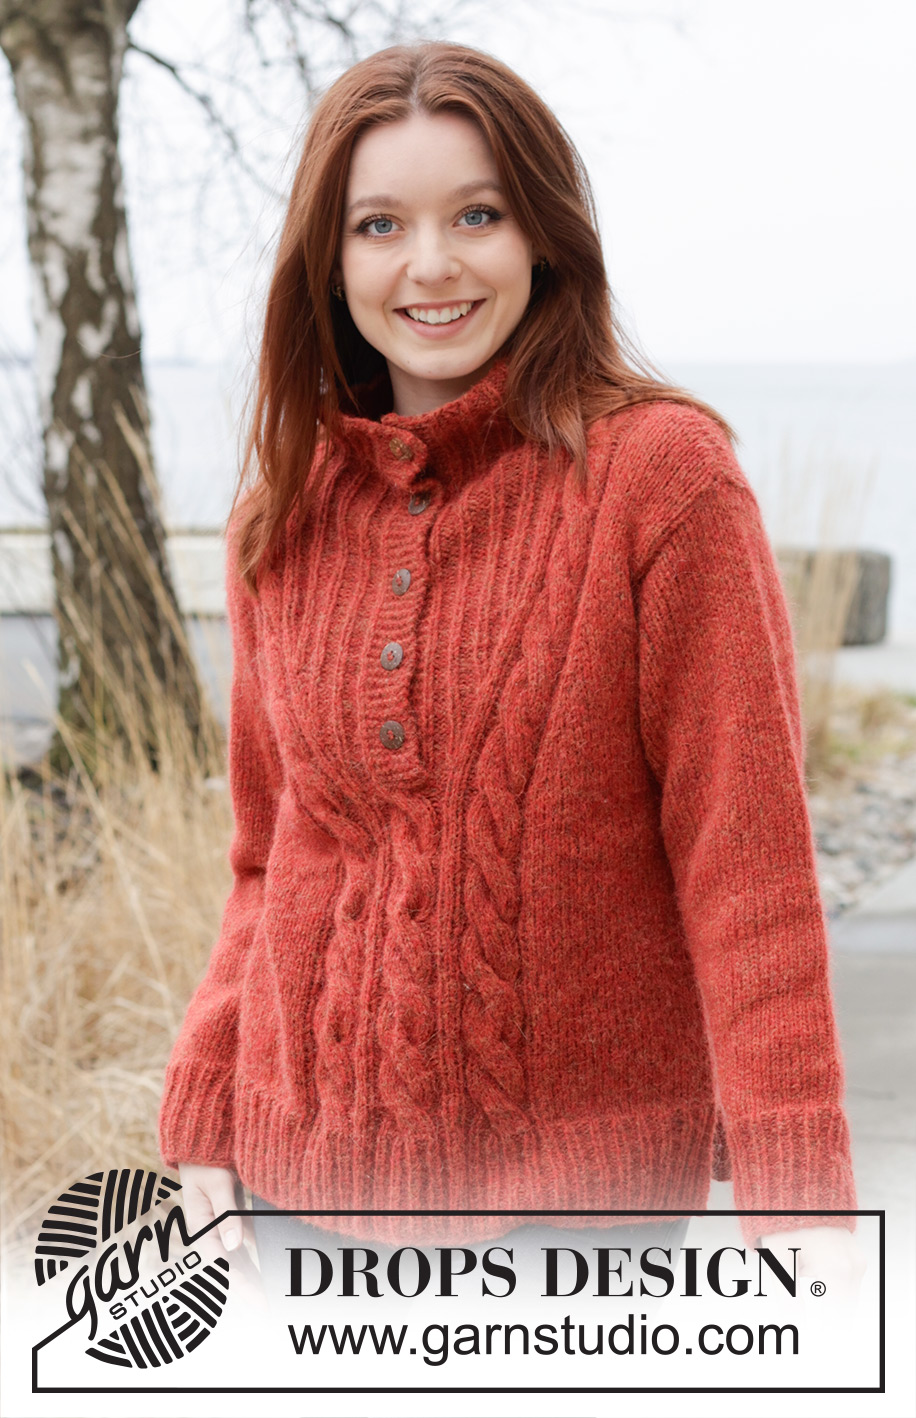
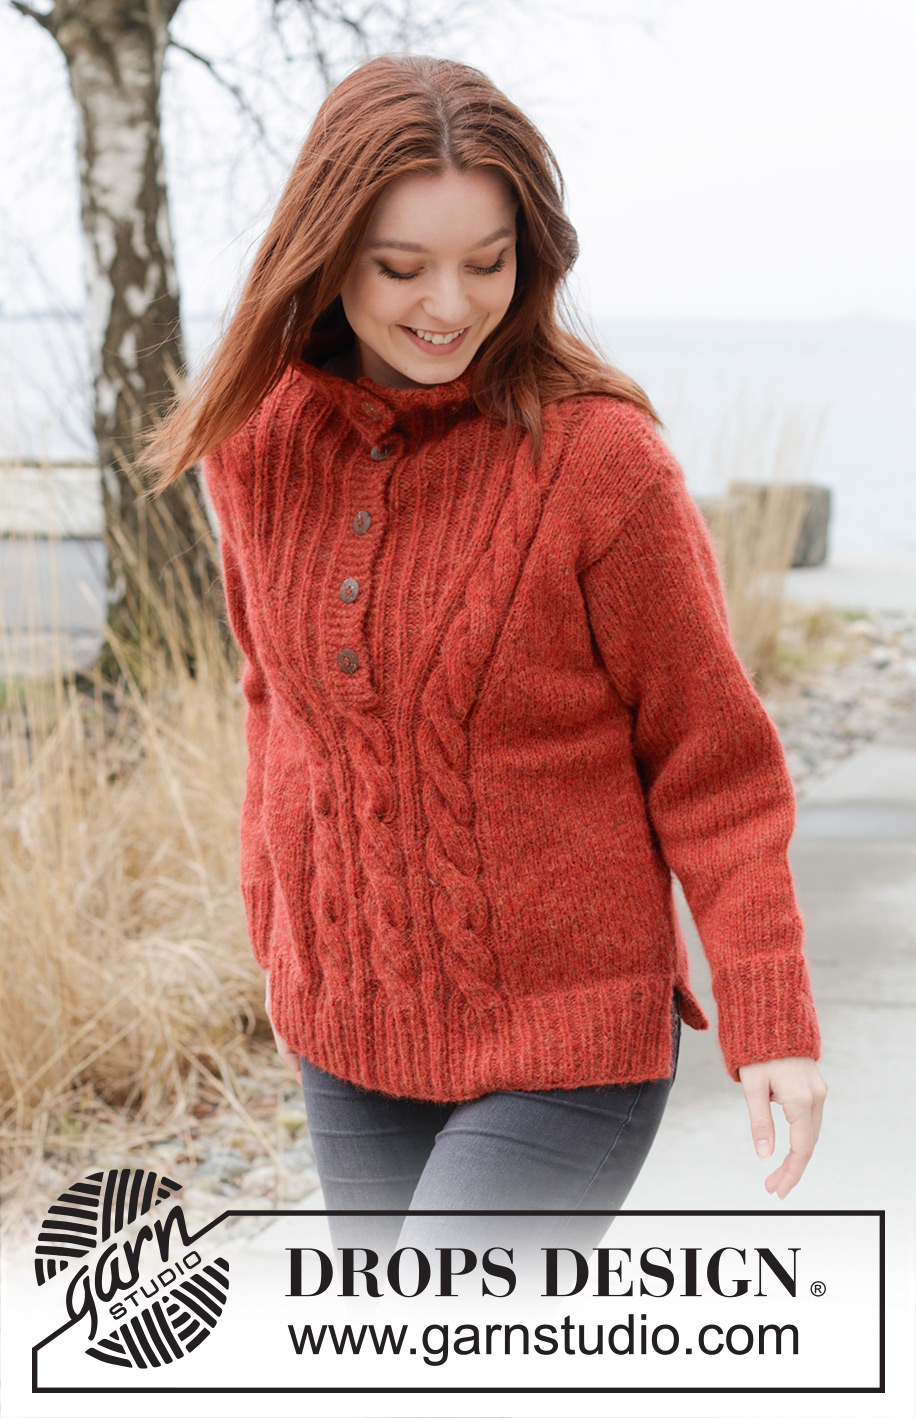
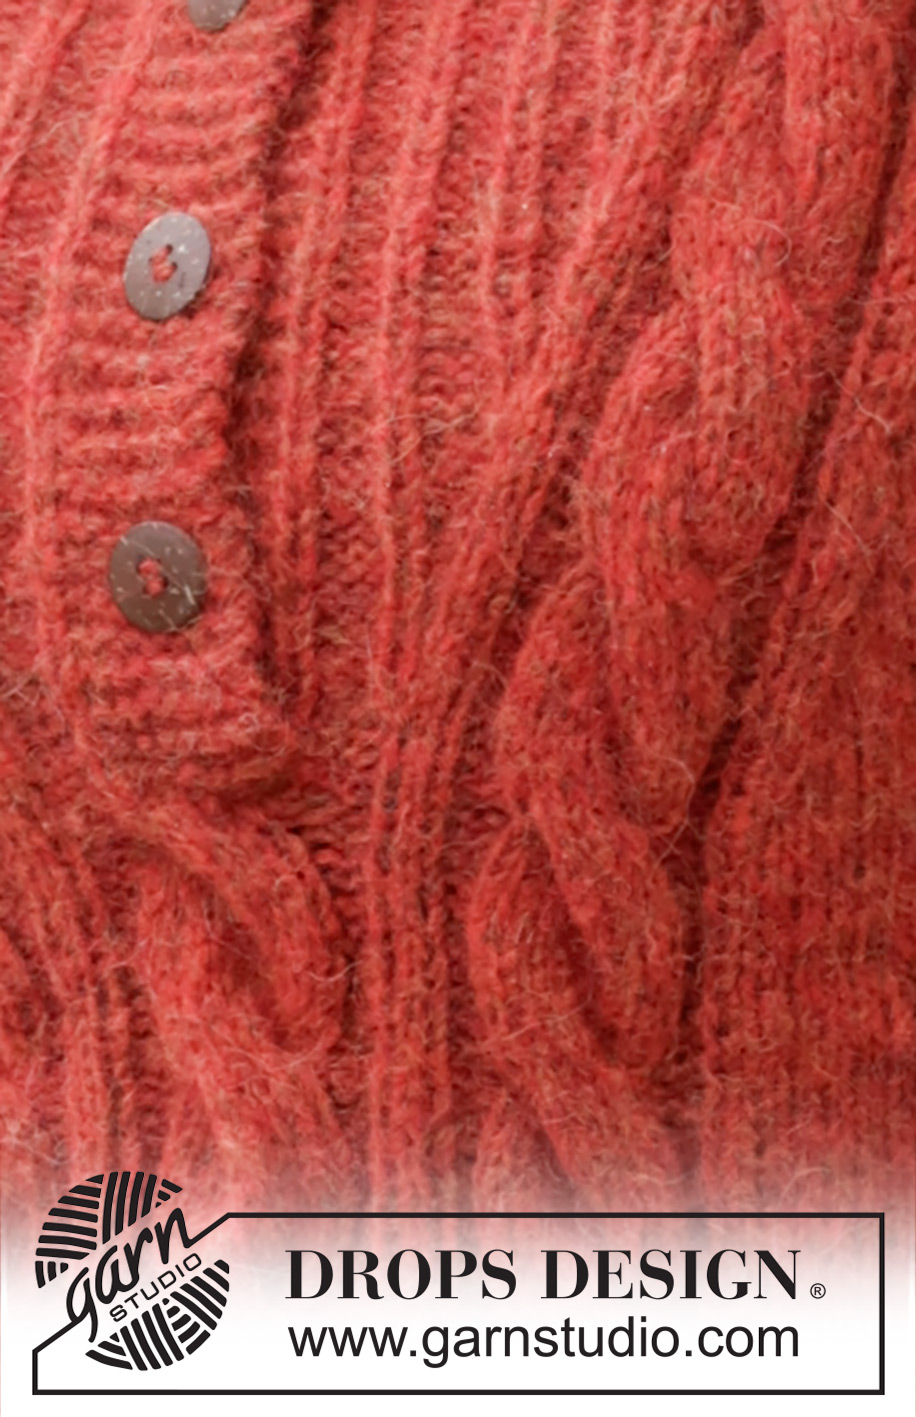
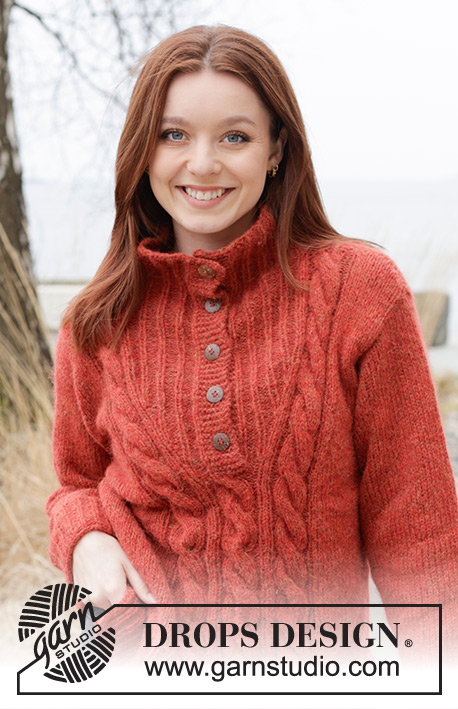
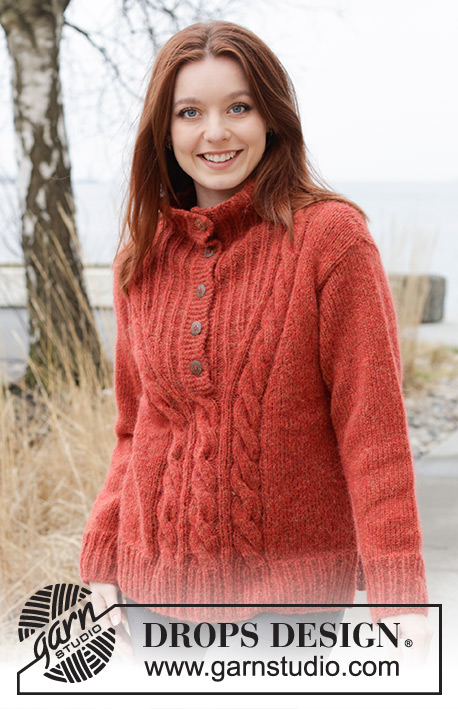
Knitted jumper in DROPS Air. The piece is worked bottom up with high neck, cables and split in sides. Sizes S - XXXL.
DROPS 245-17 |
|||||||||||||
|
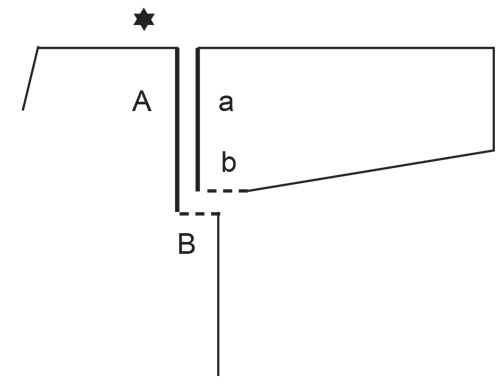
------------------------------------------------------- EXPLANATIONS FOR THE PATTERN: ------------------------------------------------------- GARTER STITCH (worked back and forth): Knit all rows. 1 ridge = knit 2 rows. NECK DISPLACEMENT: LEFT FRONT PIECE: Decrease 1 stitch before 1 knitted stitch + A.2 and increase 1 stitch after A.2 + 2 knitted stitches as follows: Work until there are 3 stitches left before A.2, knit 2 together, knit 1, A.2, knit 2, make 1 yarn over, work to end of row as before. So the rib is not tight, increase 1 stitch without decreasing every 4th time. The yarn overs are worked twisted on the next row, then worked into the rib (knit 1, purl 3, seen from the right side). i.e., increase and decrease as follows: ROW 1: increase and decrease ROWS 2-4: work as before ROW 5: increase and decrease ROWS 6-8: work as before ROW 9: increase and decrease ROW 10: work as before ROW 11: increase ROW 12: work as before Repeat these 12 rows onwards. RIGHT FRONT PIECE: Increase 1 stitch before 2 knitted stitches + A.2 and decrease after A.2 + 2 knitted stitches as follows: Work until there are 2 stitches left before A.2, make 1 yarn over, knit 2, A.2, knit 1, slip 1 stitch, knit 1, pass the slipped stitch over the knitted stitch, work to end of row as before. Increase and decrease in the same way as on the left front piece. BUTTONHOLES: Work the buttonholes on the right band. 1 BUTTONHOLE = knit together the 3rd and 4th stitch from the edge and make 1 yarn over. On the next row knit the yarn over to leave a hole. Work the buttonholes when the piece measures: S: 34, 41, 48 and 55 cm M: 36, 43, 50 and 57 cm L: 38, 45, 52 and 59 cm XL: 39, 47, 54 and 61 cm XXL: 41, 49, 56 and 63 cm XXXL: 43, 51, 58 and 65 cm The last buttonhole is worked when the neck measures 6 cm. INCREASE TIP (for sleeves): Start 1 stitch before the marker thread, 1 yarn over, knit 2 (marker thread sits between these 2 stitches), 1 yarn over. On the next round knit the yarn overs twisted to avoid holes. Then work the new stitches in stocking stitch. ------------------------------------------------------- START THE PIECE HERE: ------------------------------------------------------- JUMPER – SHORT OVERVIEW OF THE PIECE: The piece is worked bottom up in sections, back and forth, then sewn together. The neckline is worked by displacing stitches so there are increasing numbers of ribbed stitches towards mid-front and fewer stocking stitches towards the side. The sleeves are worked in the round, bottom up. The neck is worked to finish. BACK PIECE: Cast on 87-96-102-111-120-129 stitches with circular needle size 4 mm and DROPS Air. Purl 1 row from the wrong side, then work rib as follows: Work 1 GARTER STITCH – read description above, * knit 1, purl 2 *, work from *-* until there are 2 stitches left, knit 1 and 1 garter stitch. Continue this rib back and forth for 8 cm. Knit 1 row from the right side and decrease 9-10-10-11-10-11 stitches evenly spaced = 78-86-92-100-110-118 stitches. Change to circular needle size 5.5 mm. Continue with stocking stitch and 1 garter stitch on each side. REMEMBER THE KNITTING TENSION! When the piece measures 36-37-38-39-40-41 cm, cast off 2-5-6-8-12-14 stitches for the armholes at the beginning of the next 2 rows = 74-76-80-84-86-90 stitches. Continue with stocking stitch and 1 garter stitch on each side. When the piece measures 54-56-58-60-62-64 cm, cast off the middle 36-36-36-42-42-42 stitches for the neck and finish each shoulder separately. Cast off 1 stitch on the next row from the neck = 18-19-21-20-21-23 stitches. Continue with stocking stitch and 1 garter stitch on each side until the piece measures 56-58-60-62-64-66 cm. Cast off. Work the other shoulder in the same way. FRONT PIECE: Cast on 92-98-104-116-122-134 stitches with circular needle size 4 mm and DROPS Air. Purl 1 row from the wrong side, then work rib as follows: 1 garter stitch, * knit 1, purl 2 *, work from *-* over the first 21-24-27-33-36-42 stitches, knit 1, work A.1, knit 2, A.1, knit 2, A.1, * knit 1, purl 2 *, work from *-* over the next 21-24-27-33-36-42 stitches, knit 1 and 1 garter stitch. Continue this rib back and forth for 8 cm. Change to circular needle size 5.5 mm. Work as follows from the right side: 1 garter stitch, 22-25-28-34-37-43 stitches in stocking stitch and decrease 1-0-0-2-0-2 stitches evenly over these stitches, A.2, knit 2, A.2, knit 2, A.2, 22-25-28-34-37-43 stitches in stocking stitch and decrease 1-0-0-2-0-2 stitches evenly spaced, 1 garter stitch = 90-98-104-112-122-130 stitches. Continue the pattern, with 21-25-28-32-37-41 stitches in stocking stitch and 1 garter stitch on each side. REMEMBER THE KNITTING TENSION! Work until the piece measures 35-36-37-38-39-40 cm. Now divide the piece and displace stitches for the neckline. Place the last 45-49-52-56-61-65 stitches on a thread and work the first 45-49-52-56-61-65 stitches: LEFT FRONT PIECE: Work first row from the right side as follows: 1 garter stitch, stocking stitch over the next 21-25-28-32-37-41 stitches, continue A.2, work 2 stitches in stocking stitch, purl 3, knit 1, 3 garter stitches and cast on 4 stitches at the end of the row = 49-53-56-60-65-69 stitches. Work as follows from the wrong side: Work 7 garter stitches, purl 1, knit 3, purl 2, work A.2, work to the end of the row as before. Continue this pattern and work NECK DISPLACEMENTS – read description above (in addition, cast off for the armhole – see below). Increase 1 stitch and decrease 1 stitch every 4th row (every 2nd row from the right side) 12-12-12-15-15-15 times in total. NOTE! And increase 1 extra stitch as described in NECK DISPLACEMENTS 4-4-4-5-5-5 times. Increasing numbers of rib stitches towards mid-front and fewer stocking stitches towards the side. Decrease and increase on each side of A.2. A.2 + 2 stocking stitches continue upwards and are displaced towards the shoulder. AT THE SAME TIME, when the piece measures 36-37-38-39-40-41 cm cast off the first 2-5-6-8-12-14 stitches from the side for the armhole. When the neck displacements are finished there are 51-52-54-57-58-60 stitches. Continue working until the piece measures 55-57-59-61-63-65 cm. Decrease 6 stitches evenly over the cable in A.2 then cast off the first 18-19-21-20-21-23 stitches from the side = 27-27-27-31-31-31 stitches. Lay the piece to one side and work the right front piece. RIGHT FRONT PIECE: Cast on 4 stitches, place the 45-49-52-56-61-65 stitches back on the needle and work them as follows: 3 garter stitches, knit 1, purl 3, knit 2, work A.2, stocking stitch until there is 1 stitch left, 1 garter stitch = 49-53-56-60-65-69 stitches. Work as follows from the wrong side: 1 garter stitch, 21-25-28-32-37-41 stitches in stocking stitch, A.2 as before, purl 2, knit 3, purl 1 and 7 garter stitches. Continue this pattern and work NECK DISPLACEMENTS (remember to cast off for the armhole – see below). Increase 1 stitch and decrease 1 stitch every 4th row (every 2nd row from the right side) 12-12-12-15-15-15 times in total. NOTE! And increase 1 extra stitch as described in NECK DISPLACEMENTS 4-4-4-5-5-5 times. Increasing numbers of rib stitches towards mid-front and fewer stocking stitches towards the side. Decrease and increase on each side of A.2. A.2 + 2 stocking stitches continue upwards and are displaced towards the shoulder. Remember the BUTTONHOLES – read description above. AT THE SAME TIME, when the piece measures 36-37-38-39-40-41 cm cast off the first 2-5-6-8-12-14 stitches from the side for the armhole. When the neck displacements are finished there are 51-52-54-57-58-60 stitches. Continue working until the piece measures 55-57-59-61-63-65 cm. Decrease 6 stitches evenly over the cable in A.2 then cast off the first 18-19-21-20-21-23 stitches from the side = 27-27-27-31-31-31 stitches. SLEEVES: Cast on 45-45-48-48-51-54 stitches with double pointed needles size 4 mm. Knit 1 round, then work rib (knit 1, purl 2) in the round for 8 cm. Change to double pointed needles size 5.5 mm. Insert a marker at the beginning of the round = mid-under sleeve. Continue with stocking stitch. When the sleeve measures 11-12-11-12-10-13 cm, increase 1 stitch on each side of the marker-thread – read INCREASE TIP. Increase like this every 4-3-3-2½-2½-2 cm a total of 10-12-12-13-13-13 times = 65-69-72-74-77-80 stitches. When the sleeve measures 49-47-46-45-42-41 cm, work the sleeve cap back and forth (from mid-under sleeve) until the sleeve measures 50 cm in all sizes, i.e., a split of 1-3-4-5-8-9 cm at the top. Cast off. Work the other sleeve in the same way. ASSEMBLY: Sew the shoulder seams. Sew the sleeve cap to the armhole, then the split to the bottom of the armhole – see sketch. Sew the side seams, leaving a split of 8 cm at the bottom. NECK: Use circular needle size 4 mm and work the 27-27-27-31-31-31 stitches from the right front piece, knit up 37-37-37-45-45-45 stitches along the back piece and work the 27-27-27-31-31-31 stitches from the left front piece = 91-91-91-107-107-107 stitches. Work as follows from the wrong side: 7 band stitches in garter stitch, * purl 1, knit 3 *, work from *-* until there are 8 stitches left, purl 1 and 7 band stitches in garter stitch. Work this rib back and forth for 8 cm, cast off with knit over knit and purl over purl. Lay the right band over the left and sew together the opening at the bottom. Sew the buttons onto the left band. |
|||||||||||||
Diagram explanations |
|||||||||||||
|
|||||||||||||
 |
|||||||||||||
 |
|||||||||||||
 |
|||||||||||||
Have you finished this pattern?Tag your pictures with #dropspattern #autumnblazesweater or submit them to the #dropsfan gallery. Do you need help with this pattern?You'll find 36 tutorial videos, a Comments/Questions area and more by visiting the pattern on garnstudio.com. © 1982-2026 DROPS Design A/S. We reserve all rights. This document, including all its sub-sections, has copyrights. Read more about what you can do with our patterns at the bottom of each pattern on our site. |
|||||||||||||


With over 40 years in knitting and crochet design, DROPS Design offers one of the most extensive collections of free patterns on the internet - translated to 17 languages. As of today we count 324 catalogues and 12290 patterns translated into English (UK/cm). 12290
We work hard to bring you the best knitting and crochet have to offer, inspiration and advice as well as great quality yarns at incredible prices! Would you like to use our patterns for other than personal use? You can read what you are allowed to do in the Copyright text at the bottom of all our patterns. Happy crafting!
Post a comment to pattern DROPS 245-17
We would love to hear what you have to say about this pattern!
If you want to leave a question, please make sure you select the correct category in the form below, to speed up the answering process. Required fields are marked *.