
Popular categories
Looking for a yarn?


Comments / Questions (44)
![]() Trudi wrote:
Trudi wrote:
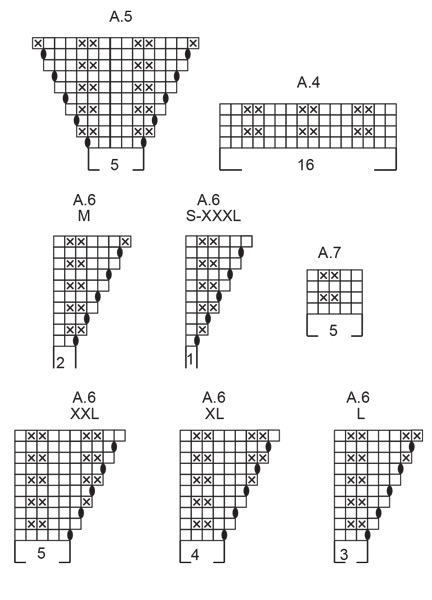
A.6, A.7 (11-11-11-11-11-21 steken) Ik kies voor de XXXL en begrijp dat ik hier de A7 4x moet doen. Het telpatroon is 5. Als ik dat 4 x doe kom ik op 20. Hoe kom ik aan de 21 steken die hier genoemd zijn?
13.02.2026 - 09:02DROPS Design answered:
Dag Trudi,
Je breit inderdaad 21 steken van A.7, dat betekent 4 herhalingen en nog eens de eerste steek van A.7.
15.02.2026 - 14:53
![]() Trudi Knol wrote:
Trudi Knol wrote:
Het patroon wordt van boven naar beneden gebreid. Waar begin ik dan met het telpatroon? En is het handig om van de verschillende onderdelen 1 telpatroon voor de goeie maat uit te werken?
11.02.2026 - 10:06DROPS Design answered:
Dag Trudi,
De telpatronen lees je altijd van onder naar boven. Dus je begint altijd onderaan bij het telpatroon, ongeacht welke kant op het werkstuk wordt gebreid. Je kunt de telpatronen uitprinten en de telpatronen die je nodig hebt uitknippen en de rest weggooien.
12.02.2026 - 19:32
![]() Adri wrote:
Adri wrote:
Is this pattern available in text not working from a diagram?
08.02.2026 - 13:12DROPS Design answered:
Dear Adri, this is the only version of the pattern available, with both charts and written instructions. If you have any doubts as you read and work the pattern you can write us a comment here and we will try to answer all of your questions as clearly as possible. Happy knitting!
08.02.2026 - 19:37
![]() Adri wrote:
Adri wrote:
Is this pattern available in text not working from a diagram?
08.02.2026 - 13:10DROPS Design answered:
Dear Adri, this is the only version of the pattern available, with both charts and written instructions. If you have any doubts as you read and work the pattern you can write us a comment here and we will try to answer all of your questions as clearly as possible. Happy knitting!
08.02.2026 - 19:37
![]() Camilla Leo wrote:
Camilla Leo wrote:
Jag har kommit till oket och får inte ihop det. Jag stickar storleken XL och det står bakstycket 11 maskor men diagrammet är endast 9. Lika med vänster framstycke då står det 5 maskor men är 6 i diagrammet och höger framstycke står det 5 maskor 9 maskor i diagrammet
20.09.2025 - 10:21DROPS Design answered:
Hei Camilla. Hvilket diagram tenker du på? I oppskriften står det (i str. XL): Strikk slik over bakstykke: Strikk A.6, A.7 (over 11 masker) og A.3. Selv om diagram A.7 viser 5 masker, skal det strikkes A.7 over 11 masker = du må strikke A.7 2 ganger + 1. maske av A.7 = A.7 er nå strikket over 11 masker. Diagrammen leses nedenfra og mot venstre. mvh DROPS Design
06.10.2025 - 10:29
![]() Kirsten wrote:
Kirsten wrote:
Hej ! Jeg kan ikke få mønsteret til at passe , efter halsudtagningen på denne cardigan. Str xxl. Jeg har de 129 masker. Og får 2 masker i overskud . Vil i hjælpe mig ??
06.09.2025 - 11:52DROPS Design answered:
Hei Kirsten. Jo, du har 129 masker og skal strikke slik: 6 stoplemasker + A.1 (= 1 m) + A.2 (=5 m) + A.3 (=5 m) + A.4 (=16 m) + A.5 (=5 m) + A.4 (=16 m) + A.6 (=5 m) + A.7 (=11 m) + A.3 (=5 m) + A.4 (=16 m) + A.5 (= 5 m ) + A.4 (=16 m) + A.6 (=5 m) + A.7 (=5 m) + A.1 (=1 m) + 6 stolpemasker = det er strikket over 129 masker (kun tall: 6+1+5+5+16+5+16+5+11+5+16+5+16+5+5+1+6 = 129). mvh DROPS Design
22.09.2025 - 09:56
![]() URSZULA MAGDALENA GRZEJSZCZAK wrote:
URSZULA MAGDALENA GRZEJSZCZAK wrote:
Dlaczego w rozm L na tyle, w A7 jest 11 oczek?
28.05.2025 - 17:38DROPS Design answered:
Witaj Urszulo, czasami liczba oczek nie jest podzielna przez liczbę oczek całego motywu schematu na szerokość. W tym przypadku powtarzamy schemat A.7 2 razy na szerokość (= 10 oczek), a następnie przerobimy pierwsze oczko schematu A.7. Zobacz kurs DROPS TUTAJ. Pozdrawiamy!
29.05.2025 - 08:14
![]() Marie-José Werba-Smits wrote:
Marie-José Werba-Smits wrote:
Volgens mij klopt het patroon niet helemaal. Op de teruggaande toer bij A7(11 steken) moet je 1 steek averecht en 2 recht breien, maar dan heb je aan de ene kant 2 averechtste steken, dan de 2 rechten steken. Bij de laatste steken van de 11 heb je dan 2 steken recht en 2 averecht, maar samen met de 2 steken van A4 heb je 4 steken averecht i.p.v. 3 st. averecht aan weerszijden van deze A7 (11 stken)
26.05.2025 - 15:27
![]() Emanuela Giraudo wrote:
Emanuela Giraudo wrote:
Quando nella parte dello sperone dice " Continuare il motivo e gli aumenti come mostrato in A.3, A.5 e A.6", si intende dopo aver finito gli schemi precedenti e cioè dopo 10 ferri? Inoltre A.3, A.5 e A.6 vanno lavorati in quest'ordine sia per davanti dx, manica dx, dietro, manica sx e davanti sx? O ogni parte deve cominciare con A3 indipendentemente da dove finisce la parte precedente?
31.03.2025 - 07:01DROPS Design answered:
Buonasera Emanuela, il primo giro imposta il lavoro con la disposizione dei diagrammi: deve continuare con i diagrammi come indicato. Buon lavoro!
12.04.2025 - 18:10
![]() Maria wrote:
Maria wrote:
Am Ende des Rumpfteils wird zugenommen und dann ein Bündchen im Rippenmuster gestrickt. Bei den Ärmeln wird für das Bündchen zu Nadeln 4.5 gewechselt. Ist das beim Rumpfteil auch so, oder wird hier mit den Nadeln 5.5 fertig gestrickt? Danke!
05.02.2025 - 20:51DROPS Design answered:
Liebe Maria, ja genau danke für den Hinweis, Bündchen soll man mit Nadeln Nr 4,5 stricken; eine Korrektur erfolgt. Viel Spaß beim Stricken!
06.02.2025 - 14:03
|
||||||||||
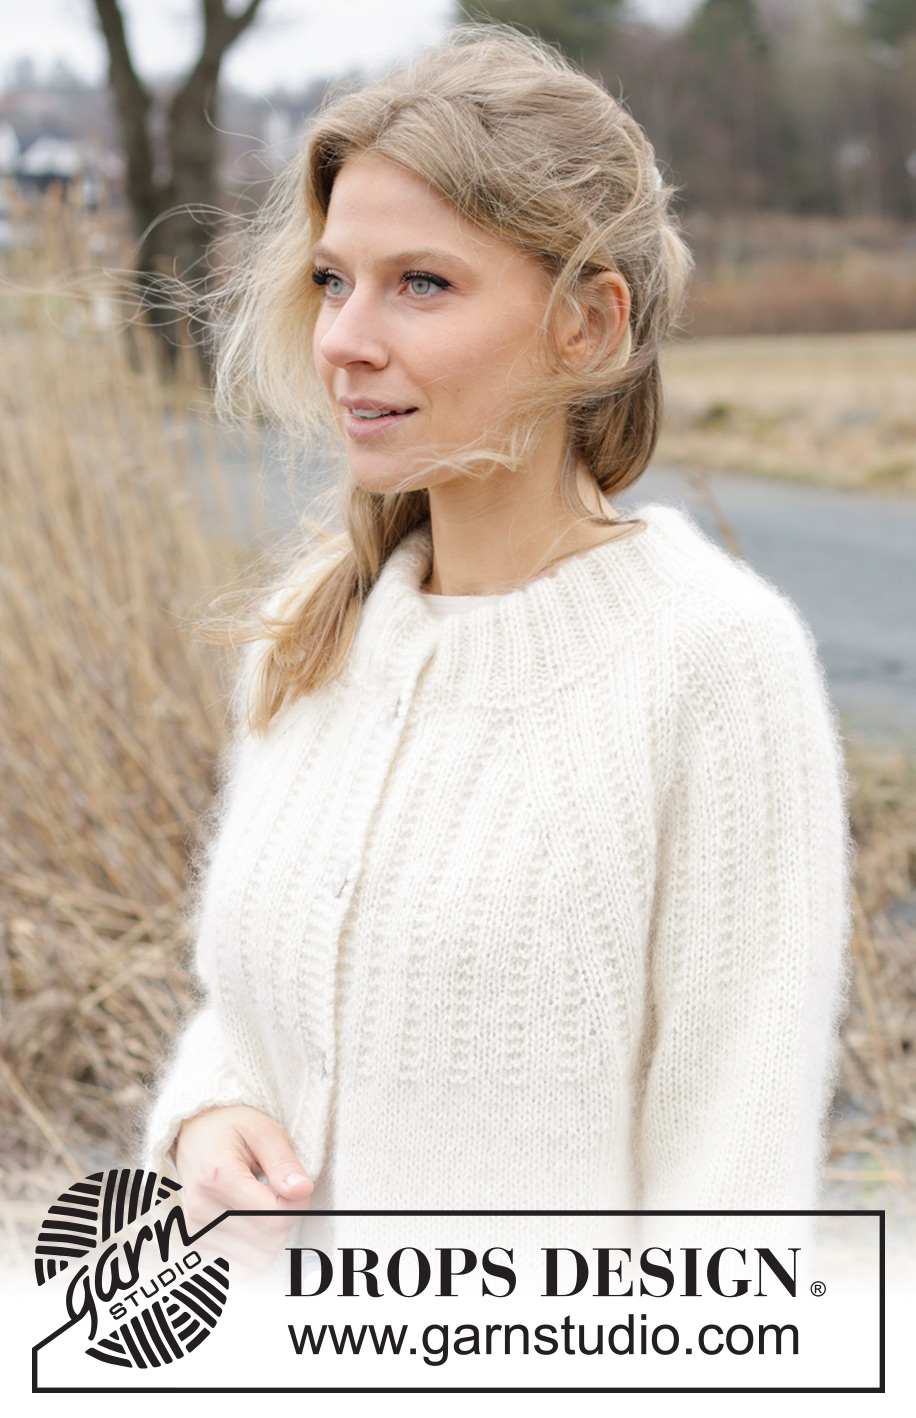
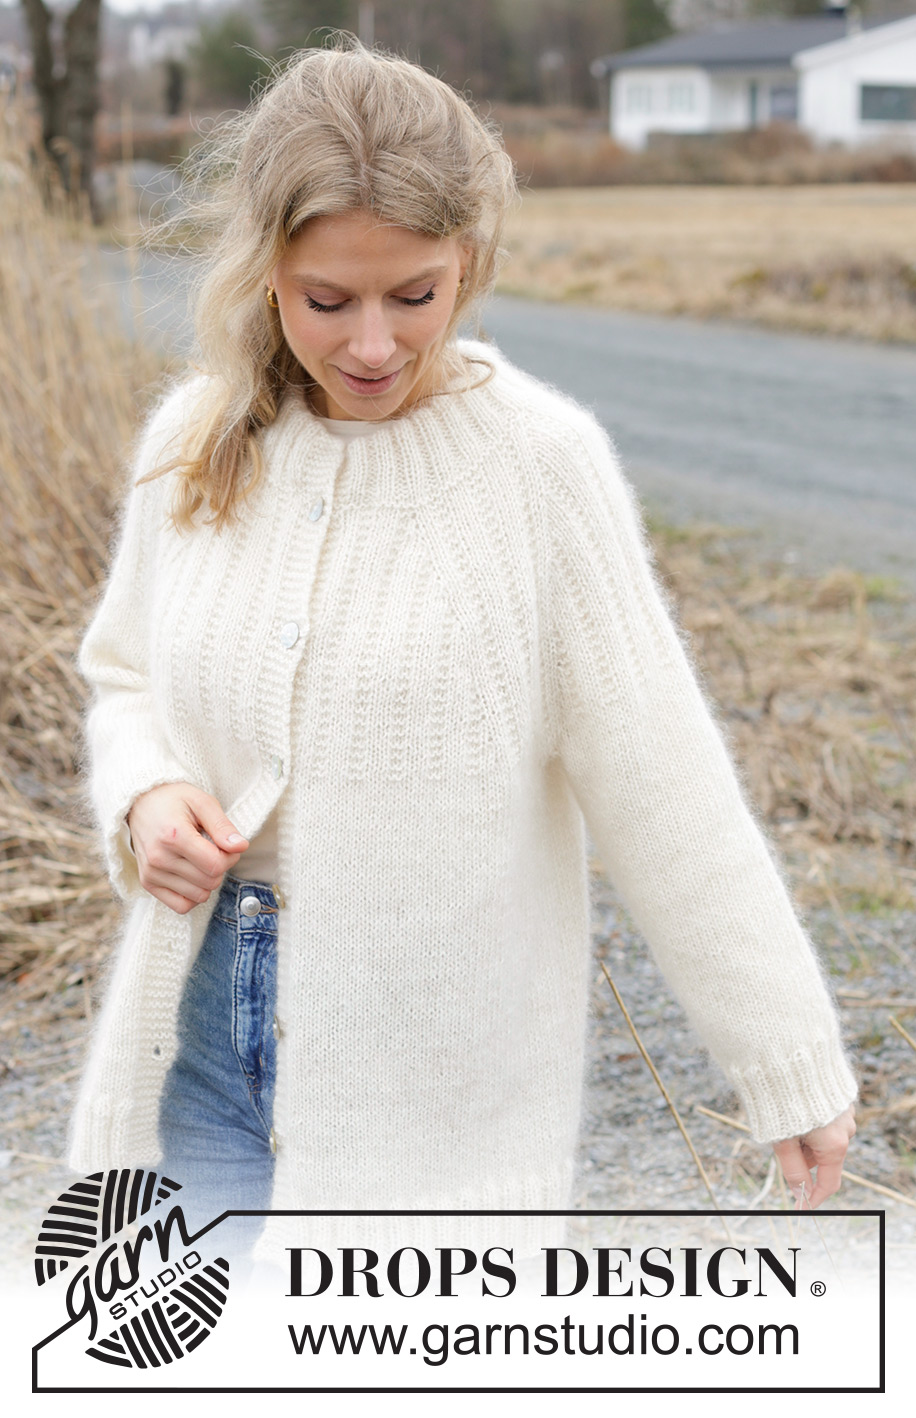
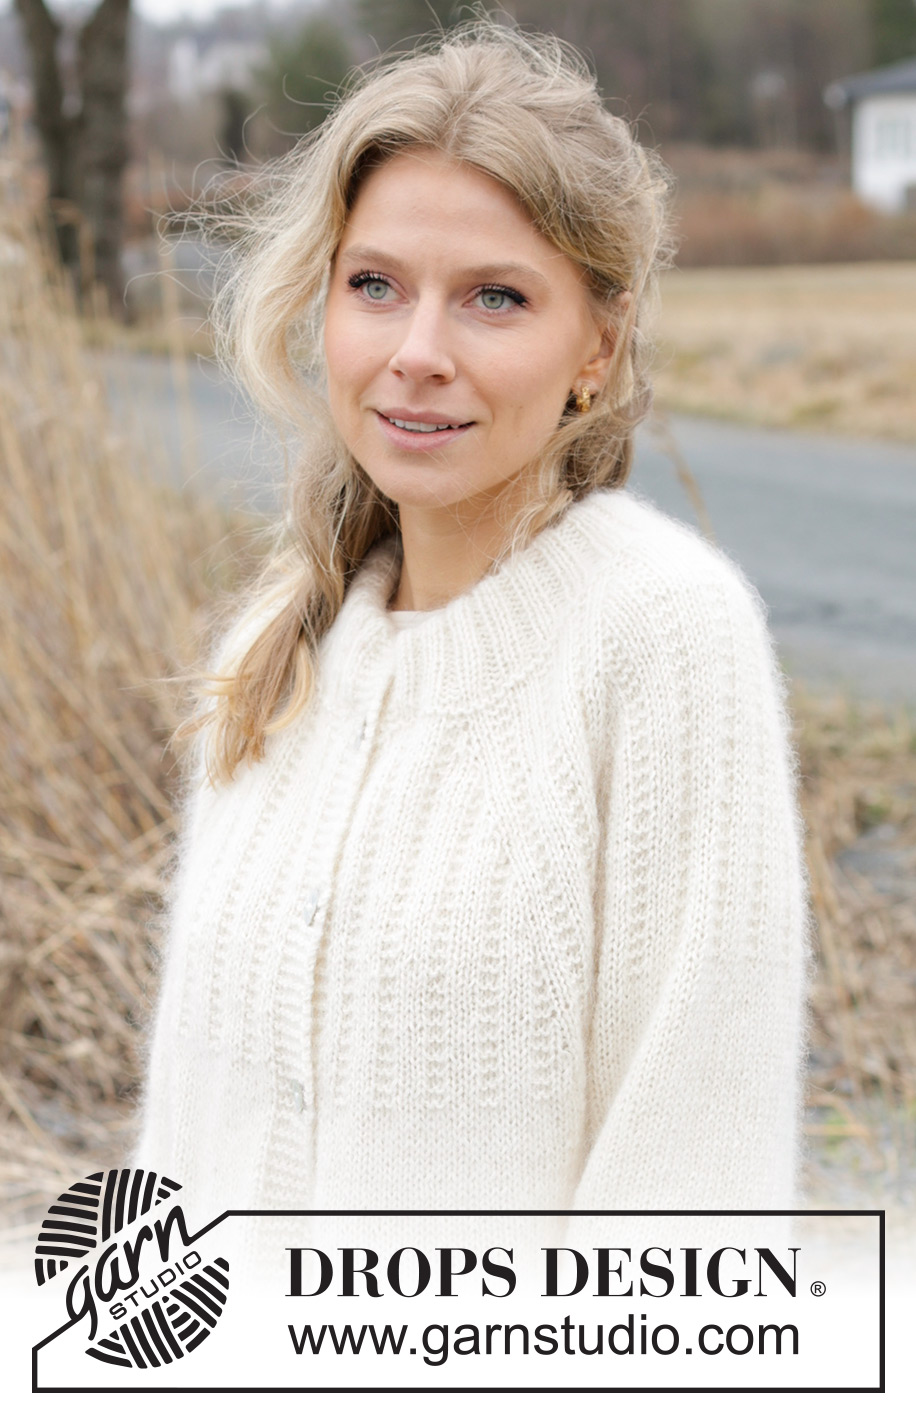
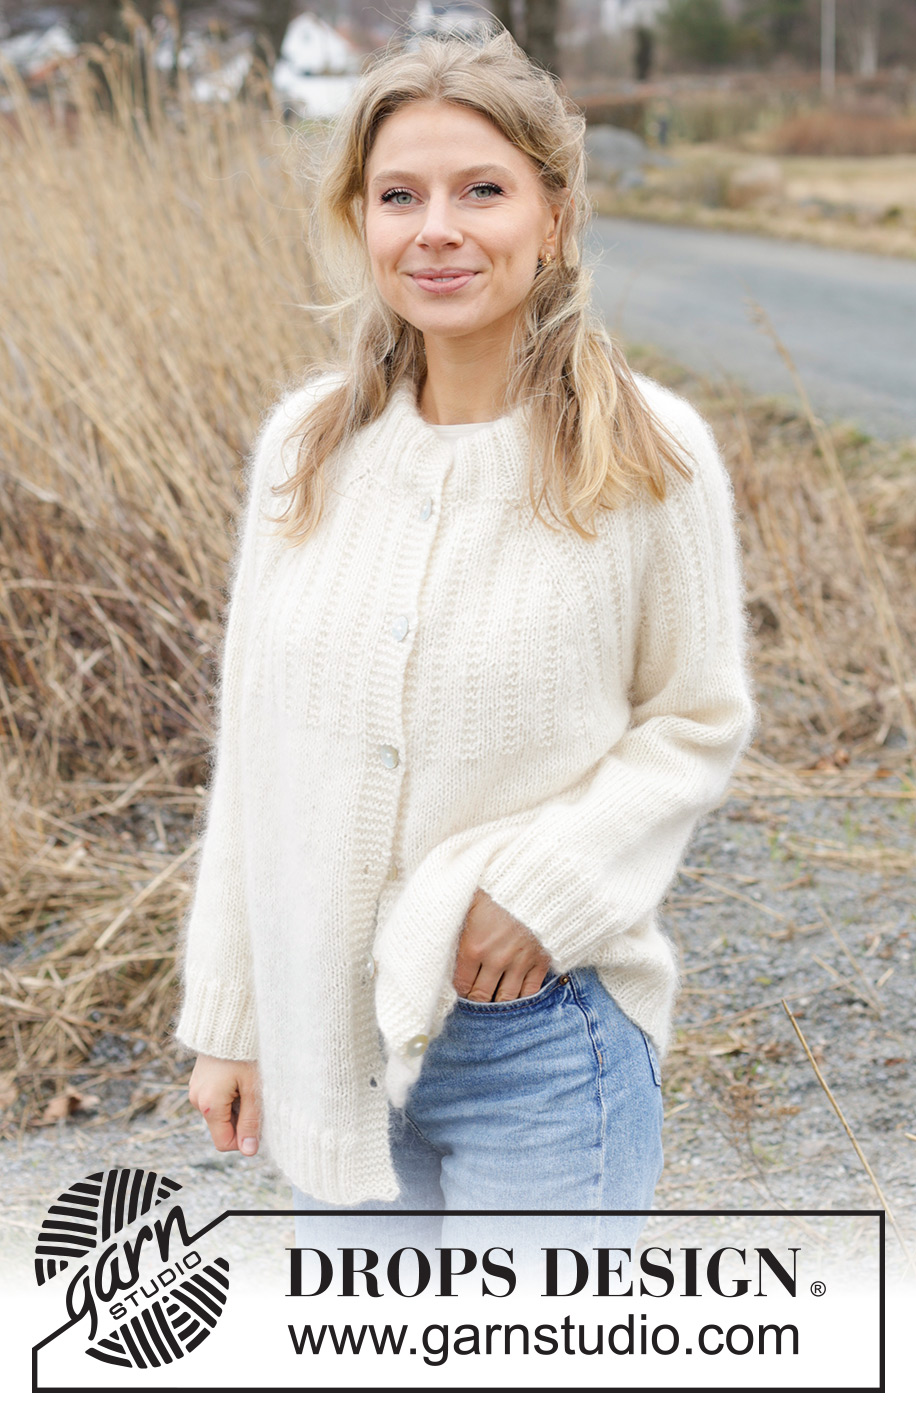
Winter Owl Cardigan#winterowlcardigan |
||||||||||
 |
 |
|||||||||
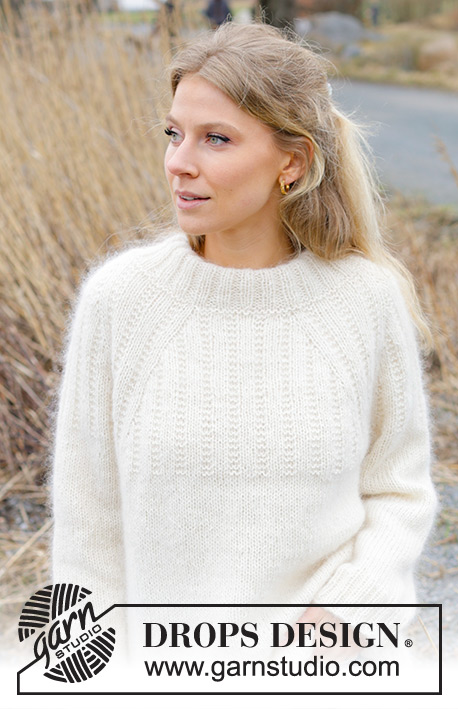
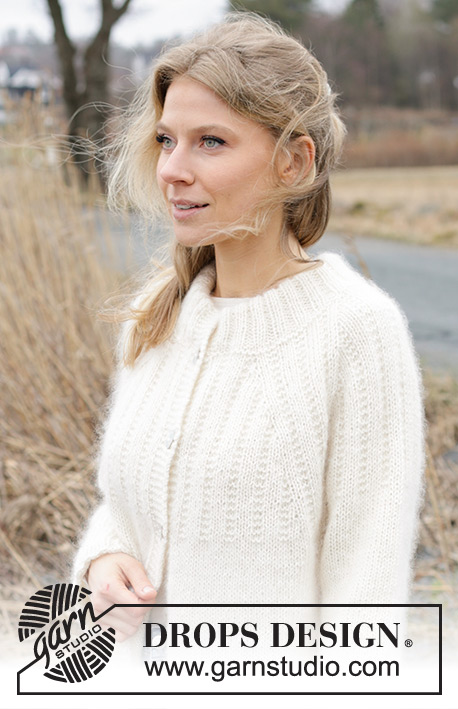
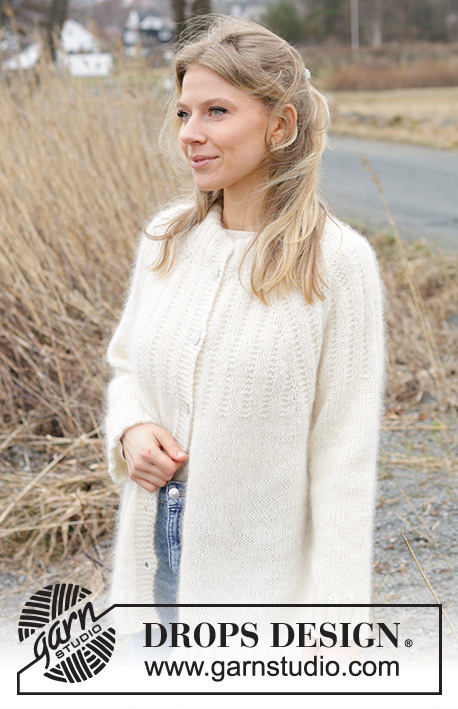
Knitted jacket in DROPS Flora and DROPS Kid-Silk. The piece is worked top down with double neck, raglan and relief-pattern. Sizes S - XXXL.
DROPS 243-2 |
||||||||||
|
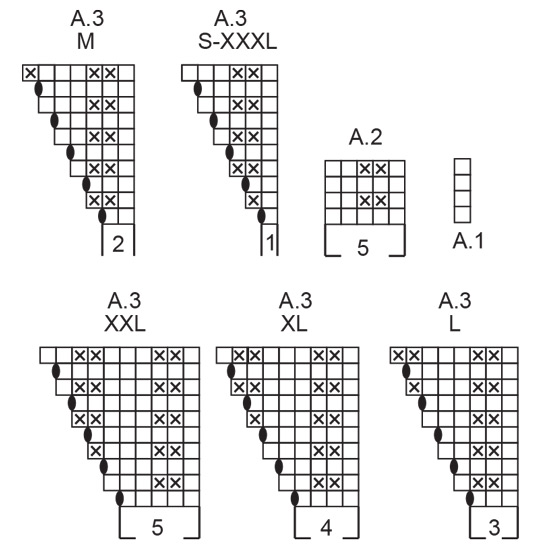
------------------------------------------------------- EXPLANATIONS FOR THE PATTERN: ------------------------------------------------------- GARTER STITCH (worked back and forth): Knit all rows. 1 ridge = knit 2 rows. PATTERN: See diagrams A.1 to A.7. Choose diagram for your size (applies to A.3 and A.6). The diagrams show all rows in the pattern from the right side. DECREASE TIP (for sleeves): Decrease 1 stitch on either side of the marker-thread as follows: Work until there are 3 stitches left before the marker-thread, slip 1 stitch knit-wise, knit 1 and pass the slipped stitch over the knitted stitch, knit 2 (marker-thread sits between these 2 stitches), knit 2 together (2 stitches decreased). BUTTONHOLES: Work buttonholes on the right band (when the garment is worn). Work from the right side when there are 3 stitches left on the row as follows: Make 1 yarn over, knit 2 together and knit 1. On the next row (wrong side), knit the yarn over to leave a hole. The first buttonhole is worked on the first row on the yoke. Then work the other 5-5-6-6-7-7 buttonholes with approx. 10-10-9-9-8-8½ cm between each one. ------------------------------------------------------- START THE PIECE HERE: ------------------------------------------------------- JACKET – SHORT OVERVIEW OF THE PIECE. The neck and yoke are worked back and forth with circular needle, from mid front and top down. The yoke is divided for body and sleeves and the body continued back and forth with circular needle. The sleeves are worked in the round with double pointed needles/short circular needle. DOUBLE NECK: Cast on 78-82-86-90-94-98 stitches with circular needle size 5.5 mm, 1 strand DROPS Flora and 2 strands DROPS Kid-Silk. Change to circular needle size 4.5 mm. Work rib (knit 2, purl 2) until there are 2 stitches left, knit 2. Work this rib back and forth for 5 cm. On the next 2 rows cast on 6 stitches at the end of each row – the new stitches are worked in GARTER STITCH – read description above (bands) = 90-94-98-102-106-110 stitches. Continue the rib with the bands in garter stitch until the neck measures 10 cm (neck edge will be folded down afterwards and will be 5 cm). Knit 1 row from the right side and increase 23 stitches (do not increase the bands) = = 113-117-121-125-129-133 stitches. Knit 1 row from the wrong side. Insert 1 marker after the band; the yoke is measured from here. YOKE: Change to circular needle size 5.5 mm and work from the right side as follows: 6 band stitches in garter stitch, A.1, A.2 (5-5-5-5-5-10 stitches), A.3 (left front piece). Work A.4, A.5 and A.4 (left sleeve), A.6, A.7 (11-11-11-11-11-21 stitches) and A.3 (back piece), A.4, A.5 and A.4 (right sleeve), A.6, A.7 (5-5-5-5-5-10 stitches), A.1 and 6 band stitches in garter stitch (right front piece) – on this row start to work the BUTTONHOLES – read description above. Continue the pattern and increase as shown in A.3, A.5 and A.6 (increase towards each A.4, and a total of 8 stitches increased on each row from the right side). The increased stitches are worked twisted into the pattern – no holes. The bands are worked in garter stitch throughout. REMEMBER THE KNITTING TENSION! Diagram A.1, A.2, A.4 and A.7 are repeated in height. When diagrams A.3, A.5 and A.6 are finished in height, continue to increase as before until you have increased a total of 17-19-23-25-27-30 times (including the increases in A.3, A.5 and A.6) = 249-269-305-325-345-373 stitches. Then continue with garter stitch and stocking stitch until the yoke measures 20-22-23-25-27-30 cm from the marker. Now divide for the body and sleeves from the right side as follows: 6 band stitches in garter stitch, 37-39-44-48-51-57 stitches in stocking stitch (left front piece), place the next 43-49-57-59-63-65 stitches on a thread (sleeve) cast on 8-10-10-10-10-8 stitches under the sleeve, work 76-80-90-98-104-116 stitches in stocking stitch (back piece), place the next 43-49-57-59-63-65 stitches on a thread (sleeve) cast on 8-10-10-10-10-8 stitches under the sleeve, work 38-40-45-49-52-58 stitches in stocking stitch and 6 band stitches in garter stitch. The body and sleeves are finished separately. BODY: = 179-191-211-227-239-259 stitches. Continue with stocking stitch and 6 band stitches in garter stitch on each side until the body measures 33-33-34-34-34-33 cm from the division. Knit 1 row from the wrong side and increase 23-27-27-31-31-35 stitches evenly spaced (do not increase over the bands) = 202-218-238-258-270-294 stitches. Change to circular needle size 4.5 mm and work rib as follows from the right side: 6 band stitches in garter stitch, * knit 2, purl 2 *, work from *-* until there are 8 stitches left, knit 2 and 6 band stitches in garter stitch. Continue this rib for 6 cm. Cast off with knit over knit and purl over purl. The piece measures approx. 63-65-67-69-71-73 cm from the neck. SLEEVES: Place the 43-49-57-59-63-65 stitches from the thread on the one side of the piece on short circular needle/double pointed needles size 5.5 mm and knit up 1 stitch in each of the 8-10-10-10-10-8 stitches cast on under the sleeve = 51-59-67-69-73-73 stitches. Insert a marker-thread in the middle of the new stitches under the sleeve. Continue stocking stitch in the round. When the sleeve measures 3 cm, decrease 1 stitch on each side of the marker-thread – read DECREASE TIP. Decrease like this every 6-4-2½-2-1½-1½ cm a total of 5-7-11-11-13-12 times = 41-45-45-47-47-49 stitches. When the sleeve measures 33-31-31-29-28-25 cm, knit 1 round and increase 7-7-7-9-9-11 stitches evenly spaced = 48-52-52-56-56-60 stitches. Change to double pointed needles size 4.5 mm and work rib (knit 2, purl 2) for 6 cm. Cast off with knit over knit and purl over purl. The sleeve measures approx. 39-37-37-35-34-31 cm from the division. Work the other sleeve in the same way. ASSEMBLY: Sew the buttons onto the left band. Fold the neck double to the inside and sew down. To avoid the neck being tight and rolling outwards, it is important that the seam is elastic. Sew the openings on the bands with small stitches. |
||||||||||
Diagram explanations |
||||||||||
|
||||||||||
 |
||||||||||
 |
||||||||||
 |
||||||||||
Have you finished this pattern?Tag your pictures with #dropspattern #winterowlcardigan or submit them to the #dropsfan gallery. Do you need help with this pattern?You'll find 28 tutorial videos, a Comments/Questions area and more by visiting the pattern on garnstudio.com. © 1982-2026 DROPS Design A/S. We reserve all rights. This document, including all its sub-sections, has copyrights. Read more about what you can do with our patterns at the bottom of each pattern on our site. |
||||||||||


With over 40 years in knitting and crochet design, DROPS Design offers one of the most extensive collections of free patterns on the internet - translated to 17 languages. As of today we count 325 catalogues and 12298 patterns translated into English (UK/cm). 12298
We work hard to bring you the best knitting and crochet have to offer, inspiration and advice as well as great quality yarns at incredible prices! Would you like to use our patterns for other than personal use? You can read what you are allowed to do in the Copyright text at the bottom of all our patterns. Happy crafting!
Post a comment to pattern DROPS 243-2
We would love to hear what you have to say about this pattern!
If you want to leave a question, please make sure you select the correct category in the form below, to speed up the answering process. Required fields are marked *.