
Popular categories
Looking for a yarn?


Comments / Questions (85)
![]() SIMON wrote:
SIMON wrote:
Bonjour je suis obligée d'adapter le modele par rapport à mon échantillon (10 cm = 15 mailles). Toutefois je ne peux pas recalculer le nombre de mailles dont j'ai besoin pour commencer le dos (26 mailles selon le modèle) car il n'y a pas les mesures n cm sur le modèle. Merci de votre retour :-)
30.03.2026 - 15:48DROPS Design answered:
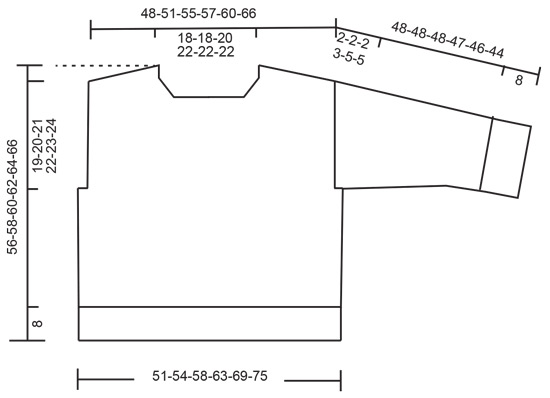
Bonjour Simone, vous trouverez le schéma avec les mesures en bas des explications. Bon tricot!
30.03.2026 - 21:13
![]() Françoise wrote:
Françoise wrote:
Bonjour, j’ai fait ce modèle il est magnifique. J’aimerais le faire en taille enfant 5ans . Est-ce qu’il existe en talle enfant?
05.03.2026 - 22:26DROPS Design answered:
Bonjour Françoise, nous avons effectivement une version enfant ce ce modèle: Sweet Pepperming, mais en version unie seulement, toutefois, vous pouvez volontiers ajouter des rayures (il se tricote en revanche avec 2 fils du groupe A, pas 4 comme ce pull). Bon tricot!
06.03.2026 - 07:50
![]() Julie wrote:
Julie wrote:
With the instructions on the back it’s says”Continue with stocking stitch for 12-13-13-14-15-15 cm along the armhole. Now start to work STRIPES – read description above until the piece measures 14-15-15-16-17-17 cm along the armhole, do you mean I knit in the pink for 14cm then I start the stripes but not all the stripes only 3cm of them before putting on a thread. Regards Julie
03.02.2026 - 17:19
![]() Pelin wrote:
Pelin wrote:
The tutorial you provided in response to my question in November “ How to knit up stitches for a sleeve and sew the split to the armhole” is different from the lesson on this page “European shoulder (sleeve)”. Which one should I do? When I am knitting up to start the sleeve, do I knit up from the bottom of the front side or from the middle under the armpit (in the middle of the 4 stitches I cast on earlier) ? Thanks !
29.12.2025 - 15:20
![]() Jenny wrote:
Jenny wrote:
Hi Thanks for your previous help. I’m now on the sleeves but I can’t see when to start the stripes. Please can you help Thanks a lot
27.12.2025 - 00:23
![]() Jenny wrote:
Jenny wrote:
Is it correct that the back is 10 cm shorter than the front when you join the pieces? Thanks
07.12.2025 - 17:40DROPS Design answered:
Hi Jenny, it is correct, a part of the front arm will be at the back of the jumper. Happy knitting!
07.12.2025 - 18:07
![]() Irene wrote:
Irene wrote:
Welche Körpergröße hat das Model und welche Pullovergrösse trägt es? Viele Grüße Irene
07.12.2025 - 14:25DROPS Design answered:
Liebe Irene, hier lesen Sie mal, wie Sie Ihre Größe wählen. Viel Spaß beim Stricken!
08.12.2025 - 09:38
![]() Pelin wrote:
Pelin wrote:
I joined the front and back piece in the round, with 4 extra stitches cast on both sides. for the arms i knit up 36 stitches on the front, down 18 stitches on the back, and then back and forth for 3cm. i finished 1 sleeve and the hole is so small, when i sewed it, it made no difference to the shape! when i start back and forth on my next sleeve, do i leave those 4 cast on stitches untouched and then sew them at the end? how big is the hole supposed to be? or was i correct the first time?
21.11.2025 - 22:02DROPS Design answered:
Dear Mrs Pelin, you are working size L, correct? Your armhole should be 21 cm deep (see chart) - as front piece is longer than front piece you will pick up more stitches along front piece so that's right too, maybe then this lesson can help you, we are showing there how to pick up sts along an armhole (not in the bottom stitches under sleeve), so same technique (even if with more usual shoulders). Hope it can help. Happy knitting!
24.11.2025 - 08:14
![]() Nadia wrote:
Nadia wrote:
Bonjour, J'ai fait ce pull: de haut en bas, j'ai tout recalculé pour faire des épaules classiques. Il est réussi je pense. Ma question reste pour mes choix futurs. Est-il possible de tricoter des épaules comme Drops le propose sans avoir les plis ? Peut-être en faisant des épaules plus étroites ?
31.10.2025 - 14:54DROPS Design answered:
Bonjour Nadia, vous pouvez tout à fait opter pour un modèle avec des épaules droites, plus "classiques", retrouvez tous nos modèles de pulls ici, choisissez les filtres correspondant à votre recherche pour l'affiner. Bon tricot!
03.11.2025 - 07:22
![]() Nadia wrote:
Nadia wrote:
Bonjour, En tricotant plus étroit, est-il possible d'éviter l'horrible pli qui longe l'emmanchure jusqu'au bas du corps ?
29.10.2025 - 16:52DROPS Design answered:
Bonjour Nadia, ce modèle se tricote de haut en bas avec des épaules biaisées dans le dos; si vous préférez avoir les épaules bien droites, vous pouvez vous orienter sur un modèle tricoté de bas en haut - retrouvez des exemples ici, pensez à ajouter des filtres si besoin. Bont ricot!
30.10.2025 - 18:47
|
||||||||||
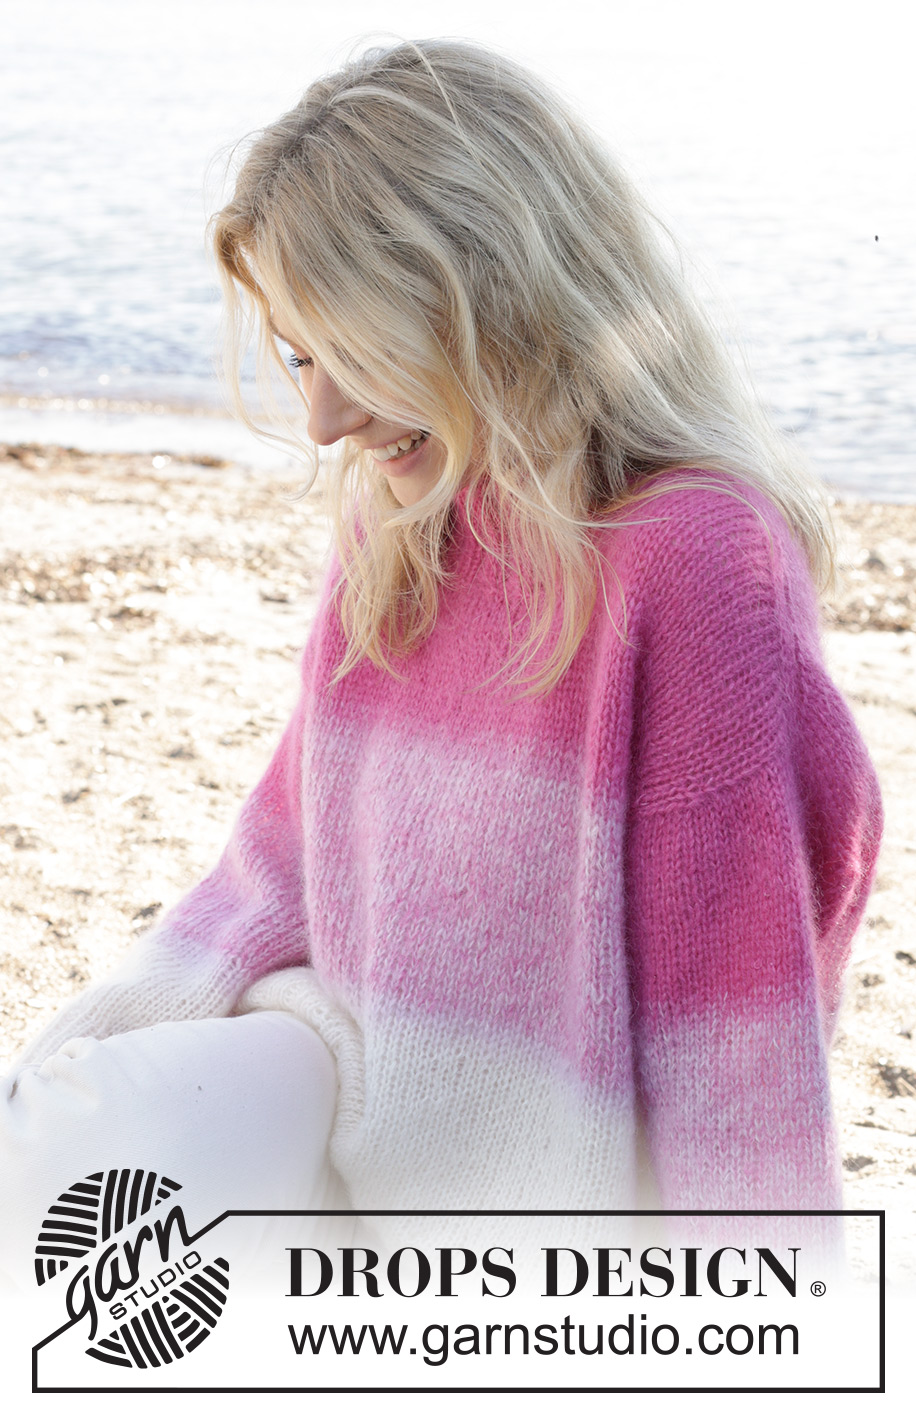
Pink Infusion#pinkinfusionsweater |
||||||||||
 |
 |
|||||||||
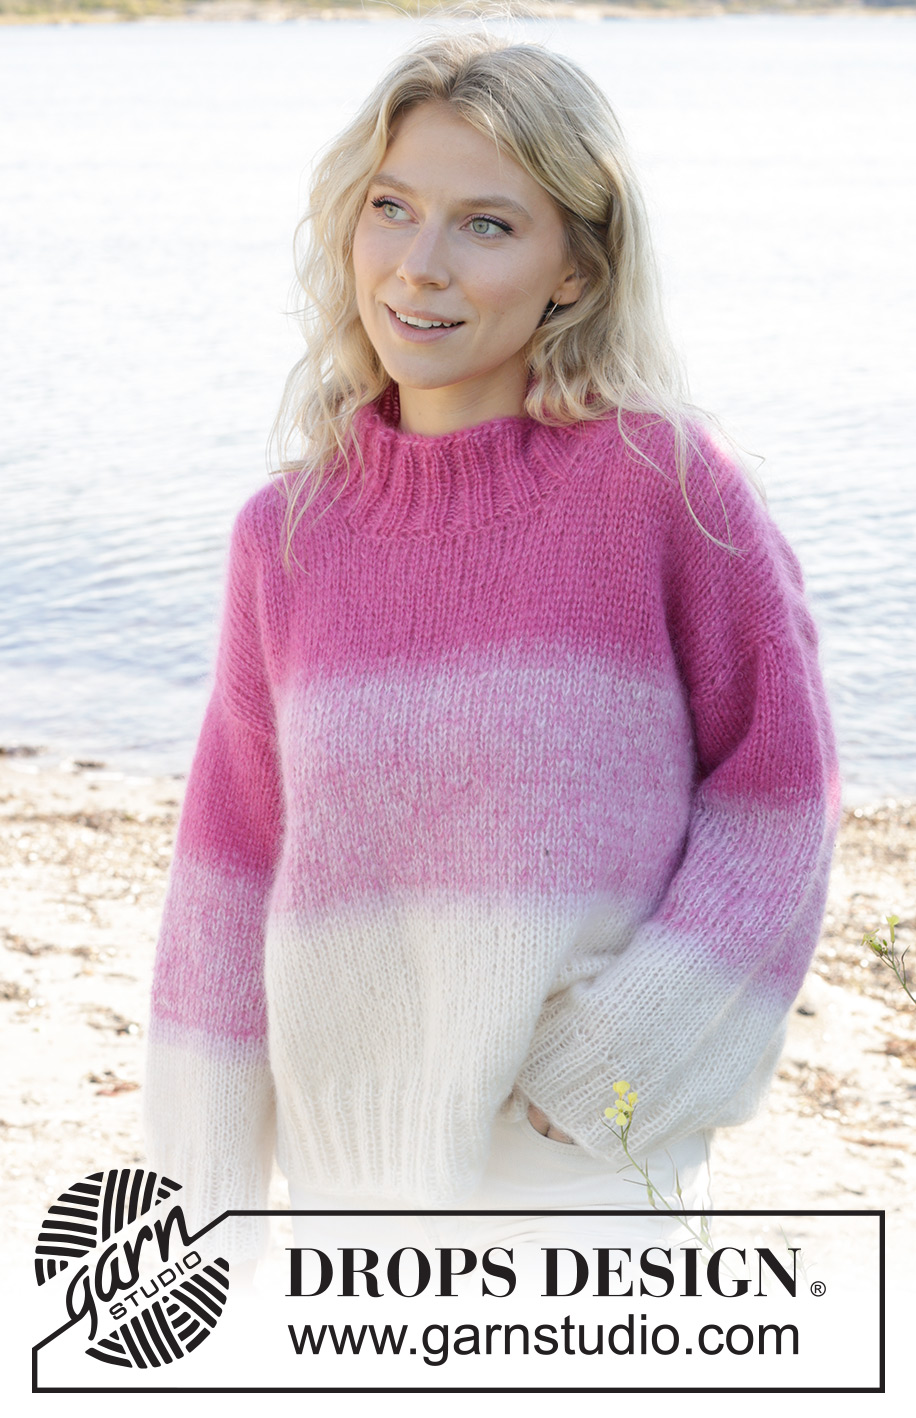
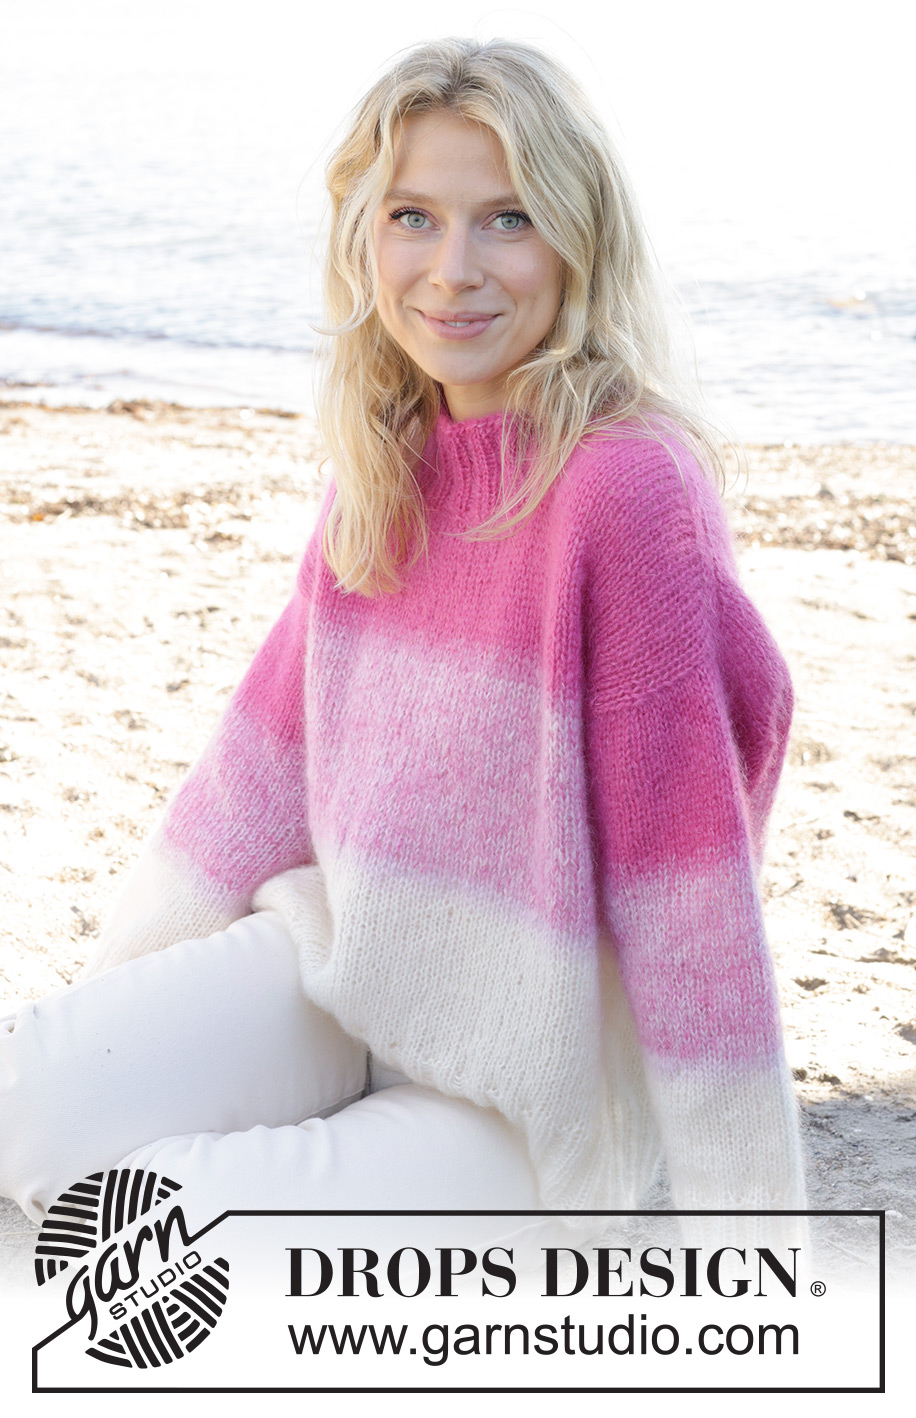
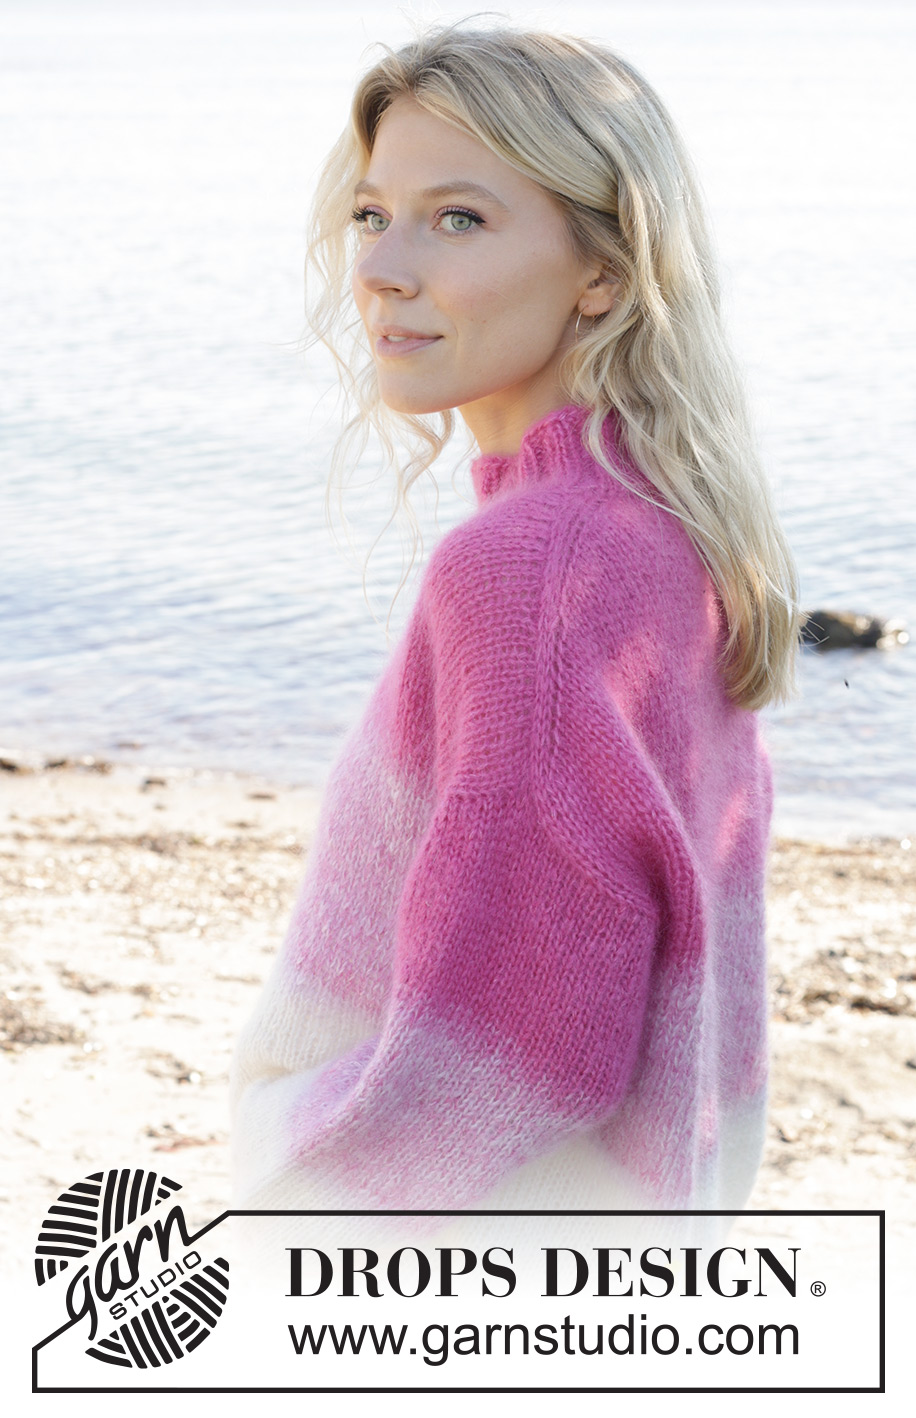
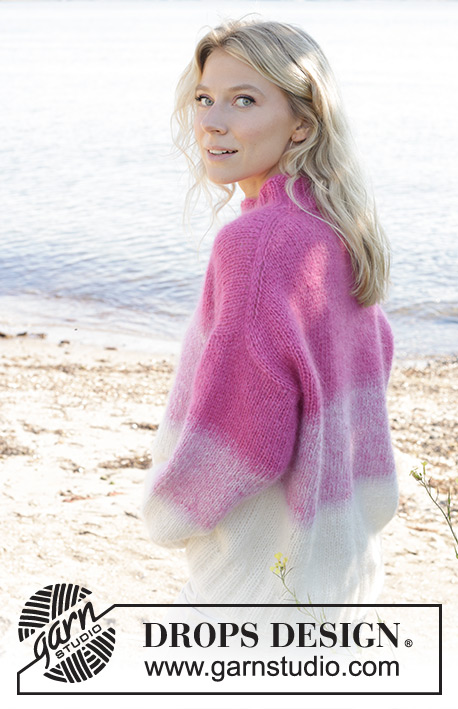
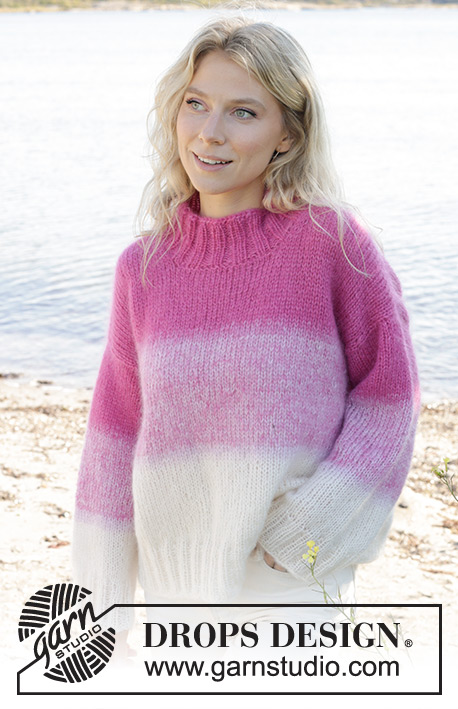
Knitted jumper in 4 strands DROPS Kid-Silk. The piece is worked top down with diagonal/European shoulders and stripes. Sizes XS - XXL.
DROPS 240-1 |
||||||||||
|
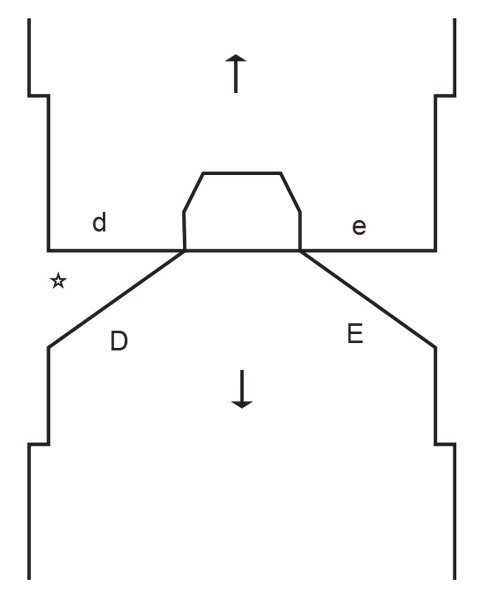
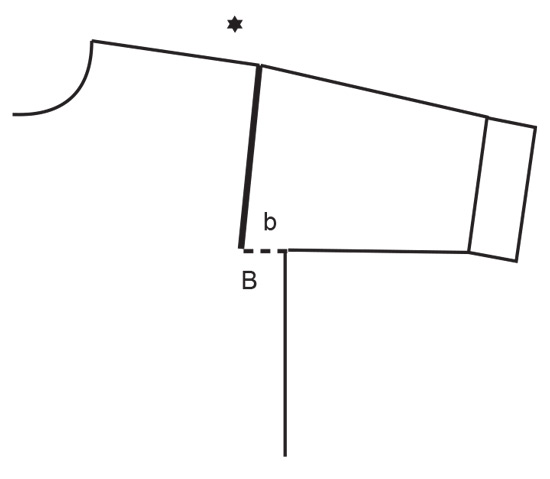
------------------------------------------------------- EXPLANATIONS FOR THE PATTERN: ------------------------------------------------------- RIDGE/GARTER STITCH (worked back and forth): Knit all rows. 1 ridge = knit 2 rows. INCREASE TIP FROM THE RIGHT SIDE: Increase towards the left AFTER MARKER: Use left needle to pick up yarn between 2 stitches from row below, pick up yarn from the front and knit in the stitch loop that is on the back of the needle. Increase towards the right BEFORE MARKER: Use left needle to pick up yarn between 2 stitches from row below, pick up yarn from the back and knit in the stitch loop that is on the front side of the needle. INCREASE TIP FROM THE WRONG SIDE: Increase towards the right AFTER MARKER: Use left needle to pick up yarn between 2 stitches from row below, pick up yarn from the back and purl in the stitch loop that is on the front side of the needle. Increase towards the left BEFORE MARKER: Use left needle to pick up yarn between 2 stitches from row below, pick up yarn from the front and purl in the stitch loop that is on the back side of the needle. DECREASE TIP (for sleeves): Decrease 1 stitch on either side of the marker-thread as follows: Work until there are 3 stitches left before the marker-thread, knit 2 together, knit 2 (marker-thread sits between these 2 stitches), slip 1 stitch as if to knit, knit 1 and pass the slipped stitch over the knitted stitch. STRIPES: 2 rows with 1 strand colour light pink + 3 strands colour pink. 2 rows with 2 strands colour light pink + 2 strands colour pink. Work 14-15-16-17-18-19 cm with 1 strand colour off white + 2 strands colour light pink + 1 strand colour pink. 2 rows with 3 strands colour light pink + 1 strand colour off white 2 rows with 3 strands colour off white + 1 strand colour light pink 4 strands with colour off white to finished length. ------------------------------------------------------- START THE PIECE HERE: ------------------------------------------------------- JUMPER – SHORT OVERVIEW OF THE PIECE: The top of the back piece is worked back and forth, top down as far as the armholes. Stitches are knitted up along each shoulder, then stitches are cast on for the neck and the front piece is worked back and forth, top down as far as the armholes. The front and back pieces are joined and the body worked in the round. Stitches are knitted up around the armholes and the sleeves worked in the round with short circular needle/double pointed needles. The neck is worked to finish. BACK PIECE: Cast on 26-26-28-30-30-30 stitches with circular needle size 7 mm and 4 strands colour pink. Purl 1 row from the wrong side. Insert 1 marker inside 3 stitches on each side. Allow them to follow your work onwards, always inside the outermost 3 stitches. Work stocking stitch back and forth. AT THE SAME TIME increase AFTER the marker at the beginning of the row and BEFORE the marker at the end of the row – read INCREASE TIP FROM RIGHT SIDE. On the next row (wrong side) increase in the same way – read INCREASE TIP FROM WRONG SIDE. Increase both from the right and wrong side a total of 18-20-22-22-24-28 times. After the last increase there are 62-66-72-74-78-86 stitches. The piece is now measured from here! REMEMBER THE KNITTING TENSION! Continue with stocking stitch for 12-13-13-14-15-15 cm along the armhole. Now start to work STRIPES – read description above until the piece measures 14-15-15-16-17-17 cm along the armhole. Cut the yarn, put stitches on a thread or an extra needle and work the front piece. FRONT PIECE: Start with the left shoulder (when the garment is worn). Knit up 18-20-22-22-24-28 stitches inside the outermost stitch along the left shoulder on back piece (i.e. knit up 1 stitch in each row on the top edge of the back piece) with 4 strands colour pink. Work stocking stitch back and forth for 7 cm. Now increase at the beginning of each row from the right side after the 3 stitches - remember INCREASE TIP FROM RIGHT SIDE. Increase 1 stitch 4 times = 22-24-26-26-28-32 stitches. Put aside after the last row from the wrong side. Now work the right shoulder as follows Knit up 18-20-22-22-24-28 stitches inside the outermost stitch along the right shoulder on the back piece. Work stocking stitch back and forth for 7 cm. Now increase at the end of each row from the right side before the 3 stitches - remember INCREASE TIP FROM RIGHT SIDE. Increase 1 stitch 4 times = 22-24-26-26-28-32 stitches. After the last increase, work the last row from the wrong side. On the next row from the right side work as follows: Stocking stitch over the 22-24-26-26-28-32 stitches from the right shoulder, cast on 18-18-20-22-22-22 stitches for the neck at the end of the row and work stocking stitch over the 22-24-26-26-28-32 stitches from the left shoulder = 62-66-72-74-78-86 stitches. When the piece measures 22-23-25-26-27-29 cm, start to work stripes. Work until the piece measures 24-25-27-28-29-31 cm along the armhole. Now join the front and back pieces for the body as follows: BODY: Work the 62-66-72-74-78-86 stitches from the front piece on the needle, cast on 4-4-4-8-12-12 stitches at the end of the row (side), work stocking stitch over the 62-66-72-74-78-86 stitches from the back piece, cast on 4-4-4-8-12-12 stitches at the end of the row = 132-140-152-164-180-196 stitches. Work stocking stitch in the round and continue stripes until the piece measures 48-50-52-54-56-58 cm – measured from the top of the shoulder on the front piece. Knit 1 round and increase 24-24-24-28-32-36 stitches evenly spaced = 156-164-176-192-212-232 stitches. Change to circular needle size 6 mm. Work rib (knit 2, purl 2) for 8 cm. Cast off with knit. LEFT SLEEVE: Use circular needle size 7 mm and 4 strands colour pink, knit up from the right side 32-34-36-38-40-40 stitches from the bottom of the armhole and to the top of the shoulder (along the front piece) and 18-18-18-20-20-22 stitches from the shoulder down to the bottom of the armhole (along the back piece) = 50-52-54-58-60-62 stitches. Work stocking stitch back and forth for 2-2-2-3-5-5 cm. Now join the sleeve using short circular needle/double pointed needles size 7 mm and continue in the round. Insert 1 marker-thread at the beginning of the round (mid-under sleeve). Allow the thread to follow your work onwards. Start at the marker thread and work stocking stitch in the round for 4-4-4-4-5-7 cm. Now decrease 2 stitches under the sleeve – read DECREASE TIP. Decrease like this every 10-10-10-7-7-6 cm a total of 4-4-4-5-5-5 times = 42-44-46-48-50-52 stitches. AT THE SAME TIME, when the sleeve measures 11 cm work stripes in the same way as on the body. Continue working until the sleeve measures 40-40-40-39-38-36 cm. There is 8 cm left; try the jumper on and work to desired length before the rib. Knit 1 round and increase 6-4-6-4-6-4 stitches evenly spaced = 48-48-52-52-56-56 stitches. Change to double pointed needles size 6 mm. Work rib (knit 2, purl 2) for 8 cm. Cast off a little loosely. The sleeve measures approx. 48-48-48-47-46-44 cm. RIGHT SLEEVE: Work the same way as left sleeve, but first knitting up 18-18-18-20-20-22 stitches from the bottom of the armhole to the shoulder along the back piece, then 32-34-36-38-40-40 stitches from the shoulder and down the front piece. Sew the bottom of the armholes together – see sketch. NECK: Start on one shoulder and knit up from the right side, inside 1 edge stitch, 64 to 76 stitches around the neck, using short circular needle size 6 mm and 4 strands colour pink. Work rib in the round (knit 2, purl 2) for 8 cm. Cast off loosely. |
||||||||||
Diagram explanations |
||||||||||
|
||||||||||
 |
||||||||||
 |
||||||||||
 |
||||||||||
Have you finished this pattern?Tag your pictures with #dropspattern #pinkinfusionsweater or submit them to the #dropsfan gallery. Do you need help with this pattern?You'll find 32 tutorial videos, a Comments/Questions area and more by visiting the pattern on garnstudio.com. © 1982-2026 DROPS Design A/S. We reserve all rights. This document, including all its sub-sections, has copyrights. Read more about what you can do with our patterns at the bottom of each pattern on our site. |
||||||||||


With over 40 years in knitting and crochet design, DROPS Design offers one of the most extensive collections of free patterns on the internet - translated to 17 languages. As of today we count 324 catalogues and 12290 patterns translated into English (UK/cm). 12290
We work hard to bring you the best knitting and crochet have to offer, inspiration and advice as well as great quality yarns at incredible prices! Would you like to use our patterns for other than personal use? You can read what you are allowed to do in the Copyright text at the bottom of all our patterns. Happy crafting!
Post a comment to pattern DROPS 240-1
We would love to hear what you have to say about this pattern!
If you want to leave a question, please make sure you select the correct category in the form below, to speed up the answering process. Required fields are marked *.