
Popular categories
Looking for a yarn?


Comments / Questions (188)
![]() Anne Ingvild Fatland wrote:
Anne Ingvild Fatland wrote:
Hei, eg prøve meg på patentstrikk for fyrste gong og eg forstår ikkje kva eg gjer feil. Har fulgt video og forklaringar, men etter eg no har strikka A2a og A3a ein gong, så har eg allereide langt over 140 masker, og dette skal vera antal masker etter å ha repetert A2a og A3a ni gongar. Eg forstår ingenting. Kva gjer eg feil?
15.11.2020 - 00:16DROPS Design answered:
Hej. Du ska inte telle kasten, kun maskene, kan det vara det som är felet? Mvh DROPS Design
17.11.2020 - 11:39
![]() Britt Sletten wrote:
Britt Sletten wrote:
Hei, da er jeg kommet dit hen at jeg skal slå sammen bak og fremstykke. Får ikke mønstre til å stemme med bakstykke, Hva betyr rette patentmasker? Er det to rette i sammen?
13.11.2020 - 12:50DROPS Design answered:
Hei Britt. Nei, det er ikke 2 rette sammen. De rillemaskene du har strikket i sidene skal nå strikkes som rettmasker (i patent). Du vil da se at de da passer inn i mønstret. God Fornøyelse!
16.11.2020 - 13:39
![]() Anna wrote:
Anna wrote:
I videoen som følger strikkeoppskriften pekes det nederst på diagram A.2 når man har strikket ferdig A.1a. Dette får jeg ikke til å stemme med mønsteret - i forhold til kast på nåla - og økninger hver 6. omgang. Skal man begynne på linje nr. 9 på A.2...? Altså de to linjene før A.2a? Det vil gi mening med mønster og økninger. Hvis dette stemmer, kommer det dårlig frem i forklaringen og også videoen som følger diagrammene?
13.11.2020 - 10:38DROPS Design answered:
Hei Anna. Vi skal få redigert videoen så snart som mulig (i disse dager), der det ikke pekes på hele diagrammet, men kun fra A.1a, A.2a og A.3a mvh DROPS design
16.11.2020 - 13:43
![]() Anna wrote:
Anna wrote:
Da gleder jeg meg til videoen blir redigert :)
10.11.2020 - 18:07
![]() Anna wrote:
Anna wrote:
I hvilken rekkefølge skal diagrammene strikkes? Beskrivelsen i videoen slutter etter A.1a. Etter dette pekes det bare til A.2 og A.2a og så videre til A.3 og oppover t.o.m A.3a. I forklaringen til mønsteret står det at man etter å ha strikket A.1 en gang « i høyden» gjentas A1a videre i høyden. Når A.2 og A.3 er strikket 1 gang i høyden, repeteres A.2a og A.3a «.... Dette stemmer ikke med det som pekes på i video? Hva skal gjøres?
07.11.2020 - 12:35DROPS Design answered:
Hei Anna. Her er svaret som ble gitt under Video på ditt samme spørsmålet (skal prøve å redigere videoen slik at det blir lettere å forstå): Du strikker A.1, A.2 og A.3 samtidig. Du er ferdig med A.1 før A.2 og A.3 og da gjentar du A.1a i høyden og når du har strikket A.2 og A.3 1 gang i høyden fortsetter du med A.2a over A.2 og A.3a over A.3. God Fornøyelse!
09.11.2020 - 12:45
![]() Britt Sletten wrote:
Britt Sletten wrote:
Hei, er det lagd en video fra når en skal begynne å dele arbeidet til forstykke og bakstykke.? Syns det er vanskelig å forstå det som står i oppskrifta. 1 maske rille er det det samme som ei rille?
29.10.2020 - 11:05DROPS Design answered:
Hei Britt. Nei, det er ikke laget video på akkurat det. Når du skal dele forstykket og bakstykket, skal det strikkes patentstrikk videre, men den første og siste masken skal strikkes som 1 kantmaske i rille (= i rille = rett både fra retten og vragen), slik at kanten til erm åpningen får en pen kant. mvh DROPS design
02.11.2020 - 10:42
![]() Kristin Gregersen wrote:
Kristin Gregersen wrote:
Ja det har jeg husket
26.10.2020 - 15:15
![]() Kristin wrote:
Kristin wrote:
Hei. Jeg hat kommet til bakstykke og skal strikke A4 fram og tilbake. Kast, ta av og rett. Når jeg strikker fra vrangen blir mønsteret feil. Det kommer vrang over rett. Hva gjør jeg feil?
20.10.2020 - 19:38DROPS Design answered:
Hei Kristin. Litt usikker på hvor det blir feil hos deg, har du husket 1 kantmaske i rille i hver side? mvh DROPS design
26.10.2020 - 07:10
![]() Vasiliki Orphanou wrote:
Vasiliki Orphanou wrote:
Can I knit the 210-4 Pattern with Baby Merino yarn? What is aquivelent to the Drops Air Gauge 11 X 32 for Baby Merino yarn? Thank you so much for your help.
09.10.2020 - 15:38DROPS Design answered:
Dear Vasiliki, you can knit it with Baby merino, however it will not be as "fluffy" as the original piece, and as with every substitution, you should knit a swatch, check your gauge, and make modifications, recalculations accordingly. Happy Crafting!
11.10.2020 - 06:56
![]() Vasiliki Orphanou wrote:
Vasiliki Orphanou wrote:
Can I knit the 210-4 Pattern with Baby Merino yarn? What is aquivelent to the Air Gauge 11 X 32 for Baby Merino yarn? Thank you so much for your help.
09.10.2020 - 15:36DROPS Design answered:
Dear Vasiliki, you can knit it with Baby merino, however it will not be as "fluffy" as the original piece, and as with every substitution, you should knit a swatch, check your gauge, and make modifications, recalculations accordingly. Happy Crafting!
11.10.2020 - 06:54
|
||||||||||||||||||||||||||||
Mountain Moraine#mountainmorainevest |
||||||||||||||||||||||||||||
 |
 |
|||||||||||||||||||||||||||
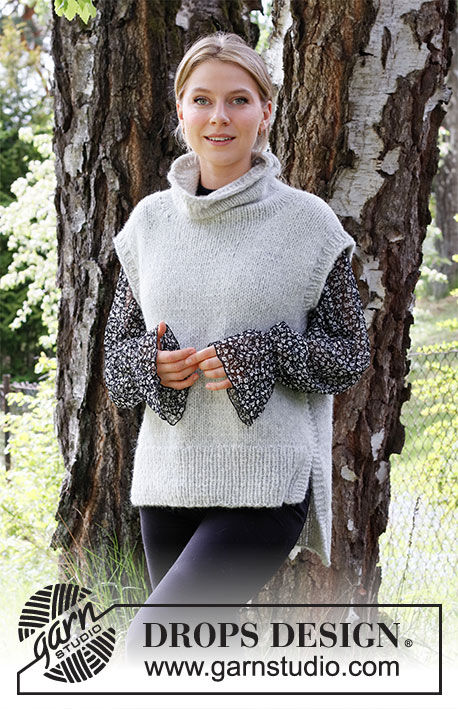
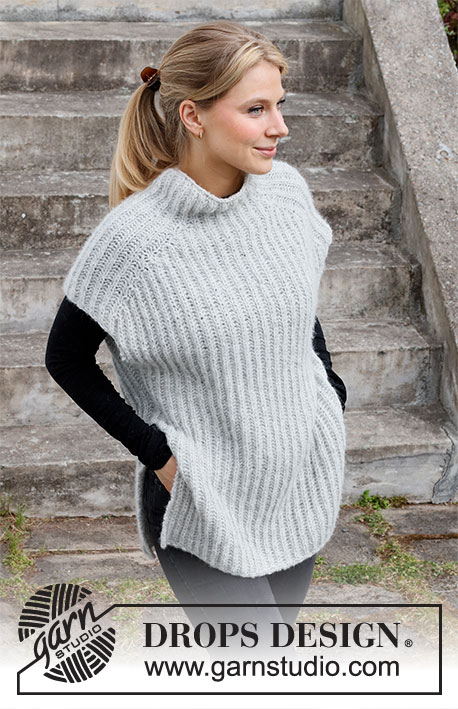
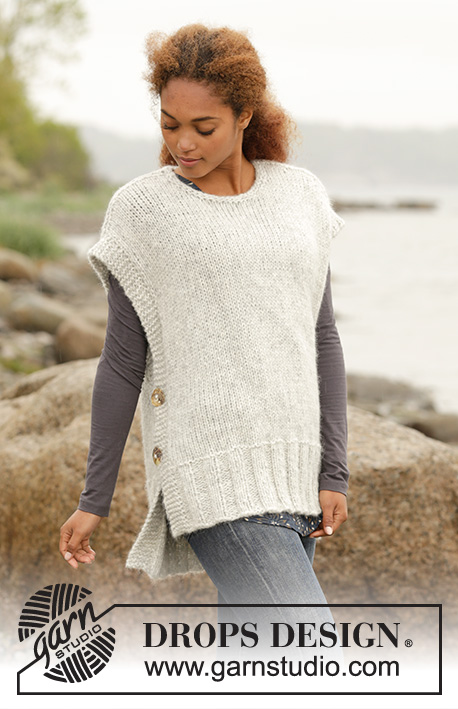
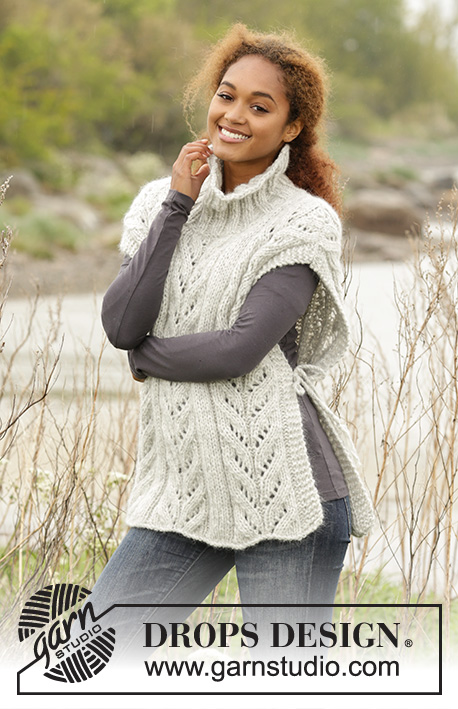
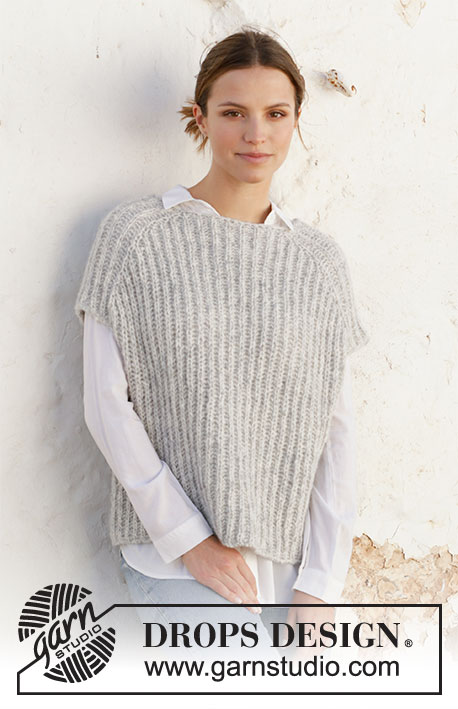
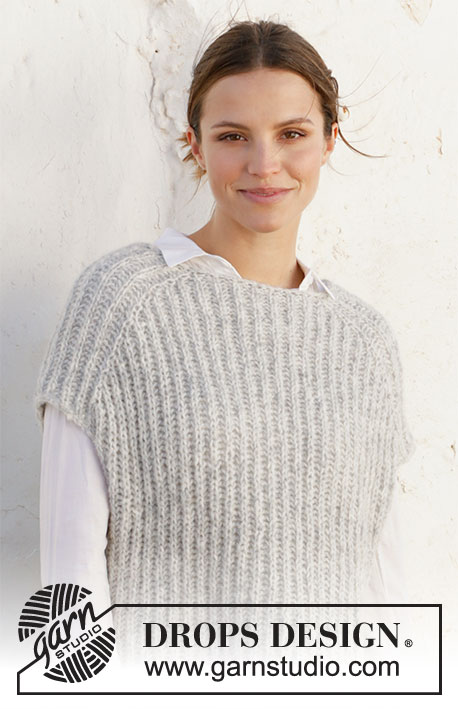
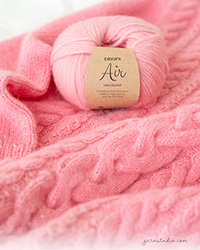
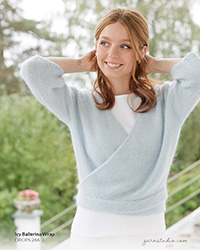
Knitted vest / slipover in DROPS Air. The piece is worked top down with English rib. Sizes XS - XXL.
DROPS 210-4 |
||||||||||||||||||||||||||||
|
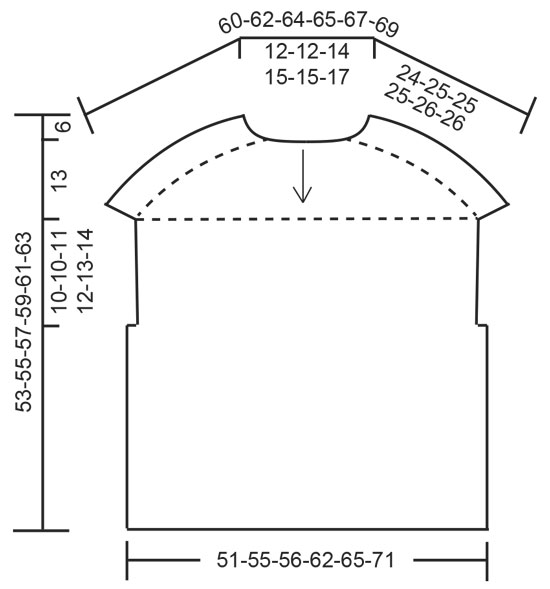
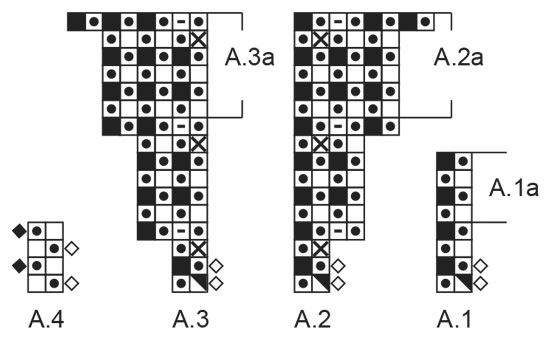
------------------------------------------------------- EXPLANATIONS FOR THE PATTERN: ------------------------------------------------------- RIDGE/GARTER STITCH (worked back and forth): Knit all rows. 1 ridge in height = Knit 2 rows. PATTERN: See diagrams A.1 to A.4 (worked with English rib). DECREASE TIP (evenly spaced): To work out how to decrease evenly, count the total number of stitches on needle (e.g. 62 stitches) and divide by number of decreases to be made (e.g. 10) = 6.2. In this example decrease by purling each 5th and 6th stitch together. ------------------------------------------------------- START THE PIECE HERE: ------------------------------------------------------- VEST – SHORT OVERVIEW OF THE PIECE: The neck and yoke are worked in the round with circular needle from mid back, top down. Stiches are increased for the shoulders before the piece is divided and the front and pieces worked separately as far as the bottom of the armholes. The pieces are rejoined and the body continued in the round. NECK: Cast on 62-62-66-70-70-74 stitches with circular needle size 6 mm and Air. Purl 1 round, purl 1 more round and decrease 10 stitches evenly spaced – read DECREASE TIP = 52-52-56-60-60-64 stitches. Purl 1 round. Change to circular needle size 7 mm. YOKE: Work pattern as follows: A.1 (= 2 stitches) over the first 6-6-6-8-8-8 stitches (= half back piece), A.2 (= 2 stitches), A.1 over 12 stitches, A.3 (= 2 stitches = shoulder), A.1 over 10-10-12-14-14-16 stitches (= front piece), A.2 over 2 stitches, A.1 over 12 stitches, A.3 over 2 stitches (= shoulder) and A.1 over the last 4-4-6-6-6-8 stitches (= half back piece). REMEMBER THE KNITTING TENSION! When A.1 has been completed 1 time in height, repeat A.1a onwards. When A.2 and A.3 have been completed 1 time in height, repeat A.2a and A.3a onwards; i.e. continue to increase every 6th round, the increased stitches are worked in English rib. When A.2a and A.3a have been worked a total of 8-9-9-10-11-12 times in height there are 132-140-144-156-164-176 stitches on the needle. Work A.1a over all stitches until the piece measures 24-25-25-25-26-26 cm at the longest point (i.e. measured along the shoulder); adjust so the next round is purled. Now divide the piece for front and back pieces and the shoulder stitches are cast off as follows: Work 26-28-28-32-34-36 stitches in English rib, 1 stitch in GARTER STITCH – read description above (= half back piece), cast off the next 13 stitches (yarn overs are cast off as separate stitches), 1 stitch in garter stitch, work 51-55-57-63-67-73 stitches in English rib, 1 stitch in garter stitch (= front piece), cast off the next 13 stitches (yarn overs are cast off as separate stitches), work 1 stitch in garter stitch and English rib over the last 25-27-29-31-33-37 stitches. Cut the strand. Now continue the armholes and back piece, working back and forth. Allow the other stitches to remain on the needle. BACK PIECE: = 53-57-59-65-69-75 stitches. Work as follows from the right side: 1 stitch in garter stitch, A.4 (= 2 stitches) until there is 1 stitch left (i.e. the English rib pattern starts and ends with 1 purled English rib stitch) and finish with 1 stitch in garter stitch. Continue this pattern back and forth for 10-10-11-12-13-14 cm, measured along the garter stitch; make sure the last row is from the wrong side. Allow the stitches to remain on the needle and work the front piece. FRONT PIECE: Work the 53-57-59-65-69-75 stitches on the front piece in the same way as the back piece. BODY: Work A.1a over the front piece (i.e. the garter stitches on each side become knitted English rib stitches), cast on 3 stitches, work A.1a over the back piece and cast on 3 stitches at the end of the row = 112-120-124-136-144-156 stitches. Now work A.1a in the round over all the stitches. On the first round work the 3 cast-on stitches under each sleeve without yarn overs. When the piece measures 47-49-51-53-55-57 cm (measured from the neck) cast off with knit; yarn overs are cast off as separate stitches (to avoid the cast-off edge being tight). |
||||||||||||||||||||||||||||
Diagram explanations |
||||||||||||||||||||||||||||
|
||||||||||||||||||||||||||||
 |
||||||||||||||||||||||||||||
 |
||||||||||||||||||||||||||||
Have you finished this pattern?Tag your pictures with #dropspattern #mountainmorainevest or submit them to the #dropsfan gallery. Do you need help with this pattern?You'll find 18 tutorial videos, a Comments/Questions area and more by visiting the pattern on garnstudio.com. © 1982-2026 DROPS Design A/S. We reserve all rights. This document, including all its sub-sections, has copyrights. Read more about what you can do with our patterns at the bottom of each pattern on our site. |
||||||||||||||||||||||||||||


With over 40 years in knitting and crochet design, DROPS Design offers one of the most extensive collections of free patterns on the internet - translated to 17 languages. As of today we count 324 catalogues and 12190 patterns translated into English (UK/cm).
We work hard to bring you the best knitting and crochet have to offer, inspiration and advice as well as great quality yarns at incredible prices! Would you like to use our patterns for other than personal use? You can read what you are allowed to do in the Copyright text at the bottom of all our patterns. Happy crafting!
Post a comment to pattern DROPS 210-4
We would love to hear what you have to say about this pattern!
If you want to leave a question, please make sure you select the correct category in the form below, to speed up the answering process. Required fields are marked *.