
Popular categories
Looking for a yarn?


Comments / Questions (40)
![]() Tini wrote:
Tini wrote:
Die cm-Angaben, z.B beim Rückenteil, dass man nach 15cm (Größe 110/116) 2 maschen anschlagen soll, ab wann gelten die 15cm? Ab dem ersten Anschlag, also inkl. Schultern oder erst ab den 58 Maschen, wenn man die Schultern mit dem Rückenteil verstrickt hat? Ich bin Anfängerin
01.12.2021 - 17:40DROPS Design answered:
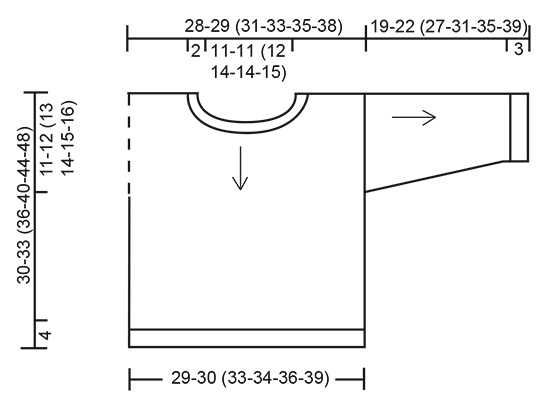
Liebe Tiri, messen Sie diese 15 cm vom Schulter an = Armausschnitt (siehe Maßskizze). Viel Spaß beim stricken!
02.12.2021 - 08:46
![]() Nan Bernard wrote:
Nan Bernard wrote:
What does this mean: Cast on 12-13 (14-14-16-17) stitches (including 1 edge stitch on each side)? Am I to cast on 12 stitches or 14 for the 6/9? What is an edge stitch?
30.09.2021 - 06:23DROPS Design answered:
Hi Nan, The 12 cast on stitches include the 2 edge stitches, so just cast on 12. Happy knitting!
30.09.2021 - 09:44
![]() Cristina Panuccio wrote:
Cristina Panuccio wrote:
Buon giorno. nelle istruzioni si parla di usare ferri circolari. poi le foto dimostrano i ferri "normali". Quali allora ? Grazie ! cordiali saluti Cristina
17.09.2021 - 08:37DROPS Design answered:
Buongiorno Cristina, al di fuori dell'Italia, è consuetudine utilizzare i ferri circolari anche per i lavori in piano come in questo caso. Dal momento che questo maglione è lavorato in parti separate, può utilizzare i ferri che ritiene più comodi. Buon lavoro!
17.09.2021 - 10:00
![]() Daniela wrote:
Daniela wrote:
Buongiorno, Sto realizzando le maniche. Mi chiedevo se si possono lavorare in tondo o se devo lavorarle come strisce e vanno cucite dopo. Non mi è molto chiaro come cucire tutto dopo. Grazie
11.04.2021 - 12:03DROPS Design answered:
Buongiorno Daniela, le maniche si lavorano in piano e vengono cucite alla fine del lavoro. Buon lavoro!
11.04.2021 - 12:09
![]() Manon wrote:
Manon wrote:
J aimerais savoir si je n utilise pas des aiguilles rondes est ce que ce patron convient merci
31.03.2021 - 19:08DROPS Design answered:
Bonjour Manon, bien sur, vous pouvez utiliser les aiguilles droites. Bon tricot!
31.03.2021 - 22:53
![]() Irja Syvertsen wrote:
Irja Syvertsen wrote:
Hello, is het eigenlijk nodig om dit op rondbreinaalden te breien? Is er een speciale reden om dit best zo te doen of kan het ook op gewone rechte naalden? Hartelijk 💖 dank alvast 🙏
08.02.2021 - 21:55DROPS Design answered:
Dag Irja,
Als je het werk in de rondte breit heb je geen zijnaden en geen naad onder de mouw. Je kan het werk ook heen en weer breien. Om een patroon aan te passen om op rechte naalden te breien hebben we een instructie gemaakt. Deze vind je hier.
23.02.2021 - 14:09
![]() Ilja wrote:
Ilja wrote:
Why it says in backpiece to knit one row to purl? Waarom bij het achterpand een rij averecht en bij het voorpand niet?
18.01.2021 - 18:55DROPS Design answered:
Dag Ilja,
Volgens mij moet deze naald averecht ook niet op het achterpand gebreid worden omdat je ribbelsteek breit, dus alle naalden recht. Ik zal het doorgeven aan de ontwerpafdeling om na te kijken.
22.01.2021 - 16:22
![]() Kvs wrote:
Kvs wrote:
Lurer på om man skal la 1+1 masker til ermehull stå åpne, eller om disse skal strikkes inn i videre arbeid?
10.01.2021 - 13:29DROPS Design answered:
Hei Kvs. De 2 maskene man legger om til ermehull skal strikkes inn i arbeidet (1 maske på hver side), slik at du nå har enten 48-50-54-56-60 eller 64 masker på pinnen, avhengig av hvilken str. du strikker. mvh DROPS design
15.01.2021 - 11:18
![]() Monika wrote:
Monika wrote:
Ich finde wenn man es von unten nach oben strickt sehen die Raender besser aus. Und die 28 M in 4,5 fuer das Aermelenden reichen nicht, viel zu eng. Hab den Aermel 3x gestrickt bis es endlich passte.
20.12.2020 - 22:43
![]() Sara wrote:
Sara wrote:
Hei! Jeg lurer på hvor man skal måle når dere skriver: «når arbeidet måler 11 cm» på feks bakstykket etter økning til halskant. Er det fra opplegg på halskanten eller fra oppleggskanten på skuldrene? Det utgjør en del forskjell. På forhånd takk, Sara
29.11.2020 - 09:06DROPS Design answered:
Hei Sara, Hvis ikke det står noe annet skal man måle fra oppleggskanten. God fornøyelse!
29.11.2020 - 11:41
|
||||
Baby Blue Note#babybluenotesweater |
||||
 |
 |
|||
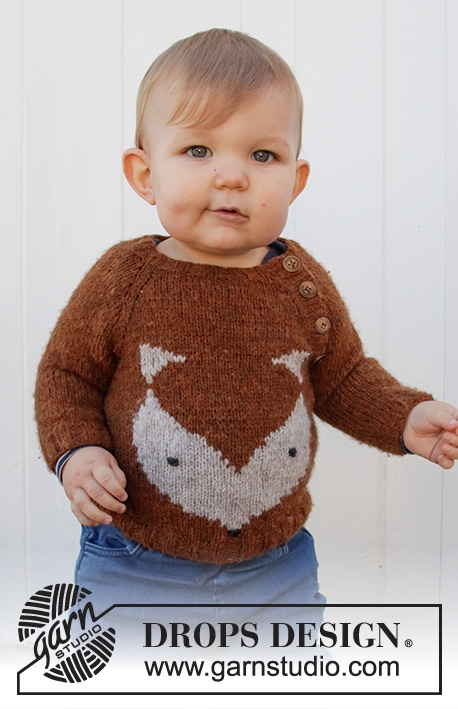
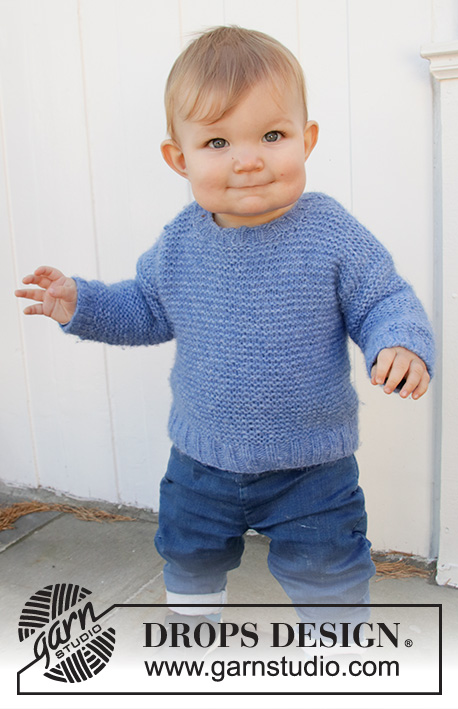
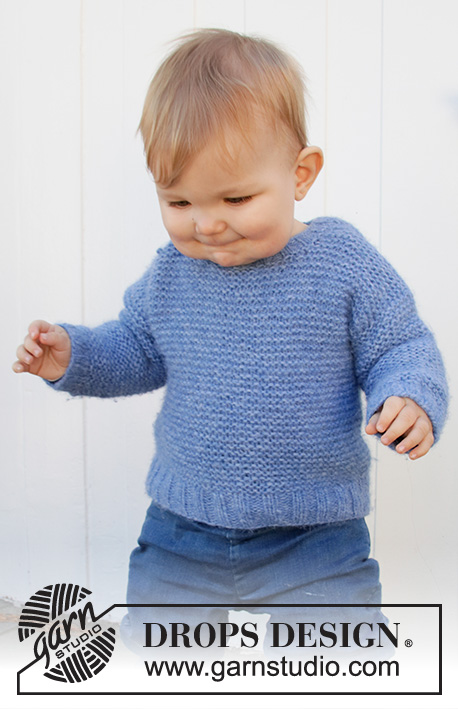
Knitted jumper for babies and children in DROPS Air. The piece is worked top down with garter stitch. Sizes 6 months – 8 years.
DROPS Baby 36-13 |
||||
|
------------------------------------------------------- EXPLANATIONS FOR THE PATTERN: ------------------------------------------------------- RIDGE/GARTER STITCH (worked back and forth): Knit all rows. 1 ridge in height = Knit 2 rows. INCREASE TIP: All increases are worked from the right side! Increase by making 1 yarn over between 2 stitches. The yarn over is worked twisted on the next row. DECREASE TIP (for sleeves): All decreases are worked from the right side. Decrease 1 stitch on each side of the piece as follows: Knit 1, slip 1 stitch as if to knit, knit 1, pass the slipped stitch over the knitted stitch (= 1 stitch decreased), knit until there are 3 stitches left, knit 2 together (= 1 stitch decreased) and knit 1. CASTING-OFF TIP: To avoid the cast-off edge being tight you can cast off with a larger size needle. If the edge is still tight, make 1 yarn over after approx. each 4th stitch at the same time as casting off and the yarn overs are cast off as normal stitches. ------------------------------------------------------- START THE PIECE HERE: ------------------------------------------------------- JUMPER – SHORT OVERVIEW OF THE PIECE: The piece is worked in sections, back and forth with circular needle, top down. The sections are sewn together and the neck is worked in the round to finish. BACK PIECE – SHORT OVERVIEW: Each shoulder is worked separately, stitches are increased for the neck before joining the shoulders by casting on stitches between them. RIGHT SHOULDER: Cast on 12-13 (14-14-16-17) stitches (including 1 edge stitch on each side) with circular needle size 5.5 mm and Air. Work GARTER STITCH – read description above over. When the piece measures 3 cm, increase 1 stitch for the neck inside the 1 stitch at the beginning of the next 2 rows from the right side – read INCREASE TIP = 14-15 (16-16-18-19) stitches. REMEMBER THE KNITTING TENSION! Work the last row from the wrong side. Lay the piece to one side and work the left shoulder. LEFT SHOULDER: Cast on and work as for the right shoulder but increase 1 stitch for the neck inside the 1 stitch at the end of 2 rows from the right side. BACK PIECE: Work the left and right shoulders together from the right side as follows: Work the 14-15 (16-16-18-19) stitches from the left shoulder, cast on 18-18 (20-22-22-24) stitches for the neck and work the 14-15 (16-16-18-19) stitches from the right shoulder = 46-48 (52-54-58-62) stitches. Continue back and forth with garter stitch. When the piece measures 11-12 (13-14-15-16) cm, cast on 1 stitch for the armholes at the end of the next 2 rows = 48-50 (54-56-60-64) stitches. When the piece measures 26-29 (32-36-40-44) cm (there is 4 cm left), increase 8-6 (6-8-8-8) stitches evenly spaced on the next row from the right side = 56-56 (60-64-68-72) stitches. Change to circular needle size 4.5 mm. Work rib from the right side as follows: Work 1 edge stitch in garter stitch, * knit 2, purl 2 *, work from *-* until there are 3 stitches left and finish with knit 2 and 1 edge stitch in garter stitch. Cast off with knit when the rib measures 4 cm – read CASTING-OFF TIP. FRONT PIECE – SHORT OVERVIEW: Each shoulder is worked separately, stitches are increased for the neck before joining the shoulders by casting on stitches between them. LEFT SHOULDER: Cast on 12-13 (14-14-16-17) stitches (including 1 edge stitch on each side) with circular needle size 5.5 mm and Air. Work garter stitch. When the piece measures 3-4 (4-5-5-6) cm, increase 1 stitch for the neck inside the stitch at the beginning of each row from the right side a total of 4 times = 16-17 (18-18-20-21) stitches. Work the last row from the wrong side. The piece measures approx. 5-6 (6-7-7-8) cm. Lay the piece to one side and work the right shoulder. RIGHT SHOULDER: Cast on and work as for the left shoulder but increase1 stitch on the inside of the 1 stitch at the end of 4 rows from the right side. FRONT PIECE: Work the right and left shoulder together from the right side as follows: Work the 16-17 (18-18-20-21) stitches from the right shoulder, cast on 14-14 (16-18-18-20) stitches for the neck and work the 16-17 (18-18-20-21) stitches from the left shoulder = 46-48 (52-54-58-62) stitches. Continue back and forth with garter stitch. When the piece measures 11-12 (13-14-15-16) cm, cast on 1 stitch for the armholes at the end of the next 2 rows = 48-50 (54-56-60-64) stitches. When the piece measures 26-29 (32-36-40-44) cm (there is 4 cm left), increase 8-6 (6-8-8-8) stitches evenly spaced on the next row from the right side = 56-56 (60-64-68-72) stitches. Change to circular needle size 4.5 mm. Work rib from the right side as follows: Work 1 edge stitch in garter stitch, * purl 2, knit 2 *, work from *-* until there are 3 stitches left and finish with purl 2 and 1 edge stitch in garter stitch. Cast off with knit when the rib measures 4 cm – remember CASTING-OFF TIP. SLEEVE: The sleeves are worked back and forth, top down. Cast on 35-38 (42-45-48-51) stitches with circular needle size 5.5 mm and Air. Work garter stitch. When the piece measures 3 cm, decrease 1 stitch on each side of the piece – read DECREASE TIP. Decrease like this every 3-3 (3-4-4-4) cm a total of 4-5 (6-6-7-8) times = 27-28 (30-33-34-35) stitches. When the sleeve measures 16-19 (24-28-32-36) cm (there is 3 cm left), increase 1-0 (2-3-2-1) stitches evenly spaced = 28-28 (32-36-36-36) stitches. Change to circular needle size 4.5 mm and work rib starting from the right side (= knit 2, purl 2). Cast off with knit when the sleeve measures 19-22 (27-31-35-39) cm. Work the other sleeve in the same way. ASSEMBLY: Sew the shoulder seams. Sew in the sleeves inside the 1 edge stitch and sew the sleeve and side seams in one go, inside the 1 edge stitch. NECK: The neck is worked in the round with double pointed needles. Pick up approx. 40 to 64 stitches (make sure the number is divisible by 4) with double pointed needles size 4.5 mm and inside the 1 edge stitch. Purl 1 round, then work rib (= knit 2, purl 2). Cast off with knit when the rib measures 2 cm. |
||||
Diagram explanations |
||||
|
||||
 |
||||
Have you finished this pattern?Tag your pictures with #dropspattern #babybluenotesweater or submit them to the #dropsfan gallery. Do you need help with this pattern?You'll find 25 tutorial videos, a Comments/Questions area and more by visiting the pattern on garnstudio.com. © 1982-2026 DROPS Design A/S. We reserve all rights. This document, including all its sub-sections, has copyrights. Read more about what you can do with our patterns at the bottom of each pattern on our site. |
||||


With over 40 years in knitting and crochet design, DROPS Design offers one of the most extensive collections of free patterns on the internet - translated to 17 languages. As of today we count 324 catalogues and 12290 patterns translated into English (UK/cm).
We work hard to bring you the best knitting and crochet have to offer, inspiration and advice as well as great quality yarns at incredible prices! Would you like to use our patterns for other than personal use? You can read what you are allowed to do in the Copyright text at the bottom of all our patterns. Happy crafting!
Post a comment to pattern DROPS Baby 36-13
We would love to hear what you have to say about this pattern!
If you want to leave a question, please make sure you select the correct category in the form below, to speed up the answering process. Required fields are marked *.