
Popular categories
Looking for a yarn?


Comments / Questions (40)
![]() Beate wrote:
Beate wrote:
Hallo, wird die Maschenprobe glatt oder kraus rechts gestrickt? In der Anleitung steht glatt, in den Kommentaren kraus... und in welcher Nadelstärke dann?
30.10.2025 - 00:03DROPS Design answered:
Liebe Beate, die Maschenprobe wird glatt rechts gestrickt. Der Pullover selbst wird kraus rechts gestrickt. Wahrscheinlich ist deswegen in der einen Antwort "kraus rechts" genannt worden, aber die 22 Reihen beziehen sich auf glatt rechts. Sie gehen erst mal von Nadel Nr. 5,5 aus, aber beachten Sie, dass Sie die Nadelstärke verwenden, mit der Sie die Maschenprobe erreichen. Viel Spaß beim Stricken!
30.10.2025 - 23:27
![]() Carley Davenport wrote:
Carley Davenport wrote:
When you are knitting the back panel do you measure the 11cm from the tip of the left or right shoulders? Or from the neck edge where you cast on 18sts? Thank you!
06.01.2025 - 23:39DROPS Design answered:
Dear Mrs Davenport, measure the 11 cm before increasing for armholes from cast on edge on shoulder. Happy knitting!
07.01.2025 - 09:51
![]() Stephanie wrote:
Stephanie wrote:
Hallo, mit welcher Nadelstärke wird denn die Maschenprobe gemacht? Wäre super, wenn das in der Anleitung stehen würde:) Lieben Dank und beste Grüße Stephanie
10.11.2024 - 13:03DROPS Design answered:
Liebe Stephanie, Maschenprobe wird mit den grösseren Nadeln Krausrechts gestrickt. Viel Spaß beim Stricken!
11.11.2024 - 09:26
![]() Anna wrote:
Anna wrote:
Hej! Finns det någon instruktionsvideo på hur man stickar halskanten? Jag tycker maskantalet låter lågt, ska man inte plocka upp för varje maska i halskanten? Jag är nybörjare och detta är min första tröja.
14.08.2024 - 11:05DROPS Design answered:
Hej Anna. Det finns dessvärre ingen video på hur man stickar halskanten, men i denna video och denna video ser du hur du plockar upp maskor längst kanter. Du plockar upp ca 40-64 maskor (ska vara delbart på 4). Mvh DROPS Design
16.08.2024 - 07:44
![]() Mona wrote:
Mona wrote:
What needle size is used for this gauge?
26.07.2024 - 03:45DROPS Design answered:
Hi Mona, the swatch is made on 5,5 mm needles. Happy knitting!
26.07.2024 - 09:02
![]() Rina wrote:
Rina wrote:
Wat mij opvalt, is dat je bij het achter- en voorpand moet meerderen voor de boord. Normaal gesproken (als je een trui van beneden naar boven breit) moet je meerderen vanaf het boord naar de rest van het werk.
15.01.2024 - 09:53DROPS Design answered:
Dag Rina,
Dat klopt. De boord trekt het werk samen en om dit te voorkomen wordt er gemeerderd, zodat hij meer recht doorloopt.
17.01.2024 - 17:57
![]() Kristin wrote:
Kristin wrote:
Hei:) Jeg er nybegynner i strikking og lurte på hvilken vanskelighetsgrad denne genseren har? Jeg har bare strikket pannebånd før og er veldig glad i å strikke med Drops Air:) Mvh Kristin
09.01.2024 - 12:39DROPS Design answered:
Hej Kristin, jo det fikser du :) Bare følg opskriften pind for pind og så spørg hvis du bliver usikker. Husk at skrive hvilken størrelse du strikker og hvor du er i opskriften :)
11.01.2024 - 15:17
![]() Annika wrote:
Annika wrote:
Hej! Såg att någon annan har frågat exakt detta men fick inte svar på själva frågan. Nämligen om man ska mäta från uppläggningskanten för halsen eller uppläggningskanten för skuldran när man mäter för nya maskor till ärmhålan?
10.11.2023 - 22:21DROPS Design answered:
Hei Annika. Hvis ikke det står noe annet skal man måle fra oppleggskanten. I denne oppskriften er oppleggskanten høyre skulder/venstre skulder. Det er her genseren starter (ikke ved halskanten). Målene kan man også sjekke ved å se på målskissen, den finner du nederst på oppskriften. mvh DROPS Design
13.11.2023 - 13:45
![]() Jette Dam wrote:
Jette Dam wrote:
Kan jeg bruge denne opskrift til en vest og så bare strikke rib på ærmegabet? Og er der en lignende opskrift i str 3 måneder?
07.11.2023 - 07:50DROPS Design answered:
Hej Jette, ja det kan du gøre, men sørg for at ærmegabet ikke bliver for lille. Her kan du se hvilke veste vi har til baby: Toppe & Veste til baby
09.11.2023 - 15:37
![]() Michaela wrote:
Michaela wrote:
Ich stricke die Droos Anleitungen sehr gerne, leider vermisse ich genauere Maßangaben. Die unter Ärmelweite sowie die Tiefe des Halsausschnittes fehlen. Das ist Schade, ich musste deswegen schon oftmals fertige Arbeiten auftrennen. Vielleicht könnte man diese Maße in Zukunftmin die Diagramme einfügen. LG Michaela
15.10.2023 - 16:54DROPS Design answered:
Liebe Michaela, danke für den Vorschlag. Viel Spaß beim stricken!
16.10.2023 - 09:59
|
||||
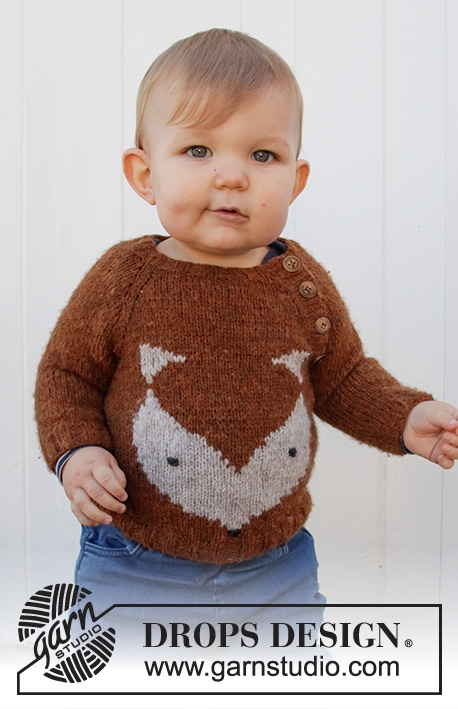
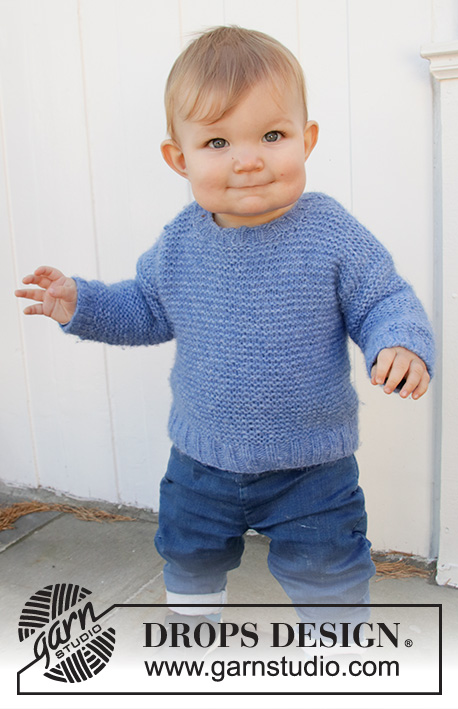
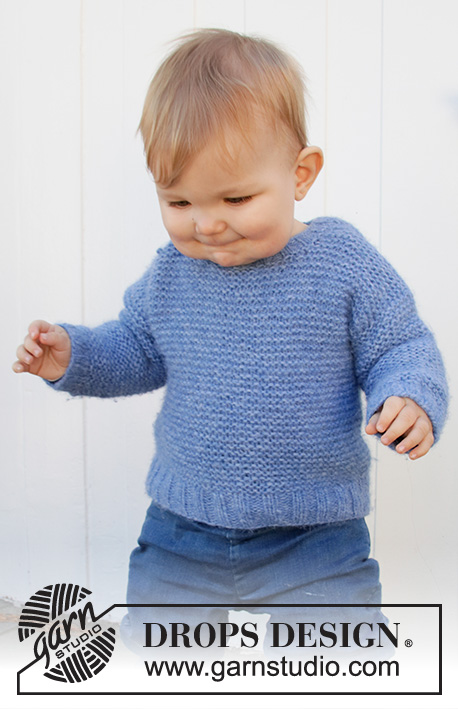
Baby Blue Note#babybluenotesweater |
||||
 |
 |
|||
Knitted jumper for babies and children in DROPS Air. The piece is worked top down with garter stitch. Sizes 6 months – 8 years.
DROPS Baby 36-13 |
||||
|
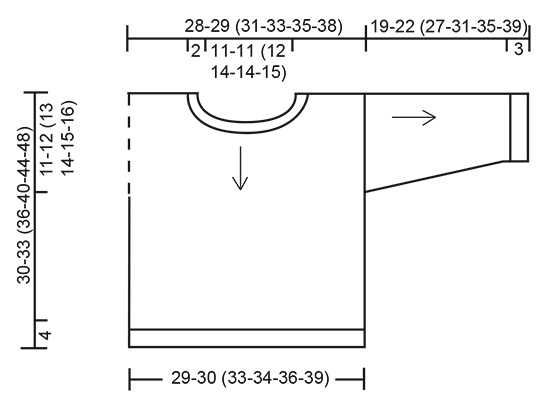
------------------------------------------------------- EXPLANATIONS FOR THE PATTERN: ------------------------------------------------------- RIDGE/GARTER STITCH (worked back and forth): Knit all rows. 1 ridge in height = Knit 2 rows. INCREASE TIP: All increases are worked from the right side! Increase by making 1 yarn over between 2 stitches. The yarn over is worked twisted on the next row. DECREASE TIP (for sleeves): All decreases are worked from the right side. Decrease 1 stitch on each side of the piece as follows: Knit 1, slip 1 stitch as if to knit, knit 1, pass the slipped stitch over the knitted stitch (= 1 stitch decreased), knit until there are 3 stitches left, knit 2 together (= 1 stitch decreased) and knit 1. CASTING-OFF TIP: To avoid the cast-off edge being tight you can cast off with a larger size needle. If the edge is still tight, make 1 yarn over after approx. each 4th stitch at the same time as casting off and the yarn overs are cast off as normal stitches. ------------------------------------------------------- START THE PIECE HERE: ------------------------------------------------------- JUMPER – SHORT OVERVIEW OF THE PIECE: The piece is worked in sections, back and forth with circular needle, top down. The sections are sewn together and the neck is worked in the round to finish. BACK PIECE – SHORT OVERVIEW: Each shoulder is worked separately, stitches are increased for the neck before joining the shoulders by casting on stitches between them. RIGHT SHOULDER: Cast on 12-13 (14-14-16-17) stitches (including 1 edge stitch on each side) with circular needle size 5.5 mm and Air. Work GARTER STITCH – read description above over. When the piece measures 3 cm, increase 1 stitch for the neck inside the 1 stitch at the beginning of the next 2 rows from the right side – read INCREASE TIP = 14-15 (16-16-18-19) stitches. REMEMBER THE KNITTING TENSION! Work the last row from the wrong side. Lay the piece to one side and work the left shoulder. LEFT SHOULDER: Cast on and work as for the right shoulder but increase 1 stitch for the neck inside the 1 stitch at the end of 2 rows from the right side. BACK PIECE: Work the left and right shoulders together from the right side as follows: Work the 14-15 (16-16-18-19) stitches from the left shoulder, cast on 18-18 (20-22-22-24) stitches for the neck and work the 14-15 (16-16-18-19) stitches from the right shoulder = 46-48 (52-54-58-62) stitches. Continue back and forth with garter stitch. When the piece measures 11-12 (13-14-15-16) cm, cast on 1 stitch for the armholes at the end of the next 2 rows = 48-50 (54-56-60-64) stitches. When the piece measures 26-29 (32-36-40-44) cm (there is 4 cm left), increase 8-6 (6-8-8-8) stitches evenly spaced on the next row from the right side = 56-56 (60-64-68-72) stitches. Change to circular needle size 4.5 mm. Work rib from the right side as follows: Work 1 edge stitch in garter stitch, * knit 2, purl 2 *, work from *-* until there are 3 stitches left and finish with knit 2 and 1 edge stitch in garter stitch. Cast off with knit when the rib measures 4 cm – read CASTING-OFF TIP. FRONT PIECE – SHORT OVERVIEW: Each shoulder is worked separately, stitches are increased for the neck before joining the shoulders by casting on stitches between them. LEFT SHOULDER: Cast on 12-13 (14-14-16-17) stitches (including 1 edge stitch on each side) with circular needle size 5.5 mm and Air. Work garter stitch. When the piece measures 3-4 (4-5-5-6) cm, increase 1 stitch for the neck inside the stitch at the beginning of each row from the right side a total of 4 times = 16-17 (18-18-20-21) stitches. Work the last row from the wrong side. The piece measures approx. 5-6 (6-7-7-8) cm. Lay the piece to one side and work the right shoulder. RIGHT SHOULDER: Cast on and work as for the left shoulder but increase1 stitch on the inside of the 1 stitch at the end of 4 rows from the right side. FRONT PIECE: Work the right and left shoulder together from the right side as follows: Work the 16-17 (18-18-20-21) stitches from the right shoulder, cast on 14-14 (16-18-18-20) stitches for the neck and work the 16-17 (18-18-20-21) stitches from the left shoulder = 46-48 (52-54-58-62) stitches. Continue back and forth with garter stitch. When the piece measures 11-12 (13-14-15-16) cm, cast on 1 stitch for the armholes at the end of the next 2 rows = 48-50 (54-56-60-64) stitches. When the piece measures 26-29 (32-36-40-44) cm (there is 4 cm left), increase 8-6 (6-8-8-8) stitches evenly spaced on the next row from the right side = 56-56 (60-64-68-72) stitches. Change to circular needle size 4.5 mm. Work rib from the right side as follows: Work 1 edge stitch in garter stitch, * purl 2, knit 2 *, work from *-* until there are 3 stitches left and finish with purl 2 and 1 edge stitch in garter stitch. Cast off with knit when the rib measures 4 cm – remember CASTING-OFF TIP. SLEEVE: The sleeves are worked back and forth, top down. Cast on 35-38 (42-45-48-51) stitches with circular needle size 5.5 mm and Air. Work garter stitch. When the piece measures 3 cm, decrease 1 stitch on each side of the piece – read DECREASE TIP. Decrease like this every 3-3 (3-4-4-4) cm a total of 4-5 (6-6-7-8) times = 27-28 (30-33-34-35) stitches. When the sleeve measures 16-19 (24-28-32-36) cm (there is 3 cm left), increase 1-0 (2-3-2-1) stitches evenly spaced = 28-28 (32-36-36-36) stitches. Change to circular needle size 4.5 mm and work rib starting from the right side (= knit 2, purl 2). Cast off with knit when the sleeve measures 19-22 (27-31-35-39) cm. Work the other sleeve in the same way. ASSEMBLY: Sew the shoulder seams. Sew in the sleeves inside the 1 edge stitch and sew the sleeve and side seams in one go, inside the 1 edge stitch. NECK: The neck is worked in the round with double pointed needles. Pick up approx. 40 to 64 stitches (make sure the number is divisible by 4) with double pointed needles size 4.5 mm and inside the 1 edge stitch. Purl 1 round, then work rib (= knit 2, purl 2). Cast off with knit when the rib measures 2 cm. |
||||
Diagram explanations |
||||
|
||||
 |
||||
Have you finished this pattern?Tag your pictures with #dropspattern #babybluenotesweater or submit them to the #dropsfan gallery. Do you need help with this pattern?You'll find 25 tutorial videos, a Comments/Questions area and more by visiting the pattern on garnstudio.com. © 1982-2026 DROPS Design A/S. We reserve all rights. This document, including all its sub-sections, has copyrights. Read more about what you can do with our patterns at the bottom of each pattern on our site. |
||||


With over 40 years in knitting and crochet design, DROPS Design offers one of the most extensive collections of free patterns on the internet - translated to 17 languages. As of today we count 324 catalogues and 12290 patterns translated into English (UK/cm).
We work hard to bring you the best knitting and crochet have to offer, inspiration and advice as well as great quality yarns at incredible prices! Would you like to use our patterns for other than personal use? You can read what you are allowed to do in the Copyright text at the bottom of all our patterns. Happy crafting!
Post a comment to pattern DROPS Baby 36-13
We would love to hear what you have to say about this pattern!
If you want to leave a question, please make sure you select the correct category in the form below, to speed up the answering process. Required fields are marked *.