
Popular categories
Looking for a yarn?


Comments / Questions (38)
![]() Marie wrote:
Marie wrote:
Hallo liebes Drops-Team, kann ich statt der drei Fäden Brushed Silk auch die Drops Wish mit einem Faden verwenden? Die Maschenprobe ist laut der Beschreibung dieselbe. Wenn ja, wie viel Gramm brauche ich für Größe "L"? Da sie "Wish" noch so neu ist, gibt es kaum Anleitungen für einen Cardigan... Herzlichen Dank, Ihr helft mir sehr weiter!! Marie
28.06.2021 - 15:07DROPS Design answered:
Liebe Marie, es könnte vielleicht auch mal with nur Wish passen (siehe alle unseren Anleitung von der Garngruppe E mit 10 M = 10 cm hier) - am besten immer eine Maschenprobe stricken. Hier lesen Sie mehr - Ihr Laden wird Ihnen noch damit weiterhelfen - auch telefonisch oder per E-Mail. Viel Spaß beim stricken!
28.06.2021 - 16:06
![]() Monika Rock wrote:
Monika Rock wrote:
Alles in Allem sehr gut beschrieben.
13.12.2020 - 05:07
![]() Jill Kingscott wrote:
Jill Kingscott wrote:
How many balls of wool for each colorare needed to make this sweater in a large size?
21.11.2020 - 23:03DROPS Design answered:
Dear Jill, for size L, you'd need: -color 11: 4 balls - color 03: 6 balls - color 02: 5 balls - color 01 : 1 ball (All of them of DROPS Brushed Alpaca Silk, where 1 ball is 25gr) Happy knitting!
21.11.2020 - 23:11
![]() Lena wrote:
Lena wrote:
Hallo, könnte ich als Garnalternative Drops Big Merino verwenden? Wenn ja, wissen Sie wie viele Garn ich benötige für Größe L? Herzlichen Dank im Voraus.
13.08.2020 - 16:52
![]() Myriam DEVAUCHELLE wrote:
Myriam DEVAUCHELLE wrote:
Merci beaucoup, vos explications sont toujours claires et très utiles
12.07.2020 - 12:07
![]() Myriam DEVAUCHELLE wrote:
Myriam DEVAUCHELLE wrote:
Au titre de "l'empiècement", vous indiquez: - tricoter un rang endroit sur l'endroit - le rang retour "à l'endroit" sur l'envers - continuer en jersey si je comprends bien on tricote donc trois rangs à l'endroit, est ce bien cela? merci d'avance
09.07.2020 - 19:09DROPS Design answered:
Bonjour Mme Devauchelle, vous tricotez d'abord 2 rangs jersey: 1 sur l'endroit en augmentant + 1 sur l'envers (à l'endroit = on a une côte mousse). On met des marqueurs sans tricoter et au rang suivant (= le 3ème rang après le col), on continue avec l'aiguille 8 en commençant à augmenter pour le raglan. Bon tricot!
10.07.2020 - 07:55
![]() Myriam DEVAUCHELLE wrote:
Myriam DEVAUCHELLE wrote:
Merci de votre réponse, c'est très clair.
31.03.2020 - 10:51
![]() Myriam DEVAUCHELLE wrote:
Myriam DEVAUCHELLE wrote:
Bonjour, au titre de l'empiècement, vous indiquez de poser 4 marqueurs et de faire 13 augmentations, ce que j'ai fait et j'obtiens bien pour la taille M , 173 mailles. vous indiquez ensuite d'augmenter encore 2 fois mais seulement sur les devaints et le dos, cela signifie t'il que les augmentations doivente se faire au niveau du 1° et du 4° marqueurs, ou au niveau du 2° et du 3°? merci de votre réponse à venir.
30.03.2020 - 20:12DROPS Design answered:
Bonjour Mme Devauchelle, pour augmenter sur les devants et le dos seulement, augmentez avant le 1er marqueur (devant), après le 2ème marqueur (= début du dos), avant le 3ème marqueur (fin du dos) et après le 4ème marqueur (début du devant) = 4 augmentations. (= vous n'augmentez pas après le 1er/avant le 2ème = 1ère manche ni après le 3ème/avant le 4ème = 2ème manche). Bon tricot!
31.03.2020 - 09:20
![]() Annette wrote:
Annette wrote:
Hej. Kan man bruge Drops Air til denne opskrift i stedet for? Hvis ja .....er det så 1 eller flere tråde? Vh Annette
29.03.2020 - 20:03DROPS Design answered:
Hej Annette, Ja du kan bruge DROPS Air istedet for Brushed, men da jakken er strikket i 3 tråde, tror jeg du skal bruge 2 tråde Air. Tjek din strikkefasthed så du får 10,5 masker i bredden på 10 cm. God fornøjelse!
14.04.2020 - 15:57
![]() Myriam DEVAUCHELLE wrote:
Myriam DEVAUCHELLE wrote:
Merci beaucoup. J'ai fini le col et je passe à l'empiècement. A bientôt certainement, c'est la première fois que je travaille de haut en bas
10.03.2020 - 10:40
|
|
Forest Shadows#forestshadowsjacket |
|
 |
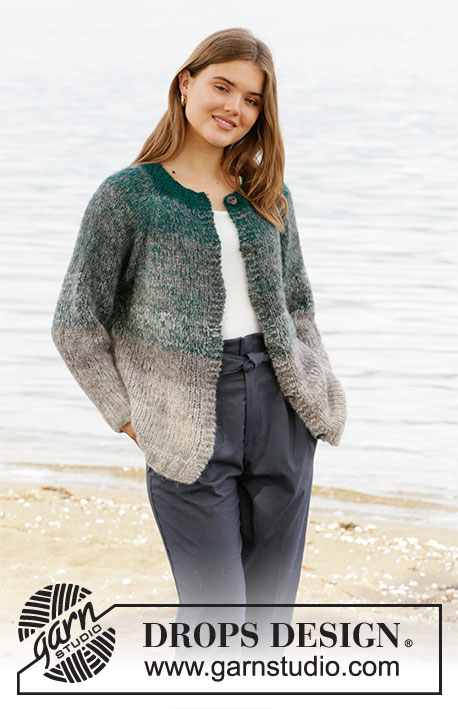 |
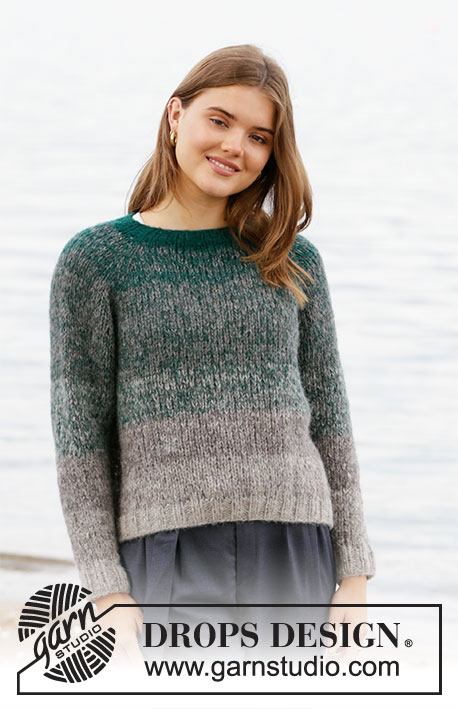
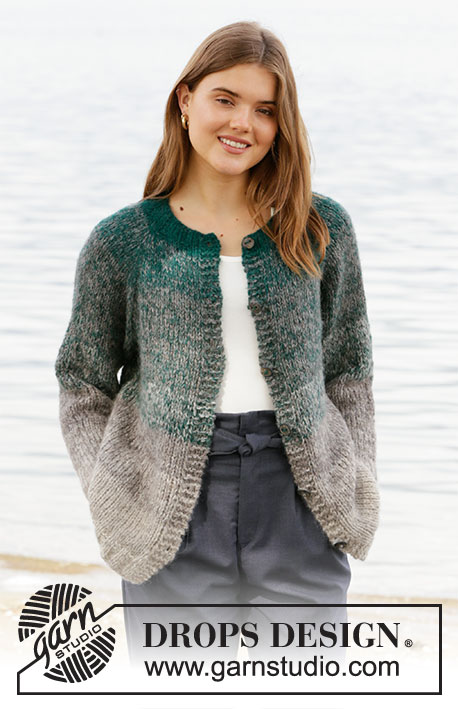
Knitted jacket with raglan in 3 strands DROPS Brushed Alpaca Silk. The piece is worked top down with stripes. Sizes S - XXXL.
DROPS 207-16 |
|
|
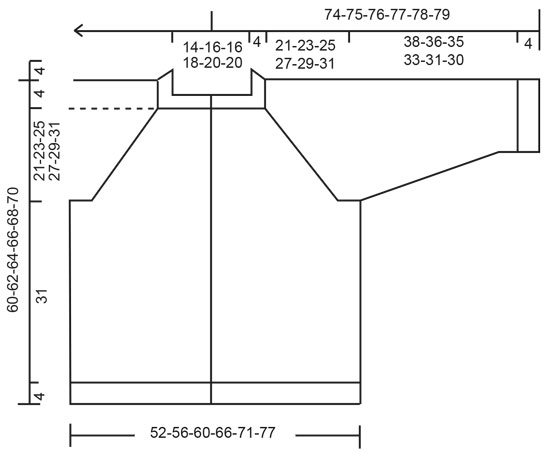
------------------------------------------------------- EXPLANATIONS FOR THE PATTERN: ------------------------------------------------------- RIDGE/GARTER STITCH (worked back and forth): Knit all rows. 1 ridge in height = Knit 2 rows. INCREASE TIP (evenly spaced): To work out how to increase evenly, count the total number of stitches on the needle (e.g. 54 stitches) minus the band stitches (= 8 stitches) and divide the remaining stitches by the number of increases to be made (e.g. 11) = 4.1. In this example, increase by making 1 yarn over after approx. each 4th stitch. On the next row work the yarn overs twisted to avoid holes. STRIPES-1: All stripes are worked with 3 strands. STRIPE 1: 7-7-8-8-8-9 cm with 2 strands forest green + 1 strand grey. STRIPE 2: 14-14-16-16-16-18 cm with 2 strands grey + 1 strand forest green. STRIPE 3: 7-7-8-8-8-9 cm with 1 strand forest green + 1 strand grey + 1 strand light grey. STRIPE 4: 7-7-8-8-8-9 cm with 2 strands grey + 1 strand light grey. STRIPE 5: 7-7-8-8-8-9 cm with 1 strand grey + 2 strands light grey. STRIPE 6: Work with 3 strands light grey as far as the rib. STRIPE 7: Work rib with 2 strands light grey + 1 strand off-white STRIPES-2 (for sleeves): All stripes are worked with 3 strands. Continue with STRIPES-1 – read description above, until stripe 3 is finished. The sleeve measures approx. 8-6-8-6-4-6 cm from the division. Continue the stripes as follows: STRIPE 4: 13-13-12-12-12-11 cm with 2 strands grey + 1 strand light grey. STRIPE 5: 13-13-12-12-12-11 cm with 1 strand grey + 2 strands light grey. STRIPE 6: Work with 3 strands light grey to finished length. RAGLAN: All increases are worked from the right side! Increase 1 stitch on each side of the marker thread in each transition between body and sleeves (= 8 stitches increased on the round) as follows: Work until there is 1 stitch left before marker thread, 1 yarn over, knit 2 (marker thread sits between these 2 stitches), 1 yarn over (= 2 stitches increased). Repeat at all marker threads. On the next row purl the yarn overs twisted to avoid holes. Then work the new stitches in stocking stitch. DECREASE TIP (for sleeves): Decrease 1 stitch on each side of the marker thread as follows: Work until there are 3 stitches left before the marker thread, knit 2 together, knit 2 (marker thread sits between these 2 stitches), slip 1 stitch as if to knit, knit 1 and pass the slipped stitch over the knitted stitch. BUTTONHOLES: Work buttonholes on the right band (when the garment is worn). Work from the right side when there are 3 stitches left on the row as follows: Make 1 yarn over, knit 2 together and knit 1. On the next row (wrong side), knit the yarn over to leave a hole. The first buttonhole is worked when the rib on the neck measures 2 cm. Then work the other 5-5-5-5-5-6 buttonholes with approx. 9½-9½-10-10-10-10 cm between each one. ------------------------------------------------------- START THE PIECE HERE: ------------------------------------------------------- JACKET – SHORT OVERVIEW OF THE PIECE: The piece is worked back and forth with circular needle, top down. The sleeves are worked in the round with short circular needle/double pointed needles. NECK: Cast on 54-58-58-62-66-66 stitches with circular needle size 6 mm and 3 strands forest green. Purl 1 row from the wrong side. Then work as follows: 4 band stitches in GARTER STITCH – read description above, rib (= knit 2 / purl 2) until there are 6 stitches left on the row, knit 2 and 4 band stitches in garter stitch. REMEMBER THE BUTTONHOLE on the right band – read description above. When the rib measures 4 cm, insert 1 marker in the piece. THE PIECE IS NOW MEASURED FROM HERE! YOKE: Knit 1 row from the right side where you increase 11-11-11-11-15-19 stitches evenly spaced – read INCREASE TIP = 65-69-69-73-81-85 stitches. Knit 1 row back from the wrong side (band stitches are knitted). Change to circular needle size 8 mm. Now insert 4 marker threads in the piece as follows: Insert the first marker thread after the first 14-15-15-16-18-19 stitches, skip the next 8 stitches (= sleeve), insert the next thread here, skip the next 21-23-23-25-29-31 stitches (= back piece), insert the next thread here, skip the next 8 stitches (= sleeve), insert the last thread here; there are 14-15-15-16-18-19 stitches between the last marker thread and end of row. Continue with stocking stitch and 4 band stitches in garter stitch on each side and work STRIPES-1 – read description above. AT THE SAME TIME on the first row from the right side begin to increase to RAGLAN – read description above. Increase like this every 2nd row a total of 12-13-15-16-16-17 times = 161-173-189-201-209-221 stitches. Then continue to increase every 2nd row on the front and back pieces (do not increase further on the sleeves = 4 stitches increased on round) 2-2-2-2-3-4 more times = 169-181-197-209-221-237 stitches. Continue working without increasing until the piece measures 21-23-25-27-29-31 cm. The next row from the wrong side is worked as follows: Work the first 28-30-32-34-37-40 stitches (= right front piece), place the next 32-34-38-40-40-42 stitches on 1 thread for sleeve, cast on 6-6-6-8-8-8 new stitches on the needle (= in side under sleeve), work the next 49-53-57-61-67-73 stitches (= back piece), place the next 32-34-38-40-40-42 stitches on 1 thread for sleeve, cast on 6-6-6-8-8-8 new stitches on the needle (= in side under sleeve), work the remaining 28-30-32-34-37-40 stitches (= left front piece). Measure now from here! BODY: = 117-125-133-145-157-169 stitches. Continue back and forth with STRIPES-1, stocking stitch and 4 band stitches in garter stitch on each side. When the piece measures 31 cm from the division, increase 17-21-21-21-25-25 stitches evenly spaced – remember INCREASE TIP = 134-146-154-166-182-194 stitches. Change to circular needle size 6 mm and work rib as follows: 4 band stitches in garter stitch, rib (= knit 2 / purl 2) until there are 6 stitches left on the row, knit 2 and finish with 4 band stitches in garter stitch. When the rib measures 4 cm, cast off with knit over knit and purl over purl. The jacket measures approx. 60-62-64-66-68-70 cm from the shoulder down. SLEEVE: Place the 32-34-38-40-40-42 stitches from the thread on the one side of the piece on short circular needle/double pointed needles size 8 mm and knit up 1 stitch in each of the 6-6-6-8-8-8 stitches cast on under the sleeve = 38-40-44-48-48-50 stitches. Insert a marker thread in the middle of the new stitches (= 3-3-3-4-4-4 new stitches on each side of the thread). Work stocking stitch and STRIPES-2; at the same time when the sleeve measures 4 cm decrease 2 stitches under the sleeve - read DECREASE TIP. Decrease like this every 4½-3½-3-2-2-2 cm a total of 7-8-9-11-10-11 times = 24-24-26-26-28-28 stitches. When the piece measures 38-36-35-33-31-30 cm (shorter measurements in larger sizes due to longer yoke) increase 4-4-6-6-8-8 stitches evenly spaced = 28-28-32-32-36-36 stitches. Change to double pointed needles size 6 mm and work rib (= knit 2 / purl 2) for 4 cm. Cast off with knit over knit and purl over purl. Cut and fasten the strands. The sleeve measures approx. 42-40-39-37-35-34 cm from the division. Work the other sleeve in the same way. ASSEMBLY: Sew buttons onto left band. |
|
 |
|
Have you finished this pattern?Tag your pictures with #dropspattern #forestshadowsjacket or submit them to the #dropsfan gallery. Do you need help with this pattern?You'll find 27 tutorial videos, a Comments/Questions area and more by visiting the pattern on garnstudio.com. © 1982-2026 DROPS Design A/S. We reserve all rights. This document, including all its sub-sections, has copyrights. Read more about what you can do with our patterns at the bottom of each pattern on our site. |
|


With over 40 years in knitting and crochet design, DROPS Design offers one of the most extensive collections of free patterns on the internet - translated to 17 languages. As of today we count 324 catalogues and 12290 patterns translated into English (UK/cm).
We work hard to bring you the best knitting and crochet have to offer, inspiration and advice as well as great quality yarns at incredible prices! Would you like to use our patterns for other than personal use? You can read what you are allowed to do in the Copyright text at the bottom of all our patterns. Happy crafting!
Post a comment to pattern DROPS 207-16
We would love to hear what you have to say about this pattern!
If you want to leave a question, please make sure you select the correct category in the form below, to speed up the answering process. Required fields are marked *.