
Popular categories
Looking for a yarn?


Comments / Questions (30)
![]() Britt-Marie Dahlberg wrote:
Britt-Marie Dahlberg wrote:
Mönster 139-34. Bild på Diagram M1 saknas i mönstret. Finns endast Diagram förklaring.
14.04.2026 - 10:18DROPS Design answered:
Hej Britt-Marie, det er til højre for måleskitsen nederst i mønsteret :)
14.04.2026 - 13:21
![]() Linda Harrison wrote:
Linda Harrison wrote:
I am not sure if I am going crazy, but I can't find the Diagram M1 for the pattern!
14.12.2023 - 06:02DROPS Design answered:
Hi Linda, The diagram is to the right of the size chart (small and under the sleeve). Happy knitting!
14.12.2023 - 06:45
![]() Charlotte wrote:
Charlotte wrote:
Awful. Took me ages to make it and it's tiny ! I made a size medium as I'm a UK 10-12 and it honestly would struggle to fit a child. Waste of time and money.
02.01.2022 - 01:27
![]() Annette Strömgård wrote:
Annette Strömgård wrote:
Det står att alla varv är räta ,men sen att man ska sticka avigt på avigan ?
05.09.2019 - 18:53
![]() Eva wrote:
Eva wrote:
Under ärmen på diagrammet som vanligt!
15.09.2013 - 21:39
![]() Em wrote:
Em wrote:
Hab mir inzwischen Muster M2 von Modell 130-11 herausgesucht und nehme das als Muster, schaue mir aber das Video noch an und versuche dann noch einmal eine Maschenprobe.
30.05.2013 - 01:45
![]() Em wrote:
Em wrote:
Hi! Danke fuer die Antwort, hab immer auf die Maschenanzahl geachtet und auch mit Umschlag begonnen, etc. Ich habs dann noch damit probiert, ab der Haelfte der Hinreihe nicht 2 Maschen zusammenzustricken, sondern 1 Masche rechts abheben, 1 Masche abstricken, abgehobene Masche ueberziehen. Dann wurde es gerade und hat nicht auf eine Seite gezogen, aber die beiden Haelften haben mir fuer meinen Geschmack dann zu unterschiedlich ausgesehen.
30.05.2013 - 01:42
![]() Sandra wrote:
Sandra wrote:
Lo he hecho y sienta muy bien. Un punto muy lucido!!!
02.03.2013 - 14:13
![]() Trine wrote:
Trine wrote:
Opskrift 139-34 Når jeg strikker ifølge opskriften bliver arbejdet skævt. Dvs. ryggen set fra retten bliver 1 maske mindre i højre side og 1 maske større i venstre side. Maskeantallet bliver korrekt ved de 74 (large). Hvad gør jeg forkert?
23.09.2012 - 10:18DROPS Design answered:
Sørg for at omslagen ikke ligger lige oven over hinanden, de skal ligge forskudt i zigzag.
04.12.2012 - 12:20
![]() Sissel Johnsen wrote:
Sissel Johnsen wrote:
Har jeg skjont mønstret riktig? 1 kantmaske , kast , 2 rett sammen , kast 2 rett sammen osv. Og på vrangen , 1 kantmaske , kast, 2 vrang sammen , kast ,2 vrang sammen osv. Har strikket noen prøve lapper ,men synes ikke det ligner bilde .
09.07.2012 - 11:43DROPS Design answered:
Ja, det var korrekt. Mønstret bliver først helt tydeligt efter en 7-8 pinde.
25.12.2012 - 17:02
|
|||||||
Holly#hollycardigan |
|||||||
 |
 |
||||||
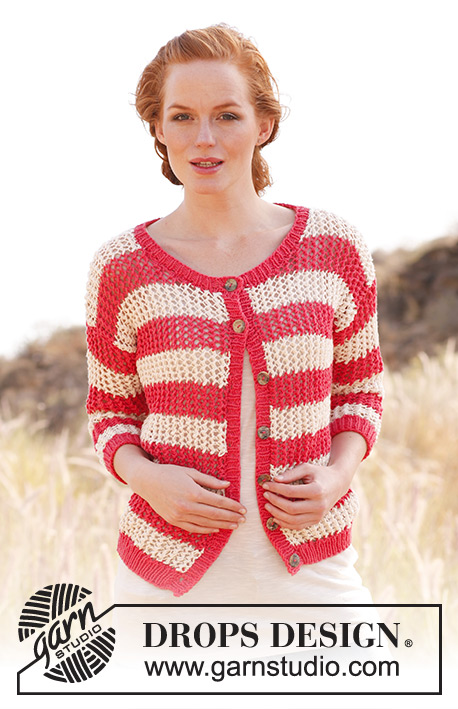
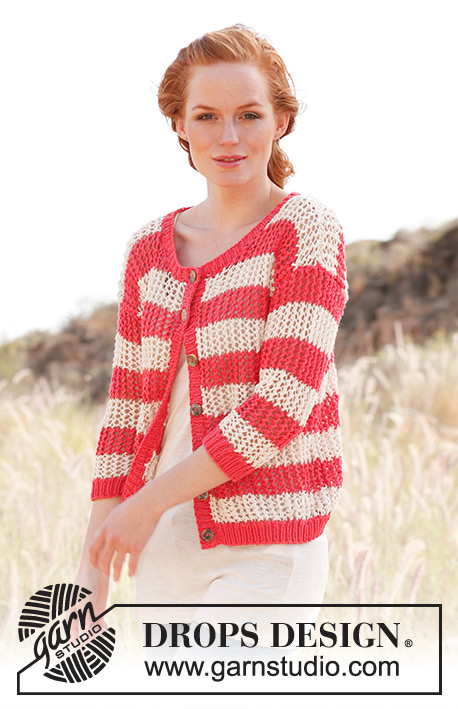
Knitted DROPS jacket with lace pattern in ”Paris”. Size S-XXXL.
DROPS 139-34 |
|||||||
|
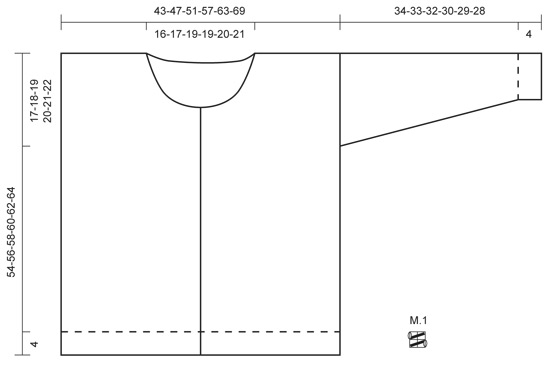
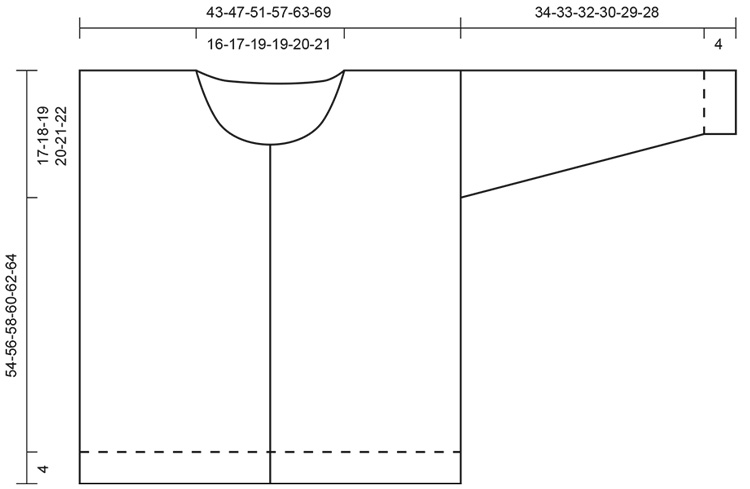
GARTER ST (back and forth on needle): K all rows. NOTE: All edge sts are worked in garter st. PATTERN: See diagram M.1. The diagram shows both rows in the pattern seen from RS. STRIPES: Work * 10 rows off white, 10 rows raspberry *. Repeat from *-*. INCREASE TIP: Inc 1 st by getting the thread between 2 sts from previous row - K this st twisted, i.e. work in back loop of st instead of front to avoid holes. NOTE: Work inc sts in stocking st until they can be worked in pattern in each side. ---------------------------------------------------------- BACK PIECE: Worked back and forth on needle. Cast on 70-76-82-94-102-110 sts with raspberry on circular needle size 4.5 mm. Work rib (K 1/P 1) with 1 edge st in garter st - Read explanation above - in each side for 4 cm. NOTE: On last row from WS, dec 8-8-8-12-12-12 sts evenly = 62-68-74-82-90-98 sts. Then switch to needle size 5 mm and off white - At the same time work diagram M.1 and STRIPES - Read explanation above - with 1 edge st in each side. REMEMBER THE KNITTING TENSION! When piece measures 37-38-39-40-41-42 cm, insert a marker in each side of piece (armholes beg here). Continue to work until piece measures 52-54-56-58-60-62 cm. Now cast off the middle 18-20-22-22-24-26 sts for neck and finish each shoulder separately. Cast off 2 sts at beg of next row from neck = 20-22-24-28-31-34 sts remain on the shoulder. Loosely cast off all sts when piece measures 54-56-58-60-62-64 cm. RIGHT FRONT PIECE: Worked back and forth on needle. Cast on 36-40-42-48-52-56 sts with raspberry on circular needle size 4.5 mm. Work rib K 1/P 1 with 1 edge st in each side for 4 cm. NOTE: On last row from WS, dec 4-4-4-6-6-6 sts evenly = 32-36-38-42-46-50 sts. Then switch to needle size 5 mm and off white - At the same time work diagram M.1 and STRIPES with 1 edge st in each side. Then work as on back piece until piece measures 43-45-46-48-49-51 cm. Cast off at the beg of every row from neck (= every other row) as follows: Cast off 6-7-7-8-7-8 sts 1 time, 2 sts 1 time, and 1 st 1-1-1-1-2-2 times. Then cast off 1 st at beg of every other row from neck a total of 3-4-4-3-4-4 times = 20-22-24-28-31-34 sts remain on shoulder. Loosely cast off all sts when piece measures 54-56-58-60-62-64 cm. LEFT FRONT PIECE: Work as right front piece but reversed. SLEEVE: Worked back and forth on needle. Cast on 38-40-42-46-48-50 sts with raspberry on circular needle size 4.5 mm. Work rib K 1/P 1 with 1 edge st in each side for 4 cm. NOTE: On last row from WS, dec 8-8-8-10-10-10 sts evenly = 30-32-34-36-38-40 sts. Then switch to needle size 5 mm and off white - AT THE SAME TIME work diagram M.1 and STRIPES. When piece measures 5 cm, inc 1 st - Read INCEREASE TIP above - inside 1 edge st in each side. Repeat inc every 2½-2½-2½-2-2-1½ cm a total of 10-10-10-12-12-12 times = 50-52-54-58-60-64 sts. Continue until piece measures 34-33-32-30-29-28 cm (shorter measurements in the larger sizes because of broader shoulder width). Loosely cast off all sts. Knit another sleeve the same way. ASSEMBLY: Sew shoulder seams from RS with stitches. Sew in sleeves between markers in each side inside 1 edge st. Sew sleeve and side seams in one. RIGHT BAND: Worked in rib back and forth on circular needle size 4.5 mm with raspberry. Knit up from RS approx. 70 to 90 sts inside 1 edge st along the edge mid front on right front piece. P next row from WS while at the same time adjusting no of sts to 70-70-70-81-88-88. On next row (= RS) work rib (K 1/P 1) - AT THE SAME TIME cast off for button holes as follows: Work 4 sts, * cast off the next 2 sts, work 9-9-9-9-10-10 sts *, repeat from *-* a total of 6-6-6-7-7-7 times. On next row cast on 2 new sts over the cast off sts. Continue until band measures approx. 2 cm, loosely cast off with K over K and P and P. LEFT BAND: Work as right band but without button holes. NECK EDGE: Work around the neck with raspberry on circular needle size 4.5 mm as follows: Knit up from RS approx. 90 to 120 sts inside 1 edge st around the neck (also over bands in each side). P next row from WS while AT THE SAME TIME adjusting no of sts to 91-95-101-107-111-115. On next row work rib (K 1/P 1) from RS, AT THE SAME TIME cast off for last button hole as follows: Work 4 sts, cast off the next 2 sts, work rib the rest of row, finish with K 1. On next row cast on 2 new sts over the cast off sts. Continue until neck edge measures approx. 2 cm, loosely cast off with K over K and P and P. Sew the buttons on to the left band. |
|||||||
Diagram explanations |
|||||||
|
|||||||
 |
|||||||
 |
|||||||
Have you finished this pattern?Tag your pictures with #dropspattern #hollycardigan or submit them to the #dropsfan gallery. Do you need help with this pattern?You'll find 16 tutorial videos, a Comments/Questions area and more by visiting the pattern on garnstudio.com. © 1982-2026 DROPS Design A/S. We reserve all rights. This document, including all its sub-sections, has copyrights. Read more about what you can do with our patterns at the bottom of each pattern on our site. |
|||||||


With over 40 years in knitting and crochet design, DROPS Design offers one of the most extensive collections of free patterns on the internet - translated to 17 languages. As of today we count 324 catalogues and 12290 patterns translated into English (UK/cm).
We work hard to bring you the best knitting and crochet have to offer, inspiration and advice as well as great quality yarns at incredible prices! Would you like to use our patterns for other than personal use? You can read what you are allowed to do in the Copyright text at the bottom of all our patterns. Happy crafting!
Post a comment to pattern DROPS 139-34
We would love to hear what you have to say about this pattern!
If you want to leave a question, please make sure you select the correct category in the form below, to speed up the answering process. Required fields are marked *.