
Popular categories
Looking for a yarn?


Comments / Questions (20)
![]() Andrea wrote:
Andrea wrote:
Habe das gleiche Problem wie Claudia (Schnabel Reihe 5) ist in der Originalanleitung auch nicht anders. Ich würde im abwechselnd überspringen und häkeln, ist das richtig ?
22.03.2016 - 12:52DROPS Design answered:
Liebe Andrea, siehe Antwort auf Claudias Kommentar.
23.03.2016 - 14:04
![]() Jacqueline wrote:
Jacqueline wrote:
Bonjour, je n'arrive pas a effectuer le bec, avez-vous un vidéo ou un example? merci
16.03.2016 - 01:23DROPS Design answered:
Bonjour Jacqueline, pour réaliser le bec, on forme un losange en partant d'1 ms et tous les rangs, on double le nbe de ms jusqu'à ce qu'il y en ait 4, puis on augmente au début et à la fin du rang 4 - ensuite, on diminue au début et à la fin du rang 5 en sautant 1 ms, puis on répète ces diminutions aux rangs 6 et 7 jusqu'à ce qu'il reste 1 ms. Bon crochet!
16.03.2016 - 09:34
![]() Claudia wrote:
Claudia wrote:
Beim Schnabel ist ein Fehler in der Anleitung: In der 5. Reihe wird eine fM zu wenig gearbeitet. Man soll die erste fM überspringen, dann jeweils 1 fM in die nächsten zwei arbeiten. Danach wieder eine überspringen und dann 1 fM in die letzte M arbeiten. Dann arbeitet man aber nur 3 fM und nicht vier. Richtig müsste es daher heißen: Die erste fM überspringen, je 1 fM in die nächsten 2 fM, die nächste fM überspringen, je eine fM in die letzten zwei fM = 4 fM.
14.03.2016 - 20:24DROPS Design answered:
Liebe Claudia, wir haben die Beschreibung für Reihe 5 nochmals überprüft und es ist korrekt: Sie häkeln 1 Lm (=1. M) überspringen 1 M, häkeln 2 M, überspringen 1 M und häkeln 1 M (4 M insgesamt).
15.03.2016 - 08:19
![]() Laila wrote:
Laila wrote:
Vedr NEBB. Stiller samme spørsmål som andre har gjort. Har lest tidligere svar lenger ned på denne kommentarsiden,men skjønner ikke svaret. Hvorfor er ikke selve oppskriften endret,slik at den blir bedre å forstå? Skal man da i hver omgang regne luftmasken som en fastmaske? Det blir heller ikke riktig! Antall fastmasker stemmer med oppskriften i alle omgangene (unntatt omg 5),så hvis man også skal telle med LUFTMASKEN,blir det jo alltid 1 maske for mye ! (?)
23.03.2015 - 00:57
![]() Anna Winther wrote:
Anna Winther wrote:
Det er noget af det sødeste påske pynt. Og den magiske cirkel er perfekt. Jeg havde Fabel tyndt uldgarn gul og orange og Alpaca rød. Ville lave en prøve, men den er blevet så nuttet. Glæder mig til at lave nogle i rigtig størrelse. ;) Kan varmt anbefales.
03.02.2015 - 17:01
![]() Alessandra Pautasso wrote:
Alessandra Pautasso wrote:
Becco: alla riga 6 c'è forse un errore? "(....) 1 m.b. nell 'ultima m.b., girare il lavoro." ma cosi' le maglie totali sono 3 invece di 4, bisogna forse sostituire con "1 m.b. nelle 2 m.b. successive", come nella prima parte della riga?
29.01.2015 - 19:10DROPS Design answered:
Risposta tardiva, chiediamo scusa! La catenella sostituisce la m.b, ma comunque c'è qualcosa che non quadra nella riga 6. L'abbiamo segnalato ai designer. In ogni caso lascerei 3 m, non cambia nulla. Alla riga successiva lavorerà 1 m in meno ancora e poi chiude. Buon lavoro!
24.04.2015 - 17:26Thao wrote:
Im am not sure if i am doing the wings, feet and beak. Plz make a tutorial on the chicken because i don't quite know if im right, it looks a bit weird thanks!
22.03.2014 - 02:50Thao Nguyen wrote:
Umm....round 19 sc round no. of sc is not 36 but 32...no matter what i did i got 32!
03.03.2014 - 09:45
![]() Karin Lykke wrote:
Karin Lykke wrote:
Hej. Jeg kan ikke få 5. omg. i næbet til at stemme; man starter med 6 fm og skal ende med 4 fm. Men der er kun anvisninger til at lave tre fm.
11.03.2013 - 22:12DROPS Design answered:
Den förste lm erstatter 1 fm. Dvs du har i alt 4 fm.
14.05.2013 - 11:08
![]() Agnes wrote:
Agnes wrote:
Ik ben bezig met de snavel, maar in toer 5 kom ik niet uit. "Haak 1 l, sla de 1e v over, 1 v in de volgende 2 v, sla de volgende v over, 1 v in laatste v, keer het werk = 4 v. Na 1 v. in de volgende 2 v. heb ik nog 2 vasten over en daarna pas 1 v. in de laatste. Dus eigenlijk maar 5 vasten ipv. 6 vasten.
01.04.2012 - 16:59DROPS Design answered:
Na toer 4 heb je 6 v (de eerste l van de toer = 1 v). Bij toer 5 haak je dan 1 l (= 1 v)sla 1 v over, 1 v in de volgende 2 v, sla 1 v over en eindig met 1 v in de laatste v (de 1e l van toer 4).
02.04.2012 - 12:29
|
|
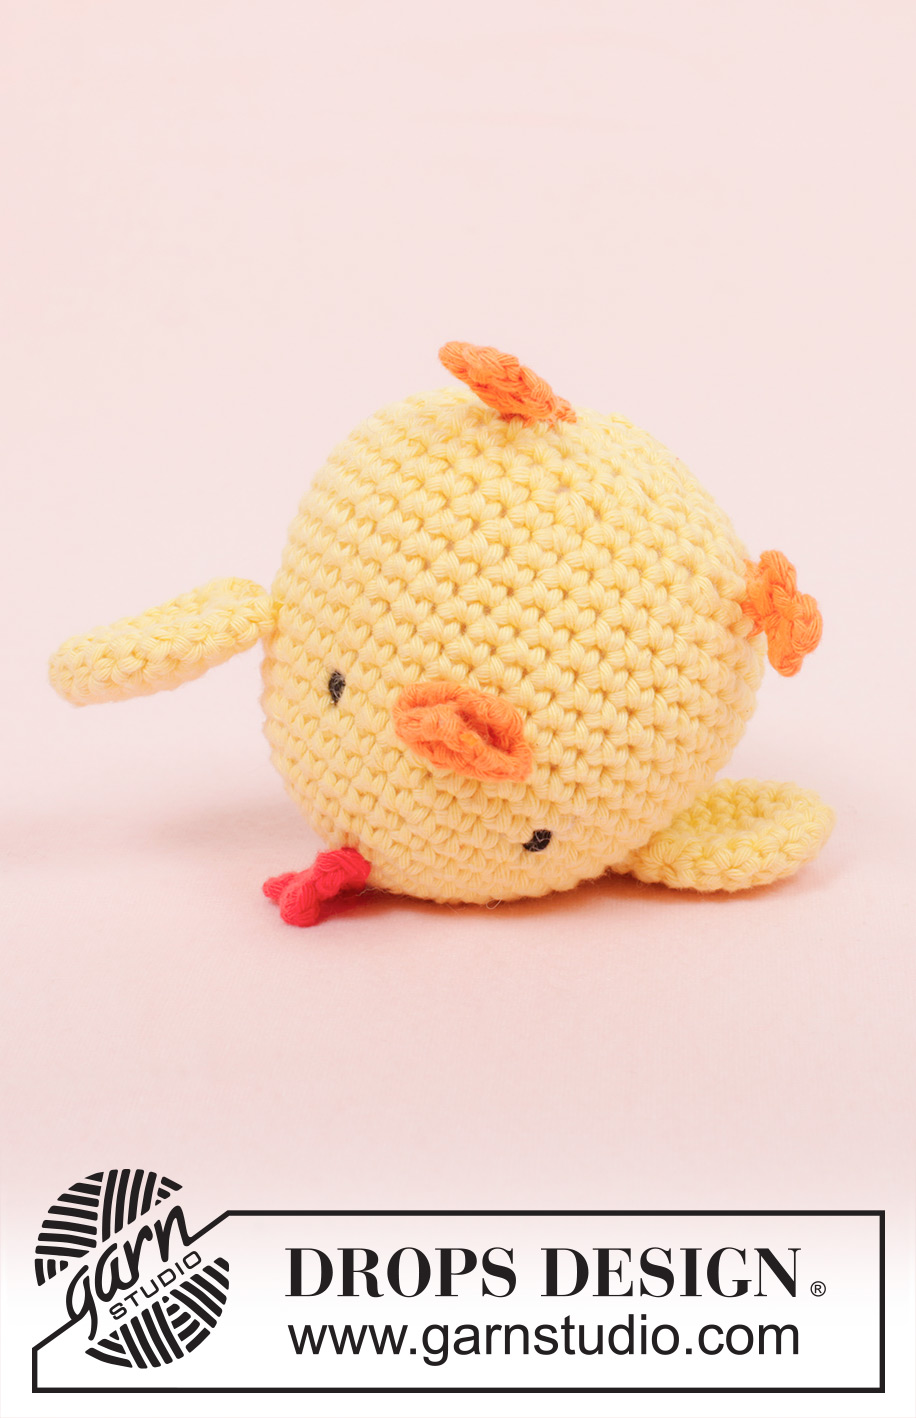
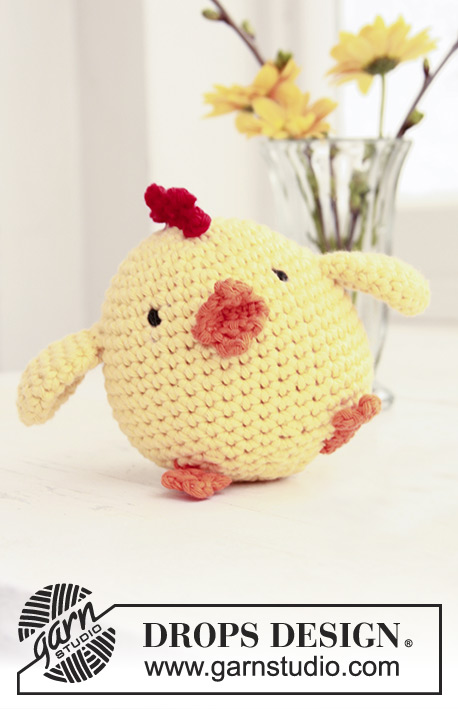
Chicken Little#dropschickenlittle |
|
 |
 |
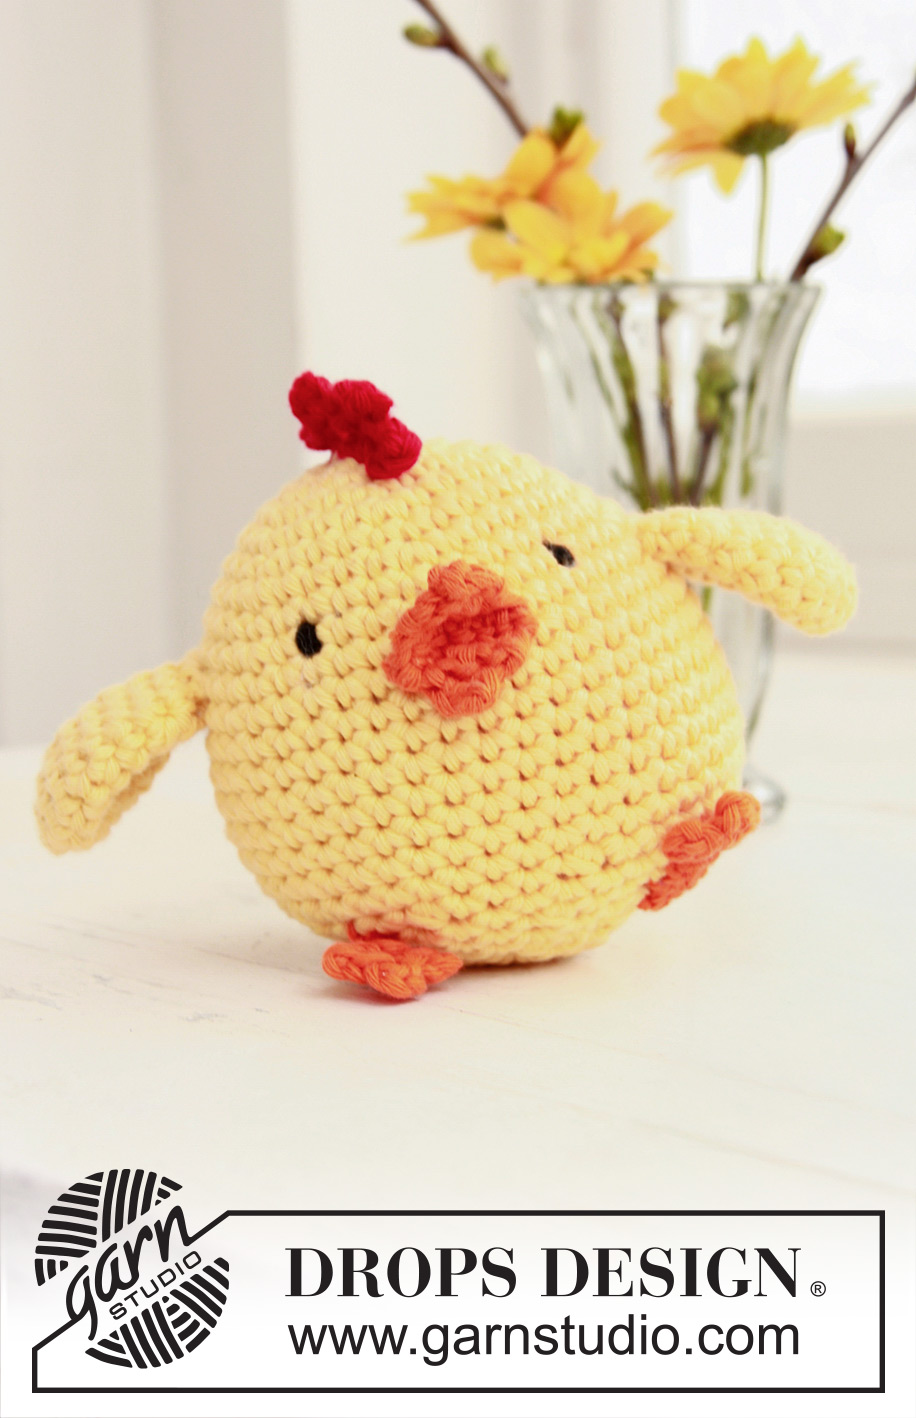
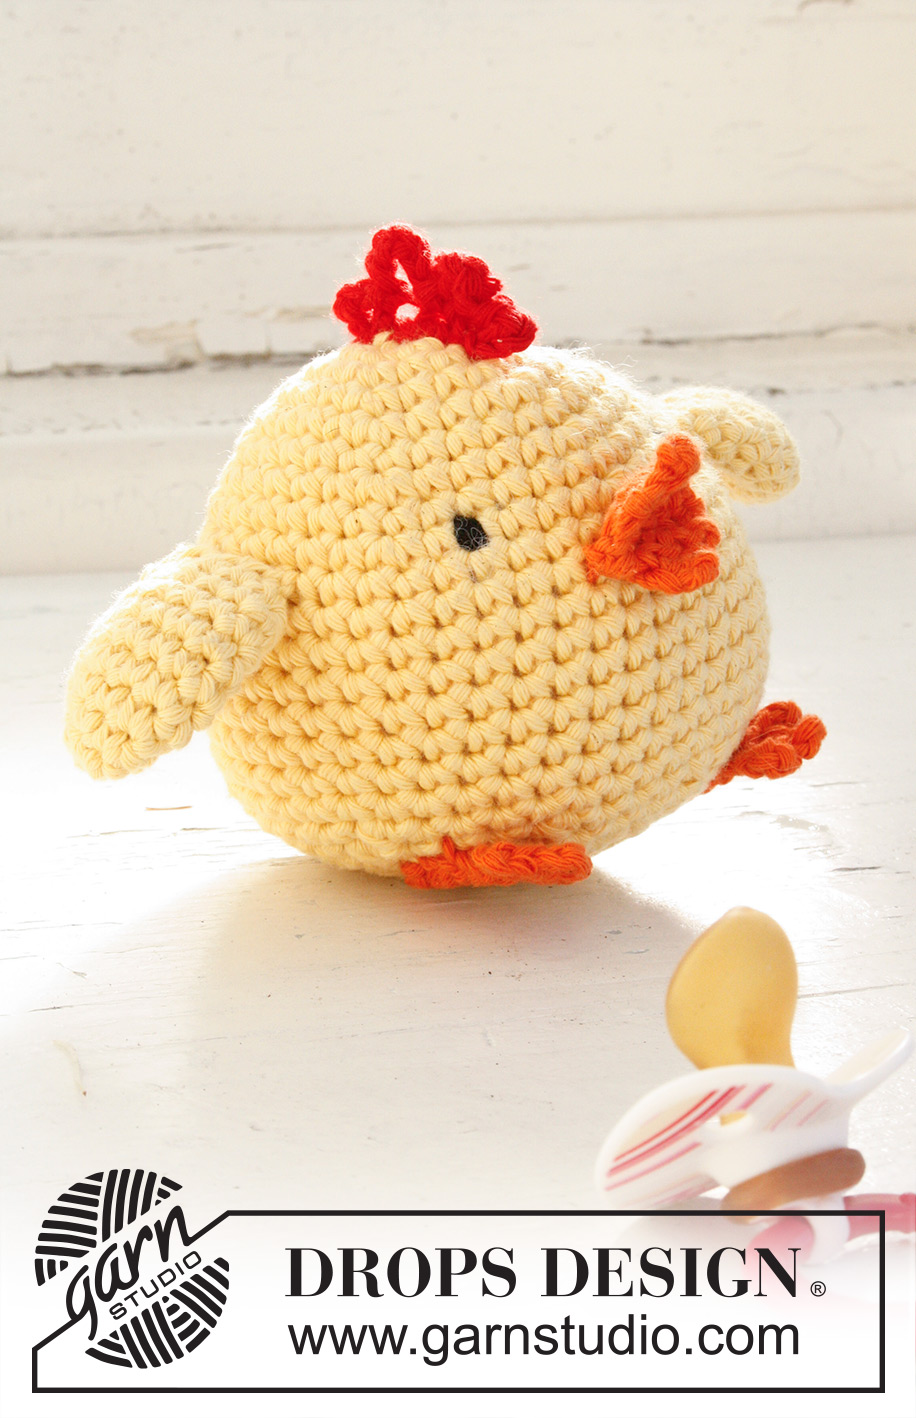
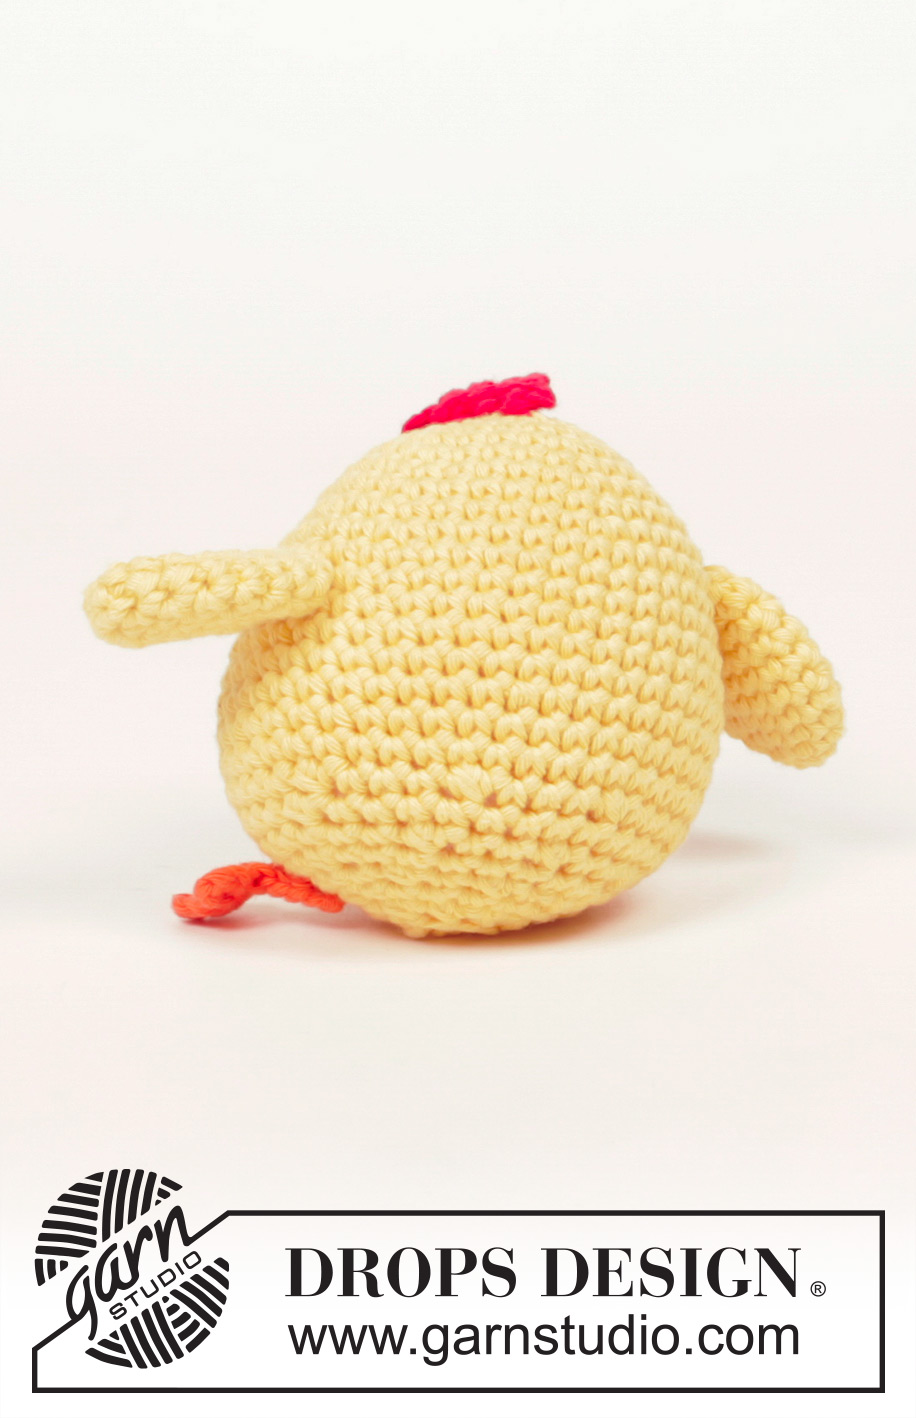
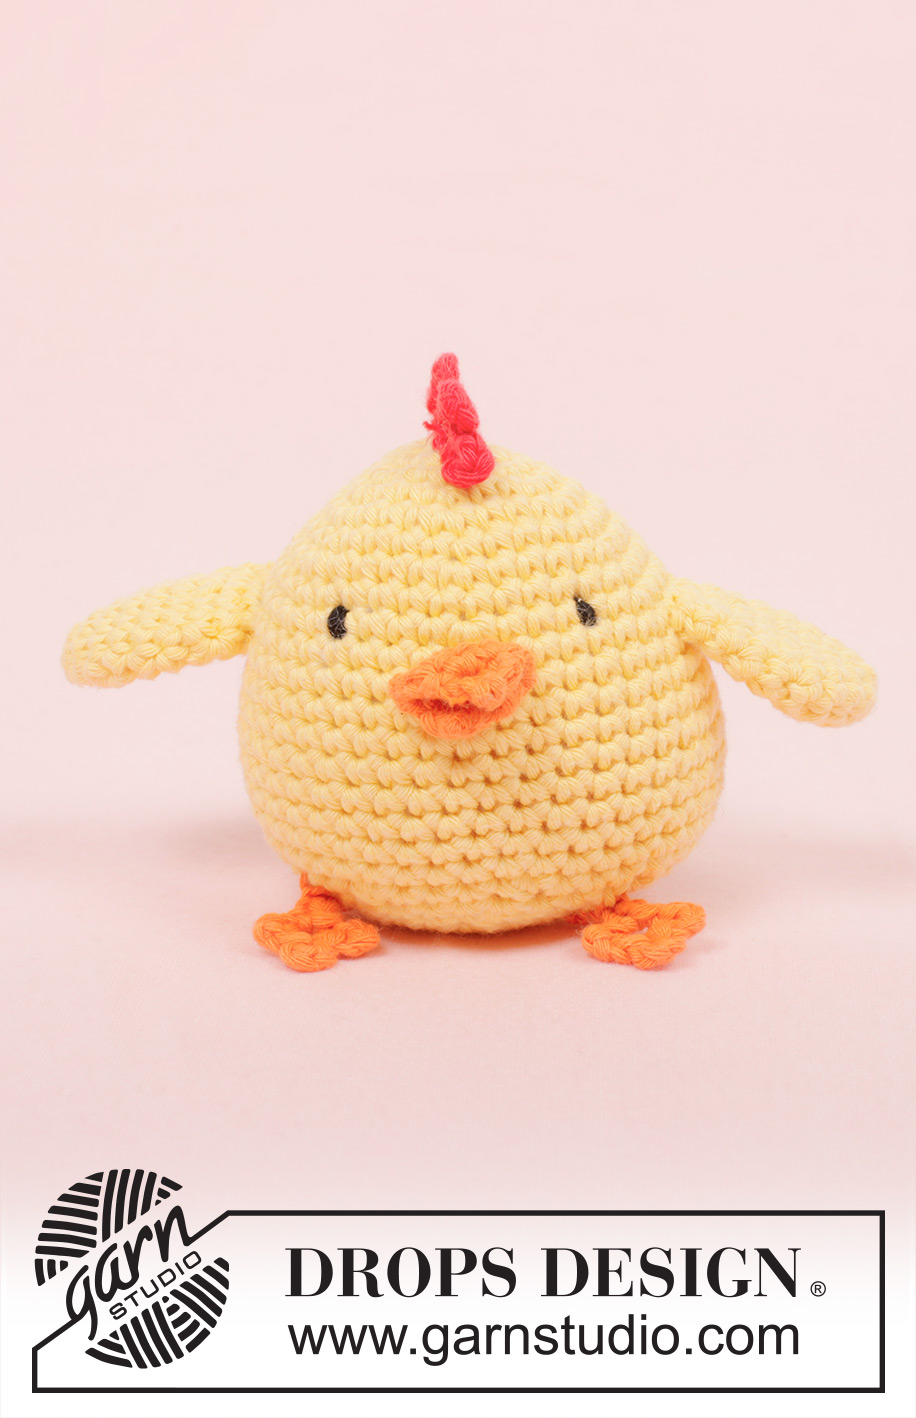
Crochet DROPS Easter chicken in "Paris".
DROPS Extra 0-769 |
|
|
CROCHET INFO: MAGIC CIRCLE: When piece is worked in the round, start with this technique to avoid holes in the middle (instead of ch-ring): Hold the yarn end and wind the yarn one time around the index finger to make a loop. Hold the loop with left thumb and middle finger, place the thread over left index finger. Insert hook through the loop, make a YO and pull thread through loop, work 1 ch, then work dc around the loop. When the desired no of dc have been reached, pull the yarn end to tighten the loop. Fasten the yarn end on the back side. Continue to work in the round in a circle. WORK IN THE ROUND IN A CIRCLE: After last dc on the round, continue to next round with 1 dc in next dc (= first dc on next round). NOTE: Insert a marker at the beg of round between last dc and first dc on the round, move the marker upwards. WORKING 2 DC TOG: * Insert hook in next st, get thread *, repeat from *-* one more time, make a YO and pull thread through all 3 sts on hook. -------------------------------------------------------- CHICKEN: Start at the top of the head by making a Magic circle - READ EXPLANATION ABOVE - on hook size 4 mm with Paris vanilla. ROUND 1: Work 6 dc in circle - READ WORK IN THE ROUND IN A CIRCLE. ROUND 2: 2 dc in every dc = 12 dc. ROUND 3: * 1 dc in next dc, 2 dc in next dc *, repeat from *-* the rest of the round = 18 dc. ROUND 4: * 1 dc in the next 2 dc, 2 dc in next dc *, repeat from *-* the rest of the round = 24 dc. ROUND 5: * 1 dc in the next 3 dc, 2 dc in next dc *, repeat from *-* the rest of the round = 30 dc. ROUND 6: Work 1 dc in every dc = 30 dc. ROUND 7: * 1 dc in the next 4 dc, 2 dc in next dc *, repeat from *-* the rest of the round = 36 dc. ROUND 8: Work 1 dc in every dc = 36 dc. ROUND 9: * 1 dc in the next 5 dc, 2 dc in next dc *, repeat from *-* the rest of the round = 42 dc. ROUND 10-17: Work 1 dc in every dc = 42 dc. ROUND 18: * 1 dc in the next 19 dc, then crochet the next 2 dc tog * - See explanation above, repeat from *-* one more time = 40 dc. ROUND 19: * 1 dc in the next 3 dc, then crochet the next 2 dc tog *, repeat from *-* the rest of the round = 32 dc. ROUND 20: Work 1 dc in every dc = 32 dc. ROUND 21: * 1 dc in the next 2 dc, then crochet the next 2 dc tog *, repeat from *-* the rest of the round = 24 dc. ROUND 22: Work 1 dc in every dc = 24 dc. ROUND 23: * 1 dc in the next 1 dc, then crochet the next 2 dc tog *, repeat from *-* the rest of the round = 16 dc. ROUND 24: Work 1 dc in every dc = 16 dc. Fill the chicken with some cotton wool. ROUND 25: Work all dc tog 2 by 2 = 8 dc, finish with 1 sl st in next dc. Cut the thread and pull it through the remaining sts and tighten tog, fasten tightly. WING: Start by making a magic circle with vanilla on hook size 4 mm. ROUND 1: Work 4 dc in the circle. ROUND 2: Work 2 dc in every dc = 8 dc. ROUND 3: * 1 dc in next dc, 2 dc in next dc *, repeat from *-* the rest of the round = 12 dc. ROUND 4: * 1 dc in the next 2 dc, 2 dc in next dc *, repeat from *-* the rest of the round = 16 dc. ROUND 5-7: Work 1 dc in every dc = 16 dc on the round. ROUND 8: * 1 dc in the next 2 dc, then crochet the next 2 dc tog *, repeat from *-* the rest of the round = 12 dc. ROUND 9: Work 1 dc in every dc, finish with 1 sl st in next dc = 12 dc. Cut the thread and keep 20 cm for assembly. Knit another wing the same way. BEAK: Work on hook size 3 mm with orange as follows: ROW 1: Work 2 ch, work 1 dc in 2nd ch from hook, turn piece = 1 dc. ROW 2: Work 1 ch, 2 dc in dc, turn piece = 2 dc. ROW 3: Work 1 ch, 2 dc in every dc, turn piece = 4 dc. ROW 4: Work 1 ch, 2 dc in 1st dc, 1 dc in next 2 dc, 2 dc in last dc, turn piece = 6 dc. ROW 5: Work 1 ch, skip 1st dc, 1 dc in next 4 dc, turn piece = 4 dc. ROW 6: Work 1 ch, skip 1st dc, 1 dc in next 2 dc, turn piece = 2 dc. ROW 7: Work 1 ch, skip 1st dc, 1 dc in last dc = 1 dc. Cut the thread and keep 20 cm for assembly. LEG: Work on hook size 3 mm with orange as follows: Work 10 ch, work 1 sl st in 5th ch from hook, * 4 ch, 1 sl st in same ch *, repeat from *-* one more time. Then work 1 sl st in every ch remaining on ch-row (= work back to beg). Cut the thread and keep 20 cm for assembly. Work another leg the same way. COCKSCOMB: Work on hook size 3 mm with red as follows: Work 10 ch, work 1 sl st in 7th ch from hook, * 5 ch, 1 sl st in next ch *, repeat from *-* one more time, finish with 6 ch, 1 sl st in last ch. Cut the thread and keep 20 cm for assembly. ASSEMBLY: Place the wings flat and sew them to each side with neat little stitches. Sew the cockscomb at the top of head. Fold the beak on the middle and sew it to the front of the head. Sew on eyes with some left-over black yarn. Sew the legs under the chicken. |
|
Have you finished this pattern?Tag your pictures with #dropspattern #dropschickenlittle or submit them to the #dropsfan gallery. Do you need help with this pattern?You'll find 7 tutorial videos, a Comments/Questions area and more by visiting the pattern on garnstudio.com. © 1982-2026 DROPS Design A/S. We reserve all rights. This document, including all its sub-sections, has copyrights. Read more about what you can do with our patterns at the bottom of each pattern on our site. |
|


With over 40 years in knitting and crochet design, DROPS Design offers one of the most extensive collections of free patterns on the internet - translated to 17 languages. As of today we count 325 catalogues and 12298 patterns translated into English (UK/cm).
We work hard to bring you the best knitting and crochet have to offer, inspiration and advice as well as great quality yarns at incredible prices! Would you like to use our patterns for other than personal use? You can read what you are allowed to do in the Copyright text at the bottom of all our patterns. Happy crafting!
Post a comment to pattern DROPS Extra 0-769
We would love to hear what you have to say about this pattern!
If you want to leave a question, please make sure you select the correct category in the form below, to speed up the answering process. Required fields are marked *.