
Popular categories
Looking for a yarn?


Comments / Questions (207)
![]() Piemontese wrote:
Piemontese wrote:
Bonjour j'ai commande la laine pour le modèle drops baby 20 14 .mais franchement je n'arrive pas a comprendre les explications ... meme en regardant votre video proposeé ... pourriez vous m'expliquer plus clairement ce procèdé de rangs raccourcis plein de gens n'on rien compris ... il faut reprendre les rangs precedants a chaque fois ? sur l'envers et l'endroit?
08.11.2014 - 14:31DROPS Design answered:
Bonjour Mme Piemontaise, les rangs raccourcis se tricotent par 2 (1 rang sur l'end, 1 rang sur l'env) en commençant sur l'end, par ex en taille 1: 2 rangs sur les 30 premières m, 2 rangs sur les 45 premières m, 2 rangs sur les 64 premières m ... Et, en même temps, vous tricotez le diagramme sur les mailles appropriées. les rangs du diagramme vont ainsi se tricoter à un rythme différent, comme on le voit dans la vidéo. Bon tricot!
10.11.2014 - 08:52
![]() Marianna wrote:
Marianna wrote:
Hallo zusammen! Kurze Frage zu diesem Satz: "GLEICHZEITIG wie folgt die verkürzten Reihen stricken...". Was ist mit den "verkürzten Reihen" gemeint? Wann stricke ich verkürzte Reihen? Danke für die Info!
27.10.2014 - 13:59DROPS Design answered:
Die verkürzten R sind direkt nach dem "GLEICHZEITIG"-Satz beschrieben, Sie halten sich einfach an die Anleitung, die wie folgt beginnt: " * die ersten 30-32-38 (42-47) M. stricken, die Arbeit drehen und zurück stricken,... ", das sind die verkürzten R. Sie können sich auch ein Video zu verkürzten R anschauen, um das Prinzip zu verstehen, unter "Videos" im Kopf neben dem Foto. Wenn Sie dazu noch weitere Fragen haben, melden Sie sich gerne wieder.
28.10.2014 - 21:36
![]() Janine wrote:
Janine wrote:
Hallo, ich würde die Weste gern in 122/128 stricken, kann die Anleitung aber nicht umrechnen. Kann mir jemand helfen?
19.08.2014 - 21:10DROPS Design answered:
Liebe Janine, das ist leider an dieser Stelle zu kompliziert und nicht möglich, eine weitere Größe können wir Ihnen daher nicht anbieten. Vielleicht stöbern Sie einfach in den Kinderheften nach anderen Modellen, dort ist dann normalerweise auch Größe 122/128 dabei.
19.08.2014 - 21:21
![]() NUNA LESTER wrote:
NUNA LESTER wrote:
Desearia saber para una niña de cuatro años, que deseo hacer con agujas circulares, se empieza por la parte del cuello ¿verdad? y cuantos puntos debo echar, gracias
06.08.2014 - 19:22DROPS Design answered:
Hola Nuna. La prenda se trabaja de lado a lado, se empieza en el delantero izquierdo. En el apartado de materiales se pueden consultar las tallas disponibles (por ej., la talla 3-4 años = el primer número dentro de paréntesis ). Las medidas en cm se pueden consultar en el diagrama debajo del patrón.
06.08.2014 - 22:40
![]() Chris wrote:
Chris wrote:
ICh verstehe die Anleitung ab hier leider nicht. Danach wie folgt: 41-45-52 (60-65) M. immer re., M1 (= 23 M.), 6-8-11 (13-16) M. immer re. GLEICHZEITIG wie folgt die verkürzten Reihen stricken. ich habe das Video gesehen aber verstehe es trotzdem nicht. Ich stricke die größte Größe. Wie stricke ich 65 Machen und soll dann gleichzeitig das andere stricken ?
28.06.2014 - 23:14DROPS Design answered:
Liebe Chris, das bedeutet, dass Sie für die verkürzten R immer nur die angegebene M-Anzahl stricken und dann wenden. Diese M, die Sie nach und nach stricken (es werden bei den verkürzten R ja mit jeder Hin-R mehr), müssen Sie ja im Muster stricken. Dazu halten Sie sich an die Beschreibung des Musters. D.h: zuerst 47 M re stricken, wenden + re zurück. Dann 65 M re, 5 M von M1 (= insg. 70 M), wenden + zurück (5 M M1 + 65 M re). Dann 65 M re, 23 M M1 (= insg. 98 M), wenden und zurück usw.
29.06.2014 - 14:06Sudha wrote:
Very pretty design! I am making this for my grandaughter.Looking forward to some more! Thanks for sharing.
12.05.2014 - 05:29
![]() Claudia wrote:
Claudia wrote:
Grüezi... ich verstehe nicht, wie ich die rückseite stricken muss... 38m stricken, drehen und dann LINKS stricken..?? danach 57m stricken wo ja 5m im muster sind... wie werden die 5m denn mach dem wenden gestrickt?? besten dank für ihre hilfe!
03.05.2014 - 14:30DROPS Design answered:
Liebe Claudia, Sie stricken die M, die nicht im Muster gestrickt werden, immer kraus re, d.h. in jeder R re, auch in Rück-R. Die 5 M im Muster stricken Sie in der Rück-R auch im Muster, wie im Diagramm angegeben, das Diagramm zeigt alle Reihen des Muster, also sowohl Hin- als auch Rück-R. Gutes Gelingen!
04.05.2014 - 12:40
![]() Laurence wrote:
Laurence wrote:
Bonjour, est il possible de faire des manches ? comment faire ? merci
21.04.2014 - 21:03
![]() Rozanne wrote:
Rozanne wrote:
I have knit many drops patterns but this one has me stymied, I used the videos for the first time and can't believe there is no sound. They were no use to me and even if I tried to follow they should start at the very beginning of the shortrows since I have no idea how to work the chart with the short rows..I have spent at least seven hours trying to figure it out.
18.03.2014 - 05:28
![]() Rianne wrote:
Rianne wrote:
Ik brei dit nu voor de 2de keer, en je hoeft de draad niet af te knippen als je overgaat op de mouw. Je kan ook na een naald waarin je (aan de goede kant) 64-70- etc. steken moet breien alleen terugbreien tot de "zoom" van de mouw, dan de zijkant op een hulpdraad zetten, en vervolgens als de mouw af is op de 1ste teruggaande naald in M.1 de zijkant er weer bij breien (aan de "verkeerde" kant). Het patroon komt zo gewoon uit - en je zit niet met “losse” draden die afgehecht moeten worden.
15.11.2013 - 00:35
|
||||||||||||||||||||||
Nova#novajacket |
||||||||||||||||||||||
 |
 |
|||||||||||||||||||||
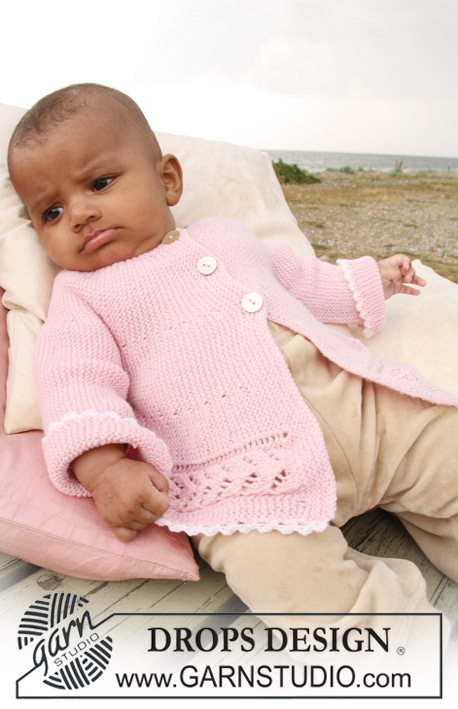
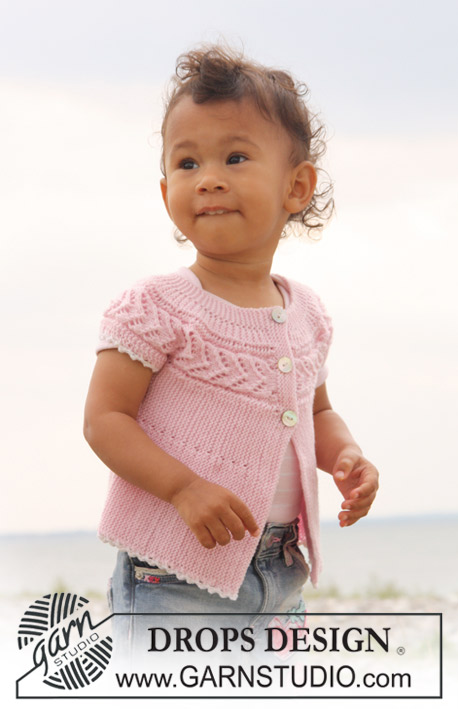
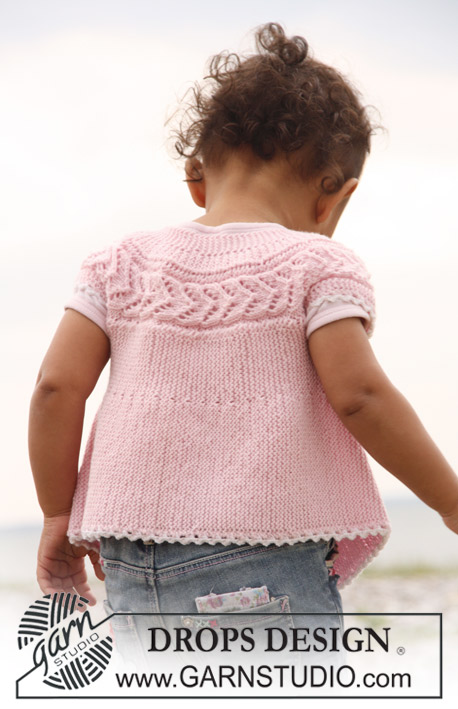
Short sleeve cardigan knitted from side to side in garter st and lace pattern for baby and children in DROPS BabyMerino
DROPS Baby 20-14 |
||||||||||||||||||||||
|
SLEEVELESS TOP: PATTERN: See diagram M.1. Diagram shows the pattern from RS. KNITTING TIP: When turning mid piece, slip first st as if to K, tighten thread and work return row in order to avoid a hole in transition. -------------------------------------------------------- -------------------------------------------------------- SLEEVELESS TOP: Beg on left front piece and work towards the armhole, work wide shoulder, work back piece, the other shoulder and then right front piece. LOOSELY cast on 62-68-78 (88-96) sts on needle size 2.5 mm with light pink and K 8 rows for front band (first row = RS). Work next row as follows from RS: K 41-45-52 (60-65) sts, K the next 15 sts AT THE SAME TIME inc 8 sts evenly (inc 1 st by making 1 YO), K the last 6-8-11 (13-16) sts = 70-76-86 (96-104) sts. K 1 row on all sts (work YO into back of loop to avoid a hole). Continue as follows: K 41-45-52 (60-65) sts (K these sts on all rows), chart M.1 (= 23 sts), K 6-8-11 (13-16) sts (K these sts on all rows). AT THE SAME TIME work shortened rows as follows - SEE KNITTING TIP: * work the first 30-32-38 (42-47) sts, turn piece and work return row, work the first 46-50-57 (65-70) sts, turn (for all sizes this will be after 5 sts in M.1) and work return row, work the first 64-70-80 (90-98) sts, turn and work return row, work all 70-76-86 (96-104) sts, turn and work return row *, repeat from *-* until piece measures approx 16-18-19 (20,5-22) cm from cast on row, measured where widest (= bottom edge). Cut the thread. Now slip the first 41-45-52 (60-65) sts towards bottom edge on a stitch holder (= the side) = 29-31-34 (36-39) sts left on needle for wide shoulder. Continue with shortened rows as follows (first row = from RS): * Work in pattern on the first 23-25-28 (30-33) sts, turn and work return row, work in pattern on all 29-31-34 (36-39) sts, turn and work return row *, repeat from *-* until piece measures 16-17-18 (18-20) cm from where sts were put on stitch holder. Cut the thread. Slip the 41-45-52 (60-65) sts from stitch holder at the side back on needle for back piece and insert a marker in piece. Continue from bottom edge of jacket (first row = RS) in pattern and with shortened rows as described for front piece. When piece measures 28-31-35 (37-40) cm from marker at the side, measured where widest (= bottom edge) cut the thread. Slip the first 41-45-52 (60-65) sts from bottom edge on a stitch holder (= the side). Continue on remaining sts for wide shoulder as described for the first shoulder until shoulders are the same length. Cut the thread. Slip the 41-45-52 (60-65) sts from stitch holder at the side back on needle and continue as described for the other front piece. When right front piece is the same length as left front piece (without front band) work next row from RS as follows: work 41-45-52 (60-65) sts, work the next 23 sts AT THE SAME TIME dec 8 sts evenly (dec by K2 tog), work the last 6-8-11 (13-16) sts = 62-68-78 (88-96) sts. Now work front band as follows: K 3 rows on all sts. On next row from RS make 3 buttonholes as follows (i.e. from bottom edge towards the top): K 41-45-53 (61-65) sts, 1 YO, K2 tog, K 7-8-9 (10-12) sts, 1 YO, K2 tog, K 7-8-9 (10-12) sts, 1 YO, K2 tog and finish with K1. Turn and K all sts. K 5 rows on all sts and cast off loosely. CROCHET BORDER: Crochet a border round bottom edge of jacket and round shoulder edges with crochet hook size 3 mm with white as follows: 1 dc, * 3 ch, 1 tr in the first of the 3 ch, skip approx 1 cm, 1 dc *, repeat from *-*. Cut and fasten thread. ASSEMBLY: Sew on buttons. |
||||||||||||||||||||||
Diagram explanations |
||||||||||||||||||||||
|
||||||||||||||||||||||
 |
||||||||||||||||||||||
Have you finished this pattern?Tag your pictures with #dropspattern #novajacket or submit them to the #dropsfan gallery. Do you need help with this pattern?You'll find 16 tutorial videos, a Comments/Questions area and more by visiting the pattern on garnstudio.com. © 1982-2026 DROPS Design A/S. We reserve all rights. This document, including all its sub-sections, has copyrights. Read more about what you can do with our patterns at the bottom of each pattern on our site. |
||||||||||||||||||||||


With over 40 years in knitting and crochet design, DROPS Design offers one of the most extensive collections of free patterns on the internet - translated to 17 languages. As of today we count 325 catalogues and 12298 patterns translated into English (UK/cm).
We work hard to bring you the best knitting and crochet have to offer, inspiration and advice as well as great quality yarns at incredible prices! Would you like to use our patterns for other than personal use? You can read what you are allowed to do in the Copyright text at the bottom of all our patterns. Happy crafting!
Post a comment to pattern DROPS Baby 20-14
We would love to hear what you have to say about this pattern!
If you want to leave a question, please make sure you select the correct category in the form below, to speed up the answering process. Required fields are marked *.