
Popular categories
Looking for a yarn?


Comments / Questions (129)
![]() Eshexje wrote:
Eshexje wrote:
Würde diese Jacke gerne stricken, bin nur nicht ganz sicher wegen der Maschenprobe. Müssen 20 M mit einfachen Faden 10 cm ergeben oder 20 M mit doppeltem Faden?
18.12.2013 - 21:00DROPS Design answered:
Hallo, die Maschenprobe wird auch mit doppeltem Faden gemacht.
19.12.2013 - 07:55
![]() Helle Gade wrote:
Helle Gade wrote:
Hej Drops Min mor og jeg har begge strikket denne model, i Baby Alpaka Silk - min i grøn, min mors i sort. Min grønne trøje fungerer fint - min mors sorte giver den sig - den er nu 20 cm længere end da hun strikkede den. ØV. Vi har samme strikkefasthed og min giver sig ikke - er det sorte garn der er problemer med ? Venlig hilsen Helle Gade
07.11.2013 - 20:01DROPS Design answered:
Hej Helle. Ja, det er da smadderaergeligt! Der skulle ikke vaere nogen forskel paa garnerne. Hun har ikke vasket / törret sin paa en anden maade? Det er vigtigt at fölge vaskeanvisningerne og törre den liggende.
08.11.2013 - 16:31
![]() Songül wrote:
Songül wrote:
Hallo, ich finde dieses Modell super schön :) Aber ich komme leider nicht voran. Habe bis jetzt die 29cm gestrickt aber danach verstehe ich die Anleitung nicht mehr! Kann es sein, dass da ein Fehler ist? Wie weit stricke ich mit den untersten 57 Maschen? Und wie weit stricke ich mit den restlichen Maschen? Wo und wann nehme ich neue Maschen auf? Ich würde mich auf eine schnelle Antwort sehr freuen! Liebe Grüße
10.03.2013 - 16:29DROPS Design answered:
Liebe Songül, die unteren M bilden den Rumpfteil und werden über das ganze Strickstück fortlaufend gestrickt. Aus den anderen M wird zum Schluss der Ärmel gestrickt.
11.03.2013 - 08:58
![]() DROPS Deutsch wrote:
DROPS Deutsch wrote:
Ja, die Arbeit wird mit 2 Fäden gestrickt.
29.09.2011 - 14:34
![]() Anke wrote:
Anke wrote:
Ich brauche Hilfe zu dieser Anleitung! In der Anleitung steht, dass die Maschen mit 2 Fäden angeschlagen werden; heißt das, dass die ganze Arbeit mit doppeltem Faden gestrickt werden muss? Ich habe den Faden nun einfach genommen, aber obwohl ich ein Vorderteil nun fast fertig habe, habe ich bisher nur 1 Knäuel verbraucht, das finde ich komisch. Außerdem kommt mir die Arbeit sehr dünn (durchsichtig vor) obwohl das auf dem Bild anders aussieht. Ich hoffe mir kann jemand einen Tipp geben.
29.09.2011 - 13:56
![]() Nicole wrote:
Nicole wrote:
Hej ! Jag har svårt att bestämma storleken jag ska sticka, finns det någon jämförelse, t.ex. att m = 38/40 eller liknande? Tacksma för hjälp Nicole
07.04.2010 - 08:56
![]() Carsta Von Felskog wrote:
Carsta Von Felskog wrote:
Für dieses Projekt hab ich ungewöhnlich lange gebraucht.Die Strickanleitung war für mich schwer verständlich,mehrmals habe ich die Jacke wieder aufgetrennt und dabei viel gelernt.Wozu die Hilfsfäden gut sein sollten, weiß ich immer noch nicht.Nun ist sie aber fertig..ein raffinierter Schnitt aus dunkelvioletter Merinowolle, der mir gut gefällt.Danke für das schöne Design.....sagt:Carsta von Felskog
05.10.2009 - 23:08
![]() Christine wrote:
Christine wrote:
Tack för snabbt svar! Stämmer det att man ska sätta hjälpstickan bakom FÖRST och framför sedan på baksidan av höger ärm och framsidan av vänster ärm?
15.09.2009 - 22:04
![]() DROPS Design wrote:
DROPS Design wrote:
Hej Christine, Så här är rättelsen: = rm på rätsidan, am på avigsidan = sätt 2 m på hj.st framför arb, 2 rm, 2 rm från hj.st = sätt 2 m på hj.st bakom arb, 2 rm, 2 rm från hj.st. = hela fram- och bakstycket i ett stycke. Pilen visar stickriktning Detta innebär 8 m.
15.09.2009 - 09:53
![]() Christine wrote:
Christine wrote:
I rättelser står det att man skall göra flätan så här: 2m framför arb, sticka 2 rm, sticka m på hjälpstickan Detta blir bara 6m och mönstret skall göras över 8m. På bilden ser flätan ut som diagrammet är rätt, ej rättelsen. Vilket är det rätta?
13.09.2009 - 16:55
|
|||||||||||||
DROPS 96-3 |
|||||||||||||
 |
 |
||||||||||||
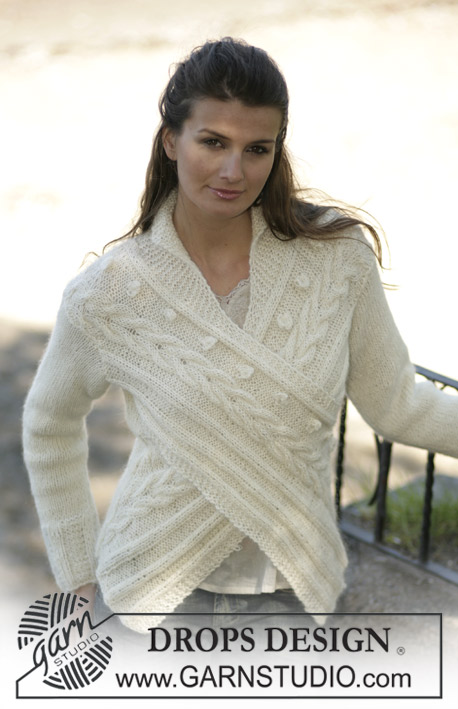
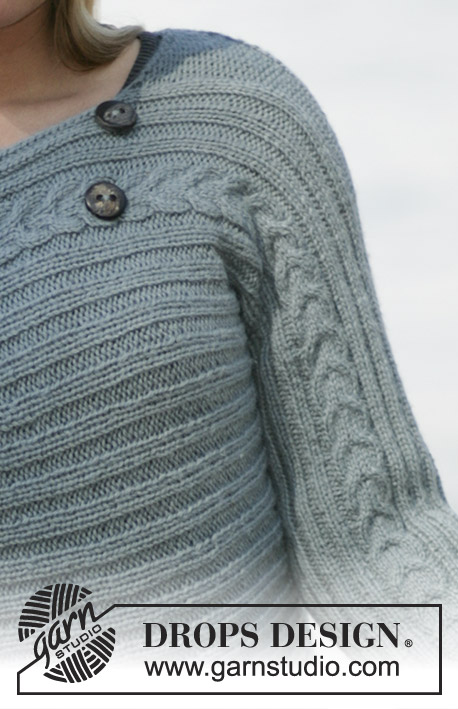
Short jacket with cables in 2 strands DROPS Alpaca. Piece is worked from side to side Size: S-XXL
DROPS 96-3 |
|||||||||||||
|
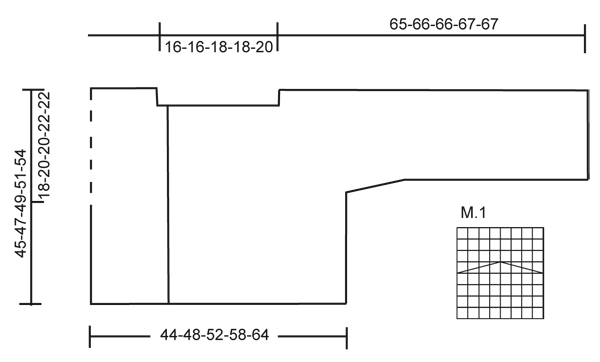
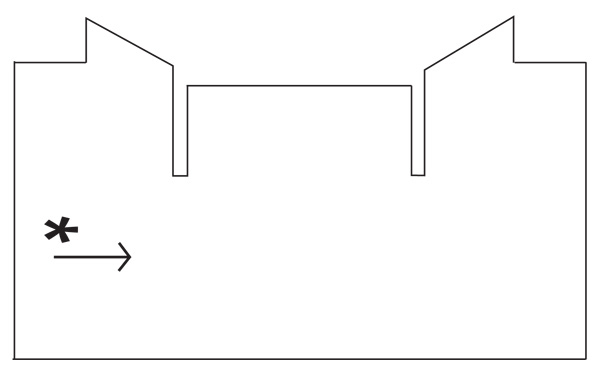
Pattern: See diagram M.1. The diagram is seen from the right side. Pattern tips: To ensure that the cable turns the same way throughout, reverse the instructions in M.1 on the back of the right sleeve and on the front of the left sleeve. This means putting stitches in front of piece when it says behind piece and vice versa. Failure to do this will make the cable twist the opposite way. -------------------------------------------------------- JACKET – SHORT OVERVIEW OF PIECE: The jacket is worked from side to side. Start mid front on right front piece, work towards the side, put stitches on thread for sleeve, cast on new stitches for sleeve. Continue over the back piece towards the other side, put stitches on thread for sleeve, cast on new stitches for sleeve and work towards mid front on left front piece. JACKET: Back and front piece: Cast on 90-94-98-102-106 stitches with 2 threads Alpaca (double thread) on needle size 4.5 mm. Work as follows (1 stitch row = RS): 1 edge stitch (knitted in garter stitches throughout) - *Knit 2, purl 2", repeat from *-* over 12 stitches, M.1 (= 8 stitches), *knit 2, purl 2*, repeat from *-* and finish with 1 edge stitch (worked in garter stitches throughout). Continue like this until piece measures 16-16-18-18-20 cm, now cast on 12-12-14-14-16 new stitches at the top of the shoulder – purl these stitches (seen from the RS) with 1 edge stitch at the side as you continue = 102-106-112-116-122 stitches (the new stitches will form a gusset at the top of the shoulder for a better fit and are to be cast off again later). Now work the original stitches as before whilst purling together the 2 outermost stitches each end of the gusset on every 8th row 6-6-7-7-8 times until there are 2 purl stitches left. At the same time when piece measures 29-31-34-37-41 cm knit only the 57-57-61-61-65 stitches towards lower edge and put the remaining stitches on a thread for sleeve. Work 1 cm, insert a marking thread (= right side), work 1 cm. Now cast on 33-37-37-41-41 new stitches over the stitches on the thread for sleeve = 90-94-98-102-106 stitches. Continue in pattern as before. When piece measures 43-47-51-57-63 cm from the marking thread, work only the 57-57-61-61-65 stitches towards lower edge - put the remaining stitches on a thread for sleeve. Work 1 cm, insert a marking thread (= left side), work 1 cm. Now cast on 37-41-41-45-45 new stitches over the stitches on the thread for sleeve = 94-98-102-106-110 stitches. Work as follows from the shoulder: 1 edge stitch, purl 4, *knit 2, purl 2*, repeat from *-* over 12 stitches, M.1 (= 8 stitches), *knit 2, purl 2*, repeat from *-* and finish with 1 edge stitch. Continue like this, at the same time increase for gusset on the shoulder by purling 2 stitches in the first and the last purl stitch at the top of the shoulder on every 8th row 6-6-7-7-8 time (=12-12-14-14-16 purl stitches increased) = 102-106-112-116-122 stitches. When piece measures 14-16-17-20-22 cm from the marking thread on left side cast off the upper 12-12-14-14-16 purl stitches for neck = 90-94-98-102-106 stitches. Continue in pattern, at the same time after 1 cm cast off for 2 buttonholes towards the top as follows: 5 stitches, cast off 2 stitches, 9 stitches, cast off 2 stitches, finish the row. On the return row cast on 2 new stitches over the cast-off stitches. Continue in pattern. Make another 2 buttonholes the same way when piece measures 28-30-33-36-40 cm from the marking thread on left side. Work 2 cm and cast off all stitches. Right sleeve: Please read Pattern tips above before continuing. Put stitches from thread for sleeve on right front piece on double pointed needles size 4.5 mm. Pick up 6 new stitches mid under arm and pick up 1 stitch in each stitch cast on over sleeve stitches on back piece. Work pattern as before – see Pattern tips above - with 6 purl stitches mid under arm. At the same time, finish the gusset mid upper arm, and decrease the 6 purl stitches mid under arm by purling together 2 stitches on every 2 cm 4 times until 2 purl stitches remain = 70-78-79-86-86 stitches. Continue until sleeve measures 65-66-66-67-67 cm from neckline and cast off. Left sleeve: Please read Pattern tips above before continuing. Put stitches from thread for sleeve on left side of back piece on double pointed needles size 4.5 mm. Pick up 1 stitch in each stitch cast on over sleeve on front piece and 6 new stitches mid under arm. Work as right sleeve. Assembly: Sew the gusset to shoulder on the back piece. Put left front piece over right front piece, slightly sloping, approximately 3-4 cm from the neckline. Sew on buttons to fit the buttonholes. |
|||||||||||||
Diagram explanations |
|||||||||||||
|
|||||||||||||
 |
|||||||||||||
 |
|||||||||||||
Have you finished this pattern?Tag your pictures with #dropspattern or submit them to the #dropsfan gallery. Do you need help with this pattern?You'll find 19 tutorial videos, a Comments/Questions area and more by visiting the pattern on garnstudio.com. © 1982-2026 DROPS Design A/S. We reserve all rights. This document, including all its sub-sections, has copyrights. Read more about what you can do with our patterns at the bottom of each pattern on our site. |
|||||||||||||


With over 40 years in knitting and crochet design, DROPS Design offers one of the most extensive collections of free patterns on the internet - translated to 17 languages. As of today we count 324 catalogues and 12290 patterns translated into English (UK/cm).
We work hard to bring you the best knitting and crochet have to offer, inspiration and advice as well as great quality yarns at incredible prices! Would you like to use our patterns for other than personal use? You can read what you are allowed to do in the Copyright text at the bottom of all our patterns. Happy crafting!
Post a comment to pattern DROPS 96-3
We would love to hear what you have to say about this pattern!
If you want to leave a question, please make sure you select the correct category in the form below, to speed up the answering process. Required fields are marked *.