
Popular categories
Looking for a yarn?


Comments / Questions (11)
![]() Stephanie wrote:
Stephanie wrote:
Bonjour, je m'interroge sur les rayures et comment garder les bordures en beige clair. Le rang 7 je commence en beige clair, à la 8eme maille je prends le coloris garden party. Je tricote jusqu'à ce qu'il reste 7 mailles. Et ensuite? Dois tourner mon travail sans tricoter le rang de bordure ou dois utiliser une nouvelle pelote de beige clair? merci
30.04.2026 - 16:26DROPS Design answered:
Bonjour Stéphanie, faites une petite pelote séparée pour la bordure devant d'un côté (pour le devant droit), et utilisez cette pelote pour tricoter la bordure devant tout du long, croisez les fils sur l'endroit avant de tricoter les 7 dernières mailles pour ainsi continuer à tricoter la bordure devant en Fiesta/Kid-Silk et sur l'envers, croisez de nouveau les fils pour continuer avec la couleur du rang suivant (comme pour un jacquard par ex.). Bon tricot!
30.04.2026 - 16:38
![]() Sonja wrote:
Sonja wrote:
Hi I don't understand how 19 stitches on the right front piece can become 24 stitches after 4 increases for size M while for S 19 stitches become 23?
17.04.2026 - 19:01DROPS Design answered:
Dear Sonja, you should have 20 sts for each front piece as you pick up 1 stitch on edge + 19 sts along shoulder = 20 sts, a correction will come, thanks for noticing. Happy knitting!
20.04.2026 - 08:46
![]() Marion wrote:
Marion wrote:
Hallo, nochmal ne Frage zu den einfarbigen Blenden.... Das bedeutet, wenn ich die Hinreihe Krauss rechts farbig gestrickt habe, muss ich am Ende der Reihe für 7 Maschen ein einfarbiges Knäuel anfangen? Mit dem stricke ich dann zwei Mal die Blende und was mach ich dann damit? Lass ich den Faden dann 6 Reihen hängen?
10.04.2026 - 23:19DROPS Design answered:
Liebe Marion, die 2 Blende stricken Sie beidseitig mit separate Knäuel wenn Sie die Krausrippe mit der anderen Farbe stricken, die beide Farben innerhalb der Blende verkreuzen (wie man Einstrickmuster strickt. Viel Spaß beim Stricken!
13.04.2026 - 07:55
![]() Gudrun V wrote:
Gudrun V wrote:
Hallo! Ist es sinnvoll am Rückenteil verkürzte Reihen zu arbeiten?
23.03.2026 - 20:44DROPS Design answered:
Liebe Gudrun, bei dieser Passe ist es nicht nötig, hier hat man einen echten Halsausschnitt, schauen Sie mal die Videos unter Tab "Video" rechts vom Tab "Anleitung", das kann Ihnen sicher helfen. Viel Spaß beim Stricken!
24.03.2026 - 08:50
![]() Anna wrote:
Anna wrote:
Hallo! Kann ich den Cardigan auch nur mit Fiesta stricken? Muss ich dann eine größere Größe wählen oder eine andere Nadelstärke? Vielen Dank!
22.03.2026 - 12:23DROPS Design answered:
Liebe Anna, mit nur Fiesta bekommen Sie die richtige Maschenprobe nicht genau, so sollen Sie die ganze Anleitung mit der Maschenprobe mit nur Fiesta neu umrechnen; oder inspirieren Sie sich von einem ähnlichen Modell der Garngruppe B (siehe hier z.B.). Viel Spaß beim Stricken!
23.03.2026 - 09:19
![]() Cathie Castaneda wrote:
Cathie Castaneda wrote:
Hello! Question on Row/round 8. How can I “ROW/ROUND 8: Knit from wrong side/purl from right side” if I am only doing one row, not both right and wrong sides?
05.03.2026 - 05:42DROPS Design answered:
Hi Cathie, When working the stripes on the body of the jacket, you are working back and forth and row 8 will be from the wrong side as the stripes begin on a row from the right side. In this case, you will knit the row from the wrong side. When working stripes on the sleeves, you are working in the round and all rounds are from the right side. On round 8 you will therefore purl from the right side. Regards, Drops Team.
05.03.2026 - 06:19
![]() Ann Van Rompaey wrote:
Ann Van Rompaey wrote:
Ik begrijp het verschil niet tussen LIJF en achterpand/voorpanden. Bij het achterpand werken we vanaf hals naar beneden, maar ik vind nergens waar ik de eerste streep moet beginnen breien. Heel moeilijke uitleg en werkwijze voor wat me toch een eenvoudig vest lijkt 😥
28.02.2026 - 15:37DROPS Design answered:
Dag Ann,
Het vest wordt van boven naar beneden gebreid, waarbij op een gegeven moment, na de armsgaten de voor en achterpanden worden samengevoegd. Vanaf dan brei je heen en weer van midden voor naar midden voor en dit wordt het lijf genoemd. De pas is dus het bovenste gedeelte van de panden. Bij de pas staat ook aangegeven 'brei nu de strepen'. Bovenaan bij de instructies staat dan weer aangegeven hoe je de strepen breit.
01.03.2026 - 10:50
![]() Jennifer wrote:
Jennifer wrote:
I love this pattern but cant wear the kid silk as it is too itchy for me. Can i leave out the kid silk and how would this affect the pattern and garment. Can i use something else, would.i havs to knit a bigger size if i leave it out?
18.02.2026 - 23:44DROPS Design answered:
Hi jJennifer, You can choose any other yarn from Yarn Group A to replace Kid Silk. Click on Yarns & Needles at the top of the page, then choose Yarn Groups on the right-hand side, and Yarn Group A. You can then use the yarn amounts and sizes as suggested in the pattern. Regards, Drops Team.
19.02.2026 - 06:05
![]() Mònica wrote:
Mònica wrote:
Hola, Formulé una pregunta acerca de esta chaqueta el 12/2: ¿Puedo contar que recibiré una respuesta y cuándo? Gracias!
16.02.2026 - 13:33DROPS Design answered:
Hola Mònica, está es la única versión del patrón disponible, trabajada de arriba abajo. Puedes trabajar la chaqueta al contrario adaptando las instrucciones escritas y comenzando desde el final de la sección cuerpo y mangas hacia arriba, pero tendrías que calcular todos los cambios y cambiar los aumentos del canesú a disminuciones.
16.02.2026 - 13:54
![]() Babsi wrote:
Babsi wrote:
Moin, wenn man an den Blenden nur hellbeige strickt, heißt das ja, dass man immer mit 2 Knäulen hellbeige arbeiten muss, also insgesamt 4 Knäulen (1 Kid silk, 2 Fiesta hellbeige, 1 Fiesta Gartenparty), korrekt? Liebe Grüße
12.02.2026 - 20:05DROPS Design answered:
Liebe Babsi, ja genau, Sie können sich ein kleines Extra-Knäuel Fiesta hellbeige vorher abwickeln oder ein eigenes Knäuel verwenden. Kid-Silk läuft ja immer in der Farbe Marzipan mit, daher brauchen Sie hier kein gesondertes Knäuel. Viel Spaß beim Stricken!
16.02.2026 - 11:52
|
|
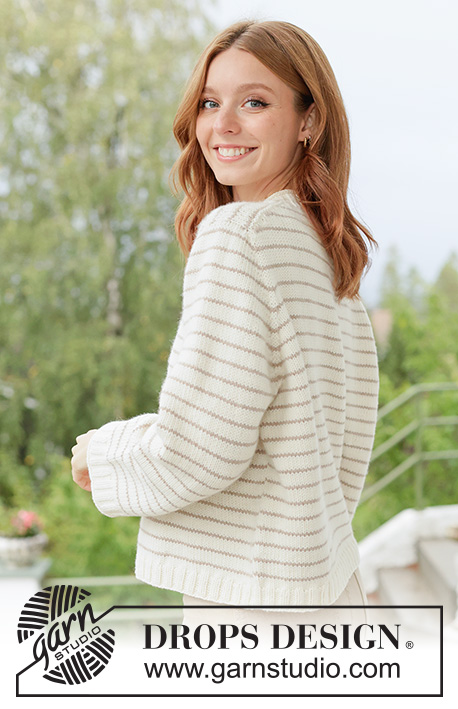
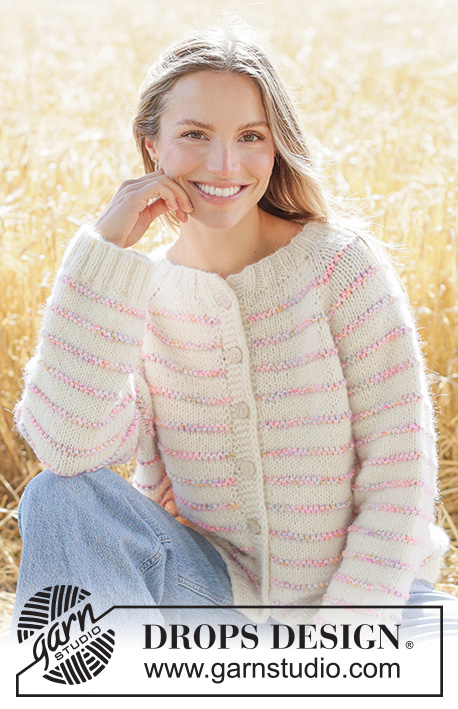
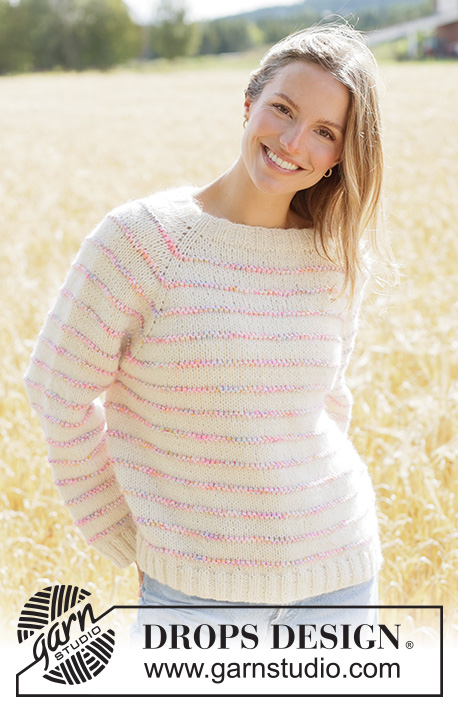
Fairy Lights Cardigan#fairylightscardigan |
|
 |
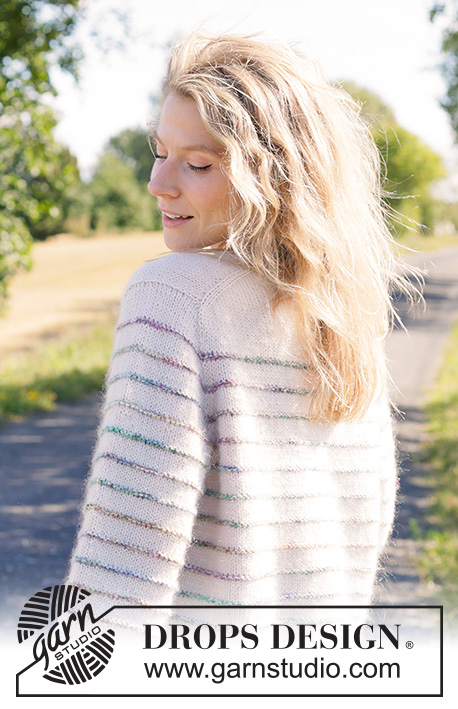 |
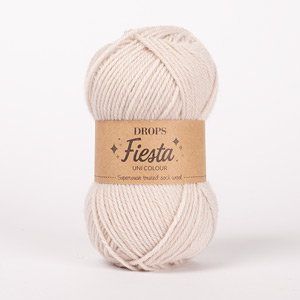
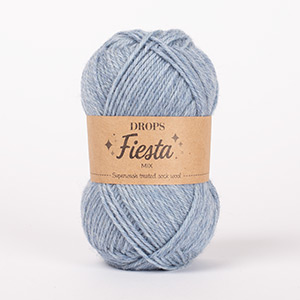
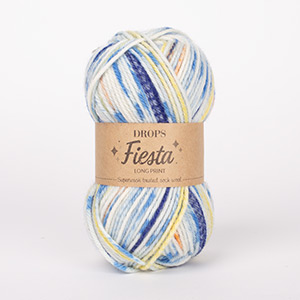
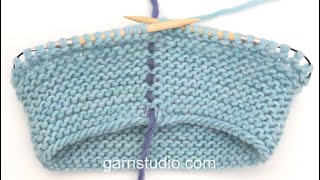
Knitted jacket in DROPS Fiesta and DROPS Kid-Silk. The piece is worked top down with European yoke, stripes, garter stitch and I-cord. Sizes XS - XXXL.
DROPS 266-6 |
|
|
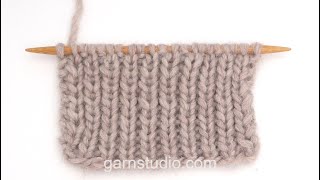
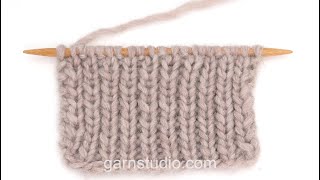
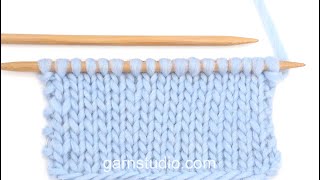
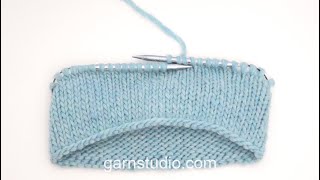
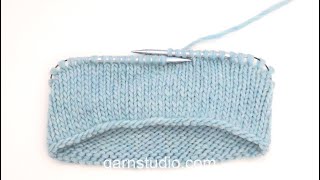
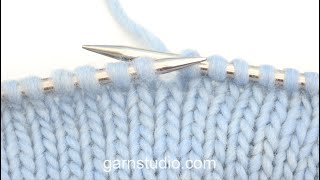
------------------------------------------------------- EXPLANATIONS FOR THE PATTERN: ------------------------------------------------------- INCREASE TIP-1: INCREASE 1 STITCH TOWARDS LEFT – from RIGHT SIDE: Use the left needle to pick up the strand between 2 stitches from the row below, pick up the strand from the front and knit through the stitch-loop that lies on the back of the needle. INCREASE 1 STITCH TOWARDS THE RIGHT- from RIGHT SIDE: Use the left needle to pick up the strand between 2 stitches from the row below, pick up the strand from the back and knit through the stitch-loop that lies on the front of the needle. INCREASE TIP-2: INCREASE 1 STITCH TOWARDS THE RIGHT- from WRONG SIDE: Use the left needle to pick up the strand between 2 stitches from the row below, pick up the strand from the back and purl through the stitch-loop that lies on the front of the needle. INCREASE 1 STITCH TOWARDS LEFT – from WRONG SIDE: Use the left needle to pick up the strand between 2 stitches from the row below, pick up the strand from the front and purl through the stitch-loop that lies on the back of the needle. GARTER STITCH (worked back and forth): Knit all rows, from both the right and wrong side. 1 ridge in height = knit 2 rows. GARTER STITCH (worked in the round): Alternately knit 1 round and purl 1 round. 1 ridge vertically = 2 rounds. BANDS WITH I-CORD: BEGINNING OF ROW: Work the band as follows (7 stitches): Slip 1 stitch purl-wise with yarn in front, knit 1, work 5 garter stitches. END OF ROW: Work the band as follows (7 stitches): Work until there are 7 stitches left on the row, work 5 garter stitches, slip 1 stitch purl-wise with yarn in front, knit 1. Work like this from both the right and wrong side. BUTTONHOLES: Work the buttonholes on the right band (when the garment is worn) from the right side, when there are 5 stitches left on the row as follows: ROW 1 (right side): Make 1 yarn over, knit 2 together, knit 1, slip 1 stitch purl-wise with the strand in front, knit 1. ROW 2 (wrong side): Work the band as before, knitting the yarn over to leave a hole. The first buttonhole is worked on the first row from the right side after the neck is finished. Then work the other 4-4-5-5-5-5-5 buttonholes with 9½-10-8½-9-9-9-9½ cm between each one. The bottom buttonhole is worked in the transition between the stocking stitch and rib. STRIPES: The stripes are worked in stocking stitch and garter stitch for 8 rows/rounds as follows: ROWS/ROUNDS 1–6: Work stocking stitch with 1 strand colour Light Beige DROPS Fiesta and 1 strand DROPS Kid-Silk (2 strands). ROW/ROUND 7: Knit with 1 strand colour Garden Party DROPS Fiesta and 1 strand DROPS Kid-Silk (2 strands). NOTE: When working stripes on the yoke and body, change colour after the 7 band-stitches (stripes are not worked on the bands). ROW/ROUND 8: Knit from wrong side/purl from right side with 1 strand colour Garden Party DROPS Fiesta and 1 strand DROPS Kid-Silk (2 strands). Remember, no stripes on the bands. Repeat ROWS/ROUNDS 1-8 on both the body and the sleeves. SLEEVE TIP: When knitting up stitches under the sleeve, you can get a small hole in the transition between stitches on the body and sleeve. This hole can be closed by picking up the strand between 2 stitches and working this strand twisted together with the first stitch between body and sleeve. DECREASE TIP: Always decrease in a stocking stitch section when working stripes. Decrease 1 stitch on each side of the marker-thread as follows: Work until there are 3 stitches left before the marker-thread, knit 2 together, knit 2 (marker-thread sits between these 2 stitches), slip 1 stitch knit-wise, knit 1 and pass the slipped stitch over the knitted stitch (2 stitches decreased). ------------------------------------------------------- START THE PIECE HERE: ------------------------------------------------------- JACKET – SHORT OVERVIEW OF THE PIECE. The pattern uses both long and short needles; start with the length which fits the number of stitches and change when necessary. If there is a «0» in your chosen size, skip the information and go straight to the next instruction. Work according to points 1 – 5. 1. BACK PIECE: Cast on stitches for the back of the neck. Work the back piece back and forth, increasing stitches on each side until the shoulder stitch count has been achieved. The back piece has slightly diagonal shoulder. 2. FRONT PIECES: Start by knitting up stitches along one back shoulder, working downwards and increasing for the neckline. Repeat on the other shoulder. 3. YOKE: Join the front and back pieces, working first 1 front piece, knitting up stitches for the sleeve along the side of the front piece, working the back piece, knitting up stitches for the sleeve along the side of the second front piece, then working this front piece. The yoke is continued back and forth from mid-front. 4. INCREASE FOR BODY AND SLEEVES: While working the yoke, you increase stitches first for the sleeves, then for the body and sleeves. 5. BODY AND SLEEVES: When all the increases are finished and the yoke is the correct length, it is divided for the body and sleeves. The body is continued back and forth while the sleeves wait. Then the sleeves are worked in the round, top down. Stitches are knitted up around the neckline and the neck is worked back and forth to finish. BACK PIECE: The piece is worked back and forth. Cast on 28-30-30-32-32-34-34 stitches with circular needle size 5 mm, 1 strand colour Light Beige DROPS Fiesta and 1 strand DROPS Kid-Silk (2 strands). ROW 1 (wrong side): Purl. ROW 2 (right side): Read INCREASE TIP-1. Knit 3, increase 1 stitch towards the left, knit until there are 3 stitches left on the row, increase 1 stitch towards the right, knit 3. ROW 3 (wrong side): Read INCREASE TIP-2. Purl 3, increase 1 stitch towards the right, purl until there are 3 stitches left on the row, increase 1 stitch towards the left, purl 3. AFTER ROW 3: Work ROWS 2 and 3 a total of 9-9-9-9-10-10-10 times, then ROW 2, 0-0-1-1-0-0-1 more time (18-18-19-19-20-20-21 rows worked). After the last increase there are 64-66-68-70-72-74-76 stitches. Remember to maintain the knitting tension. Cut the strand and place the stitches on a stitch holder. RIGHT FRONT PIECE: Find the right back shoulder as follows: Lay the back piece flat, right side up, with the stitch holder/thread towards you; right-hand side of piece = right shoulder. Start from the right side by the armhole on the right back shoulder and knit up 1 stitch outermost on the shoulder (edge stitch), then knit up 1 stitch in each row worked, inside the outermost stitch as far as the neckline (18-18-19-19-20-20-21 stitches) = 19-19-20-20-21-21-22 shoulder-stitches. Insert 1 marker by the neck. All measurements on the front piece are taken from this marker, measured in the knitting direction. Work stocking stitch back and forth (the first row is from the wrong side)). When the piece measures 5-5-6-6-6-7-8 cm, increase for the neckline as follows: ROW 1 (right side): Knit until there are 3 stitches left on the row, increase 1 stitch towards the right, knit 3 – remember INCREASE TIP-1. ROW 2 (wrong side): Purl. Work ROWS 1 and 2 a total of 4-4-4-4-5-5-5 times (8-8-8-8-10-10-10 rows worked) = 23-23-24-24-26-26-27 stitches. At the end of the next row from the right side, cast on 16-17-17-18-17-18-18 stitches = 39-40-41-42-43-44-45 stitches. Working back from the wrong side, work the first 7 stitches according to BANDS WITH I-CORD – read explanation above. The neckline-increases are finished. The piece measures approx. 9-9-10-10-11-12-13 cm from the marker. Approx. 2 cm of the neckline-depth will lie on the back piece. Remember to work the first BUTTONHOLE at the end of the row – read description above. Continue stocking stitch and the band until the piece measures 12-12-13-13-13-13-14 cm from the marker. Cut the strand, place the stitches on a stitch holder and work the left front piece along the left back shoulder. LEFT FRONT PIECE: Start from the right side by the neck on the left back shoulder and knit up 1 stitch in each row worked, inside the outermost stitch as far as the armhole (18-18-19-19-20-20-21 stitches), then knit up 1 stitch outermost on the shoulder (edge stitch) = 19-19-20-20-21-21-22 shoulder-stitches. Insert 1 marker by the neck. All measurements on the front piece are taken from this marker, measured in the knitting direction. Work stocking stitch back and forth (the first row is from the wrong side)). When the piece measures 5-5-6-6-6-7-8 cm, increase for the neckline as follows: ROW 1 (right side): Remember INCREASE TIP-1. Knit 3, increase 1 stitch towards the left, knit to end of row. ROW 2 (wrong side): Purl. Work ROWS 1 and 2 a total of 4-4-4-4-5-5-5 times (8-8-8-8-10-10-10 rows worked) = 23-23-24-24-26-26-27 stitches. At the end of the next row from the wrong side, cast on 16-17-17-18-17-18-18 stitches = 39-40-41-42-43-44-45 stitches. Continue the band (7 stitches) as above and stocking stitch until the front piece measures approx. 12-12-13-13-13-13-14 cm from the marker, finishing after a row from the wrong side. The front and back pieces are now joined and stitches are knitted up for the sleeves. YOKE: Start from the right side on the left front piece, work the 7 band-stitches as before, knit until there are 2 stitches left on the front piece, slip 1 stitch, knit 1 and pass the slipped stitch over (1 decreased stitch), insert 1 marker, knit up 20-20-22-22-22-22-24 stitches along the side of the left front piece (= sleeve-stitches, knitted up inside the outermost stitch), insert 1 marker, knit together the first 2 stitches on the back piece (1 stitch decreased), knit until there are 2 stitches left on the back piece, slip 1 stitch, knit 1 and pass the slipped stitch over (1 decreased stitch), insert 1 marker, knit up 20-20-22-22-22-22-24 stitches along the side of the right front piece (= sleeve-stitches, knitted up inside the outermost stitch), insert 1 marker, knit together the first 2 stitches on the right front piece (1 stitch decreased), knit until there are 7 stitches left, work the band as before = 178-182-190-194-198-202-210 stitches. On the next row from the wrong side increase for the sleeves as follows: Work the band, then purl to the first marker, move the marker onto the right needle, increase 1 stitch towards the left, purl to the next marker, increase 1 stitch towards the right, move the marker onto the right needle, purl to the next marker, move the marker onto the right needle, increase 1 stitch towards the left, purl to the next marker, increase 1 stitch towards the right, move the marker onto the right needle, purl until there are 7 stitches left, work the band as before (4 increased stitches) = 182-186-194-198-202-206-214 stitches. You have worked the first increase on the sleeves. Now begin STRIPES – read explanation above. Continue increasing on the sleeves, each time increasing from the right side (NOTE: In size XXXL this does not apply, so go straight to the next paragraph and begin increasing on both body and sleeves). In the other sizes work as follows: ROW 1 (right side): Work as before to the first marker, move the marker onto the right needle, increase 1 stitch towards the left, work to the next marker, increase 1 stitch towards the right, move the marker onto the right needle, work to the next marker, move the marker onto the right needle, increase 1 stitch towards the left, work to the next marker, increase 1 stitch towards the right, move the marker onto the right needle, work to end of row as before (4 stitches increased). ROW 2 (wrong side): Work as before with 7 band-stitches on each side. Work ROWS 1 and 2, 6-6-6-5-3-1-0 times (12-12-12-10-6-2-0 rows worked). A total of 7-7-7-6-4-2-1 increases in height on the sleeves: 34-34-36-34-30-26-26 stitches on each sleeve, 38-39-40-41-42-43-44 stitches on each front piece and 62-64-66-68-70-72-74 stitches on the back piece = 206-210-218-218-214-210-214 stitches. Now increase on both the body and sleeves, increasing 2 stitches before/after the markers on the body so there are 2 stitches between the increases on the sleeves and body – remember to continue the stripes and the buttonholes. ROW 1 (right side): Work as before until there are 2 stitches left on the front piece before the first marker, increase 1 stitch towards the right, knit 2, move the marker onto the right needle, increase 1 stitch towards the left, knit to the next marker, increase 1 stitch towards the right, move the marker onto the right needle, knit 2, increase 1 stitch towards the left, knit until there are 2 stitches left on the back piece before the next marker, increase 1 stitch towards the right, knit 2, move the marker onto the right needle, increase 1 stitch towards the left, knit to the next marker, increase 1 stitch towards the right, move the marker onto the right needle, knit 2, increase 1 stitch towards the left, knit until there are 7 stitches left and work the band as before (8 increased stitches, i.e., 1 stitch on each side of 2 knitted stitches in each transition between body and sleeves). ROW 2 (wrong side): Work as before with 7 band-stitches on each side. Work ROWS 1 and 2 a total of 8-10-12-14-17-20-23 times (16-20-24-28-34-40-46 rows worked). A total of 15-17-19-20-21-22-24 increases in height on the sleeves and 8-10-12-14-17-20-23 increases in height on the body: 50-54-60-62-64-66-72 stitches on each sleeve, 46-49-52-55-59-63-67 stitches on each front piece and 78-84-90-96-104-112-120 stitches on the back piece = 270-290-314-330-350-370-398 stitches. The sleeves measure approx. 14-15-17-18-19-20-22 cm. Fold the jacket double at the shoulder, the piece then measures approx. 20-21-24-25-26-27-29 cm from outermost on the shoulder and down the armhole. Adjust so the next row is not a stripe-row and now divide for the body and sleeves. DIVIDE FOR BODY AND SLEEVES: Work 46-49-52-55-59-63-67 stitches as before (= front piece), place the next 50-54-60-62-64-66-72 stitches on a stitch holder for the sleeve, cast on 6-8-8-10-10-12-14 stitches (mid-under the sleeve), work the next 78-84-90-96-104-112-120 stitches (= back piece), place the next 50-54-60-62-64-66-72 stitches on a stitch holder for the sleeve, cast on 6-8-8-10-10-12-14 stitches (mid-under the sleeve), work the last 46-49-52-55-59-63-67 stitches as before (= front piece). The body and sleeves are finished separately. BODY: = 182-198-210-226-242-262-282 stitches. Continue stocking stitch, stripes and bands until the piece measures 42-44-46-48-49-51-53 cm from the cast-on edge mid-back. Then work stocking stitch and the bands without stripes for 2 cm (the piece measures 44-46-48-50-51-53-55 cm from the cast-on edge mid-back). On the next row from the right side begin the rib, AT THE SAME TIME increase 47-53-59-59-67-73-79 stitches evenly on the row (do not increase across the bands) as follows: Change to circular needle size 3.5 mm. Work 7 band-stitches as before, rib (knit 1, purl 1 – remember to increase) until there are 7 stitches left, work the band as before = 229-251-269-285-309-335-361 stitches. When the rib measures 7-7-7-7-8-8-8 cm, cast off with knit above knit and purl above purl. The jacket measures approx. 51-53-55-57-59-61-63 cm from mid-back and 53-55-57-59-61-63-65 cm from the shoulder. SLEEVES: Place the 50-54-60-62-64-66-72 sleeve-stitches from one stitch holder onto circular needle size 5 mm and knit up 1 stitch in each of the 6-8-8-10-10-12-14 stitches cast on under the sleeve – read SLEEVE TIP = 56-62-68-72-74-78-86 stitches. Insert a marker-thread in the middle of the 6-8-8-10-10-12-14 stitches under the sleeve. The round starts by the marker-thread. Continue the stocking stitch and STRIPES from the yoke, in the round. AT THE SAME TIME, when the sleeve measures 2 cm from the division, decrease mid-under the sleeve – read DECREASE TIP as follows: Decrease 2 stitches every 10-7-4½-4-3½-3-2 cm a total of 3-5-7-8-8-9-12 times = 50-52-54-56-58-60-62 stitches. Continue working until the sleeve measures 33-33-31-31-29-29-27 cm from the division. Then work stocking stitch without stripes for 2 cm. The sleeve measures 35-35-33-33-31-31-29 cm from the division. Change to double pointed needles size 3.5 mm. Work rib (knit 1, purl 1), AT THE SAME TIME increase 14-16-16-16-16-16-16 stitches evenly on the first round = 64-68-70-72-74-76-78 stitches. When the rib measures 7-7-7-7-8-8-8 cm, cast off with rib. The sleeve measures approx. 42-42-40-40-39-39-37 cm from the division. NECK: Use circular needle size 3.5 mm and 1 strand colour Light Beige DROPS Fiesta and 1 strand DROPS Kid-Silk (2 strands). Start from the right side mid-front and knit up 89-93-95-101-103-109-111 stitches along the neckline, making sure you knit up 1 stitch in each band-stitch. Knit up inside 1 stitch, with the stitch count divisible by 2 + 1. Work the next row as follows from the wrong side: 7 band stitches as before, then rib (purl 1, knit 1) until there are 8 stitches left, purl 1 and work 7 band stitches as before. When the rib measures 4-4-4-4½-4½-5-5 cm, cast off with knit above knit and purl above purl. ASSEMBLY: Sew the buttons onto the left band. |
|
 |
|
Have you finished this pattern?Tag your pictures with #dropspattern #fairylightscardigan or submit them to the #dropsfan gallery. Do you need help with this pattern?You'll find 54 tutorial videos, a Comments/Questions area and more by visiting the pattern on garnstudio.com. © 1982-2026 DROPS Design A/S. We reserve all rights. This document, including all its sub-sections, has copyrights. Read more about what you can do with our patterns at the bottom of each pattern on our site. |
|


With over 40 years in knitting and crochet design, DROPS Design offers one of the most extensive collections of free patterns on the internet - translated to 17 languages. As of today we count 325 catalogues and 12298 patterns translated into English (UK/cm).
We work hard to bring you the best knitting and crochet have to offer, inspiration and advice as well as great quality yarns at incredible prices! Would you like to use our patterns for other than personal use? You can read what you are allowed to do in the Copyright text at the bottom of all our patterns. Happy crafting!
Post a comment to pattern DROPS 266-6
We would love to hear what you have to say about this pattern!
If you want to leave a question, please make sure you select the correct category in the form below, to speed up the answering process. Required fields are marked *.