
Popular categories
Looking for a yarn?


Comments / Questions (13)
![]() Yasmine wrote:
Yasmine wrote:
Bonjour, Tout est ok, j'ai été induite en erreur à cause des 3 mailles à monter sur le dos. merci
21.02.2026 - 08:25
![]() Yasmine wrote:
Yasmine wrote:
Re bonjour, Décidement j'ai du mal de comprendre...quand on relève les mailles pour l'épaule gauche, le 3 mailles endroit se retrouvent donc à l'extérieur (côté manche )et non côté encolure...hors après 5 cm c'est bien côté encolure que les augmentations se font après les 3 m endroit... Merci de m'éclairer.
20.02.2026 - 08:51DROPS Design answered:
Bonjour Yasmine, en fait, les 3 m jersey se trouvent côté encolure dès le début, le 1er rang de l'épaule gauche se tricote sur l'envers = à partir de l'emmanchure: 1 m lis, A.4 puis 3 m envers (côté encolure), sur l'endroit, on tricote 3 m endroit, A.4 et 1 m env. On va ensuite augmenter pour l'encolure après ces 3 m end, en début de rang sur l'endroit. Bon tricot!
23.02.2026 - 07:12
![]() Yasmine wrote:
Yasmine wrote:
Merci
20.02.2026 - 07:34
![]() Yasmine wrote:
Yasmine wrote:
Bonjour, pour les épaules, on monte 40m et on tricote 16 rangs en tout avec une augmentation à chaque rang, cela devrait faire +16 mailles donc 56 au total et non 48... je ne comprends pas, popuvez-vous m'aider? merci
17.02.2026 - 16:41DROPS Design answered:
Bonjour Yasmine, on augmente que d'un seul côté pour l'encolure, autrement dit pour l'épaule gauche on augmente en début de rang sur l'endroit, après les 3 premières mailles = on tricote 16 rangs au total en augmentant seulement sur l'endroit = on a augmenté 8 mailles. Pour l'épaule droite, on augmente avant les 3 dernières mailles du rang, en fin de rang sur l'endroit. Bon tricot!
18.02.2026 - 10:12
![]() Marianne wrote:
Marianne wrote:
Hvor er diagram for denne model og mange andre af jeres modeller?
20.10.2025 - 15:54DROPS Design answered:
Hi Marianne, the diagrams are at the bottom, under pattern instructions. If you can't see them, please change the browser. Happy knitting!
21.10.2025 - 10:55
![]() Regina wrote:
Regina wrote:
Hallo, liebes Drops-Team! Mir fehlen in der Beschreibung die Muster-Diagramme A1- A 7 und eine Pulloverskizze mit den Massangaben. wo finde ich diese?
09.10.2025 - 11:23DROPS Design answered:
Hi, Regina, the diagrams are at the bottom, under pattern instructions. If you can't see them, please change the browser. Regards, DROPS Design
21.10.2025 - 11:53
![]() Pirkko wrote:
Pirkko wrote:
Miksi piirrokset eivät näy? Miten saan ne näkyviin?
09.10.2025 - 11:17DROPS Design answered:
Hei, nyt piirrokset näkyvät. Ohjeeseen on tehty korjaus.
10.10.2025 - 18:34
![]() Problème De Longeur Dos/devant wrote:
Problème De Longeur Dos/devant wrote:
Bonjour, je tricote la taille S, je suis à l'étape des augmentations d'épaule et devant/dos, avant la séparations du corps et des manches. Je pense avoir un problème de longeur car mon dos mesure 26cm de hauteur et mon devant, à partir du bas de l'encolure, seulement 9 cm. Je suis sûr d'avoir respecté les longueurs recommandées mais peut être qu'il faut que je tricote le dos moins long après les augmentations ?
08.10.2025 - 00:19DROPS Design answered:
Bonjour, retrouvez les différentes étapes de construction de ce modèle sous l'onglet Vidéo, si vous avez bien tricoté en suivant les longueurs indiquées, vous devriez avoir les bonnes mesures comme dans le schéma; notez que dans les mesures indiquées on ne mesure pas la 1ère partie du dos (augmentations pour la largeur d'épaules). Bon tricot!
08.10.2025 - 07:52
![]() Elyne wrote:
Elyne wrote:
Bonjour, pour l'épaule droite est-ce qu'il ne faut pas plutôt faire le diagramme A2 ? Car il faut faire 2 mailles endroits après les 3 mailles envers sinon on ne fait pas un miroire de l'épaule gauche.
05.10.2025 - 12:09DROPS Design answered:
Bonjour Elyne, vous pouvez avoir raison. J'envoie votre question a Design Department. Verifiez s'il y a une corrections pour ce modele. Bon tricot!
05.10.2025 - 19:51
![]() Pascale wrote:
Pascale wrote:
Dans le passage où on réunit le devant et le dos et où on relève les mailles des manches (444 mailles au total en taille M), il manque la partie concernant les mailles du dos.
20.09.2025 - 13:46DROPS Design answered:
Bonjour Pascale, retrouvez les mailles du dos au 1er rang sur l'endroit ici, je cite: ricoter ensemble à l'endroit les 2 premières mailles du dos (on a diminué 1 maille), tricoter comme avant jusqu'à ce qu'il reste 2 mailles avant la fin du dos, glisser 1 maille, tricoter 1 maille endroit et passer la maille glissée par-dessus la maille tricotée (on a diminué 1 maille), . Bon tricot!
24.09.2025 - 07:22
|
||||||||||||||||||||||||||||||||||
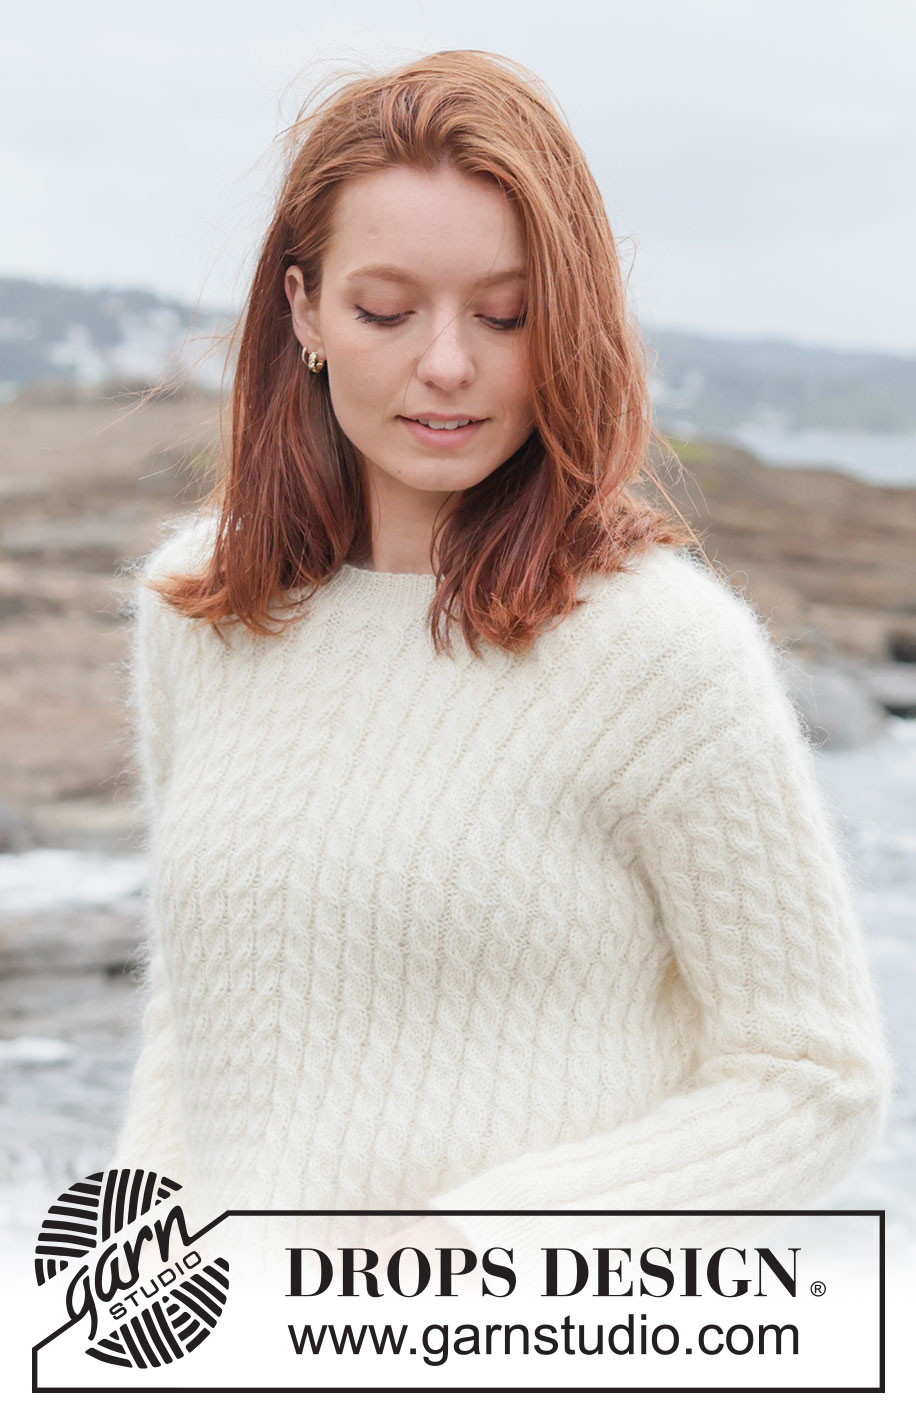
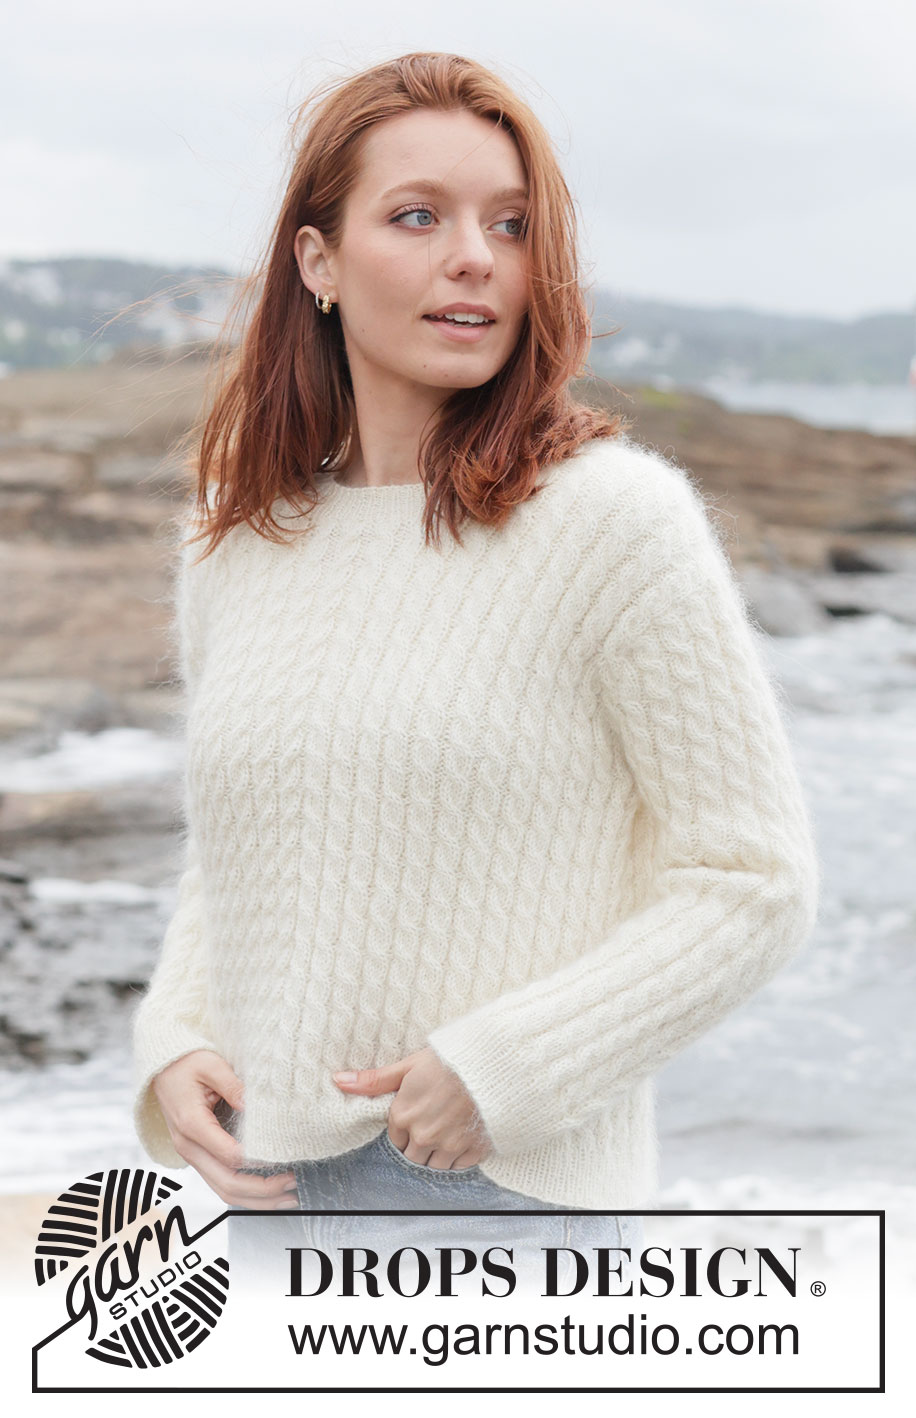
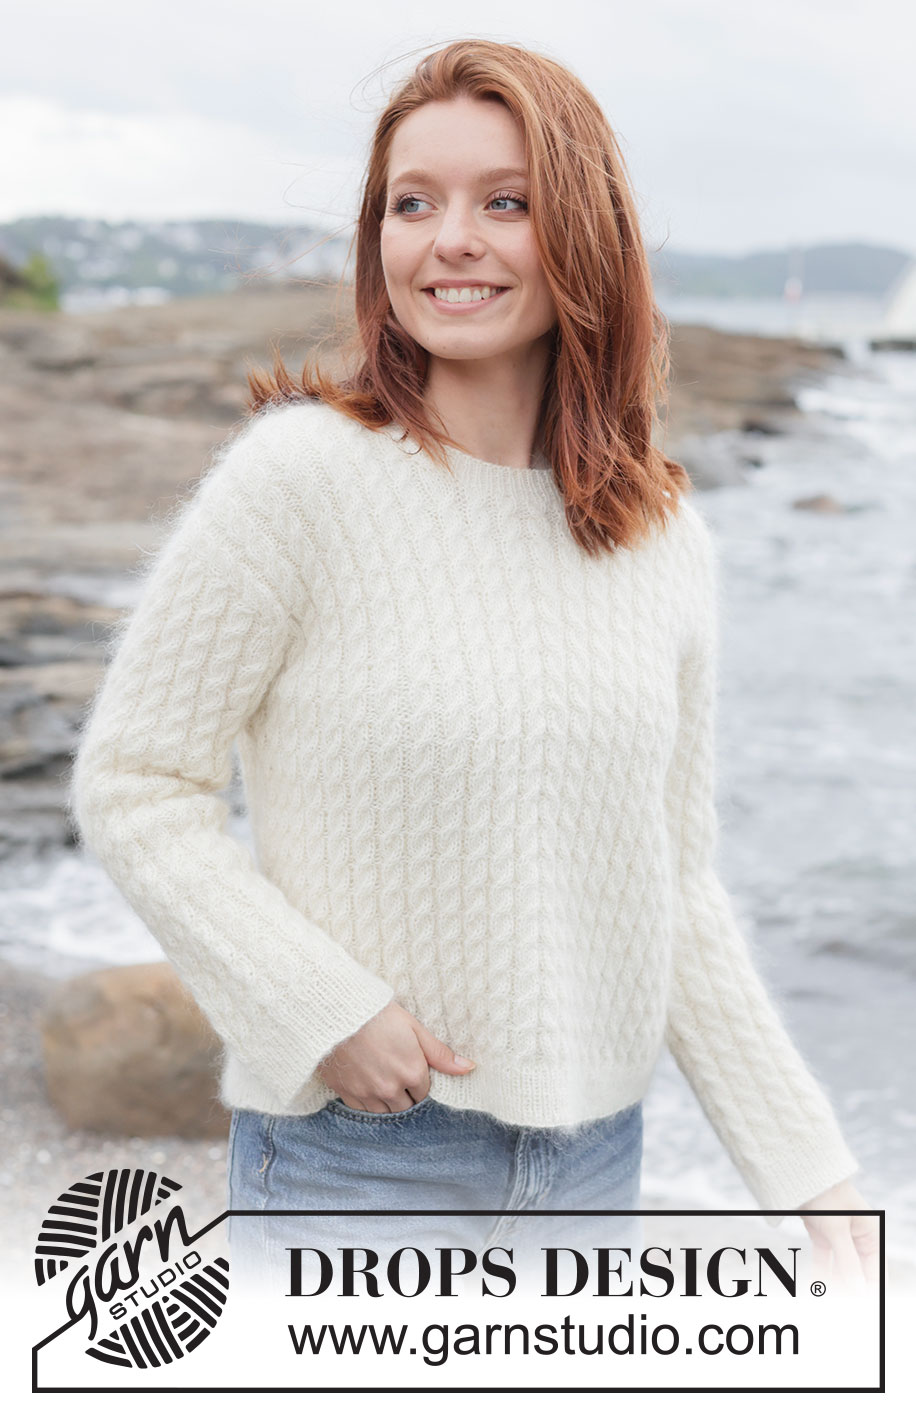
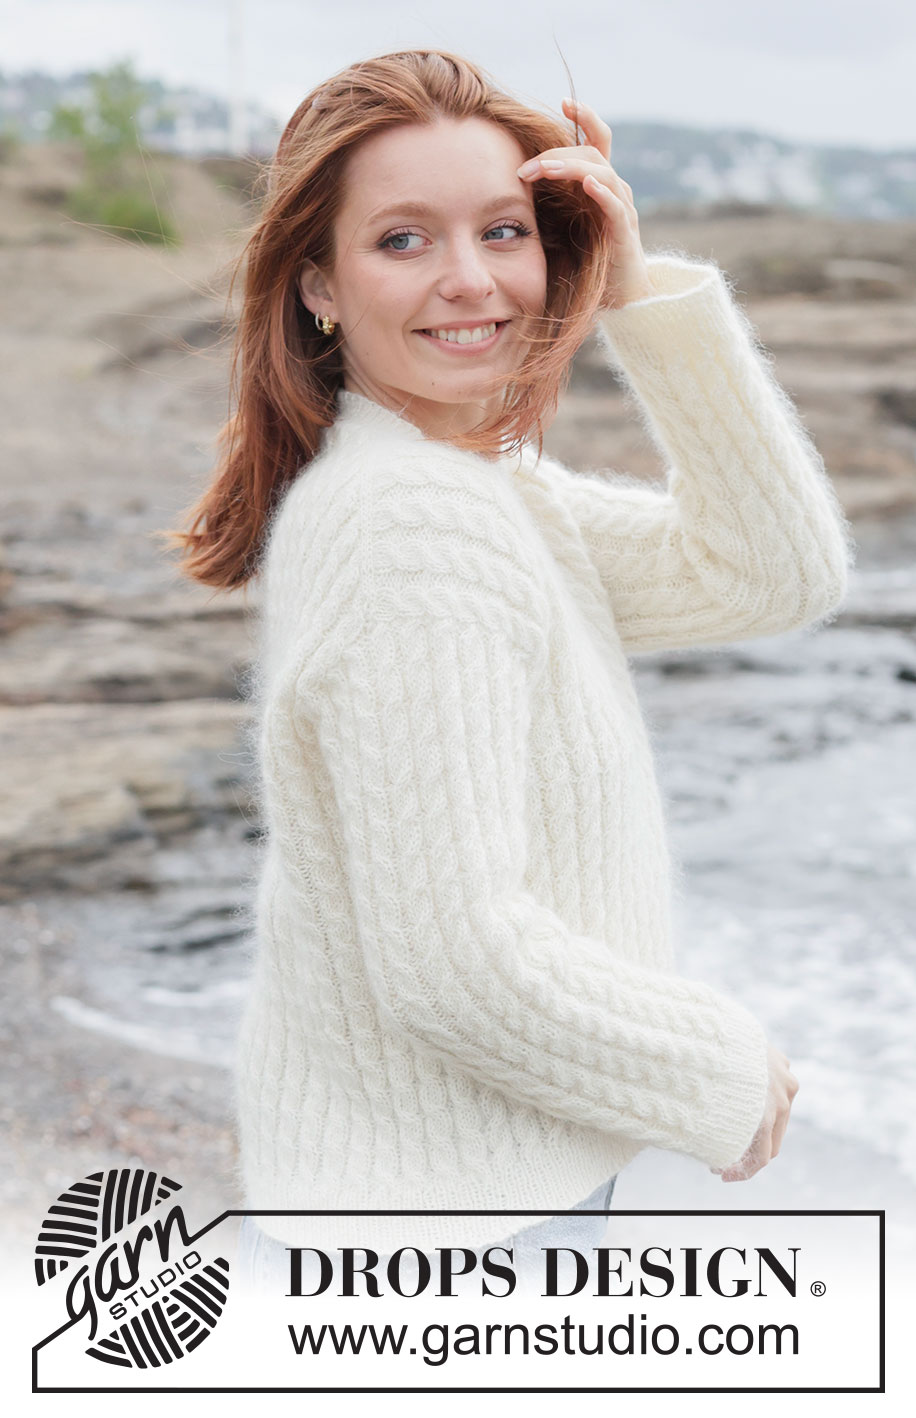
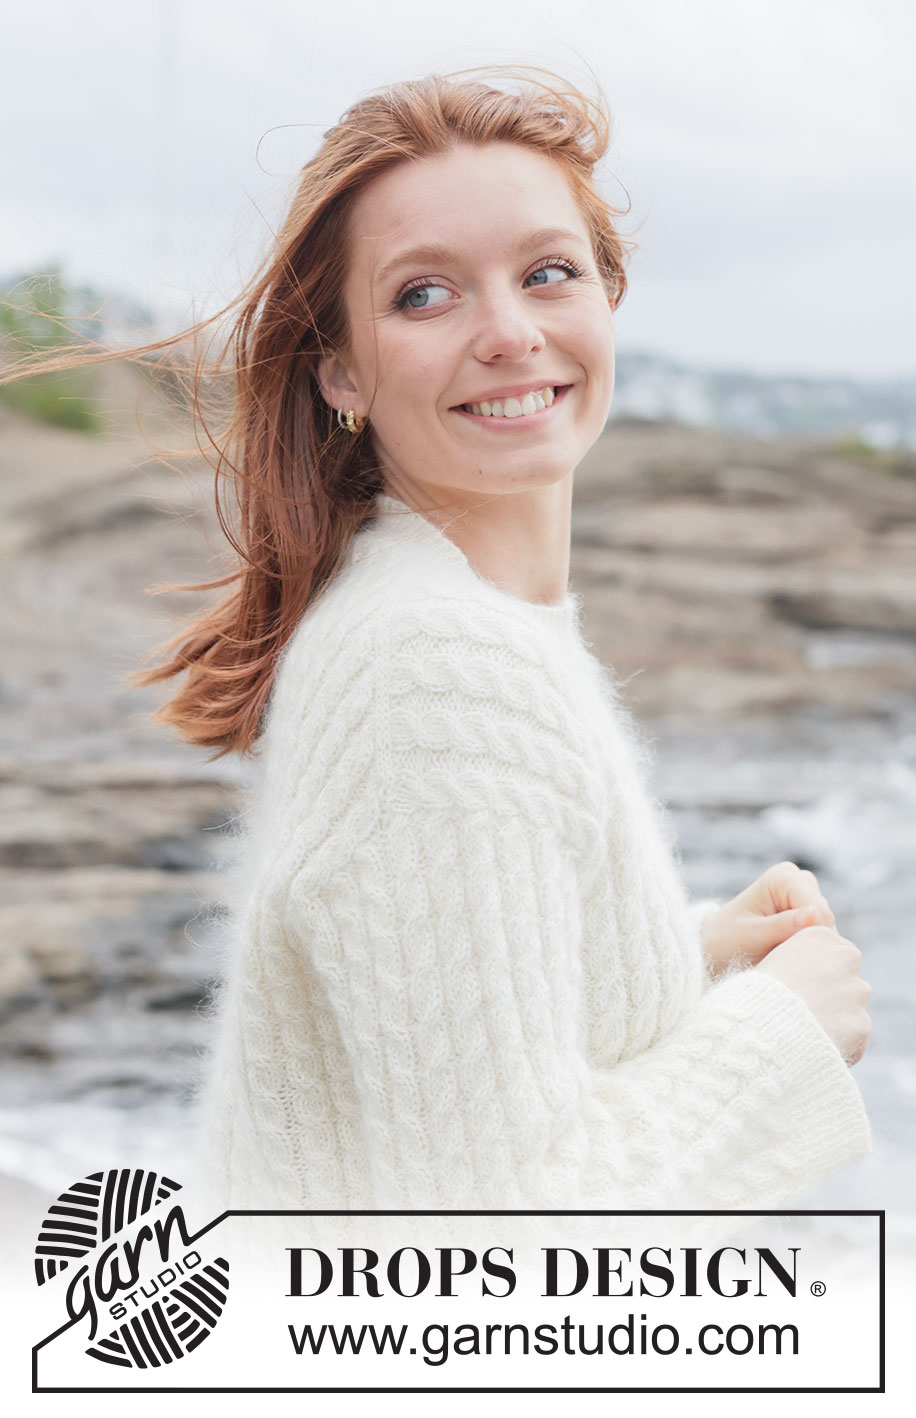
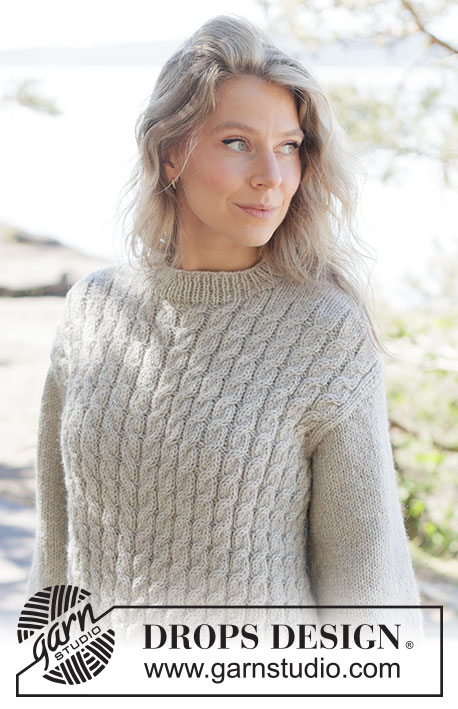
Soft Waves Sweater#softwavessweater |
||||||||||||||||||||||||||||||||||
 |
 |
|||||||||||||||||||||||||||||||||
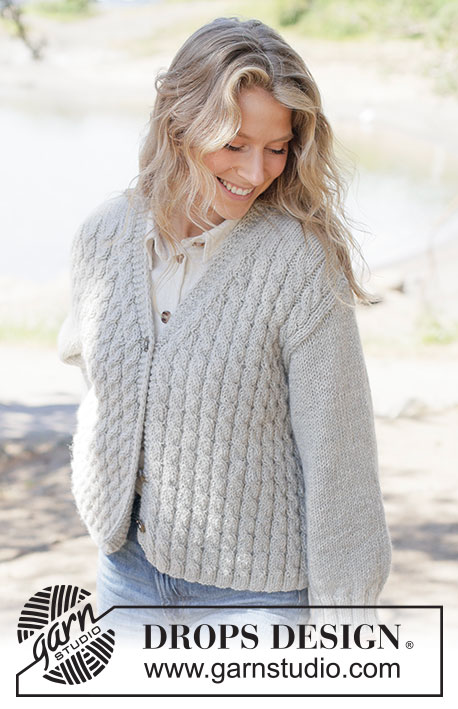
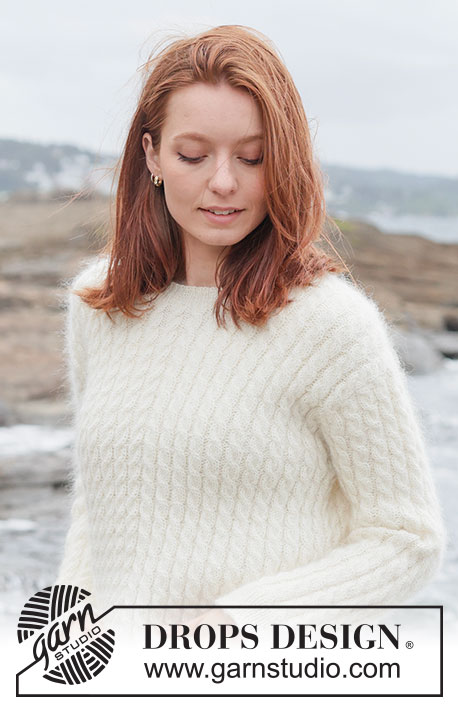
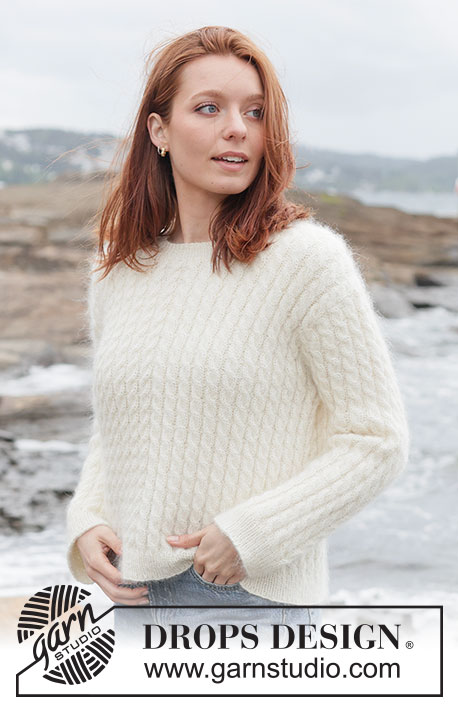
Knitted jumper in 1 strand DROPS Flora and 1 strand DROPS Kid-Silk, or 1 strand DROPS Alpaca and 1 strand DROPS Kid-Silk. The piece is worked top down with European yoke and cables. Sizes XS - XXXL.
DROPS 262-7 |
||||||||||||||||||||||||||||||||||
|
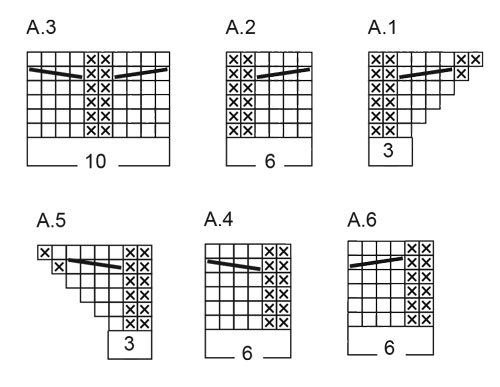
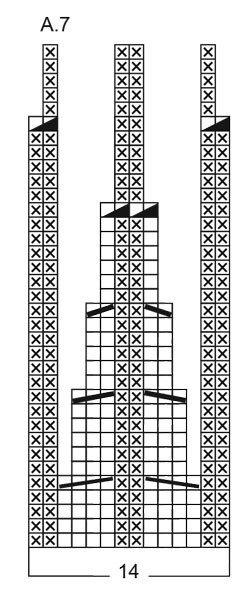
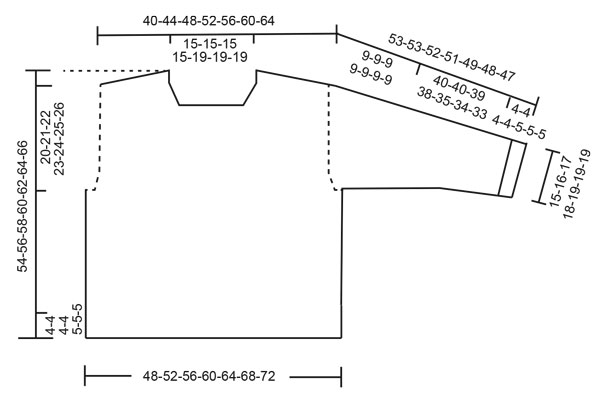
------------------------------------------------------- EXPLANATIONS FOR THE PATTERN: ------------------------------------------------------- GARTER STITCH (worked back and forth): Knit all rows, from both the right and wrong side. 1 ridge in height = knit 2 rows. PATTERN: See diagrams A.1 to A.6. The diagrams show the pattern from the right side. INCREASE TIP-1: INCREASE 1 STITCH TOWARDS THE LEFT - from RIGHT SIDE: Use left needle to pick up yarn between 2 stitches from row below, pick up yarn from the front and knit in the stitch loop that is on the back of the needle. INCREASE 1 STITCH TOWARDS THE RIGHT - from RIGHT SIDE: Use left needle to pick up yarn between 2 stitches from row below, pick up yarn from the back and knit in the stitch loop that is on the front side of the needle. . INCREASE TIP-2: INCREASE 1 STITCH TOWARDS THE RIGHT - from WRONG SIDE: Use left needle to pick up yarn between 2 stitches from row below, pick up yarn from the back and purl in the stitch loop that is on the front side of the needle. INCREASE 1 STITCH TOWARDS THE LEFT - from WRONG SIDE: Use left needle to pick up yarn between 2 stitches from row below, pick up yarn from the front and purl in the stitch loop that is on the back side of the needle. SLEEVE TIP: When knitting up stitches under the sleeve, you can get a small hole in the transition between stitches on the body and sleeve. This hole can be closed by picking up the strand between 2 stitches and working this strand twisted together with the first stitch between body and sleeve. ------------------------------------------------------- START THE PIECE HERE: ------------------------------------------------------- JUMPER – SHORT OVERVIEW OF THE PIECE. The pattern uses both long and short needles; start with the length which fits the number of stitches and change when necessary. Work according to points 1 – 5. 1 BACK PIECE: Cast on stitches for the back of the neck. Work the back piece back and forth, increasing stitches on each side until the shoulder stitch count. The back piece has slightly diagonal shoulder. The back piece is then worked back and forth to the correct length. 2 FRONT PIECE: Is worked in 2 sections (each side of neck). Start by knitting up stitches along one back shoulder, working downwards and increasing for the neckline. Repeat on the other shoulder. Then stitches are cast on for the front neckline and the 2 shoulders are joined. The front piece is worked back and forth to the correct measurement. 3 YOKE: Place the front and back pieces on the same needle, working first the front piece, knitting up stitches for one sleeve along the side of the front piece, then working the back piece and knitting up stitches for the second sleeve along the other side of the front piece. Continue in the round. 4 INCREASE FOR BODY AND SLEEVES: While working the yoke, increase stitches for the body and sleeves. 5 BODY AND SLEEVES: When the yoke is finished, it is divided and the body is continued in the round while the sleeves wait. Then the sleeves are worked top down. Stitches are knitted up around the neckline and the neck is worked to finish. BACK PIECE: The piece is worked back and forth. Cast on 46-46-46-46-58-58-58 stitches with circular needle size 3.5 mm, 1 strand DROPS Flora and 1 strand DROPS Kid-Silk (2 strands), or 1 strand DROPS Alpaca and 1 strand DROPS Kid-Silk (2 strands). ROW 1 (wrong side): Purl. ROW 2 (right side): Read INCREASE TIP-1. Knit 3, increase 1 stitch towards the left, work A.1, then A.2 2-2-2-2-3-3-3 times, A.3, work A.4 2-2-2-2-3-3-3 times, A.5, increase 1 stitch towards the right, knit 3. ROW 3 (wrong side): Read INCREASE TIP-2. Purl 3, increase 1 stitch towards the right, knit above knit and purl above purl until there are 3 stitches left, increase 1 stitch towards the left, purl 3. Work ROWS 2 and 3 a total of 18-21-24-27-27-30-33 times (36-42-48-54-54-60-66 rows worked), then work row 2 one more time = 120-132-144-156-168-180-192 stitches. NOTE! Each time A.1 and A.5 are finished vertically, there is room for 1 more repeat of A.2 and A.4 on each side of A.3. When the increases are finished, insert 1 marker on each side. The piece is now measured from here. Continue as follows: 1 edge stitch in GARTER STITCH – read explanation above, A.2 9-10-11-12-13-14-15 times, A.3, then A.4 9-10-11-12-13-14-15 times and 1 edge stitch in garter stitch. Make sure you continue with the correct row in A.2 and A.3 so the pattern continues with 5 rows between each cable-row. Continue this pattern until the piece measures 7-8-9-10-11-12-13 cm from the markers, finishing with row 4 in the diagrams (wrong side). Place the stitches on a thread or another needle. LEFT SHOULDER: Find the left back shoulder as follows: Lay the back piece flat, right side up, with the thread/stitch holder towards you; left side of piece = left shoulder. Start from the right side by the neck on the left back shoulder and knit up 1 stitch in every row worked inside the outermost stitch, in addition knit up 3 stitches down the back piece = 40-46-52-58-58-64-70 stitches. All length-measurements on the front piece are taken from this knitted-up row. Work the first row from the wrong side as follows: 1 edge stitch, work A.4 6-7-8-9-9-10-11 times, purl 3. Make sure you match the stitches from the back piece, i.e., knit above knit and purl above purl. Remember A.4 is read from left to right when working from the wrong side, starting with purl 4. Continue this pattern. When the piece measures 5-5-6-6-7-7-7 cm, increase for the neckline as follows: ROW 1 (right side): Remember INCREASE TIP-1. Knit 3, increase 1 stitch towards the left, work to end of row as before. ROW 2 (wrong side): Knit above knit and purl above purl. The increased stitches are worked into the pattern, i.e., from the right side: knit, knit, knit, knit, purl, purl, knit, knit. When there are enough stitches to cable, work the cables in the same way as on the rest of the row. Work ROWS 1 and 2 a total of 8 times (16 rows worked) = 48-54-60-66-66-72-78 stitches. The piece measures approx. 11-11-12-12-13-13-13 cm. Cut the strand and work right shoulder as explained below. RIGHT SHOULDER: Start from the right side on the right back shoulder and begin by knitting-up 3 stitches up the back piece, then knit up 1 stitch in each row worked along the shoulder, inside 1 stitch as far as the neck = 40-46-52-58-58-64-70 stitches. All length-measurements on the front piece are taken from this knitted-up row. Work the first row from the wrong side as follows: Purl 3, work A.2 6-7-8-9-9-10-11 times and finish with 1 edge stitch. Make sure you match the stitches from the back piece in the same way as on the left front piece. Remember A.2 is read from left to right when working from the wrong side, starting with knit 2. When the piece measures 5-5-6-6-7-7-7 cm, increase for the neckline as follows: ROW 1 (right side): Work as before until there are 3 stitches left, increase 1 stitch towards the right, purl 3 - remember INCREASE TIP-1. ROW 2 (wrong side): Knit above knit and purl above purl. The increased stitches are worked into the pattern, i.e., from the right side: knit, knit, knit, knit, purl, purl, knit, knit. When there are enough stitches to cable, work the cables in the same way as on the rest of the row. Work ROWS 1 and 2 a total of 8 times (16 rows worked) = 48-54-60-66-66-72-78 stitches. The piece measures approx. 11-11-12-12-13-13-13 cm. On the next row (right side) join the front pieces as follows: Work the 48-54-60-66-66-72-78 stitches from the right front piece as before, cast on 24-24-24-24-36-36-36 stitches for the neckline, work the 48-54-60-66-66-72-78 stitches from the left front piece as before = 120-132-144-156-168-180-192 stitches. Continue as follows: 1 edge stitch in garter stitch, work A.2 9-10-11-12-13-14-15 times, A.3, then A.4 9-10-11-12-13-14-15 times and 1 edge stitch in garter stitch. NOTE! Remember to begin on the correct row in A.2 and A.3 so the pattern continues with 5 rows between each cable-row. Continue this pattern until the piece measures 16-17-18-19-20-21-22 cm, finishing with row 4 in the diagrams. Now join the front and back pieces, knitting up stitches for the sleeves as follows. ROW 1 (right side): Start from the right side on the front piece, and knit the first 2 stitches together (1 decreased stitch), work pattern until there are 2 stitches left before the end of the front piece, slip 1 stitch, knit 1 and pass the slipped stitch over (1 decreased stitch), knit up 68-74-80-86-92-104-104 stitches along the left side of the front piece (= sleeve-stitches, knitted up inside the outermost stitch), knit together the first 2 stitches on the back piece (1 decreased stitch), work as before until there are 2 stitches left before the end of the back piece, slip 1 stitch, knit 1 and pass the slipped stitch over (1 decreased stitch), knit up 68-74-80-86-92-104-104 stitches along the right side of the front piece (= sleeve-stitches, knitted up inside the outermost stitch) = 372-408-444-480-516-564-588 stitches. You now work pattern in the round and, at the same time, increase for the body and sleeves. Read the next 2 sections before continuing. PATTERN: Continue the pattern on the front piece (last row in the diagrams). The 68-74-80-86-92-104-104 knitted-up stitches for the left sleeve are worked as follows (from the last row in the diagrams): A.4 7-8-9-9-10-10-10 times, purl 2, work A.2 4-4-4-5-5-7-7 times. Continue the pattern across the back piece. The 68-74-80-86-92-104-104 knitted-up stitches for the right sleeve are worked as follows (from the last row in the diagrams): A.4 4-4-4-5-5-7-7 times, purl 2, work A.2 7-8-9-9-10-10-10 times. Continue this pattern, working from row 1 in the diagrams. INCREASES: Increase every 2nd round, on each side of the outermost cable on each side of the front and back pieces as follows: Work the first cable on the front piece, increase 1 stitch towards the left, work to the last cable on the front piece, increase 1 stitch towards the right, work the cable as before, increase 1 stitch towards the left, then increase like this by the first and last cables on the back piece, increase 1 stitch towards the right before the first cable on the front piece (8 increased stitches on the round). The increased stitches are worked into the pattern, i.e., knit, knit, knit, knit, purl, purl, etc. When there are enough stitches to cable, cable the stitches in the same way as on the rest of the round. Increase every 2nd round a total of 12 times = 468-504-540-576-612-660-684 stitches. The sleeve measures approx. 9 cm in all sizes. When the jumper is folded double at the shoulder it measures approx. 20-21-22-23-24-25-26 cm, outermost on the shoulder and down the armhole. If the piece is shorter than this, continue working to the correct length without further increases. Now divide for the body and sleeves. DIVIDE FOR BODY AND SLEEVES: Place the 2 first stitches (half the first cable) on the front piece on a thread for the sleeve, work the next 138-150-162-174-186-198-210 stitches as before (= front piece), place the next 96-102-108-114-120-132-132 stitches on a separate thread for the 2nd sleeve, cast on 6 stitches (mid-under the sleeve), work the next 138-150-162-174-186-198-210 stitches as before (= back piece), place the last 94-100-106-112-118-130-130 stitches on the first thread (= 96-102-108-114-120-132-132 sleeve-stitches), cast on 6 stitches (mid-under the sleeve). The piece has been divided in the middle of each of the 4 cables you increased by. The body and sleeves are finished separately. BODY: = 288-312-336-360-384-408-432 stitches. Continue the pattern in the round until the piece measures 50-52-54-56-57-59-61 cm, measured from close by the neck. Change to circular needle size 2.5 mm. Work rib (knit 1, purl 1), AT THE SAME TIME decrease 76-84-90-96-102-108-116 evenly on the first row = 212-228-246-264-282-300-316 stitches. When the rib measures 4-4-4-4-5-5-5 cm, cast off. The jumper measures approx. 54-56-58-60-62-64-66 cm. SLEEVES: Place the 96-102-108-114-120-132-132 sleeve-stitches from one thread on circular needle size 3.5 mm and knit up 1 stitch in each of the 6 stitches cast on under the sleeve – read SLEEVE TIP = 102-108-114-120-126-138-138 stitches. Insert a marker-thread in the middle of the 6 stitches under the sleeve- the round starts by the marker-thread. Continue the pattern in the round. The middle 14 stitches under the sleeve are worked according to A.6. When A.6 is finished, purl together the 4 purled stitches under the sleeve 2 and 2 = 90-96-102-108-114-126-126 stitches. In sizes XXL and XXXL work A.6 one more time across the middle 14 stitches, then purl together the 4 purled stitches under the sleeve 2 and 2 = 90-96-102-108-114-114-114 stitches. Continue working until the sleeve measures 40-40-39-38-35-34-33 cm from the division. Change to double pointed needles size 2.5 mm. Work rib (knit 1, purl 1), AT THE SAME TIME decrease 24-26-28-28-30-30-30 stitches evenly on the first round = 66-70-74-80-84-84-84 stitches. When the rib measures 4-4-4-4-5-5-5 cm, cast off. The sleeve measures approx. 53-53-52-51-49-48-47 cm from the shoulder. NECK: Use circular needle size 2.5 mm. Start from the right side on one shoulder-line and knit up 90 to 112 stitches inside 1 stitch around the neckline. Work rib (knit 1, purl 1) for 3-3-3-3-4-4-4 cm. Cast off with rib. |
||||||||||||||||||||||||||||||||||
Diagram explanations |
||||||||||||||||||||||||||||||||||
|
||||||||||||||||||||||||||||||||||
 |
||||||||||||||||||||||||||||||||||
 |
||||||||||||||||||||||||||||||||||
 |
||||||||||||||||||||||||||||||||||
Have you finished this pattern?Tag your pictures with #dropspattern #softwavessweater or submit them to the #dropsfan gallery. Do you need help with this pattern?You'll find 35 tutorial videos, a Comments/Questions area and more by visiting the pattern on garnstudio.com. © 1982-2026 DROPS Design A/S. We reserve all rights. This document, including all its sub-sections, has copyrights. Read more about what you can do with our patterns at the bottom of each pattern on our site. |
||||||||||||||||||||||||||||||||||


With over 40 years in knitting and crochet design, DROPS Design offers one of the most extensive collections of free patterns on the internet - translated to 17 languages. As of today we count 324 catalogues and 12290 patterns translated into English (UK/cm).
We work hard to bring you the best knitting and crochet have to offer, inspiration and advice as well as great quality yarns at incredible prices! Would you like to use our patterns for other than personal use? You can read what you are allowed to do in the Copyright text at the bottom of all our patterns. Happy crafting!
Post a comment to pattern DROPS 262-7
We would love to hear what you have to say about this pattern!
If you want to leave a question, please make sure you select the correct category in the form below, to speed up the answering process. Required fields are marked *.