
Popular categories
Looking for a yarn?


Comments / Questions (20)
![]() Alessia wrote:
Alessia wrote:
Dopo aver chiuso le maglie centrali per lo scollo dice lavorare fino alla fine e tagliare i fili. Poi dice : ora continuare in piano dal centro davanti… ma al centro ci sono le maglie intrecciate x lo scollo , non capisco e la parte dietro che fine ha fatto? Si può avere un video tutorial ? Grazie
19.03.2026 - 22:19
![]() Alessia wrote:
Alessia wrote:
Premetto che il mio capo ha una tensione diversa per cui non ho lo stesso numero di maglie. Arrivata alle diminuzioni per spalle a sella , si dice di passare a lavorare in piano il davanti intrecciando le maglie per lo scollo. Cosa faccio con il dietro? Devo metterlo su un ferro ausiliario? Perché non c’è un video per questo passaggio, non capisco come andare avanti. Grazie
19.03.2026 - 22:11DROPS Design answered:
Buonasera Alessia, nel paragrafo delle spalle a sella si arriva ad intrecciare le maglie per la scollatura e poi si prosegue in piano, non più in tondo. Buon lavoro!
08.04.2026 - 16:50
![]() Ania wrote:
Ania wrote:
Please help me In this part: “Work until the piece measures 25 cm. In the next row on the right side of the work, bind off 4 stitches (size L) at the beginning of the next 2 rows for the armholes = 90.” Does this mean that I should bind off 4 stitches at the beginning of the right-side row, and then bind off another 4 stitches at the beginning of the next row (right or wrong side)? Would it be a mistake to bind off 2 st at the beginning and 2 at the end in 2 next rows?
15.03.2026 - 19:23DROPS Design answered:
Dear Ania, starting from the right side you will cast off the first 4 stitches, work the row to the end, then turn piece and cast off the first 4 stitches at the beginning of next row from the wrong side and work row to the end = you have cast off a total of 8 sts (4 sts on each side), and you have now 98-8=90 sts left. Happy knitting!
16.03.2026 - 10:52
![]() Ebru wrote:
Ebru wrote:
Hello, In the neckline part where exactly is mid-front in the XS size?there are 22 stiches on both sides and 18 cut off stiches in between? How do we knit back and forth with circular needles? Do we purl? Thank you
25.02.2026 - 09:11
![]() Ebru wrote:
Ebru wrote:
“Work to the middle of the back piece, work the next 39-41-43-44-45-47 stitches (these stitches now belong to half of the back piece) “This is unclear, it makes 35+39=74 which is not half of the back piece (for xs it is 70 stiches)?? “work 40-48-52-64-72-78 stitches (= sleeve),” aren’t sleeves 48 for xs?? “You now place all the pieces on the same circular needle” do we do this by knitting or just transferring the stiches? Thank you
08.02.2026 - 13:37DROPS Design answered:
Dear Ebru, of 48 sts on each sleeve you move 4 sts on each side of the sleeves to the back piece/ front piece. So you had 70 sts on the back piece and front piece and 48 sts on each sleeve = 236 sts. You put all sts as you knit the next round. First work up from one edge of the back piece to the mid-back then work 35 sts from the back piece and 4 sts from the sleeves (these are all for the back piece now). Work 40 sts for the sleeve and then work the last 4 sts from the sleeve with the 70 sts of the front piece and the first 4 sts of the next sleeve. Work 40 sts for the other sleeve and work the last 4 sts of the sleeve with the back piece. Happy knitting!
08.02.2026 - 20:11
![]() Sophie TOMBROPOULOS wrote:
Sophie TOMBROPOULOS wrote:
Bonjour et bonne année Je suis assez novice et c'est le 1er pull que je tricote. Je suis un peu bloquée pour l'encolure. Déjà, il faut couper les fils à la fin du rang. Comme on tricote en rond où se trouve t'elle exactement? Ensuite comment enchainer en aller et retour au milieu devant? Bien cordialement,
22.01.2026 - 15:11DROPS Design answered:
Bonjour Mme Tombropoulos, lorsque vous avez rabattu les mailles de l'encolure devant, terminez ce tour comme avant, puis coupez le fil et glissez les mailles de l'une des aiguilles sur l'autre, sans les tricoter, jusqu'aux mailles rabattues pour l'encolure, puis continuez en allers et retours à partir de mailles rabattues pour l'encolure, et continuez les diminutions comme avant/comme indiqué, et, en même temps, rabattez encore des mailles pour l'encolure devant, au début de chaque rang, de chaque côté. Bon tricot!
23.01.2026 - 09:57
![]() Madeleine wrote:
Madeleine wrote:
Bonjour je voudrais faire ce pull mais avec des aiguilles de 7, mais tous en rond donc si jai bien compris je diminue pour les manches et les rajouté a mon dos et devant qui sont tricoter ensemble mais jai 155 m pour le dos et devant quelle serait les diminution pour les manches sachant que j aurais 45 mailles car je les fait larges et longue. Merci de votre réponse. Bonne journée Cordialement
07.01.2026 - 15:22
![]() Madeleine wrote:
Madeleine wrote:
Bonjour je voudrais faire ce pull mais avec des aiguilles de 7, mais tous en rond donc si jai bien compris je diminue pour les manches et les rajouté a mon dos et devant qui sont tricoter ensemble mais jai 155 m pour le dos et devant quelle serait les diminution pour les manches sachant que j aurais 45 mailles car je les fait larges et longue. Merci de votre réponse. Bonne journée Cordialement
07.01.2026 - 15:21DROPS Design answered:
Bonjour Madeleine, nous ne sommes malheureusement pas en mesure de pouvoir adapter chacun de nos modèles à chaque demande; vous pouvez vous inspirer d'un modèle similaire avec la même tension que vous avez ou bien recalculer celui-ci sur la base de votre propre tension.Bon tricot!
08.01.2026 - 09:18
![]() Jana wrote:
Jana wrote:
Zadný a predný diel vo veľkosti S po dokončení má 78 ok, ale pri spájaní všetkých častí (predný a zadný diel a rukávy) do sedla sa píše, že predný a zadný diel majú 82 ok. Nie je tam chyba?
13.12.2025 - 21:27
![]() Bente Stenhaug wrote:
Bente Stenhaug wrote:
It’s difficult to understand how to begin decrease no. 1. It says that the decreases should only be worked on the sleeves. In that case, I would decrease the last three and the first three stitches on the sleeve, leaving only one stitch on the sleeve. But then the stitches on the body aren’t involved in the decreases at all. I found this explanation unclear and hard to understand. I am an experienced knitter.Can you Paracet explain for me how to this correctly
04.12.2025 - 17:45DROPS Design answered:
Dear Mrs Stenhaug when you work the sleeve decreases-1 you will decrease only the number of stitches on sleeve, the stitch count on the front and the back will remains the same; ie you will knit the first 3 sts tog at the beg of sleeves and knit the last 3 sts tog at the end of sleeves = you decreased 4 sts on each sleeve, 8 sts on the round. When working sleeve decreases-2 you will then decrease on same places but only 1 st on each side of sleeve (2 sts / sleeves, 4 sts / Round) Then you will decrease for saddle shoulders-1: you will then decrease only the number of sts on front and back piece, not on sleeves. Can this help?
05.12.2025 - 08:38
|
|
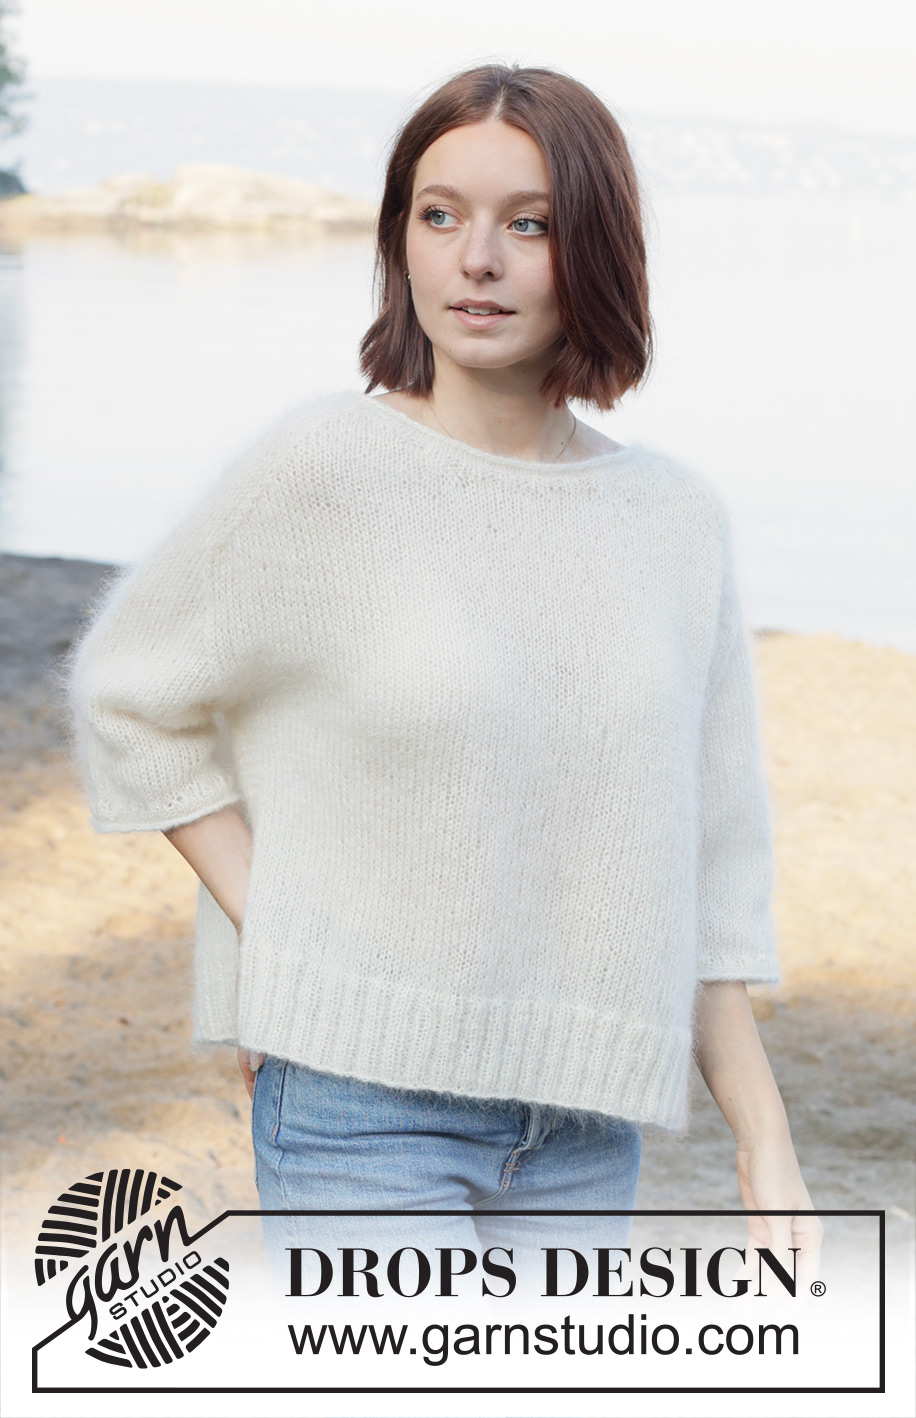
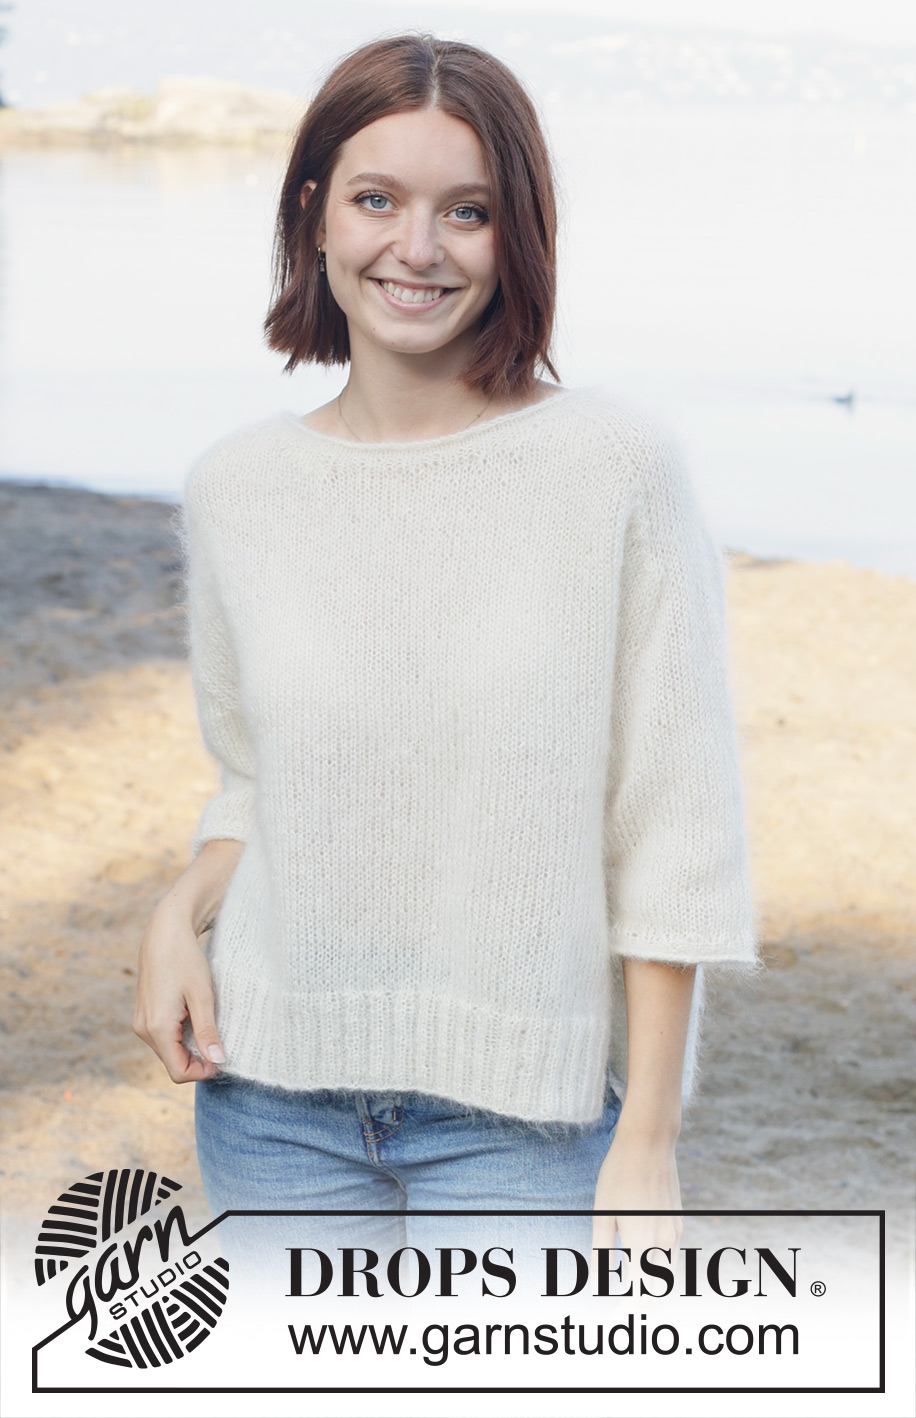
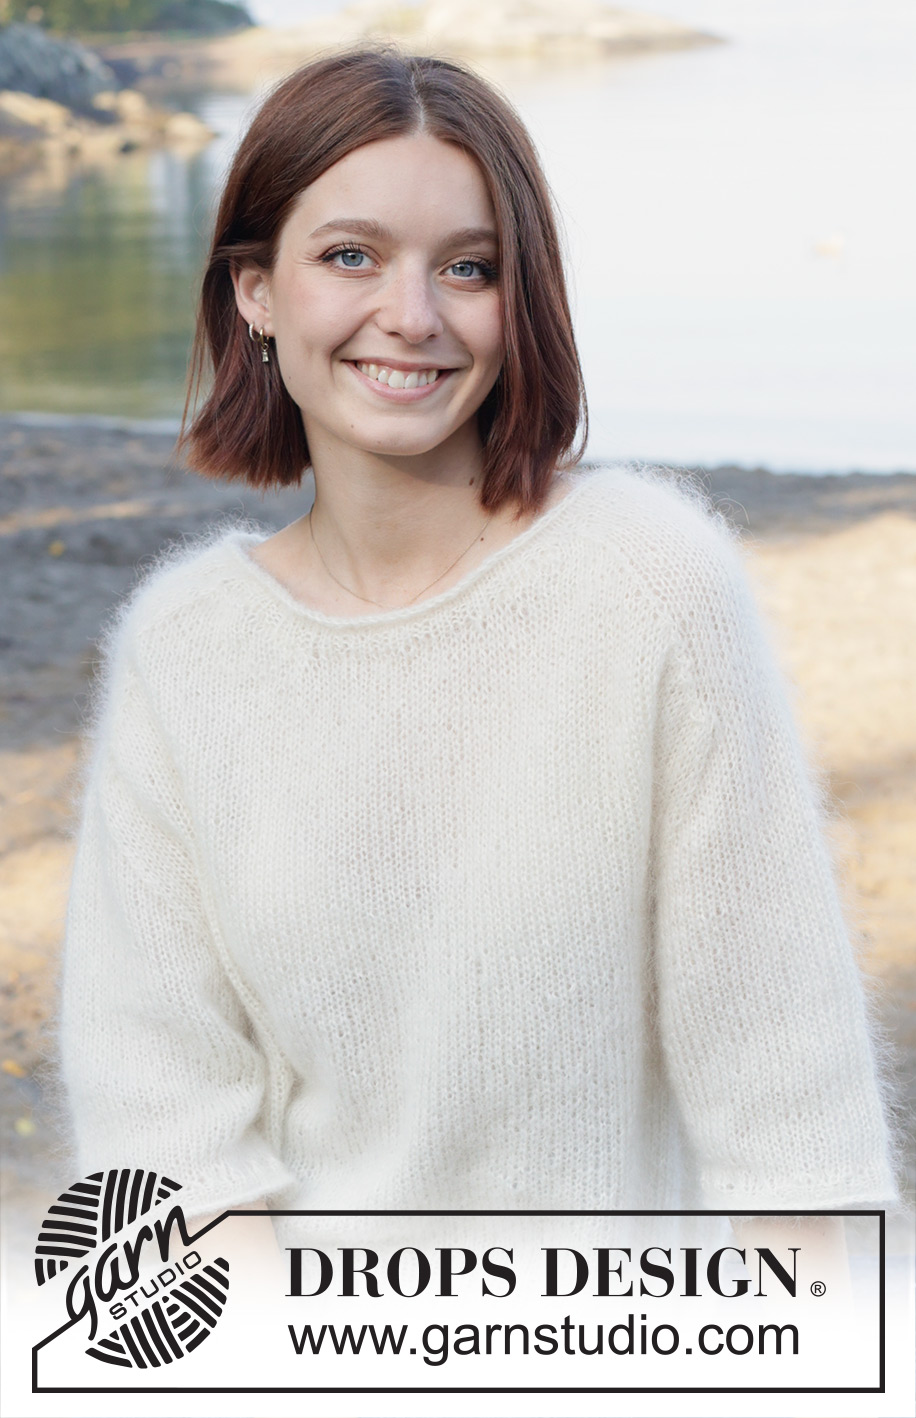
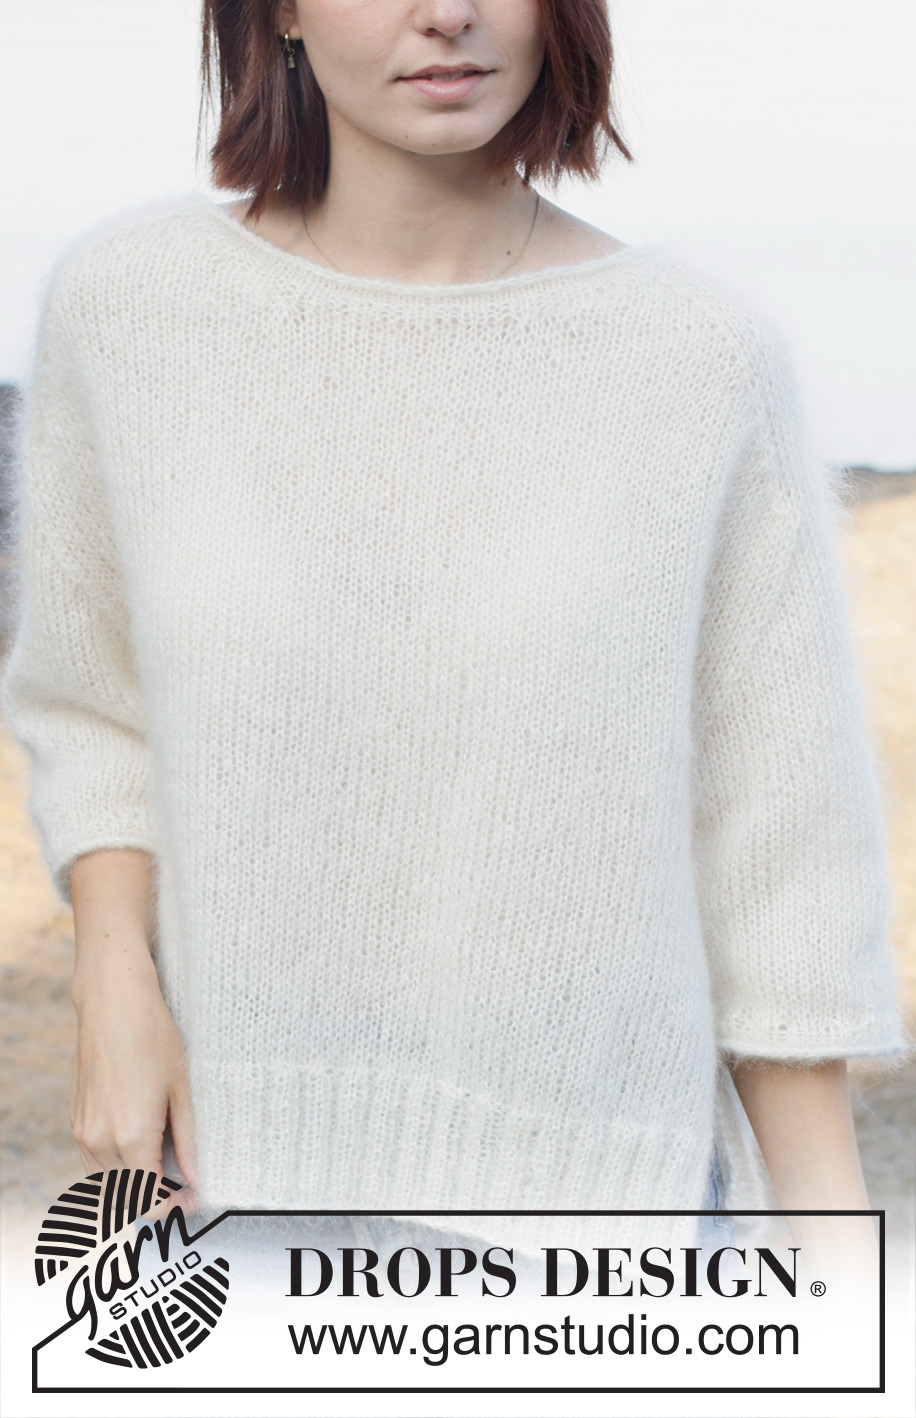
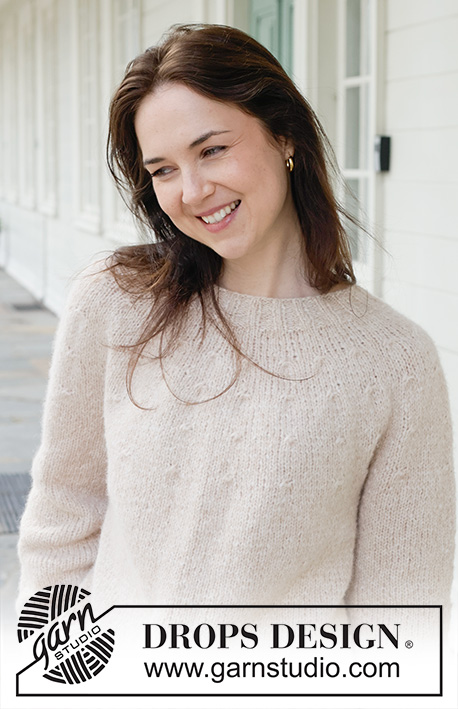
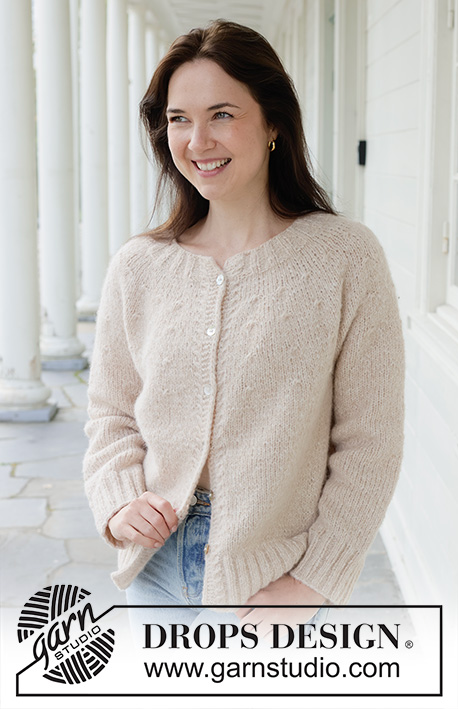
Wispy Dandelion#wispydandelionsweater |
|
 |
 |
Knitted jumper with short sleeves in 3 strands DROPS Kid-Silk. The piece is worked bottom up with saddle-shoulders, rolled edges and split in sides. Sizes XS - XXL.
DROPS 258-17 |
|
|
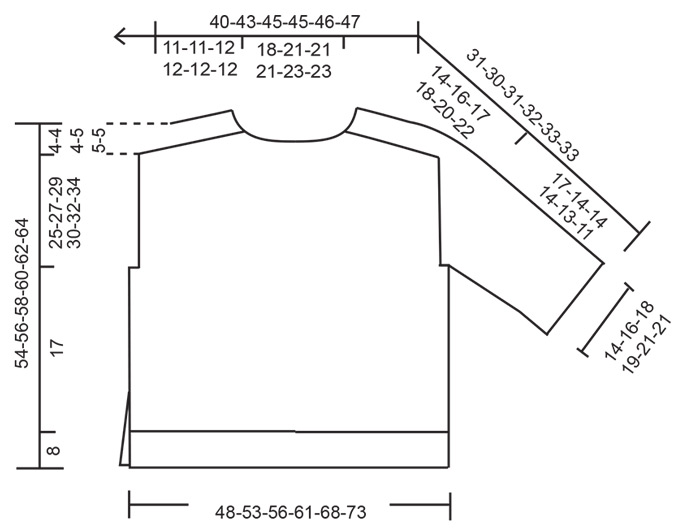
------------------------------------------------------- EXPLANATIONS FOR THE PATTERN: ------------------------------------------------------- GARTER STITCH (worked back and forth): Knit all rows, from both the right and wrong side. 1 ridge in height = knit 2 rows. DECREASE TIP-1 (for sleeves and shoulders): All decreases are worked from the right side! BEFORE MARKER: Work until there are 3 stitches left before the marker, knit 3 together (2 decreased stitches). AFTER MARKER: Slip 1 stitch knit-wise, knit 2 together, pass the slipped stitch over the knitted-together stitches (2 decreased stitches). DECREASE TIP-2 (for sleeves): All decreases are worked from the right side! BEFORE MARKER: Work until there are 2 stitches left before the marker, knit 2 together (1 decreased stitch). AFTER MARKER: Slip 1 stitch knit-wise, knit 1, pass the slipped stitch over the knitted stitch (1 decreased stitch). INCREASE TIP (mid-under sleeve): Start 1 stitch before the marker-thread, make 1 yarn over, knit 2 (marker-thread sits between these 2 stitches), make 1 yarn over. On the next round knit the yarn overs twisted to avoid holes (2 increased stitches). Then work the new stitches in stocking stitch. ------------------------------------------------------- START THE PIECE HERE: ------------------------------------------------------- JUMPER – SHORT OVERVIEW OF THE PIECE. The pattern uses both long and short needles; start with the length which fits the number of stitches and change when necessary. The piece is worked bottom up. The front and back pieces are worked separately, back and forth as far as the armholes. The sleeves are worked in the round as far as the armholes. All pieces are placed on the same needle and the yoke is worked in the round, while decreasing for the sleeves and saddle-shoulders. The neck is worked in the round. The side seams are sewn as described in the text. If there is a «0» in your chosen size, skip the information and go straight to the next instruction. BACK PIECE: Cast on 106-118-126-134-150-162 stitches with circular needle size 3.5 mm and 3 strands DROPS Kid-Silk. Purl 1 row from the wrong side, then work as follows from the right side: 4 GARTER STITCHES – see explanation above, * knit 2, purl 2 *, work from *-* until there are 6 stitches left, knit 2 and 4 garter stitches. Continue this rib back and forth for 8 cm. Change to circular needle size 5.5 mm. Work 1 row from the wrong side and decrease 30-34-36-36-42-46 evenly on this row – do not decrease across the garter stitches = 76-84-90-98-108-116 stitches. Continue with stocking stitch and 4 garter stitches on each side. Remember to maintain the knitting tension. Work until the piece measures 25 cm. On the next row from the right side, cast off 3-3-4-4-5-5 stitches at the beginning of the next 2 rows for the armholes = 70-78-82-90-98-106 stitches. Cut the strands, lay the piece to one side. FRONT PIECE: Work in the same way as the back piece. SLEEVES: The sleeves are worked in the round. Cast on 46-50-56-62-66-68 stitches with double pointed needles size 5.5 mm and 3 strands DROPS Kid-Silk. Knit 4 rounds (= rolled edge). Change to double pointed needles size 3.5 mm and work 2 rounds of rib (knit 1, purl 1). Insert 1 marker-thread at the beginning of the round (mid-under sleeve). Allow the thread to follow your work onwards; it is used when increasing under the sleeve. Change to double pointed needles size 5.5 mm. Work stocking stitch. When the sleeve measures 4 cm, increase 1 stitch on each side of the marker-thread – read INCREASE TIP. Work this increase every 4-2½-2½-2½-2-1½ cm a total of 4 times = 54-58-64-70-74-76 stitches. Work until the sleeve measures 17-14-14-14-13-11 cm. Cast off 6-6-8-8-10-10 stitches mid-under the sleeve (i.e., 3-3-4-4-5-5 stitches on each side of the marker-thread) = 48-52-56-62-64-66 stitches. Cut the strands, lay the piece to one side. YOKE: You now place all the pieces on the same circular needle and insert 4 markers on the round (used for the saddle-shoulders and sleeves, each marker is inserted between 2 stitches). Allow the markers to follow your work onwards. Work to the middle of the back piece, work the next 39-41-43-44-45-47 stitches (these stitches now belong to half of the back piece), insert marker-1 here, work 40-48-52-64-72-78 stitches (= sleeve), insert marker-2 here, work 78-82-86-88-90-94 stitches (= front piece), insert marker-3 here, work 40-48-52-64-72-78 stitches (= sleeve), insert marker-4 here, work to marker-1 (= back piece). There are 40-48-52-64-72-78 stitches between markers 1 and 2 and between markers 3 and 4 (= sleeves) and 78-82-86-88-90-94 stitches between markers 2 and 3 and between markers 4 and 1 (= front/back pieces). There are 236-260-276-304-324-344 stitches on the needle. Start the round after marker-1 and work stocking stitch in the round for 1-0-0-1-0-0 cm. SLEEVE-DECREASES-1: Read this section before continuing! On the next round decrease 8 stitches on the sleeves as follows: Decrease 2 stitches AFTER markers 1 and 3 and decrease 2 stitches BEFORE markers 2 and 4 – read DECREASE TIP-1. Decrease only on the sleeves (the stitch-count on the front and back pieces remains the same). Decrease like this every 2nd round 0-1-2-7-8-9 times = 236-252-260-248-260-272 stitches. SLEEVE-DECREASES-2: On the next round, decrease 4 stitches on the sleeves as follows: Decrease 1 stitch AFTER markers 1 and 3 and decrease 1 stitch BEFORE markers 2 and 4 – read DECREASE TIP-2. Decrease only on the sleeves (the stitch-count on the front and back pieces remains the same). Decrease like this every 2nd round 13-15-15-10-12-13 times = 184-192-200-208-212-220 stitches (14-14-14-16-16-16 sleeve-stitches remaining). The piece now measures approx. 14-16-17-18-20-22 cm from the join. SADDLE-SHOULDERS-1: On the next round, decrease 8 stitches for the shoulders as follows: Decrease 2 stitches BEFORE markers 1 and 3 and decrease 2 stitches AFTER markers 2 and 4 – remember DECREASE TIP-1. Decrease only on the front and back pieces (the stitch-count on the sleeves remains the same). Decrease like this every 2nd round 4-4-5-5-5-5 times = 152-160-160-168-172-180 stitches. The piece measures approx. 44-46-47-48-50-52 cm from the cast-on edge. On the next round (which is not a decrease-round), knit and cast off the middle 18-22-22-24-26-30 stitches on the front piece for the neckline – NOTE! Then work to end of round and cut the strands. Continue back and forth from mid-front. Work the first row from the right side while decreasing for the saddle-shoulders and neckline as described below. Read the next 2 sections before continuing. NECKLINE: Cast off for the neckline at the beginning of each row as follows: 3 stitches 1 time on each side, 2 stitches 1 time on each side, 1 stitch 3 times on each side. SADDLE-SHOULDERS-2: Continue decreasing 8 stitches on each row from the right side 7-7-7-7-7-7 more times. A total of 11-11-12-12-12-12 times for the shoulders, with the last row from the right side. AFTER THE FINAL DECREASE: There are 62-66-66-72-74-78 stitches (14-14-14-16-16-16 stitches on each sleeve, no stitches on the front piece, 34-38-38-40-42-46 stitches on the back piece). The yoke measures approx. 25-27-29-30-32-34 cm from the join. The jumper measures approx. 54-56-58-60-62-64 cm from the shoulder. Cut the strands. NECK: Begin the new round mid-back by moving the stitches you have just worked from the right needle onto the left needle. Use circular needle size 3.5 mm. Knit as far as the neckline, knit up 34-38-38-40-42-46 stitches along the neckline and knit to mid-back = 96-104-104-112-116-124 stitches. Work rib in the round (knit 2, purl 2) decreasing 12-12-12-12-12-20 stitches evenly on the first round = 84-92-92-100-104-104 stitches. Work 3 more rounds of rib, then knit 4 rounds (= rolled edge). Cast off with needle size 5.5 mm. ASSEMBLY: Sew the side seams, starting by the armholes and sewing in the outermost loop of the outermost stitch so the seam is flat. Leave a split of your chosen length at the bottom on each side (there are 8 garter stitches visible along each seam). Sew the openings under each sleeve. |
|
 |
|
Have you finished this pattern?Tag your pictures with #dropspattern #wispydandelionsweater or submit them to the #dropsfan gallery. Do you need help with this pattern?You'll find 36 tutorial videos, a Comments/Questions area and more by visiting the pattern on garnstudio.com. © 1982-2026 DROPS Design A/S. We reserve all rights. This document, including all its sub-sections, has copyrights. Read more about what you can do with our patterns at the bottom of each pattern on our site. |
|


With over 40 years in knitting and crochet design, DROPS Design offers one of the most extensive collections of free patterns on the internet - translated to 17 languages. As of today we count 324 catalogues and 12285 patterns translated into English (UK/cm).
We work hard to bring you the best knitting and crochet have to offer, inspiration and advice as well as great quality yarns at incredible prices! Would you like to use our patterns for other than personal use? You can read what you are allowed to do in the Copyright text at the bottom of all our patterns. Happy crafting!
Post a comment to pattern DROPS 258-17
We would love to hear what you have to say about this pattern!
If you want to leave a question, please make sure you select the correct category in the form below, to speed up the answering process. Required fields are marked *.