
Popular categories
Looking for a yarn?


Comments / Questions (26)
![]() Carola wrote:
Carola wrote:
Ich habe die Jacke für meine Tochter gestrickt und meine 2 jährige Enkelin wünscht sich auch diese Jacke. Wie kann ich denn die Maschenzahl bzw. die Größe errechnen? Können sie mir da eventuell weiterhelfen? Vielen Dank schon mal :)
01.05.2026 - 20:50DROPS Design answered:
Liebe Carola, leider haben wir keine ähnliche Jacke für Kinder, vielleicht können Sie sich aber von einem anderen Modell inspirieren? Viel Spaß beim Stricken!
04.05.2026 - 09:16
![]() Marie-Noëlle wrote:
Marie-Noëlle wrote:
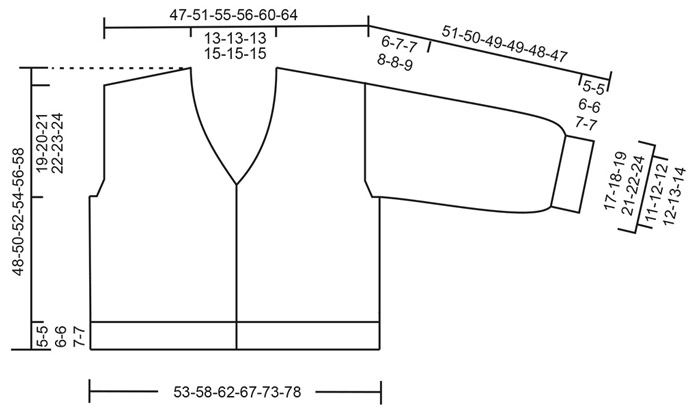
Bonjour, Serait-il possible de corriger la page car je ne trouve pas les dimensions du cardigan fini pour choisir ma taille. Le diagramme n'apparait plus non plus. Je pense qu'il faudrait revoir toute la page car il y a des bugs (photos remplacées par du texte et logos manquants). Dès qu'elle sera complète je l'imprimerai pour tricoter ce modèle qui me plait beaucoup. Merci !
28.04.2026 - 23:04DROPS Design answered:
Bonjour Marie-Noëlle, les schémas et diagrammes sont de retour - bon tricot!
29.04.2026 - 09:22
![]() Thea wrote:
Thea wrote:
Hi, ich bin gerade dabei den I-Cord-Rand zu stricken. Jedoch bin ich etwas verwirrt, da auf der Linken Seite in Hinreihen "1 M. Li abheben , 1 M. re, 1 M. Li abheben" gestrickt wird (da es am Anfang der Reihe ist). Rechts ist es jedoch am Ende der Reihe, wodurch es laut Anleitung genau anders herum ist, also "1 M. re, 1 M. li abheben, 1 M. re" Dadurch entstehen rechts und links unterschiedliche Ränder. Hab ich das falsch verstanden? Vielen Dank schonmal im Voraus :D
22.04.2026 - 00:01DROPS Design answered:
Liebe Thea, so muss man auch stricken, dh die 1. und die 3. Masche am Anfang der Hin- sowie Rückreihe werden abgehoben und nur die 2. Masche wird gestrickt, und am Ende der Hin- sowie Rückreihe wird nur die mittlere Masche abgehoben; in diesem Video zeigen wir einen ähnlichen Rand mit nur 2 Maschen (dazu kommt noch hier die 3. Masche), das kann Ihnen aber sicher helfen. Viel Spaß beim Stricken!
22.04.2026 - 08:09
![]() Alina wrote:
Alina wrote:
Hi, ich bin grade am schauen, welche Größe ich stricken möchte. Habt ihr eine Angabe, wie viel Bewegungsspielraum das Model aus den Bildern trägt?
14.03.2026 - 06:58DROPS Design answered:
Liebe Alina, unsere Modellen tragen meistens entweder S oder M; aber hier lesen Sie, wie Sie Ihre Größe wählen. Viel Spaß beim Stricken!
16.03.2026 - 08:01
![]() Sylwia wrote:
Sylwia wrote:
Witam serdecznie . Czy podana ilość wełny 200g dla rozmiaru M jest już obliczona na 3 nitki z grupy A, czy trzeba tą ilość pomnożyć przez 3 bo wydaje mi się jakoś mało?
02.02.2026 - 00:21DROPS Design answered:
Witaj Sylwio, podana ilość włóczki włóczki DROPS Kid-Silk jest poprawna. Przerabiasz 4 nitkami: 1 Melody + 3 Kid-Silk. Pozdrawiamy!
02.02.2026 - 08:47
![]() Lea wrote:
Lea wrote:
Huhu ich habe eine Frage. Strickt man den i cord Rand ab dem Moment wo man die Schulter jeweils angefangen hat ? Weil das ist für mich logischer aber habe es in der Anleitung so verstanden erst wenn man bei den Zunahmen für die Schleife ist also ab 7 cm.
30.12.2025 - 20:14DROPS Design answered:
Liebe Lea, Sie fassen am Ende Maschen aus dem ganzen V-Ausschnitt auf und stricken dann erst das eine I-Cord-Band, dann die I-Cord am Halsausschnitt entlang und dann das andere I-Cord-Band. So setzt sich dann die I-Cord am V-Ausschnitt fort. Am Vorderteil beginnen Sie die I-Cord nach den Zunahmen für den V-Ausschnitt, d.h. hier wird die I-Cord jeweils direkt an den vorderen Rand beim Stricken des Vorderteils angestrickt.
24.02.2026 - 21:44
![]() Aline wrote:
Aline wrote:
Hallo, ich stricke gerade den I-Cord-Rand, habe jedoch das Gefühl, dass das falsch aussieht. Ich habe ein Video gefunden (Wie man einen I-Cird-Rand strickt), das ist aber anders als in dem Stricktipp der Anleitung beschrieben. Gibt es auch ein passendes Video für die Anleitung oder ein Bild von Näherem von dem Rand de Cardigans?
21.12.2025 - 09:49DROPS Design answered:
Liebe Aline, im Video besteht der I-Cord-Rand aus 2 Maschen, in dieser Anleitung wird er mit 3 Maschen gestrickt. Achten Sie darauf, dass Sie die Maschen in der richtigen Reihenfolge abheben und stricken, dann sollte es klappen. Die abgehobene Masche wird in der nächsten Reihe rechts gestrickt, die rechts gestrickte Masche wird abgehoben. Achten Sie darauf, dass der Faden beim Abheben vor der Arbeit liegt, also sichtbar ist. Viel Spaß beim Weiterstricken!
24.12.2025 - 09:14
![]() Aline wrote:
Aline wrote:
Hallo, ich stricke den Cardigan in Größe S. Den ersten Teil des Rückenteils habe ich fertiggestellt und die Maschen stillgelegt. Nun wollte ich die Maschen für die linke Schulter aufnehmen, laut Anleitung 20 Maschen für Größe S. Wenn ich nun vom Halsausschnitt beginnend die Maschen aufnehme, sind jedoch 2 Maschen bis zum Maschenmarkierer übrig. Ist das richtig so oder müsste ich von Halsausschnitt bis Maschenmarkierer 20 Maschen genau haben? Vielen Dank für die Mühe!
11.12.2025 - 21:42DROPS Design answered:
Liebe Aline, am Anfang vom Rückenteil haben Sie 20 Reihen mit Zunahmen gestrickt, die Maschen für die Schulter am Vorderteile werden Sie in jeder dieser 2O Reihen aufnehmen = 20 Maschen. Schauen Sie mal hier, im Video oder da, mit Fotos wie man die Schulter aufnimmt und strickt. Viel Spaß beim Stricken!
12.12.2025 - 08:12
![]() Zoé wrote:
Zoé wrote:
While doing increases for the armhole, do i continue to do the icord edging ? The armhole instructions say to knit/purl all stitches but the v neck instructions say to do the icord
13.11.2025 - 13:33DROPS Design answered:
Hi Zoe, Yes, you continue to work the I-cord edge for the neck. Regards, Drops Team.
14.11.2025 - 06:23
![]() Mathilda wrote:
Mathilda wrote:
Hej, Tack för fint mönster. Vill bara dubbelkolla, stämmer beskrivningen gällande att öka maskorna på avigsidan? Alla andra tutorials eller beskrivningar som jag sett skriver tvärtom… Vill bara veta om det verkligen är rätt beskrivet hos er innan man investerar massa tid i att sticka. När jag ska öka på samma ställe som jag gjort en ökning varvet tidigare så får jag inte fram någon tydlig länk att använda som båge, är det vanligt?
29.09.2025 - 22:13DROPS Design answered:
Hei Mathilda. I begynnelsen av denne jakken når bakstykket strikkes økes det i hver side av arbeidet (både fra retten og fra vrangen) til skulderviddens maskeantall er nådd. Se gjerne videoen: Hvordan øke 1 maske mot venstre (retten), Hvordan øke 1 maske mot høyre (retten), Hvordan øke 1 maske mot venstre (vrangen) og Hvordan øke 1 maske mot høyre (vrangen). Du finner dem under Instruksjonsvideoer - Strikke - Øke - Basic. mvh DROPS Design
13.10.2025 - 13:25
|
|
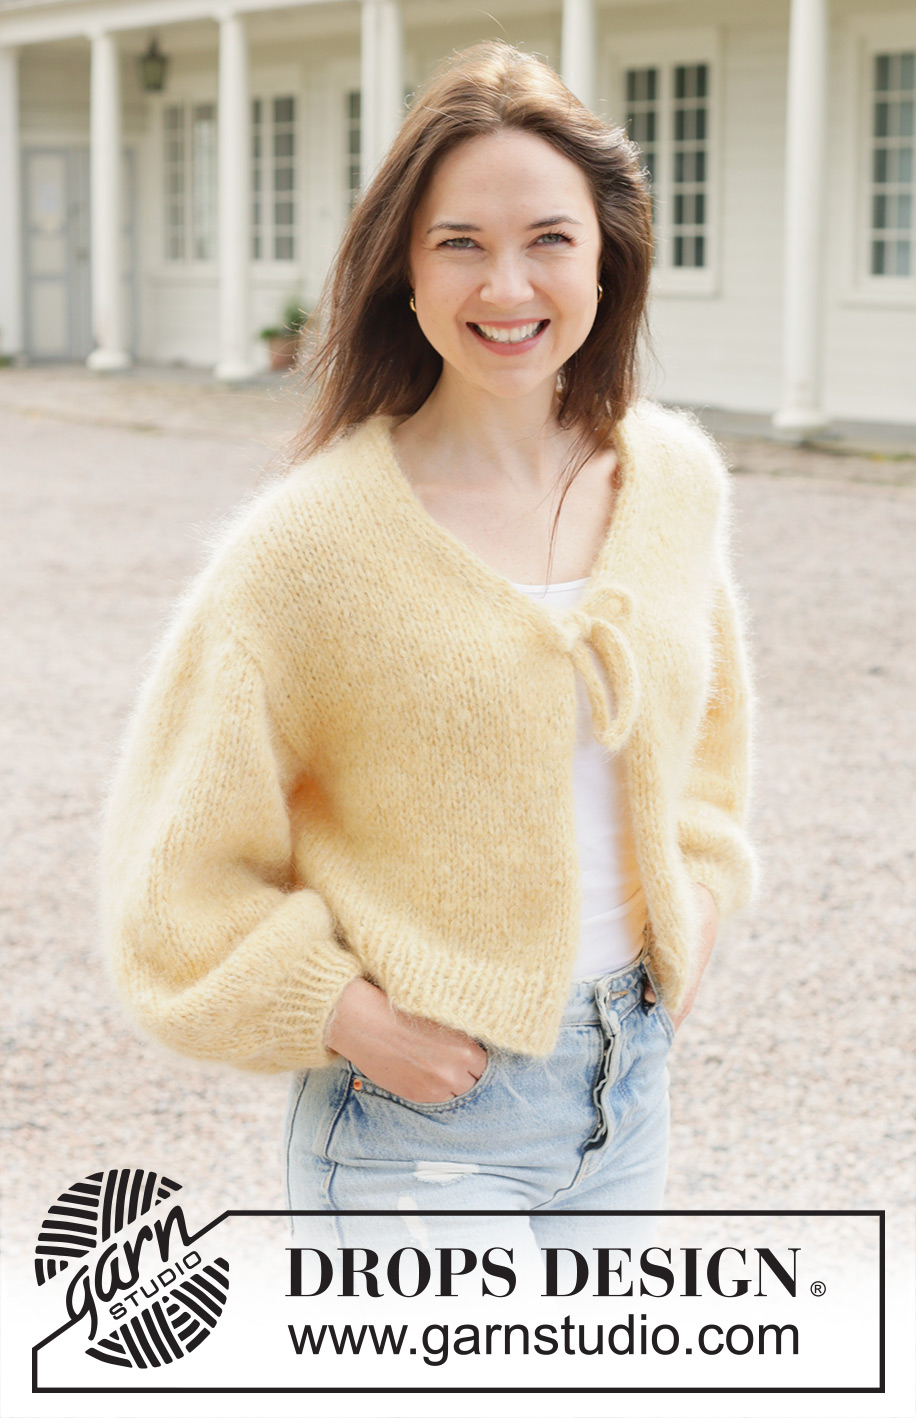
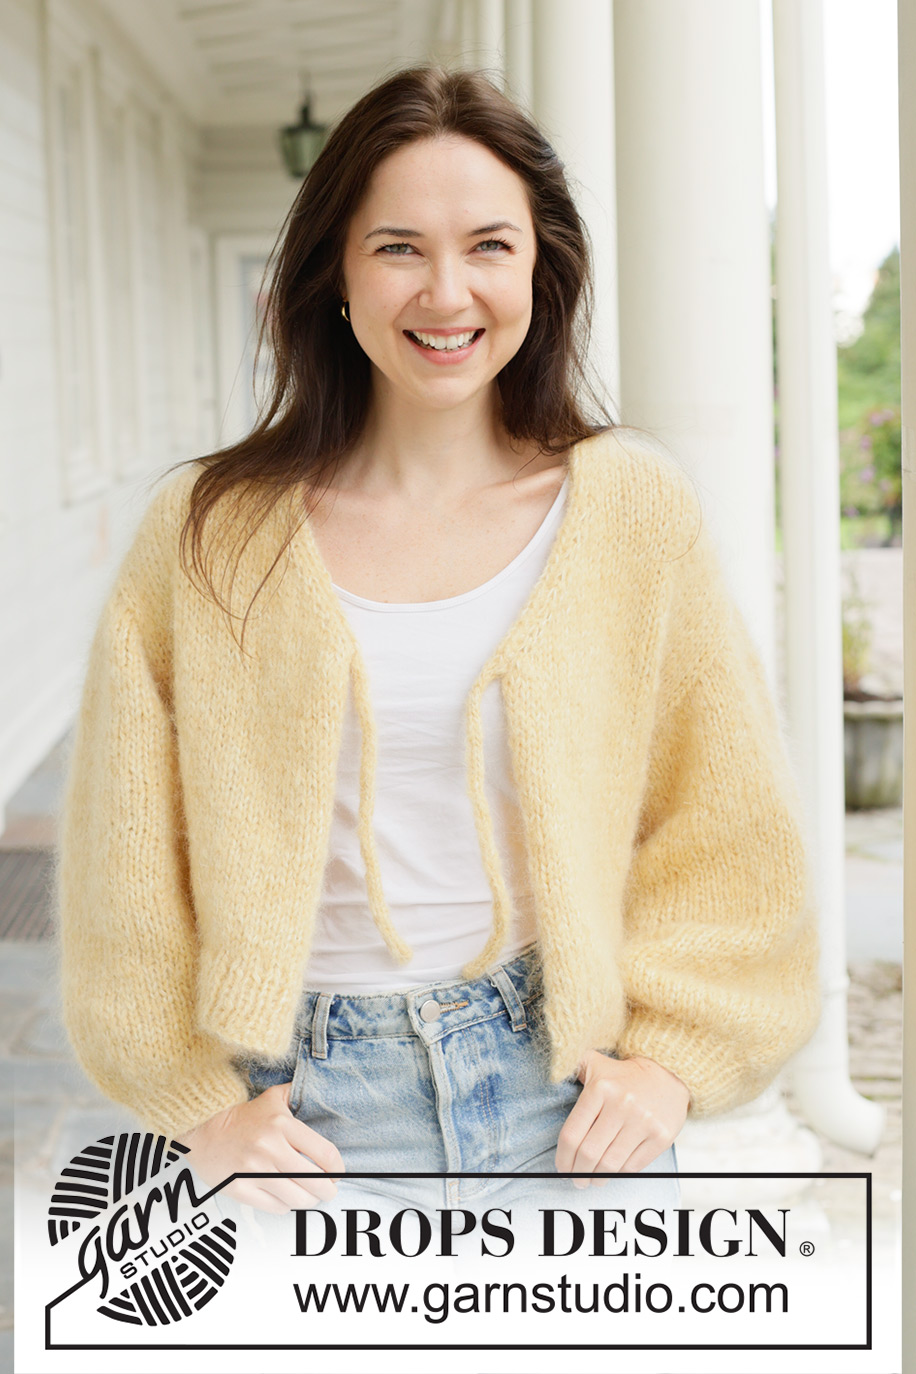
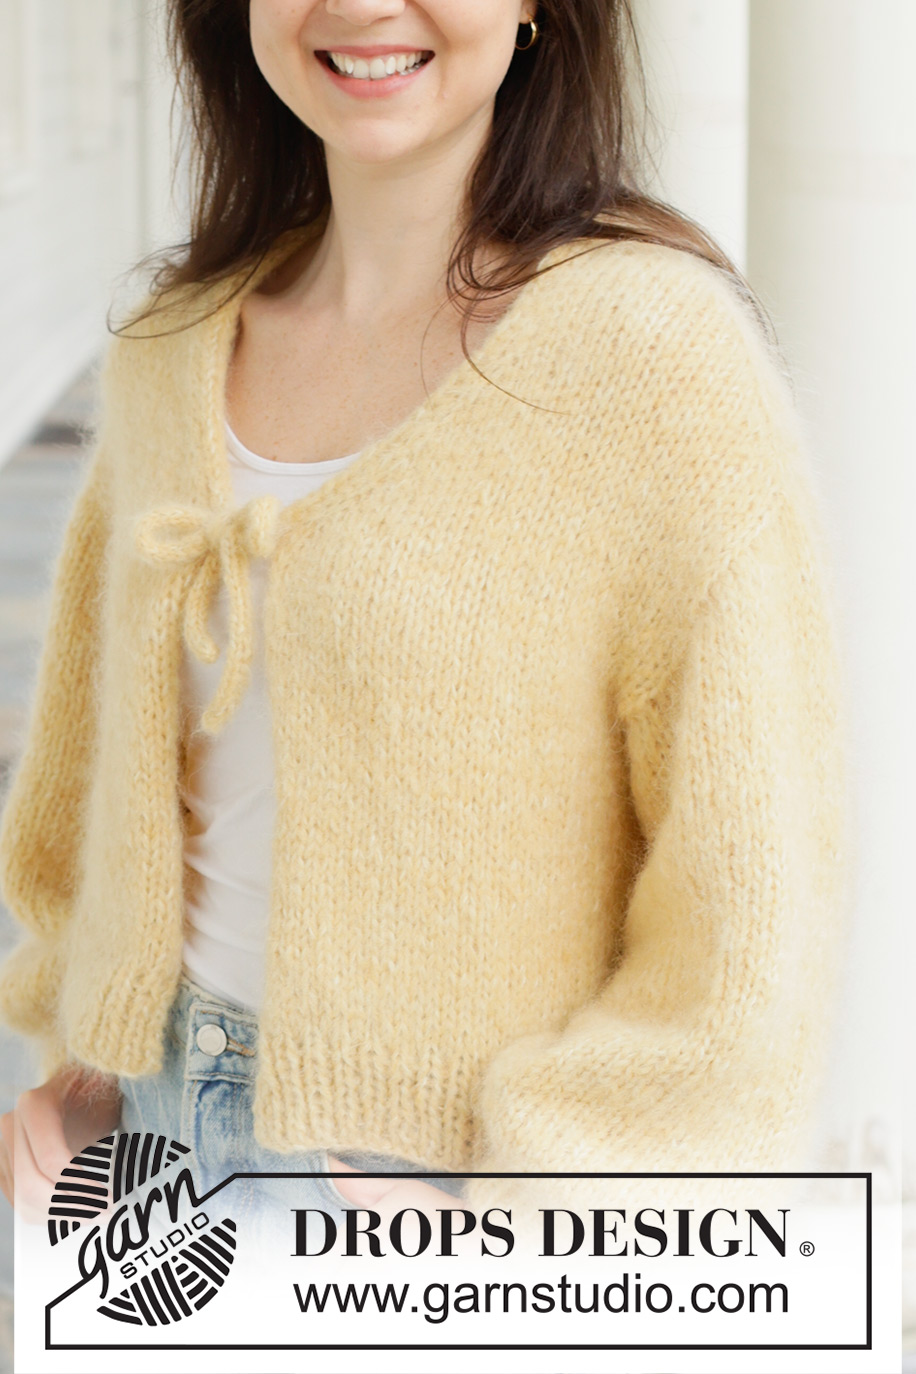
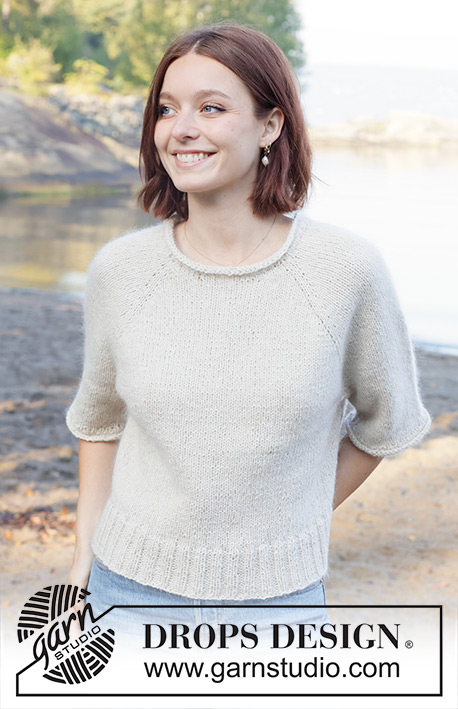
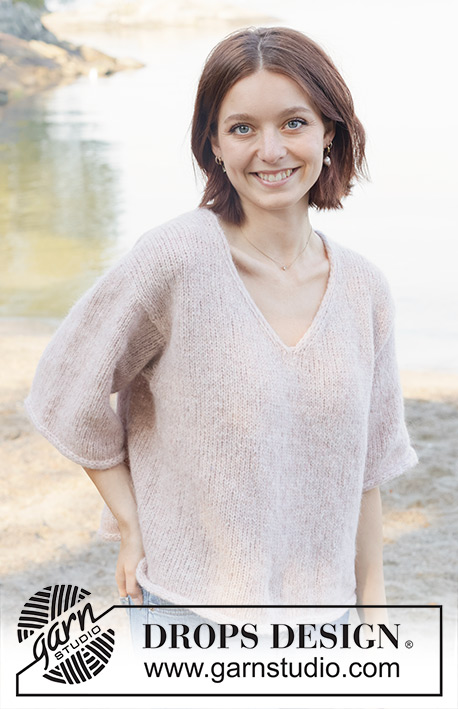
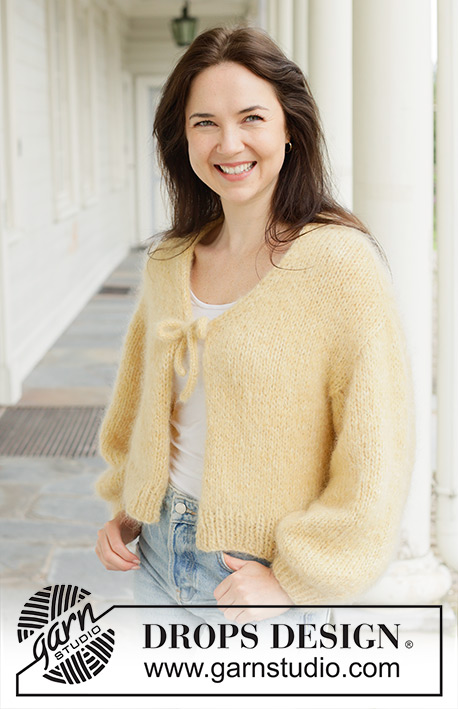
Lemon Fizz Cardigan#lemonfizzcardigan |
|
 |
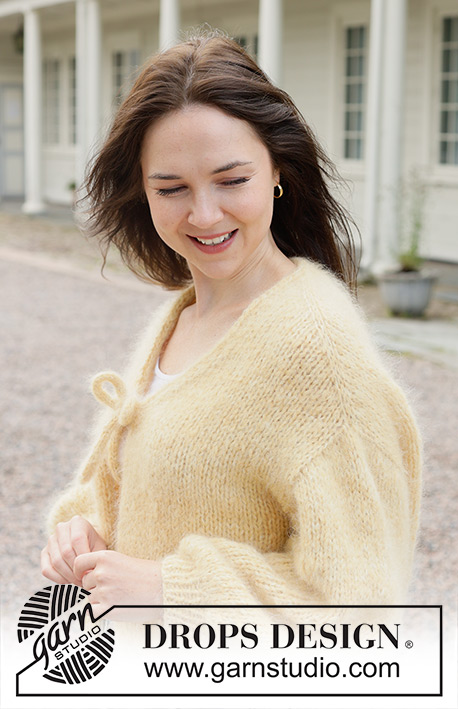 |
Knitted jacket in 1 strand DROPS Melody together with 3 strand DROPS Kid-Silk. Piece is knitted top down in stocking stitch with European shoulder / diagonal shoulder, V-neck, tube knitted tie and I-cord. Size: S - XXXL.
DROPS 258-30 |
|
|
---------------------------------------------------------- EXPLANATION FOR THE PATTERN: ---------------------------------------------------------- INCREASE TIP-1: INCREASE 1 STITCH TOWARDS THE LEFT - from RIGHT SIDE: Use left needle to pick up yarn between 2 stitches from row below, pick up yarn from the front and knit in the stitch loop that is on the back of the needle. INCREASE 1 STITCH TOWARDS THE RIGHT - from RIGHT SIDE: Use left needle to pick up yarn between 2 stitches from row below, pick up yarn from the back and knit in the stitch loop that is on the front side of the needle. . INCREASE TIP-2: INCREASE 1 STITCH TOWARDS THE RIGHT - from WRONG SIDE: Use left needle to pick up yarn between 2 stitches from row below, pick up yarn from the back and purl in the stitch loop that is on the front side of the needle. INCREASE 1 STITCH TOWARDS THE LEFT - from WRONG SIDE: Use left needle to pick up yarn between 2 stitches from row below, pick up yarn from the front and purl in the stitch loop that is on the back side of the needle. INCREASE/DECREASE TIP (evenly): To calculate how to increase evenly, use the total number of stitches on row (e.g. 120 stitches), minus I-cord stitches (= 6 stitches) and divide the remaining stitches by number of increases to be done (e.g. 37) = 3.1. In this example increase by making 1 yarn over after approx. every 3rd stitch (do not increase over I-cord stitches). On next row work yarn overs twisted to avoid holes. To calculate how to decrease evenly, use number of stitches on needle (e.g. 38 stitches) and divide stitches by number of decreases to be done (e.g. 6) = 6.3. In this example decrease by knitting approx. every 5th and 6th stitch together. 3 STITCHES I-CORD: BEGINNING OF ROW: Work as follows: Slip 1 stitch purlwise with strand in front of piece, knit 1, slip 1 stitch purlwise with strand in front of piece. END OF ROW: Work as follows: Work until 3 stitches remain on needle, knit 1, slip 1 stitch purlwise with strand in front of piece, knit 1. Work the same way both from right side and wrong side. KNITTING TIP: When working short row there will be a small hole when turning the piece - the hole can be closed by tightening the yarn or using the technique German Short Rows as follows: Slip first stitch purlwise. Place strand over right needle and tighten well at the back (should lead to two loops on needle). Work these loops together on next row. DECREASE TIP: Decrease 1 stitch on each side of marker thread as follows: Work until 3 stitches remain before marker thread, knit 2 together, knit 2 (marker thread is between these 2 stitches), slip 1 stitch knitwise, knit 1, pass slipped stitch over stitch worked (= 2 stitches decreased). ---------------------------------------------------------- START THE PIECE HERE: ---------------------------------------------------------- JACKET - SHORT OVERVIEW OF THE PIECE: In this pattern needles of different length have been used, begin with fitting length for number of stitches and switch as needed. Begin by casting on stitches in the back of neck. Then work back piece downwards while AT THE SAME TIME increasing in each side of piece until number of stitches for shoulder width is reached. Back piece has a slight diagonal shoulder. Then work down to armholes. Now put back piece aside and work the front pieces. Work front pieces separately. Begin by picking up stitches along one shoulder from back piece, work downwards to armhole while increasing towards the neck. Repeat on the other shoulder. At the armholes slip front pieces and back piece on to same circular needle and work body downwards back and forth on circular needle. Pick up stitches for sleeves around the armholes and work sleeves downwards. First work back and forth with short rows to form a sleeve cap, then work sleeves downwards in the round on needle. Pick up stitches along V-neck. Then work a tube knitted tie, cast off the stitches along V-neck with I-cord before working a tube knitted tie in the other side. Tie ties like a bow mid front. If 0 is given for the chosen size, it means that you skip the information until next information. BACK PIECE: Work piece back and forth on circular needle. Cast on 16-16-16-18-18-18 stitches on circular needle size 7 mm with 1 strand DROPS Melody and 3 strands DROPS Kid-Silk (= 4 strands), or cast on with 4 strands DROPS Brushed Alpaca Silk. ROW 1 (= wrong side): Purl all stitches. ROW 2 (= right side): Read INCREASE TIP-1 and knit 3, increase 1 stitch towards the left, knit until 3 stitches remain, increase 1 stitch towards the right, knit 3. ROW 3 (= wrong side): Read INCREASE TIP-2 and purl 3, increase 1 stitch towards the right, purl until 3 stitches remain, increase 1 stitch towards the left, purl 3. AFTER 3RD ROW: Work 2nd and 3rd ROW 9-10-11-11-12-13 times in total (= 18-20-22-22-24-26 rows have been worked), after increase there are = 52-56-60-62-66-70 stitches on needle. Insert 1 marker in the side. Now measure piece from here! Continue in stocking stitch - remember to follow the knitting tension - until piece measures 11-12-12-12-13-14 cm measured from marker along armhole. Now increase in each side for armholes. INCREASE FOR ARMHOLES: ROW 1 (= right side): Remember INCREASE TIP-1 and knit 3, increase 1 stitch towards the left, knit until 3 stitches remain, increase 1 stitch towards the right, knit 3. ROW 2 (= wrong side): Purl all stitches. Work 1st and 2nd ROW 2-2-2-3-3-3 times in total (= 4-4-4-6-6-6 rows have been worked) = 56-60-64-68-72-76 stitches on needle. Work until piece measures 14-15-15-16-17-18 cm, measured from marker along armhole, finish with a row from right side. Cut the yarn, slip stitches on a thread or stitch holder, now work left front piece along the left shoulder from back piece - read explanation below. LEFT FRONT PIECE: Find left shoulder on back piece as follows: Place back piece flat with right side up, place back piece so that stitches on thread/stitch holder is towards you, left side of piece = left shoulder. Now pick up stitches along left diagonal shoulder on back piece - begin from right side at the neck and pick up stitches out towards the armhole as follows: Pick up 1 stitch in every worked row inside outermost stitch = 18-20-22-22-24-26 stitches. All length measurements on front piece are done from pick up edge. Work in stocking stitch (work first row from wrong side) until piece measures 7-8-9-8-9-10 cm. OVERVIEW OF NEXT SECTION: Now increase for V-neck, increase also in the side towards the armhole. Increase in the side begins before increases for V-neck are done, thus read both of the next 2 sections before continuing to get an overview of when the increase for armholes begin. INCREASE FOR V-NECK: ROW 1 (= right side): Remember INCREASE TIP-1 and knit 2, increase 1 stitch towards the left, knit the rest of row. ROW 2 (= wrong side): Purl all stitches. Work 1st and 2nd ROW 7-7-7-8-8-8 times in total (= 14-14-14-16-16-16 rows worked). Continue to increase as follows: ROW 1 (= right side): Knit all stitches. ROW 2 (= wrong side): Purl all stitches. ROW 3 (= right side): Remember INCREASE TIP-1 and knit 2, increase 1 stitch towards the left, knit the rest of row. ROW 4 (= wrong side): Purl all stitches. You have increased a total of 8-8-8-9-9-9 times for V-neck. Then work as follows: ROW 1 (= right side): Knit 1 in front and back loop of first stitch (= 1 stitch increased), knit the rest of row. ROW 2 (= wrong side): Purl all stitches. ROW 3 (= right side): Work 3 STITCHES I-CORD - read explanation above, knit the rest of row. ROW 4 (= wrong side): Purl until 3 stitches remain, 3 stitches I-cord. Work ROWS 3 and 4. INCREASE FOR ARMHOLES: When piece measures 21-22-24-24-25-26 cm, increase in the side towards armhole as follows: ROW 1 (= right side): Work as before until 3 stitches remain, increase 1 stitch towards the right - read INCREASE TIP-1, knit 3. ROW 2 (= wrong side): Purl all stitches. Work 1st and 2nd ROW 2-2-2-3-3-3 times in total (= 4-4-4-6-6-6 rows worked). When all increases for V-neck and armhole are done, there are 29-31-33-35-37-39 stitches on needle. Work until piece measures 24-25-27-28-29-30 cm, measured from pick up-edge at the top of front piece, finish with a row from right side. Cut the yarn, slip stitches on a thread or stitch holder, and work right front piece along the right shoulder from back piece - read explanation below. RIGHT FRONT PIECE: Now pick up stitches along right diagonal shoulder on back piece - begin from right side at the armhole and pick up stitches in towards the neck as follows: Pick up 1 stitch in every worked row inside outermost stitch = 18-20-22-22-24-26 stitches. All length measurements on front piece are done from pick up edge. Work in stocking stitch (work first row from wrong side) until piece measures 7-8-9-8-9-10 cm. OVERVIEW OF NEXT SECTION: Now increase for V-neck, increase also in the side towards the armhole. Increase in the side begins before increases for V-neck are done, thus read both of the next 2 sections before continuing to get an overview of when the increase for armholes begin. INCREASE FOR V-NECK: ROW 1 (= right side): Knit until 2 stitches remain, increase 1 stitch towards the right - remember INCREASE TIP-1, knit 2. ROW 2 (= wrong side): Purl all stitches. Work 1st and 2nd ROW 7-7-7-8-8-8 times in total (= 14-14-14-16-16-16 rows worked). Continue to increase as follows: ROW 1 (= right side): Knit all stitches. ROW 2 (= wrong side): Purl all stitches. ROW 3 (= right side): Knit until 2 stitches remain, increase 1 stitch towards the right, knit 2 – remember INCREASE TIP-1. ROW 4 (= wrong side): Purl all stitches. You have increased a total of 8-8-8-9-9-9 times for V-neck. Then work as follows: ROW 1 (= right side): Knit until 1 stitch remains on needle, knit 1 in front and back loop of last stitch (= 1 stitch increased). ROW 2 (= wrong side): Purl all stitches. ROW 3 (= right side): Knit until 3 stitches remain on row, work 3 stitches I-cord. ROW 4 (= wrong side): Work 3 stitches I-cord, purl the rest of row. Work ROWS 3 and 4. INCREASE FOR ARMHOLES: When piece measures 21-22-24-24-25-26 cm, increase in the side towards armhole as follows: ROW 1 (= right side): Knit 3, increase 1 stitch towards the left - remember INCREASE TIP-1, work as before the rest of row. ROW 2 (= wrong side): Purl all stitches. Work 1st and 2nd ROW 2-2-2-3-3-3 times in total (= 4-4-4-6-6-6 rows worked). When all increases for V-neck and armhole are done, there are 29-31-33-35-37-39 stitches on needle. Work until piece measures 24-25-27-28-29-30 cm, measured from pick up-edge at the top of front piece, finish with a row from right side. Now put front pieces and back piece together for body as explained below. Now measure the piece from here. BODY: Work first row from wrong side - begin with stitches over right front piece and work the row as follows: Work the 29-31-33-35-37-39 stitches from right front piece, cast on 2-4-4-6-8-10 new stitches at the end of this row (= in the side mid under sleeve), work the 56-60-64-68-72-76 stitches on back piece, cast on 2-4-4-6-8-10 new stitches (= in the side mid under sleeve), work the 29-31-33-35-37-39 stitches from left front piece = 118-130-138-150-162-174 stitches on needle. Now measure piece from here! Work back and forth from mid front over all stitches with stocking stitch and I-cord as before. Work until piece measures approx. 21-22-21-22-22-23 cm from armhole. On next row from right side begin rib AT THE SAME TIME increase 37-41-43-47-51-55 stitches evenly on row – read INCREASE/DECREASE TIP (do not increase over I-cord stitches) = 155-171-181-197-213-229 stitches, work as follows: Switch to circular needle size 4.5 mm and work 3 stitches I-cord as before, work rib (= knit 1 /purl 1 - remember increase) until 4 stitches remain, knit 1 and 3 stitches in I-cord as before. When rib measures 5-5-6-6-7-7 cm cast off somewhat loosely. Jacket measures approx. 48-50-52-54-56-58 cm, measured furthest in towards neck. SLEEVES: Sleeve is worked from the armhole and down. Place piece flat and insert 1 marker at the top of armhole = mid on top shoulder (NOTE! Mid on top of shoulder is not same place as where stitches were picked up for front piece but approx. 5-6 cm down on front piece). Pick up stitches around armhole, use circular needle size 4.5 mm, begin in the middle of the new stitches cast on under sleeve - pick up 40-44-46-52-56-60 stitches - adjust to pick up same number of stitches on each side of marker along armhole. Switch to circular needle size 7 mm. Now work in stocking stitch back and forth with short rows over sleeve cap to get a better shape on sleeve, begin round mid under sleeve as follows: ROW 1 (= right side): Work 4-4-4-5-5-6 stitches past marker on top of shoulder, turn piece – read KNITTING TIP. ROW 2 (= wrong side): Work 4-4-4-5-5-6 stitches past marker, turn piece. ROW 3 (= right side): Work 4-3-4-3-3-3 stitches past where the previous turn was, turn piece. ROW 4 (= wrong side): Work 4-3-4-3-3-3 stitches past where the previous turn was, turn piece. Repeat ROWS 3 and 4. Work until 8-10-10-12-12-12 turns have been done in total (= 4-5-5-6-6-6 times in each side and last row is worked from wrong side). AFTER LAST TURN: The last time 4th row is worked finish row by turning piece, then work from right side until beginning of round (mid under sleeve). Insert 1 marker thread mid under sleeve, this is used when decreasing stitches under sleeve. Move marker thread upwards when working. Now work in the round in stocking stitch over all stitches while AT THE SAME TIME decreasing under sleeve, read DECREASE TIP and decrease like this: When sleeve measures 1-1-1-1-1-1 cm measured mid under sleeve decrease 2 stitches 1-2-2-2-2-2 times on every other round, then decrease 2 stitches every 0-0-0-2-2-2 cm 0-0-0-1-2-2 times in total = 38-40-42-46-48-52 stitches on row. Work until sleeve measures 46-45-43-43-41-40 cm from mid on top shoulder. Switch to double pointed needles size 4.5 mm and work rib (= knit 1/purl 1) while AT THE SAME TIME decreasing 6-6-8-10-10-12 stitches evenly on 1st round - remember INCREASE/DECREASE TIP = 32-34-34-36-38-40 stitches. When rib measures 5-5-6-6-7-7 cm cast off somewhat loosely. Sleeve measures approx. 51-50-49-49-48-47 cm from mid on top of shoulder. NECK EDGE WITH TUBE KNITTED TIE: Begin by picking up stitches from right side along V-neck. Use circular needle size 4.5 mm and 1 strand DROPS Melody together with 3 strands DROPS Kid-Silk (= 4 strands) or 4 strands DROPS Brushed Alpaca Silk. Pick up approx. 70 to 90 stitches inside outermost stitch along V-neck on right front piece, the back of neck and down along V-neck on left front piece (number of stitches equals picking up approx. 1 stitch in every stitch/row from tip to tip along V-neck and in the back of neck). Cut the yarn. Then work tie as explained below. Cast on 4 stitches on 1 double pointed needle size 4.5 mm (work with the other), work tube knitting as follows: * Move stitches to the beginning of row, tighten the yarn and knit the 4 stitches from right side *, work from *-* until tie measures approx. 25-27-29-31-33-35 cm. Do not cut the yarn. Now cast off with an I-cord cast-off along the V-neck on front piece as follows: Begin from right side, * knit the first 3 stitches from tie, knit last stitch twisted together with first stitch on needle on front piece. Lift stitches worked back on left needle *, work from *-* until all stitches along the neck have been cast off and 4 stitches remain on right needle. Move these 4 stitches over on to left needle, work the other tie the same way until tie measures approx. 25-27-29-31-33-35 cm (adjust length according to the other tie). Cut the yarn and pull yarn through stitches, tighten together and fasten. |
|
 |
|
Have you finished this pattern?Tag your pictures with #dropspattern #lemonfizzcardigan or submit them to the #dropsfan gallery. Do you need help with this pattern?You'll find 39 tutorial videos, a Comments/Questions area and more by visiting the pattern on garnstudio.com. © 1982-2026 DROPS Design A/S. We reserve all rights. This document, including all its sub-sections, has copyrights. Read more about what you can do with our patterns at the bottom of each pattern on our site. |
|


With over 40 years in knitting and crochet design, DROPS Design offers one of the most extensive collections of free patterns on the internet - translated to 17 languages. As of today we count 325 catalogues and 12298 patterns translated into English (UK/cm).
We work hard to bring you the best knitting and crochet have to offer, inspiration and advice as well as great quality yarns at incredible prices! Would you like to use our patterns for other than personal use? You can read what you are allowed to do in the Copyright text at the bottom of all our patterns. Happy crafting!
Post a comment to pattern DROPS 258-30
We would love to hear what you have to say about this pattern!
If you want to leave a question, please make sure you select the correct category in the form below, to speed up the answering process. Required fields are marked *.