
Popular categories
Looking for a yarn?


Comments / Questions (160)
![]() Francoise Murciano wrote:
Francoise Murciano wrote:
Dans la confection de vos echantillons il y a une erreur, si il y a trop de mailles pour faire 10 cm, il faut utiliser des aiguilles plus fines, et si il n' y a pas assez de mailles on peut utiliser des aiguilles plus grosses pour obtenir 10 cm
13.01.2025 - 10:52
![]() Francoise Murciano wrote:
Francoise Murciano wrote:
Dans la confection de vos echantillons il y a une erreur, si il y a trop de mailles pour faire 10 cm, il faut utiliser des aiguilles plus fines, et si il n' y a pas assez de mailles on peut utiliser des aiguilles plus grosses pour obtenir 10 cm
13.01.2025 - 10:52DROPS Design answered:
Bonjour Mme Murciano, s'il a trop de mailles pour 10 cm, c'est que vos mailles sont trop petites par rapport à l'échantillon, il vous faut donc les agrandir à l'aide d'une aiguille plus grosse; si vous n'avez pas assez de mailles pour 10 cm, c'est que vos mailles sont trop grosses et qu'il vous faut donc utiliser une aiguille plus fine pour les "rétrécir". Bon tricot!
13.01.2025 - 10:59
![]() Gabrielle VIDAL wrote:
Gabrielle VIDAL wrote:
Bonjour, taille XL je remplace 6 pelotes ALPACA 300 gr par BABY MERINO 300 gr et pour 5 pelotes KID silk 125 gr je garde le nombre de pelote de BABY MERINO : je pense à 6 pelotes aussi merci de me confirmer si j'ai bien calculer Merci
04.01.2025 - 00:54DROPS Design answered:
Bonjour Mme Vidal, pensez à utiliser le convertisseur pour avoir la nouvelle quantité d'une alternative choisie, autrement dit, il vous faudra effectivement 300 g Baby Merino (6 pelotes) et toujours 125 g Kid-Silk (5 pelotes). Bon tricot!
06.01.2025 - 08:39
![]() Hanneke wrote:
Hanneke wrote:
Beste mensen van Drops. Ik ben bezig met Remembering Spring 250. Ik heb net na de hals geminderd naar 106 steken (maat XL) voor de pas en de markeerdraden aangebracht. Echter markeerdraden na 16,19,32, 19,16 steken is totaal 102 steken. Wat doe ik met de 4 steken die ik nu over heb?
02.01.2025 - 09:40DROPS Design answered:
Dag Hanneke,
Je voegt de markeerdraden in de steken en niet tussen de steken. Dit zorgt voor het verschil van 4 steken.
02.01.2025 - 20:30
![]() Melanie wrote:
Melanie wrote:
Noch zu der anderen Frage, ich soll 17x an den Ärmel zunehmen und 22x am Vorderteil/Rückenteil. Wenn ich aber 22x Zunahmen machen soll und Ärmel nur 17x nehme ich doch automatisch weiter zu, weil ich doch im Muster trotzdem weiterstricken muss. Oder wie soll ich die Ärmel nur 17x zunehmen wenn ich aber noch 5 weitere zunahmen für den vorder/Rückenteil macheb muss. Vielen Dank für die Hilfe!
21.12.2024 - 20:57DROPS Design answered:
Liebe Melanie, die Zunahmen für Rumpfteil stricken Sie in jeder 2. Runde - bei den Ärmel nehmen Sie wie im Diagram zu, dh 2 Mal die Diagramme in der Höhe ( 12 Mal) dann noch die ersten 5 Zunahmen (- die ersten 11 Reihen). Viel Spaß beim Stricken!
02.01.2025 - 10:03
![]() Melanie wrote:
Melanie wrote:
Hallo, ich verstehe nicht ganz die Anleitung zum Ärmel. Wenn ich nur noch die Ärmel stricke wie gehe ich dann im Muster vor? Weil dann kommen immer mehr Zunahmen. Mache ich auch von unten nach oben im Muster erst A1, A2 so oft wie es geht und dann A3 oder wie?
21.12.2024 - 11:13DROPS Design answered:
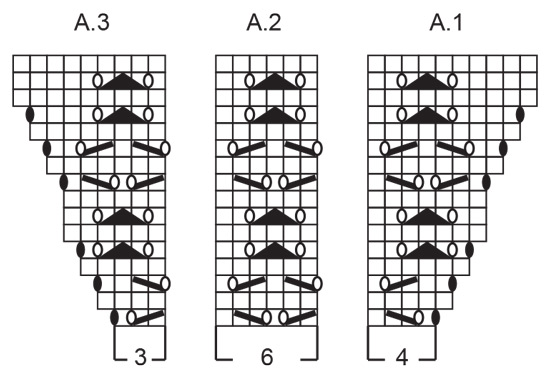
Liebe Melanie, die Zunahmen für die Ärmel werden in den Diagrammen A.1 und A.3 gezeichnet; so wenn die Diagramme einmal in der Höhe gestrickt sind haben Sie 6 Maschen in jedem A.1 und A.3 gestrickt, bei der nächsten Runde stricken Sie A.1, dann 2 Mal A.2 mehr in der Breite und enden mit A.3. Viel Spaß beim Stricken!
02.01.2025 - 09:41
![]() Melanie wrote:
Melanie wrote:
Guten Tag leider verstehe ich die ZUNAHMEN AM VORDERTEIL / RÜCKENTEIL nicht. Ich stricke Größe S. Können Sie es mir bitte einfacher erklären wie ich vorgehen soll? Mir wird das nicht klar mit erst 22x Zunahmen dann 0x und dann nochmal 22× Vielen Dank!
15.12.2024 - 20:20DROPS Design answered:
Liebe Melanie, in S werden Sie insgesamt 22 Mal in jeder 2. Runde beim Vorder- / Rückenteil zunehmen (in S wird man nicht in jeder Runde zunehmen); gleichzeitig nehmen Sie 17 Mal (wie in den Diagramme gezseichnet) für die Ärmel. Vile Spaß beim Stricken!
16.12.2024 - 11:11
![]() Christine wrote:
Christine wrote:
Merci d3 votre réponse j'ai compris pour le nombre de mailles des manches mais lorsque je reprend les manches comment ne plus augmenter alors que ds le diagramme les augmentations continuent ?
13.12.2024 - 23:45DROPS Design answered:
Bonjour Christine, notez dans le diagramme la 1ère maille de A.1 et la dernière maille de A.3, et tricotez le motif comme avant, mais veillez à ce que chaque diminution soit compensée par 1 jeté (et vice versa) pour ne plus augmenter le nombre de mailles, si vous n'avez plus suffisamment dem ailles pour tricoter 1 jeté et.1 diminution, tricotez ces mailles en jersey. Bon tricot!
16.12.2024 - 09:50
![]() Melanie wrote:
Melanie wrote:
Hallo, könnten Sie mir bitte erklären wie genau ich das macheb soll: zwischen 2 Maschen 1 Umschlag arbeiten, in der nächsten Runde den Umschlag rechts verschränkt stricken? Vielen Dank
13.12.2024 - 21:05DROPS Design answered:
Liebe Melanie, in diesem Video zeigen wir, wie man einen Pullover mit Raglan von oben nach unten strickt, die Zunahmen werden genauso mit 1 Umschlag gestrickt, der dann rechts verschränkt bei der nächsten Runde wird. Viel Spaß beim Stricken!
16.12.2024 - 09:44
![]() Gb Christine wrote:
Gb Christine wrote:
Bonjour Lorsque j arrive 23cm avec le bon nombre d3 mailles pour le dos et le devant mais seulement 53 m pour les manches au lieu de 61 ....et comment faire pour ne plus augmenter au niveau du point fantaisie alors que les augmentations sont à l intérieur de ce point Merci de votre réponse
03.12.2024 - 20:38DROPS Design answered:
Bonjour Christine, en taille M les augmentations du raglan se terminent en même temps: 24 fois tous les 2 tours pour le dos et le devant = 48 tours; 20 fois pour les manches (= 3 x les 15 rangs du diagramme (3x6 augmentations=18) + les 4 premiers rangs du diagrammes (2 augmentations) = 48 rangs et 20 augmentations); vous avez ainsi 19 m + 2x20 augmentations= 59 mailles + 1 m raglan de chaque côté = 61 mailles. Bon tricot!
04.12.2024 - 07:26
|
|||||||||||||||||||
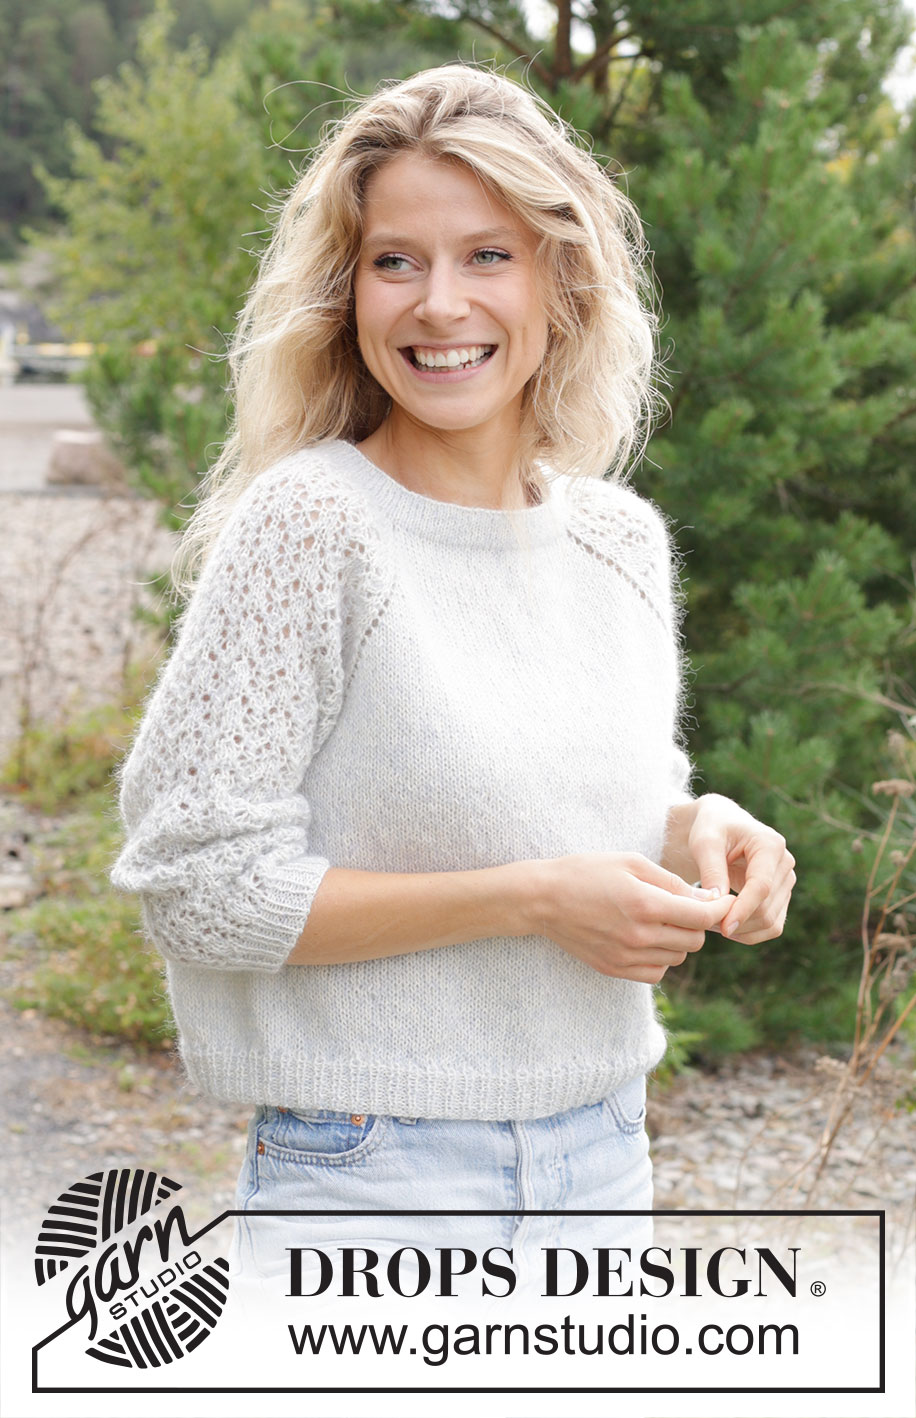
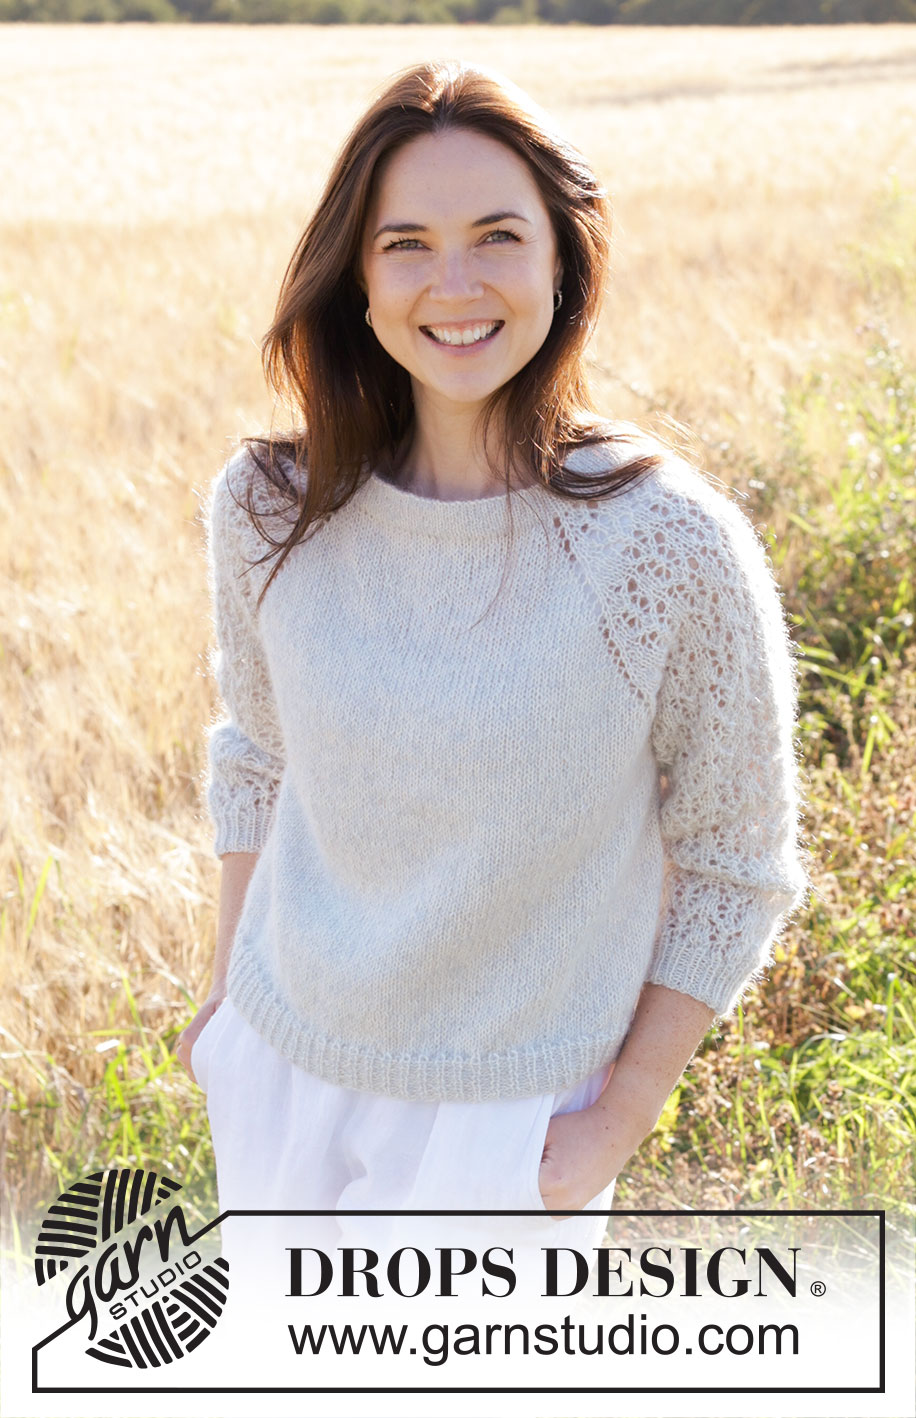
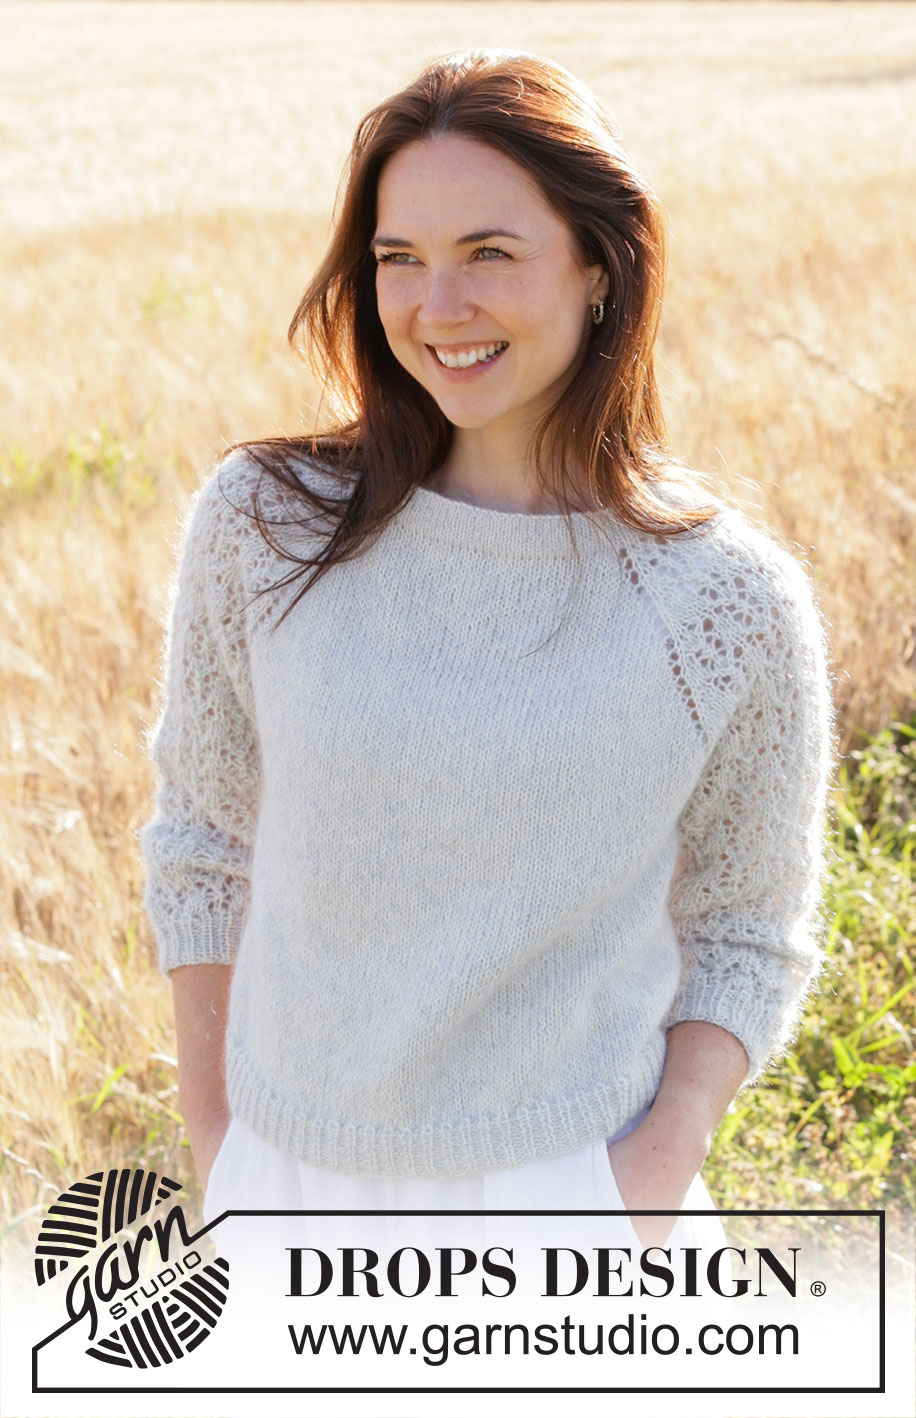
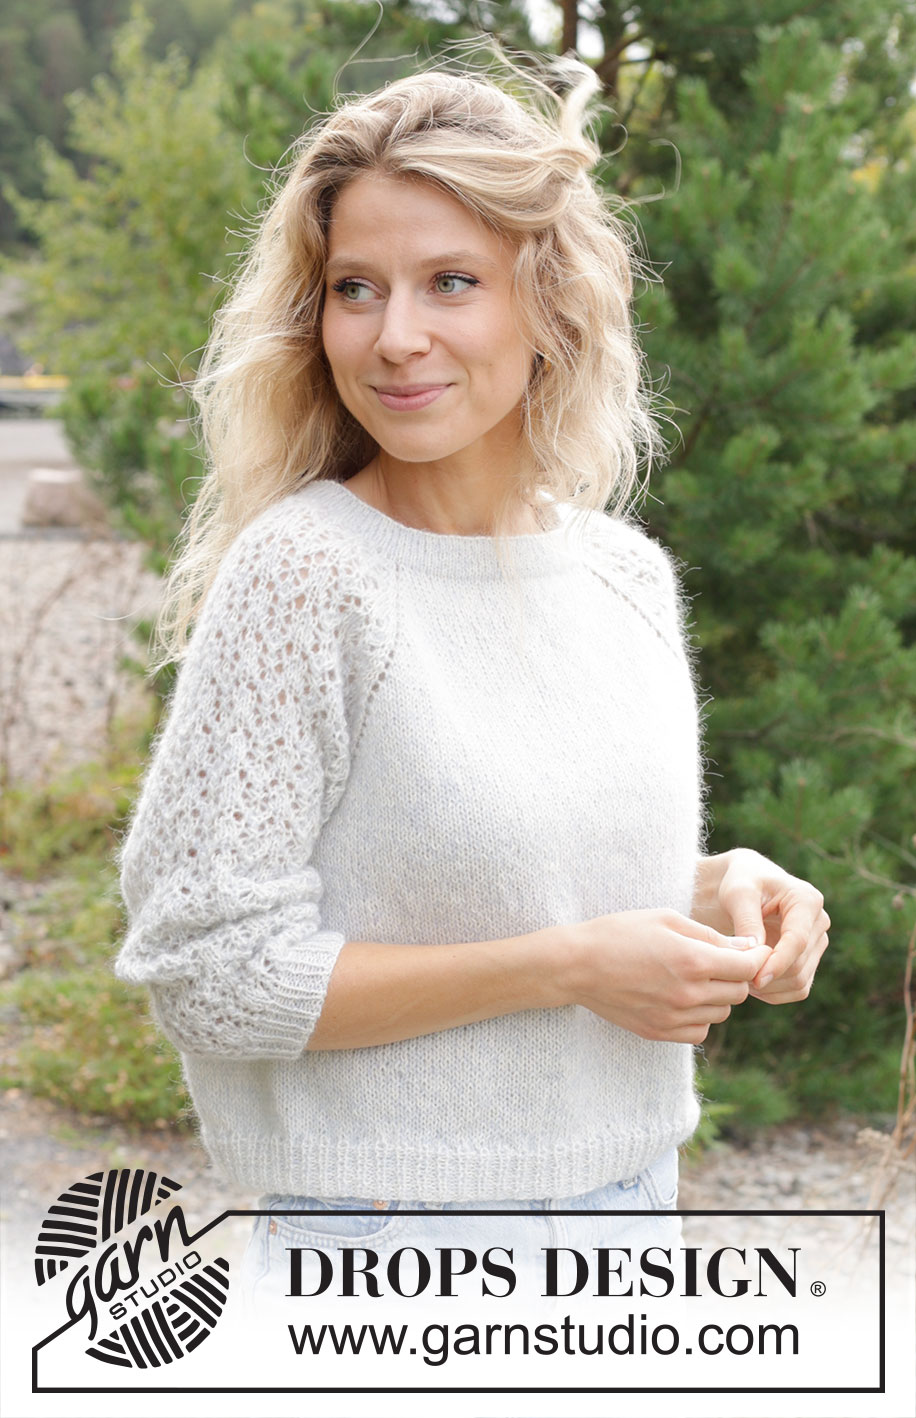
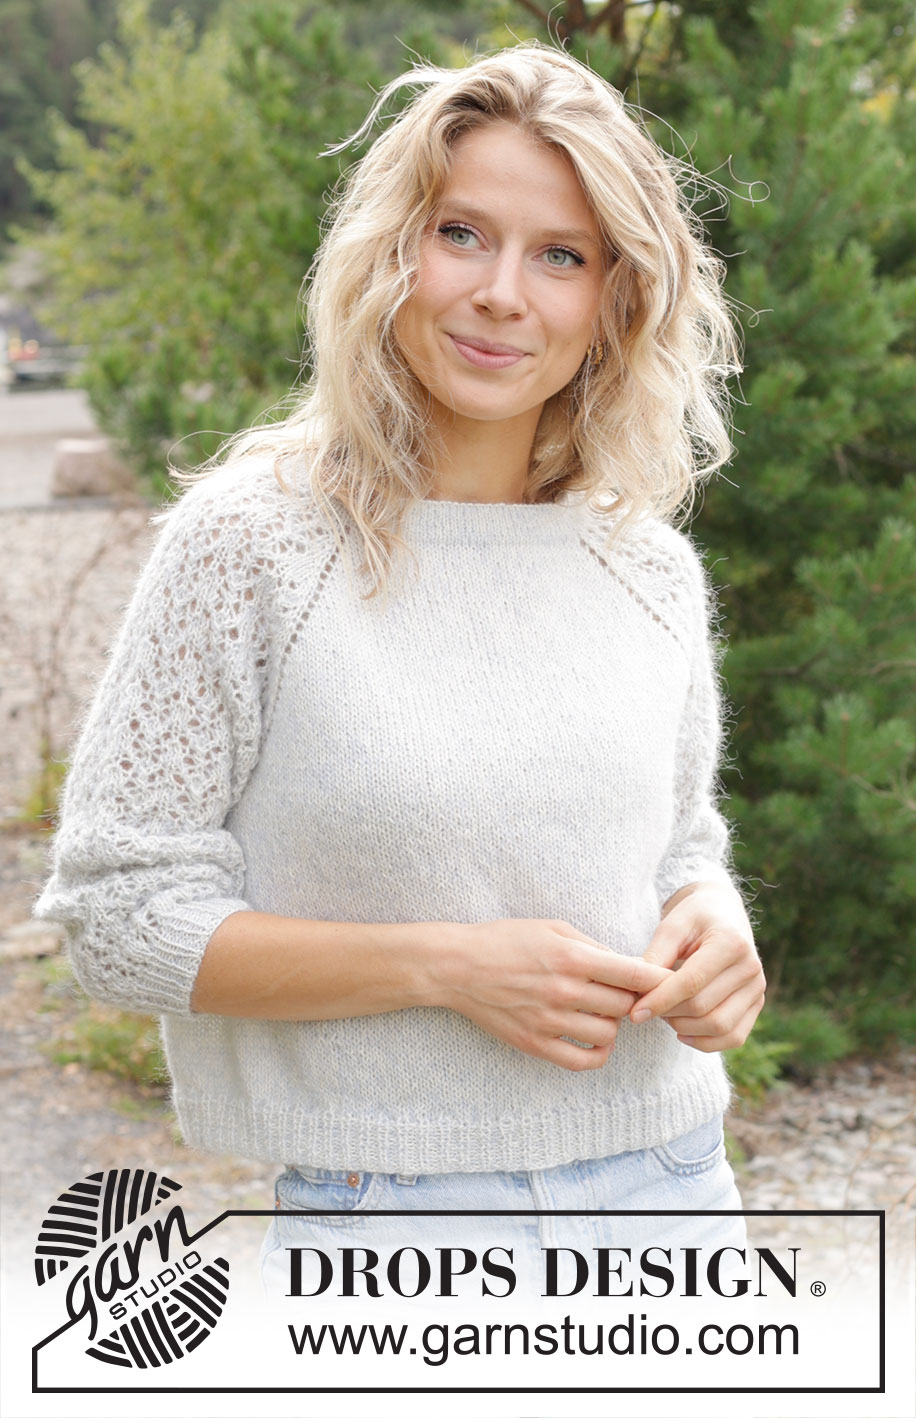
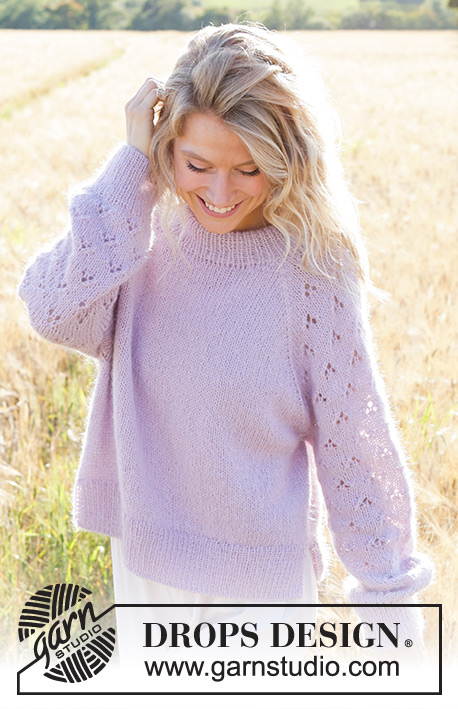
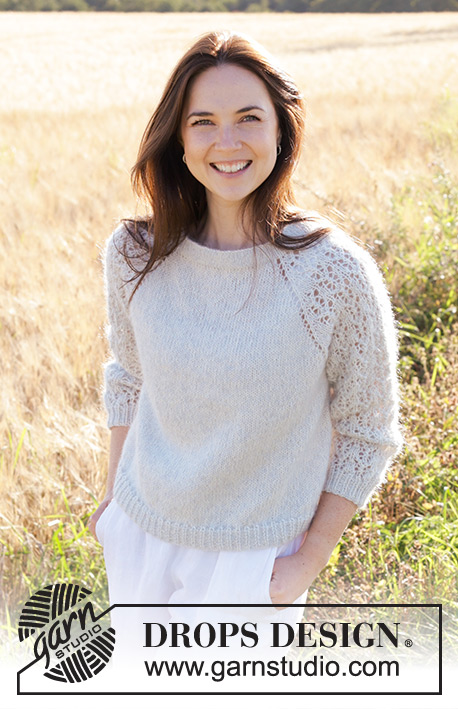
Remembering Spring#rememberingspringsweater |
|||||||||||||||||||
 |
 |
||||||||||||||||||
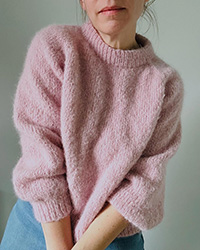
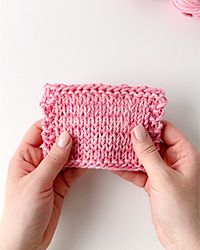
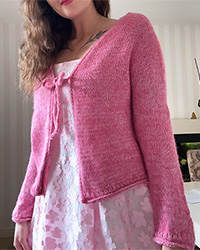
Knitted jumper in DROPS Alpaca and DROPS Kid-Silk. The piece is worked top down with double neck, raglan, lace pattern and ¾-length sleeves. Sizes S - XXXL.
DROPS 250-1 |
|||||||||||||||||||
|
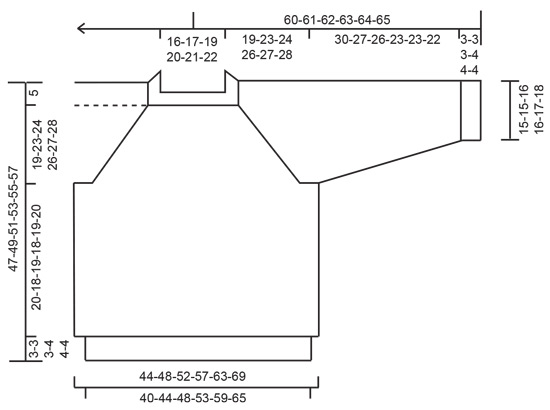
------------------------------------------------------- EXPLANATIONS FOR THE PATTERN: ------------------------------------------------------- PATTERN: See diagrams A.1 to A.3. RAGLAN: Increase 1 stitch by making 1 yarn over before/after each marker-stitch. On the next round knit the yarn overs on the front and back pieces – leaving holes. The yarn overs on the sleeves are knitted twisted – no holes. Work the new stitches in stocking stitch on the front and back pieces and into the pattern on the sleeves. DECREASE TIP (for sleeves): Decrease 1 stitch on each side of the marker-thread as follows: Work until there are 3 stitches left before the marker-thread, knit 2 together, knit 2 (marker-thread sits between these 2 stitches), slip 1 stitch knit-wise, knit 1 and pass the slipped stitch over the knitted stitch (2 stitches decreased). ------------------------------------------------------- START THE PIECE HERE: ------------------------------------------------------- JUMPER – SHORT OVERVIEW OF THE PIECE: The pattern uses both long and short needles; start with the length which fits the number of stitches and change when necessary. The double neck and yoke are worked in the round with circular needle, top down. When the yoke is finished, it is divided for body and sleeves and the body is continued in the round, while the sleeves wait. The sleeves are worked in the round, top down. The neck is folded to the inside and sewn down. If there is a «0» in your chosen size, skip the information and go straight to the next instruction. DOUBLE NECK: Cast on 104-108-114-118-122-126 stitches with circular needle size 4.5 mm, 1 strand DROPS Alpaca and 1 strand DROPS Kid-Silk (= 2 strands). Change to circular needle size 3.5 mm (casting on with a larger needle size gives and elastic cast-on edge). Work stocking stitch in the round for 2½ to 3 cm. Purl 1 round, the neck is later folded along this round. Continue with stocking stitch until the neck measures 6 cm. It will be approx. 3 cm when folded double. Insert 1 marker at the beginning of the round (= mid-back), the yoke is measured from here. YOKE: Change to circular needle size 4.5 mm. Knit 1 round and decrease 10-10-12-12-12-12 stitches evenly spaced = 94-98-102-106-110-114 stitches. Insert 4 markers without working the stitches (these are used when increasing for raglan) as follows: Count 13-14-15-16-17-18 stitches (= half back piece), insert 1 marker in the next stitch, count 19 stitches (= sleeve), insert 1 marker in the next stitch, count 26-28-30-32-34-36 stitches (= front piece), insert 1 marker in the next stitch, count 19 stitches (= sleeve), insert 1 marker in the next stitch, there are 13-14-15-16-17-18 stitches left after the last marker (= half back piece). On the next round, work PATTERN and increase for RAGLAN – read description above, as follows: Knit 13-14-15-16-17-18 (= half back piece), increase 1 stitch for raglan, knit 1 (first marker sits in this stitch), work A.1, A.2 over the next 12 stitches, work A.3, knit 1 (second marker sits in this stitch) (= sleeve), increase 1 stitch for raglan, knit 26-28-30-32-34-36, increase 1 stitch for raglan (= front piece), knit 1 (third marker sits in this stitch), work A.1, A.2 over the next 12 stitches, work A.3, knit 1 (fourth marker sits in this stitch) (= sleeve),increase 1 stitch for raglan, knit 13-14-15-16-17-18 (= half back piece). REMEMBER THE KNITTING TENSION! Continue this pattern but note that the increases are different on the front/back pieces and the sleeves – read INCREASES FOR SLEEVES and INCREASES FOR FRONT/BACK PIECES before continuing! INCREASES FOR SLEEVES: On the sleeves you increase 17-20-21-23-24-25 times on each side (including the first increase described above). The sleeve increases are drawn into diagrams A.1 and A.3. Each time A.1, A.2 and A.3 are finished in height, there is room for 2 more repeats of A.2 between A.1 and A.3. The stitches which do not fit into the pattern on each side of the sleeve are worked in stocking stitch. INCREASES FOR FRONT/BACK PIECES: On the front and back pieces, you increase 22-24-26-29-33-36 times (including the first increase described above), as follows: Increase on each round 0-0-0-0-4-6 times, then every 2nd round 22-24-26-29-29-30 times. AFTER THE LAST INCREASE: When all the increases are finished there are 250-274-290-314-338-358 stitches (70-76-82-90-100-108 stitches on the front/back pieces and 55-61-63-67-69-71 stitches on each sleeve (including the marker-stitches on each side of the sleeves). Continue with pattern and stocking stitch but without further increases. The stitches which do not fit into the pattern on each side of the sleeve are worked in stocking stitch. Work until the yoke measures 19-23-24-26-27-28 cm from the marker. DIVIDE FOR BODY AND SLEEVES: Now divide for the body and sleeves as follows: Knit 35-38-41-45-50-54 (= half back piece), place the next 55-61-63-67-69-71 stitches on a thread for the sleeve, cast on 10-10-12-12-14-16 stitches (in side under sleeve), knit 70-76-82-90-100-108 (= front piece), place the next 55-61-63-67-69-71 stitches on a thread for the sleeve, cast on 10-10-12-12-14-16 stitches (in side under sleeve), knit the last 35-38-41-45-50-54 stitches (= half back piece). The body and sleeves are finished separately. The piece is now measured from here! BODY: = 160-172-188-204-228-248 stitches. Continue with stocking stitch in the round until the body measures 20-18-19-18-19-20 cm from the division. On the next round begin working rib, AT THE SAME TIME on the first round increase 0-4-4-8-8-12 stitches evenly spaced = 160-176-192-212-236-260 stitches, as follows: Change to circular needle size 3.5 mm, work rib (knit 1, purl 1 – remember the increases). When the rib measures 3-3-3-4-4-4 cm, cast off a little loosely with rib. The jumper measures approx. 47-49-51-53-55-57 cm from the shoulder. SLEEVES: Place the 55-61-63-67-69-71 stitches from the thread on the one side of the piece on circular needle size 4.5 mm and knit up 1 stitch in each of the 10-10-12-12-14-16 stitches cast on under the sleeve = 65-71-75-79-83-87 stitches. Insert a marker-thread in the middle of the 10-10-12-12-14-16 stitches under the sleeve. Start at the marker-thread and continue the pattern in the round. The stitches which do not fit into the pattern under the sleeve are worked in stocking stitch. AT THE SAME TIME when the sleeve measures 3-3-3-4-4-4 cm from the division, decrease 2 stitches under the sleeve – read DECREASE TIP. Decrease like this every 4-2½-2-1½-1½-1 cm a total of 6-8-9-10-11-12 times = 53-55-57-59-61-63 stitches. Continue working until the sleeve measures 30-27-26-23-23-22 cm from the division. Change to double pointed needles size 3.5 mm and work rib (knit 1, purl 1). AT THE SAME TIME on the first round increase 1-1-3-3-5-7 stitches evenly spaced = 54-56-60-62-66-70 stitches. When the rib measures 3-3-3-4-4-4 cm, cast off a little loosely with rib. The sleeve measures approx. 33-30-29-27-27-26 cm from the division. ASSEMBLY: Fold the neck double to the inside and sew down. To avoid the neck being tight and rolling outwards, it is important that the seam is elastic. |
|||||||||||||||||||
Diagram explanations |
|||||||||||||||||||
|
|||||||||||||||||||
 |
|||||||||||||||||||
 |
|||||||||||||||||||
Have you finished this pattern?Tag your pictures with #dropspattern #rememberingspringsweater or submit them to the #dropsfan gallery. Do you need help with this pattern?You'll find 29 tutorial videos, a Comments/Questions area and more by visiting the pattern on garnstudio.com. © 1982-2026 DROPS Design A/S. We reserve all rights. This document, including all its sub-sections, has copyrights. Read more about what you can do with our patterns at the bottom of each pattern on our site. |
|||||||||||||||||||


With over 40 years in knitting and crochet design, DROPS Design offers one of the most extensive collections of free patterns on the internet - translated to 17 languages. As of today we count 324 catalogues and 12232 patterns translated into English (UK/cm).
We work hard to bring you the best knitting and crochet have to offer, inspiration and advice as well as great quality yarns at incredible prices! Would you like to use our patterns for other than personal use? You can read what you are allowed to do in the Copyright text at the bottom of all our patterns. Happy crafting!
Post a comment to pattern DROPS 250-1
We would love to hear what you have to say about this pattern!
If you want to leave a question, please make sure you select the correct category in the form below, to speed up the answering process. Required fields are marked *.