
Popular categories
Looking for a yarn?


Comments / Questions (167)
![]() Līga wrote:
Līga wrote:
Hi! I was wondering how to increase a raglan. The instructions say to increase one stitch. Do you mean between 2 stitches make 1 yarn over, which is knitted on the next round – leaves a hole?
27.02.2026 - 19:29DROPS Design answered:
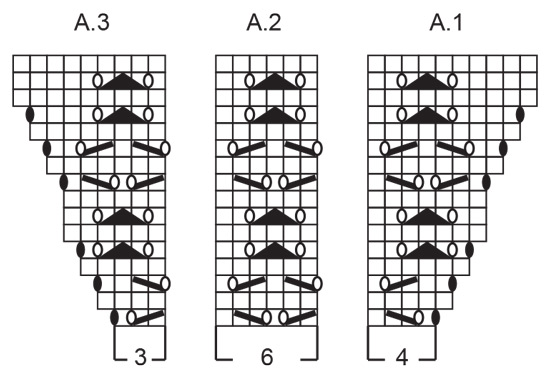
Dear Liga, the increases for raglan will be worked with a yarn over on sleeves and body, but the yarn overs on sleeves shouldn't create holes, this means they will be worked into back of loop (see diagrams A.1 and A.3 where yarn overs for raglan increases are drawn) while the yarn overs on body will should create holes = they will be knitted in front loop on next round. Happy knitting!
02.03.2026 - 07:37
![]() Marilyn wrote:
Marilyn wrote:
I have noticed that there is a pattern correction for first row on the yoke. Where can i find the information for this? Thankyou
27.02.2026 - 00:15DROPS Design answered:
Hi Marilyn, The corrections have been drawn into the diagram. Regards, Drops Team.
27.02.2026 - 06:38
![]() Annie Thiffault wrote:
Annie Thiffault wrote:
J’ai terminé les augmentations des manches 69 m chacune et dos/devant 100 m/ chacune .Vous dites de continuer le point fantaisie et le jersey sans augmenter, je ne comprend pas car je dois continuer le point fantaisie sans augmentation donc est-ce que je doit enlever les jeter ovales noires et je tricote A1, A2 le nombre de fois qu’il faut et A3 selon le nombre de mailles totales et les restantes au début et à la fin sont tricoté en jerseys est-ce que j’ai bien compris ? Merci
20.02.2026 - 22:50DROPS Design answered:
Bonjour Mme Thiffault, c'est exact, vous ne tricotez désormais plus les jetés (ovales noirs) au début de A.1 et à la fin de A.3 car vous ne devez plus augmenter, tricotez les mailles de A.1/A.3 comme indiqué dans le diagramme (si vous n'avez as suffisamment de mailles pour qu'il y ait autant de jeté que de diminutions, tricotez simplement ces mailles en jersey. Bon tricot!
23.02.2026 - 07:51
![]() Claudi Engel wrote:
Claudi Engel wrote:
In der Anleitung sind Vorder- und Rückenteil glatt rechts gestrickt, das Modell auf dem Foto von drops design aber eindeutig glatt links :-/ \\r\\nEin ganz anderer Charakter von Pullover.\\r\\n\\r\\nDie Anleitung ist insgesamt ein kleine Katastrophe….. und ich bin wirklich eine erfahrene Strickerin!
15.02.2026 - 00:49DROPS Design answered:
Liebe Claudia, schade, dass Sie mit der Anleitung nicht zurechtkommen - wir sind um Ausführlichkeit und Eindeutigkeit bemüht, manchmal wirkt das dann aber vielleicht zu unübersichtlich. Der Pullover ist auf jeden Fall am Vorder- und Rückenteil glatt rechts gestrickt, das ist auch auf den Fotos erkennbar, es ist aber durch das Flauschgarn etwas verwaschen.
24.02.2026 - 10:32
![]() Irene wrote:
Irene wrote:
Jeg har nu 338 masker på pinden, men arbejdet måler kun 23,5 cm fra mærket midt bag. Vil det ikke given en underlig vinkel og manglende "pyntehuller" på for-og bagstykket, samt en pasform der ikke tager hensyn til min skulder, hvis jeg fortsætter 3,5 cm uden udtagninger?
10.02.2026 - 18:39DROPS Design answered:
Hej Irene, Strikker du i DROPS Alpaca og DROPS Kid-Silk? Det ser ud til at du strikker lidt mere stramt end vi gør. Har du flere end 24 pinde i højden på 10 cm, da vil du blive færdig med antal udtagninger for tidligt ( i forhold til opskriften). I så fald skal du strikke med en tykkere pind for at få strikkefastheden.
11.02.2026 - 14:56
![]() Pam Castanelli wrote:
Pam Castanelli wrote:
This sleeve pattern is a nightmare. I'm sure I would benefit from the questions asked but unfortunately I can only understand English. At the end of the day knitting should be a joy and this pattern is not that for me. I'm off to find another pattern with clearer instructions. No matter how much I love Remembering Spring it's just not worth the angst.
09.02.2026 - 21:30
![]() Karin wrote:
Karin wrote:
Question pour les manches : faut-il continuer les augmentations au début de A1 et la fin de A3 ? Ou seulement tricoter le point fantaisie sans augmentations ? Merci d'avance pour votre réponse
11.01.2026 - 14:13DROPS Design answered:
Bonjour Karin, sur les manches vous continuez le point fantaisie sans augmentations. Bon tricot!
11.01.2026 - 16:54
![]() Annie Thiffault wrote:
Annie Thiffault wrote:
Dans les rangs du point de fantaisie de A1à A3 le rang 7 et le le rang et le 15 rang il n’y a aucune augmentation donc ds les 24 rangs d’augmentation des manches ses deux rangs ne compte pas ds les 24 rangs j’imagine qu’on doit en faire deux de plus pour arriver au bon nombre de mailles à la fin des augmentations?
08.01.2026 - 02:08DROPS Design answered:
Bonjour Mme Thiffault, à chaque fois que l'on tricote les diagrammes A.1 et A.3, on augmente 6 fois, pour augmenter 24 fois pour les manches, vous devrez répéter 4 fois les diagrammes en hauteur (4 x 6 augmentations à chaque motif en hauteur = 24 augmentations au total en hauteur). Bon tricot!
09.01.2026 - 07:47
![]() Helle Morell wrote:
Helle Morell wrote:
Mønster nr 250-1 når man begynder på mønster på ærme. Skal jeg lave omslag lige efter omslaget ved raglandudtaget? Altså 2 omslag (udtag) lige efter hinanden? Strikker derefter a1a2 det er 10 m står der strikkes over 12 m? Strikker a3 så har jeg 6 m tilbage inden raglan?
07.01.2026 - 08:35DROPS Design answered:
Hei Helle. Har du husket de 4 maskene i hver raglanlinje med merke i? Det økes med 1 kast før 1. maske med merke (bakstykket), så strikkes masken med merke før økningen i A.1. I arbeidet er det satt 4 merker i en maske = raglanlinjene, og det økes både før og etter disse maskene. mvh DROPS Design
26.01.2026 - 09:44
![]() Fernanda wrote:
Fernanda wrote:
Estou com dificuldade com o gráfico, sou canhota. Teria que fazer de modo espelhado?
30.12.2025 - 17:18DROPS Design answered:
Bom dia, Sim, em princípio, sim. Aconselhamos a que efectue uma pesquisa para encontrar conselhos para quem tricota à esquerda. Bons tricôs!
05.01.2026 - 10:44
|
|||||||||||||||||||
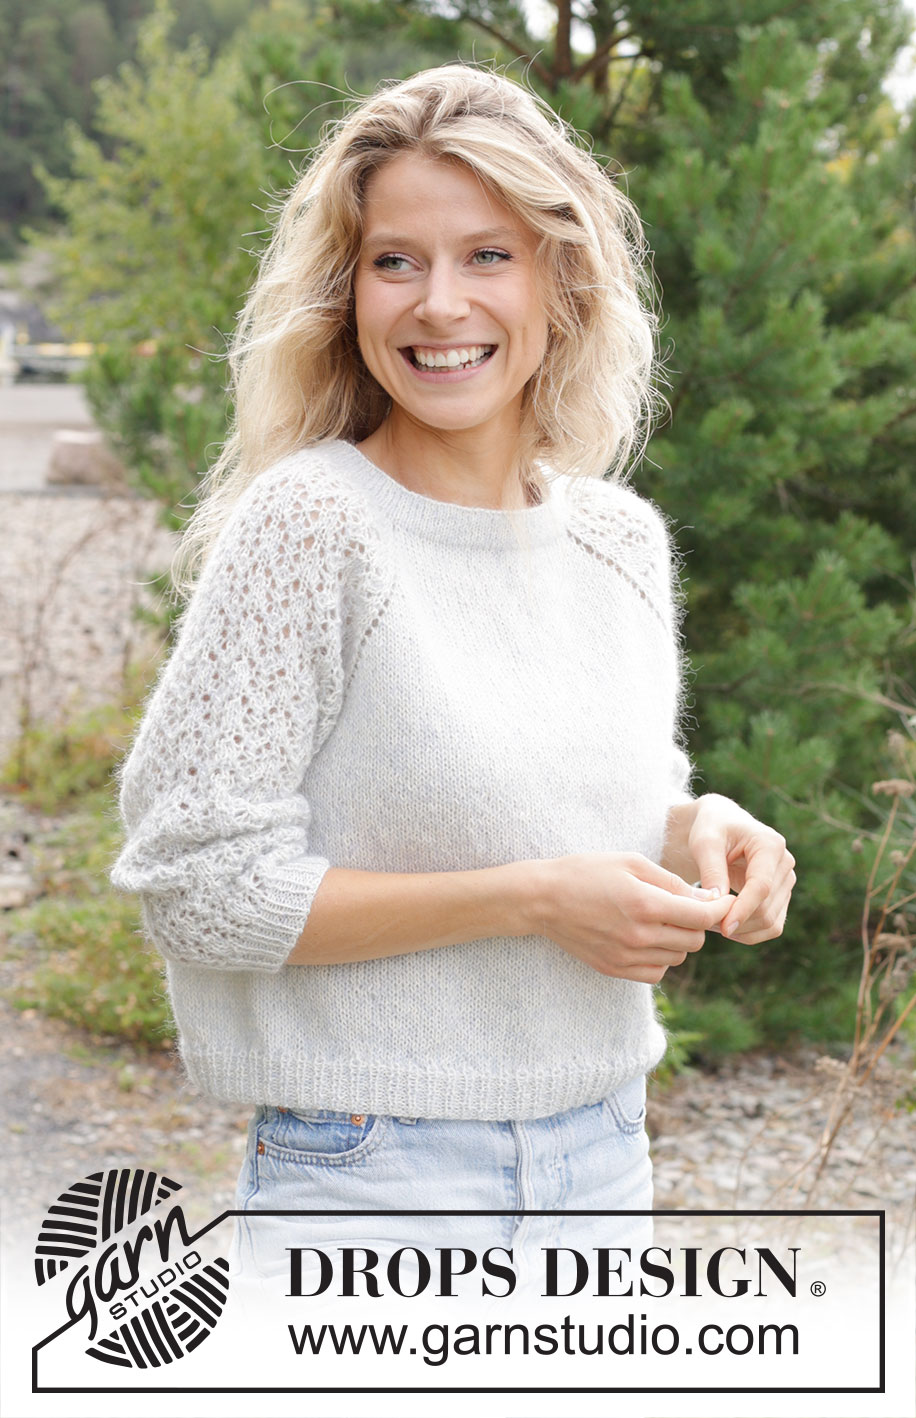
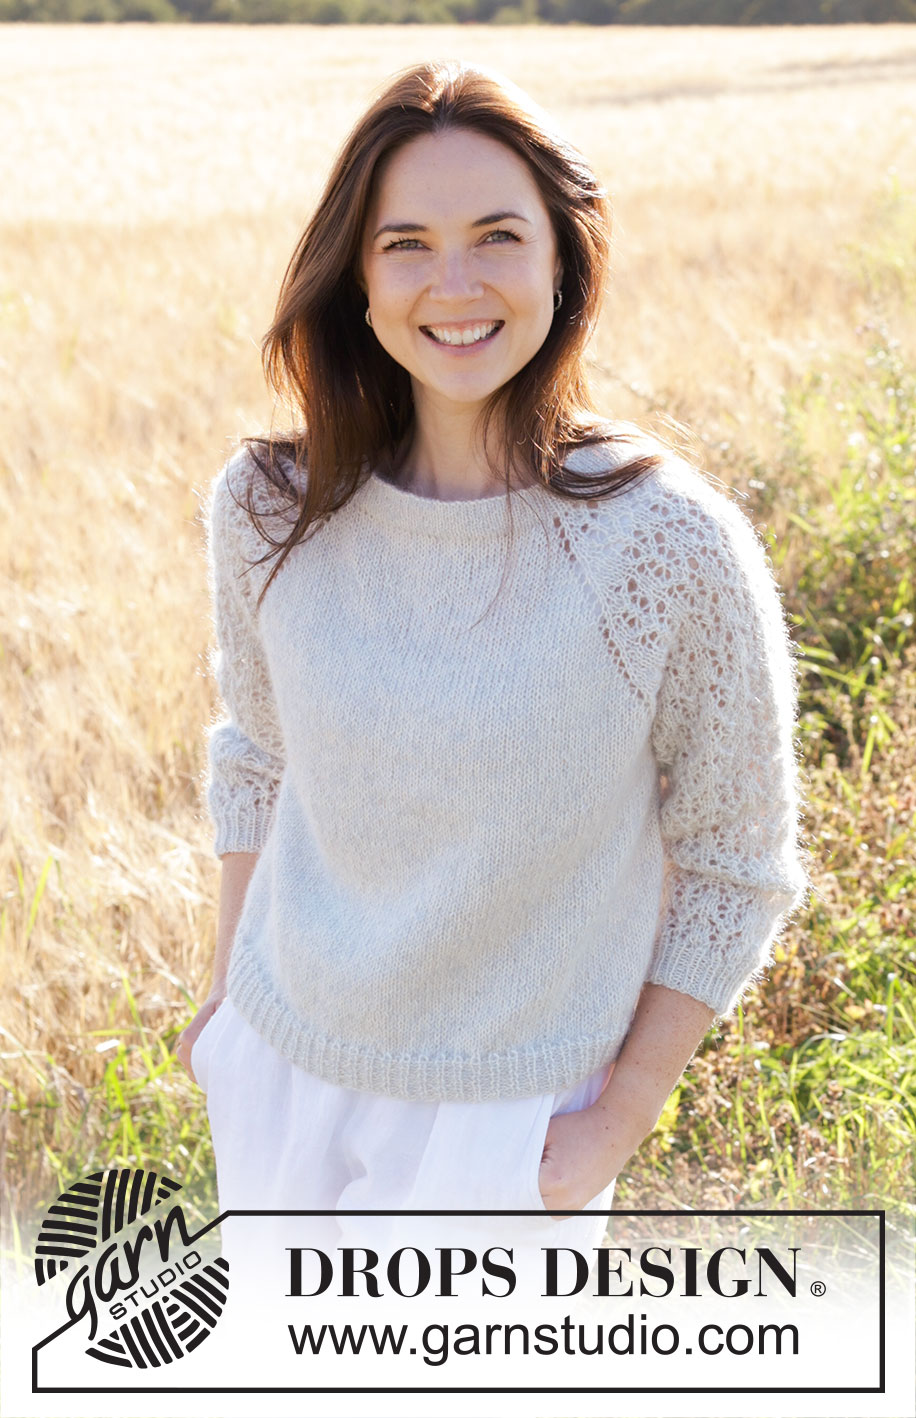
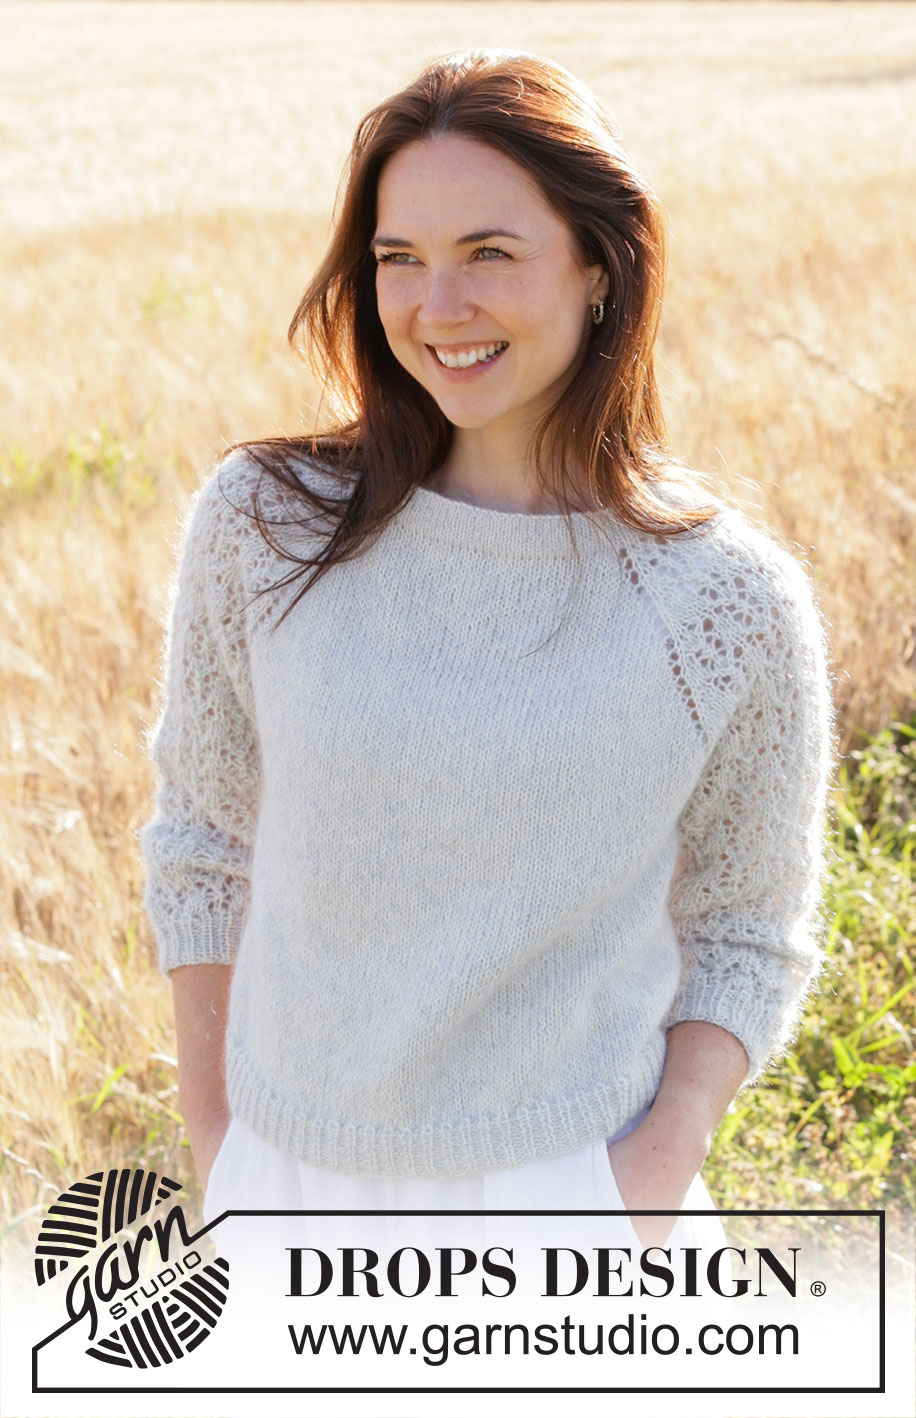
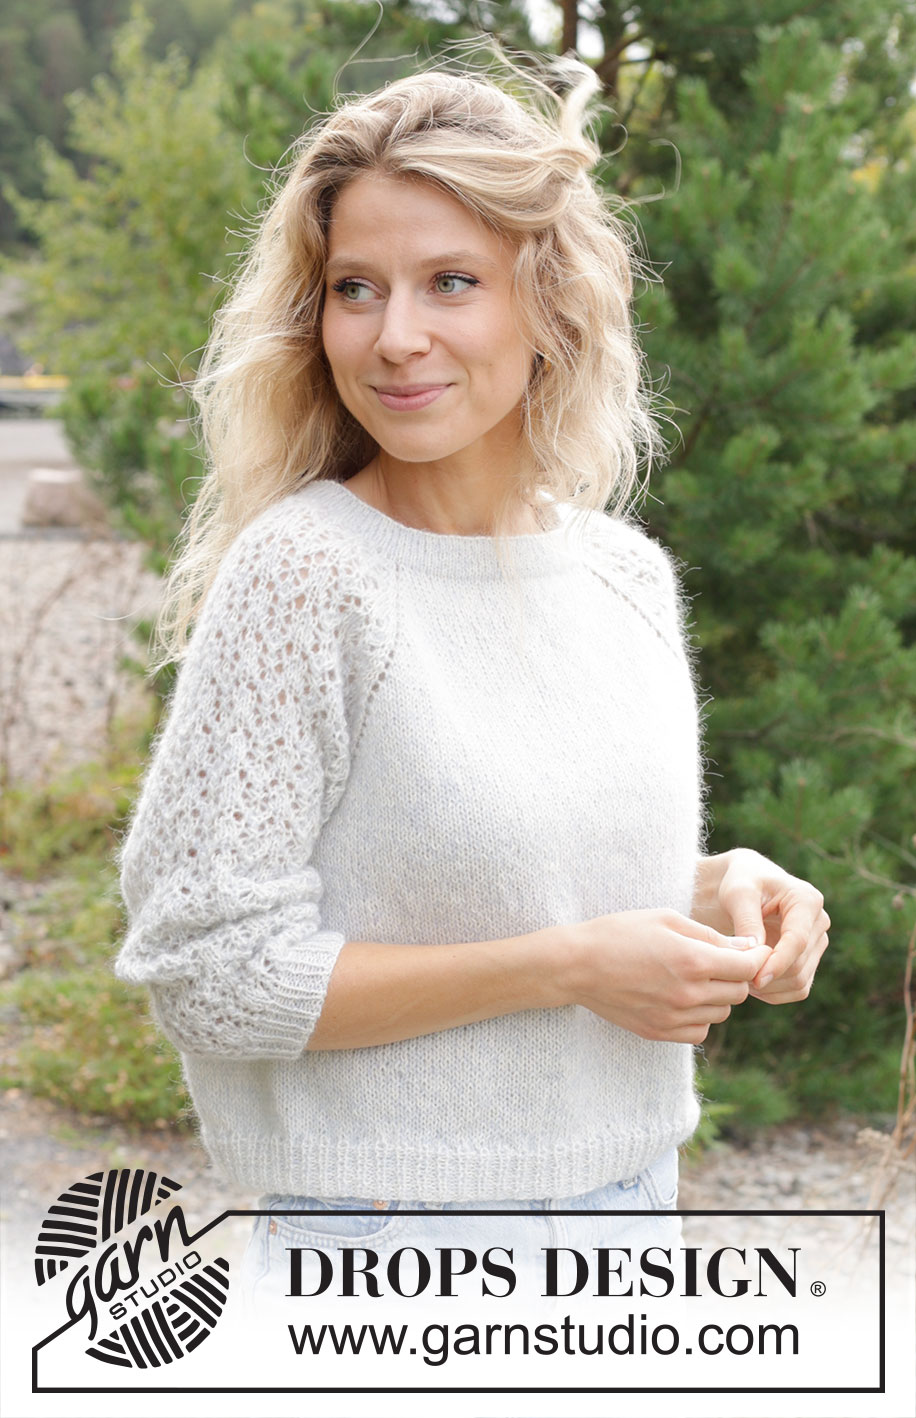
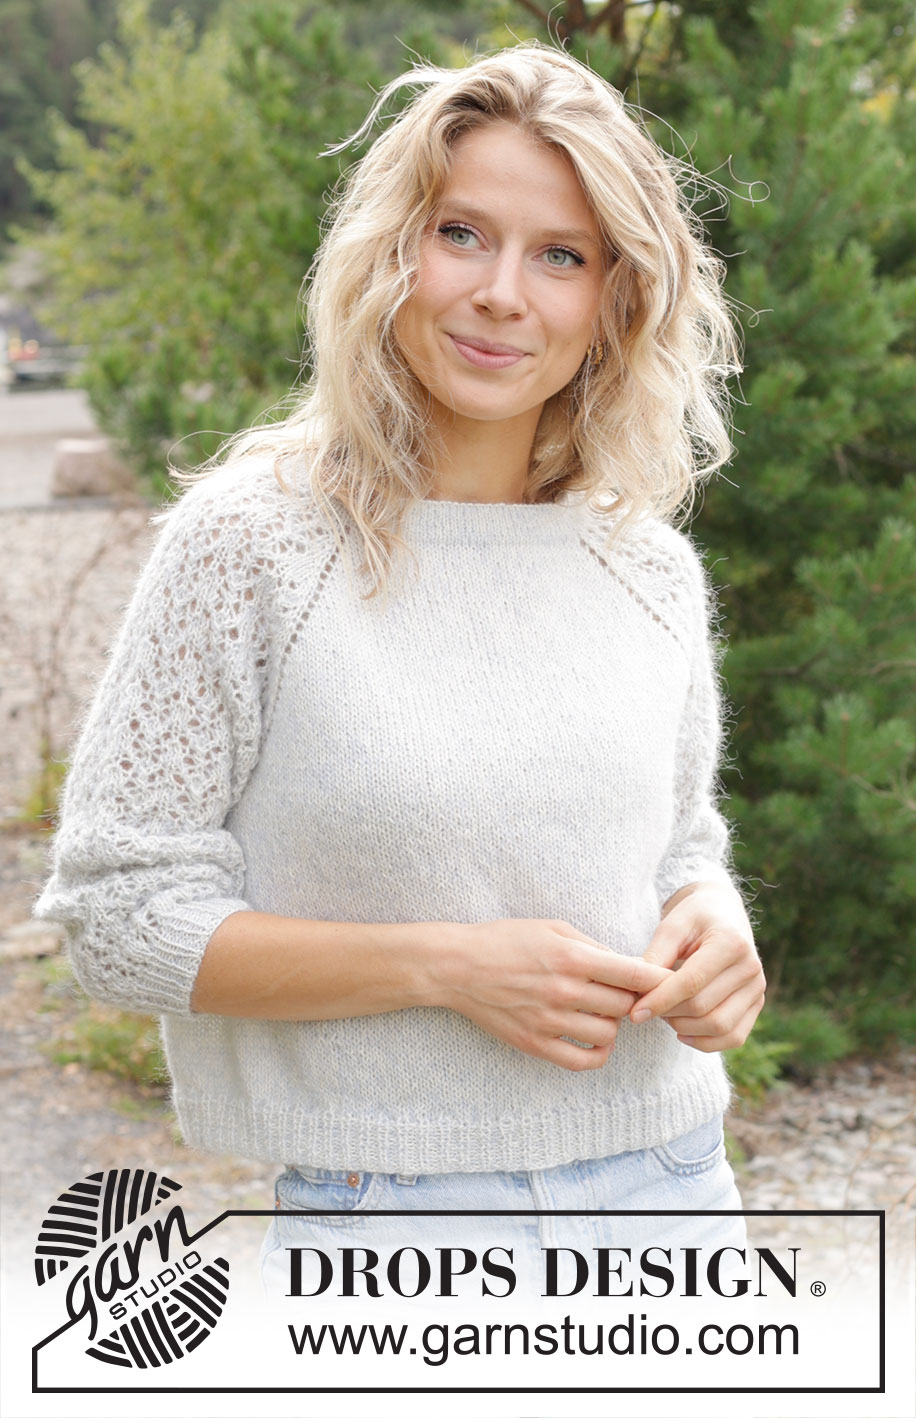
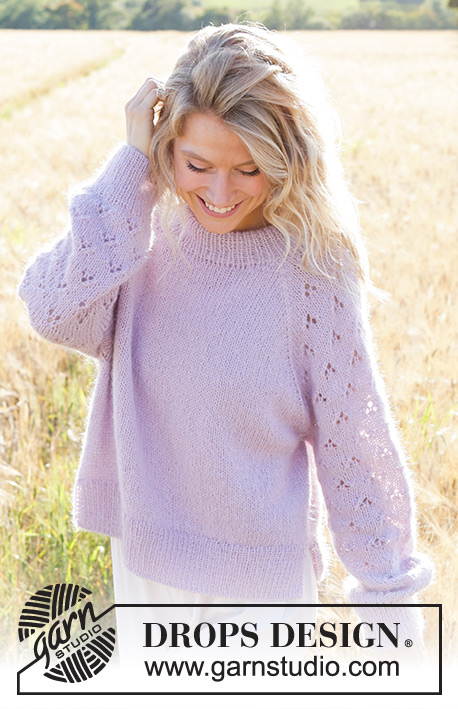
Remembering Spring#rememberingspringsweater |
|||||||||||||||||||
 |
 |
||||||||||||||||||
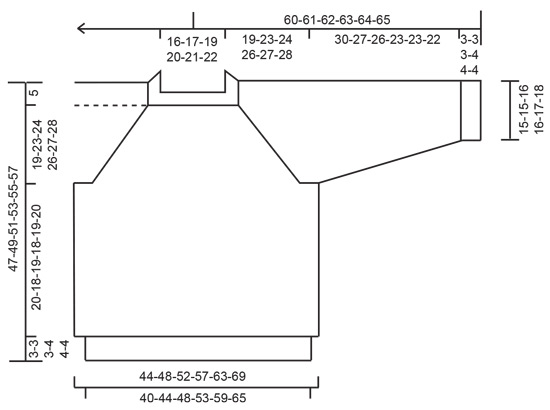
Knitted jumper in DROPS Alpaca and DROPS Kid-Silk. The piece is worked top down with double neck, raglan, lace pattern and ¾-length sleeves. Sizes S - XXXL.
DROPS 250-1 |
|||||||||||||||||||
|
------------------------------------------------------- EXPLANATIONS FOR THE PATTERN: ------------------------------------------------------- PATTERN: See diagrams A.1 to A.3. RAGLAN: Increase 1 stitch by making 1 yarn over before/after each marker-stitch. On the next round knit the yarn overs on the front and back pieces – leaving holes. The yarn overs on the sleeves are knitted twisted – no holes. Work the new stitches in stocking stitch on the front and back pieces and into the pattern on the sleeves. DECREASE TIP (for sleeves): Decrease 1 stitch on each side of the marker-thread as follows: Work until there are 3 stitches left before the marker-thread, knit 2 together, knit 2 (marker-thread sits between these 2 stitches), slip 1 stitch knit-wise, knit 1 and pass the slipped stitch over the knitted stitch (2 stitches decreased). ------------------------------------------------------- START THE PIECE HERE: ------------------------------------------------------- JUMPER – SHORT OVERVIEW OF THE PIECE: The pattern uses both long and short needles; start with the length which fits the number of stitches and change when necessary. The double neck and yoke are worked in the round with circular needle, top down. When the yoke is finished, it is divided for body and sleeves and the body is continued in the round, while the sleeves wait. The sleeves are worked in the round, top down. The neck is folded to the inside and sewn down. If there is a «0» in your chosen size, skip the information and go straight to the next instruction. DOUBLE NECK: Cast on 104-108-114-118-122-126 stitches with circular needle size 4.5 mm, 1 strand DROPS Alpaca and 1 strand DROPS Kid-Silk (= 2 strands). Change to circular needle size 3.5 mm (casting on with a larger needle size gives and elastic cast-on edge). Work stocking stitch in the round for 2½ to 3 cm. Purl 1 round, the neck is later folded along this round. Continue with stocking stitch until the neck measures 6 cm. It will be approx. 3 cm when folded double. Insert 1 marker at the beginning of the round (= mid-back), the yoke is measured from here. YOKE: Change to circular needle size 4.5 mm. Knit 1 round and decrease 10-10-12-12-12-12 stitches evenly spaced = 94-98-102-106-110-114 stitches. Insert 4 markers without working the stitches (these are used when increasing for raglan) as follows: Count 13-14-15-16-17-18 stitches (= half back piece), insert 1 marker in the next stitch, count 19 stitches (= sleeve), insert 1 marker in the next stitch, count 26-28-30-32-34-36 stitches (= front piece), insert 1 marker in the next stitch, count 19 stitches (= sleeve), insert 1 marker in the next stitch, there are 13-14-15-16-17-18 stitches left after the last marker (= half back piece). On the next round, work PATTERN and increase for RAGLAN – read description above, as follows: Knit 13-14-15-16-17-18 (= half back piece), increase 1 stitch for raglan, knit 1 (first marker sits in this stitch), work A.1, A.2 over the next 12 stitches, work A.3, knit 1 (second marker sits in this stitch) (= sleeve), increase 1 stitch for raglan, knit 26-28-30-32-34-36, increase 1 stitch for raglan (= front piece), knit 1 (third marker sits in this stitch), work A.1, A.2 over the next 12 stitches, work A.3, knit 1 (fourth marker sits in this stitch) (= sleeve),increase 1 stitch for raglan, knit 13-14-15-16-17-18 (= half back piece). REMEMBER THE KNITTING TENSION! Continue this pattern but note that the increases are different on the front/back pieces and the sleeves – read INCREASES FOR SLEEVES and INCREASES FOR FRONT/BACK PIECES before continuing! INCREASES FOR SLEEVES: On the sleeves you increase 17-20-21-23-24-25 times on each side (including the first increase described above). The sleeve increases are drawn into diagrams A.1 and A.3. Each time A.1, A.2 and A.3 are finished in height, there is room for 2 more repeats of A.2 between A.1 and A.3. The stitches which do not fit into the pattern on each side of the sleeve are worked in stocking stitch. INCREASES FOR FRONT/BACK PIECES: On the front and back pieces, you increase 22-24-26-29-33-36 times (including the first increase described above), as follows: Increase on each round 0-0-0-0-4-6 times, then every 2nd round 22-24-26-29-29-30 times. AFTER THE LAST INCREASE: When all the increases are finished there are 250-274-290-314-338-358 stitches (70-76-82-90-100-108 stitches on the front/back pieces and 55-61-63-67-69-71 stitches on each sleeve (including the marker-stitches on each side of the sleeves). Continue with pattern and stocking stitch but without further increases. The stitches which do not fit into the pattern on each side of the sleeve are worked in stocking stitch. Work until the yoke measures 19-23-24-26-27-28 cm from the marker. DIVIDE FOR BODY AND SLEEVES: Now divide for the body and sleeves as follows: Knit 35-38-41-45-50-54 (= half back piece), place the next 55-61-63-67-69-71 stitches on a thread for the sleeve, cast on 10-10-12-12-14-16 stitches (in side under sleeve), knit 70-76-82-90-100-108 (= front piece), place the next 55-61-63-67-69-71 stitches on a thread for the sleeve, cast on 10-10-12-12-14-16 stitches (in side under sleeve), knit the last 35-38-41-45-50-54 stitches (= half back piece). The body and sleeves are finished separately. The piece is now measured from here! BODY: = 160-172-188-204-228-248 stitches. Continue with stocking stitch in the round until the body measures 20-18-19-18-19-20 cm from the division. On the next round begin working rib, AT THE SAME TIME on the first round increase 0-4-4-8-8-12 stitches evenly spaced = 160-176-192-212-236-260 stitches, as follows: Change to circular needle size 3.5 mm, work rib (knit 1, purl 1 – remember the increases). When the rib measures 3-3-3-4-4-4 cm, cast off a little loosely with rib. The jumper measures approx. 47-49-51-53-55-57 cm from the shoulder. SLEEVES: Place the 55-61-63-67-69-71 stitches from the thread on the one side of the piece on circular needle size 4.5 mm and knit up 1 stitch in each of the 10-10-12-12-14-16 stitches cast on under the sleeve = 65-71-75-79-83-87 stitches. Insert a marker-thread in the middle of the 10-10-12-12-14-16 stitches under the sleeve. Start at the marker-thread and continue the pattern in the round. The stitches which do not fit into the pattern under the sleeve are worked in stocking stitch. AT THE SAME TIME when the sleeve measures 3-3-3-4-4-4 cm from the division, decrease 2 stitches under the sleeve – read DECREASE TIP. Decrease like this every 4-2½-2-1½-1½-1 cm a total of 6-8-9-10-11-12 times = 53-55-57-59-61-63 stitches. Continue working until the sleeve measures 30-27-26-23-23-22 cm from the division. Change to double pointed needles size 3.5 mm and work rib (knit 1, purl 1). AT THE SAME TIME on the first round increase 1-1-3-3-5-7 stitches evenly spaced = 54-56-60-62-66-70 stitches. When the rib measures 3-3-3-4-4-4 cm, cast off a little loosely with rib. The sleeve measures approx. 33-30-29-27-27-26 cm from the division. ASSEMBLY: Fold the neck double to the inside and sew down. To avoid the neck being tight and rolling outwards, it is important that the seam is elastic. |
|||||||||||||||||||
Diagram explanations |
|||||||||||||||||||
|
|||||||||||||||||||
 |
|||||||||||||||||||
 |
|||||||||||||||||||
Have you finished this pattern?Tag your pictures with #dropspattern #rememberingspringsweater or submit them to the #dropsfan gallery. Do you need help with this pattern?You'll find 30 tutorial videos, a Comments/Questions area and more by visiting the pattern on garnstudio.com. © 1982-2026 DROPS Design A/S. We reserve all rights. This document, including all its sub-sections, has copyrights. Read more about what you can do with our patterns at the bottom of each pattern on our site. |
|||||||||||||||||||


With over 40 years in knitting and crochet design, DROPS Design offers one of the most extensive collections of free patterns on the internet - translated to 17 languages. As of today we count 325 catalogues and 12298 patterns translated into English (UK/cm).
We work hard to bring you the best knitting and crochet have to offer, inspiration and advice as well as great quality yarns at incredible prices! Would you like to use our patterns for other than personal use? You can read what you are allowed to do in the Copyright text at the bottom of all our patterns. Happy crafting!
Post a comment to pattern DROPS 250-1
We would love to hear what you have to say about this pattern!
If you want to leave a question, please make sure you select the correct category in the form below, to speed up the answering process. Required fields are marked *.