
Popular categories
Looking for a yarn?


Comments / Questions (21)
![]() Lola wrote:
Lola wrote:
Bonjour, je suis bloqué au niveau de la bordure devant et du devant gauche. Je ne comprends pas l’explication du devant gauche. Serait-il possible de m’aider?
19.04.2026 - 17:34DROPS Design answered:
Bonjour Lola, on va d'abord tricoter la bordure du devant gauche qui sera ensuite assemblée à celles du devant droit puis le long du dos (cf cette vidéo); autrement dit, tricotez comme indiqué pendant 8 à 9 cm, puis relevez les mailles le long de l'épaule gauche du dos pour tricoter le devant; pour le devant droit, il vous faudra couper le fil après la bordure devant avant de relever les mailles du devant droit pour terminer le rang sur l'endroit par la bordure devant. Bon tricot!
20.04.2026 - 10:42
![]() Lola wrote:
Lola wrote:
Bonjour, petite question, lorsque vous écrivez un rang avec 4 fils natural, est-ce que c’est un aller simple (ou un retour) ou un rang est = à un aller retour ?
17.04.2026 - 18:20DROPS Design answered:
Bonjour Lola, 1 rang = toutes les mailles tricotées 1 seule fois, autrement dit soit 1 aller soit 1 retour; pour tricoter 2 rangs, on va tricoter 1 aller + 1 retour et pour 4 rangs, on va tricoter 2 allers et retours (1 rang sur l'endroit, 1 rang sur l'envers, 1 rang sur l'endroit et 1 rang sur l'envers). Bon tricot!
20.04.2026 - 08:43
![]() Lola wrote:
Lola wrote:
Ce model n'est donc pas adapter a un fils Air?
06.03.2026 - 10:23DROPS Design answered:
Bonjour Lola, vous pouvez tricoter ce modèle avec 2 fils Air mais pas avec 1 seul, vous n'auriez pas la bonne tension - n'hésitez pas à utiliser le convertisseur pour voir les alternatives et les quantités correspondantes. Bon tricot!
06.03.2026 - 16:36
![]() Lola wrote:
Lola wrote:
Ou serait il possible de le faire avec 1 seul fils Air?
05.03.2026 - 12:27DROPS Design answered:
Bonjour Lola, vous pouvez utiliser 1 fil DROPS Air pour tous les modèles tricotés avec une tension de 17-16 mailles par exemple, découvrez ici un échantillon - utilisez le convertisseur pour faire calculer la quantité Air nécessaire si ce n'est pas la laine utilisée dans le modèle présenté. Bon tricot!
05.03.2026 - 17:13
![]() Lola wrote:
Lola wrote:
Bonjour, est-il possible de tricoter ce model avec 2 fils de laine DROPS Air? si oui quel combinaison de laines serait le plus adapter lors des rayures?
04.03.2026 - 18:30DROPS Design answered:
Bonjour Lola, 2 fils Air seraient peut être un peu trop épais, éventuellement 2 fils Brushed Alpaca Silk ou bien retrouvez ici les combinaisons possibles avec différentes laines/couleurs pour un échantillon de 12-13 m pour 10 cm. Si vous avez besoin d'aide pour assortir les couleurs, votre magasin saura vous conseiller les meilleures alternatives possibles, même par mail ou téléphone. Bon tricot!
05.03.2026 - 10:39
![]() ANNIE wrote:
ANNIE wrote:
Est-il possible d'avoir le patron de ce gilet àtricoter avec des aiguilles classiques du bas vers le haut. Je ne sais pas tricoter en top down. Je suis prête à le payer. Merci.
30.01.2026 - 23:23
![]() Sonia wrote:
Sonia wrote:
Is there a pattern for knitting in round please for the same cardigan
11.07.2025 - 23:53DROPS Design answered:
Dear Sonia, the piece is worked with a circular needle but you can't work a cardigan in the round, since working in rounds will result in a tubular piece and cardigans need to have an opening. Happy knitting!
13.07.2025 - 23:28
![]() Patricia wrote:
Patricia wrote:
Bonjour, combien de pelotes pour un gilet uni Merci
26.05.2025 - 18:27DROPS Design answered:
Bonjour Patricia, comme ce modèle a été tricoté avec des rayures, nous avons seulement la quantité nécessaire pour chaque couleur, vous pouvez ainsi additionner les quantités pour chaque couleur pour votre taille, il vous en faudra peut-être un peu moins; votre magasin pourra également vous aider, même par mail ou téléphone. Bon tricot!
27.05.2025 - 08:53
![]() MORENAS wrote:
MORENAS wrote:
Bonjour Madame, Pourriez vous m'indiquer le nombre de pelote pour couleur, Je souhaite réaliser ce modèle avec un camaieu de rose. bien cordialement merci pour votre aide.
23.09.2024 - 09:37DROPS Design answered:
Bonjour Mme Morenas, DROPS Kid-Silk se présente sous la forme de pelote de 25 g (cf nuancier), ainsi, vous pouvez simplement diviser la quantité indiquée pour chaque couleur par 25 pour avoir le nombre de pelotes Kid-Silk nécessaire. Bon tricot!
23.09.2024 - 16:28
![]() Charline wrote:
Charline wrote:
Bonjour ! Les explications disent que tout le modèle se tricote en point mousse, mais sur la photo le gilet semble être tricoté en jersey (dans l'explication en anglais aussi il est mentionné "garter stitch"). Je voudrais m'assurer qu'il s'agit bien ou non d'un jersey avant de me lancer 🙌
04.04.2024 - 22:13DROPS Design answered:
Bonjour Charline, le gilet se tricote effectivement en jersey avec la bordure des devants. au point mousse (raison pour laquelle il est expliqué au début comment tricoter du point mousse). Bon tricot!
05.04.2024 - 08:16
|
|||||||
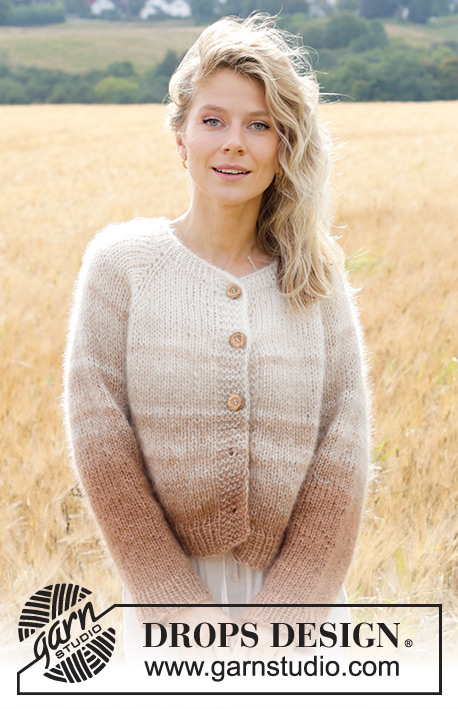
Irish Morning#irishmorningcardigan |
|||||||
 |
 |
||||||
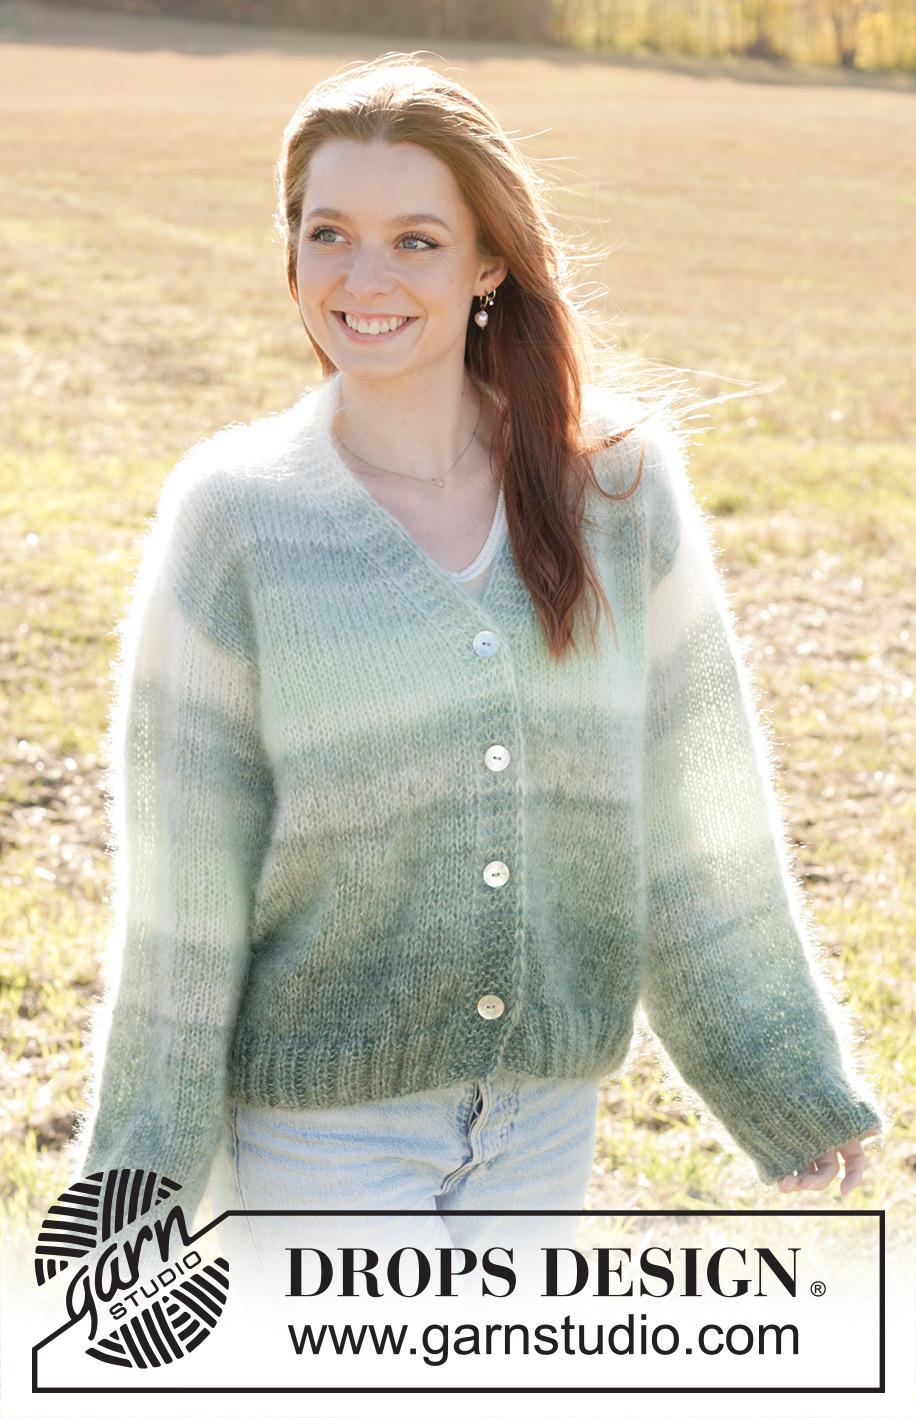
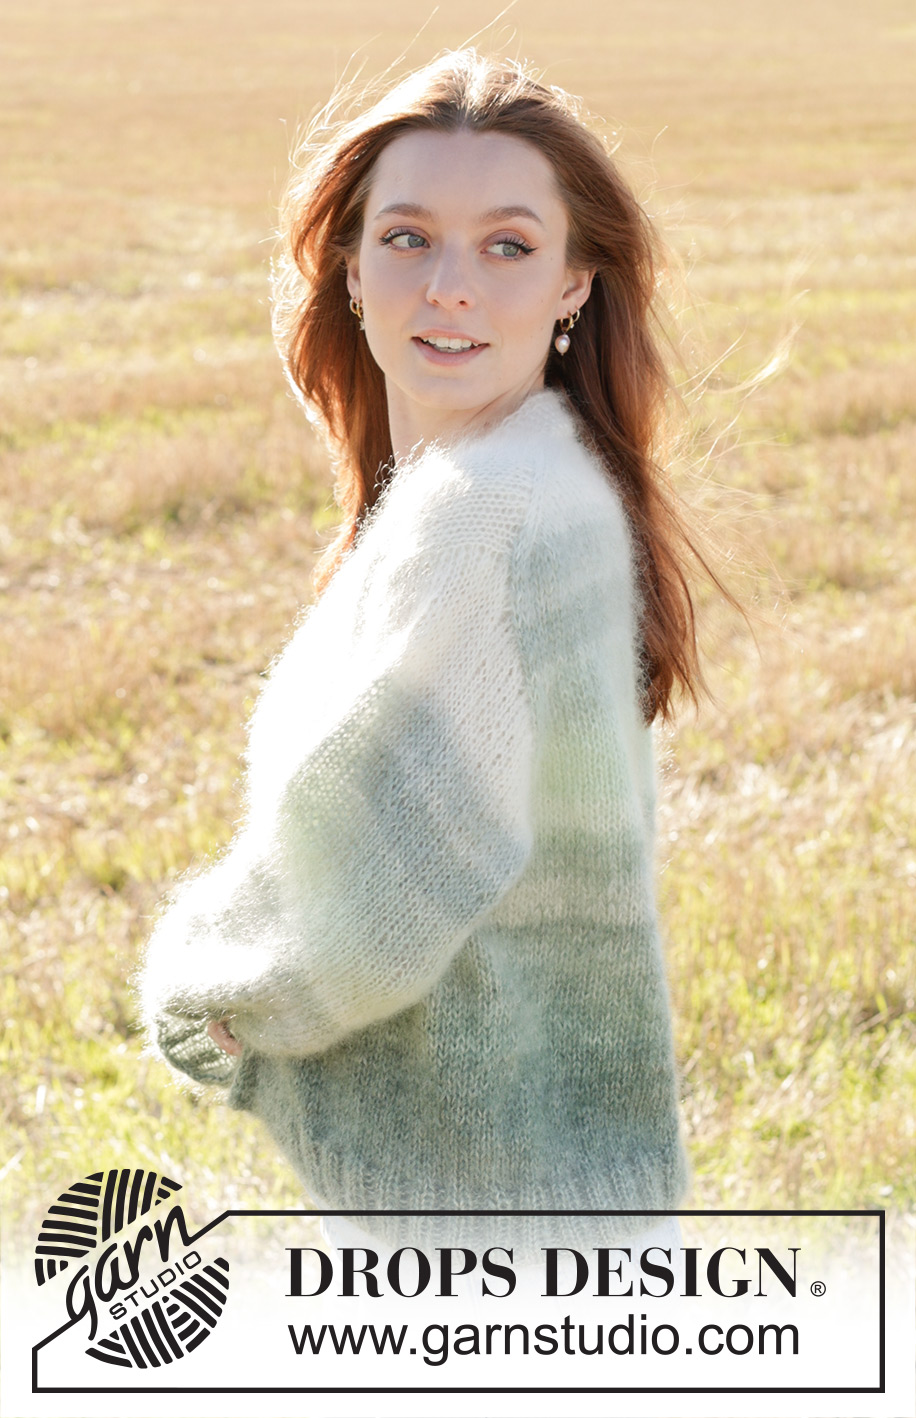
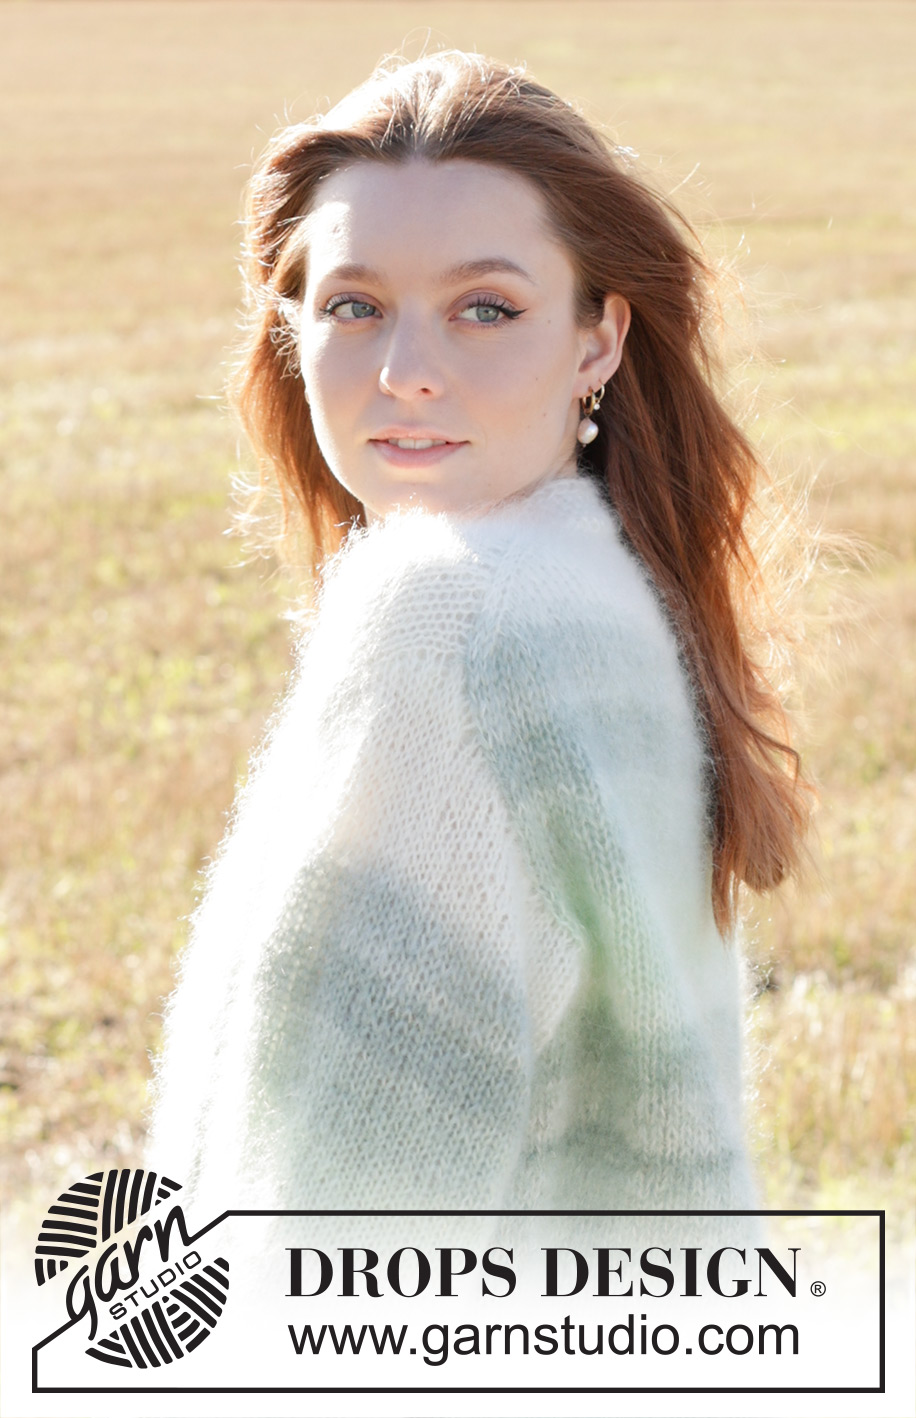
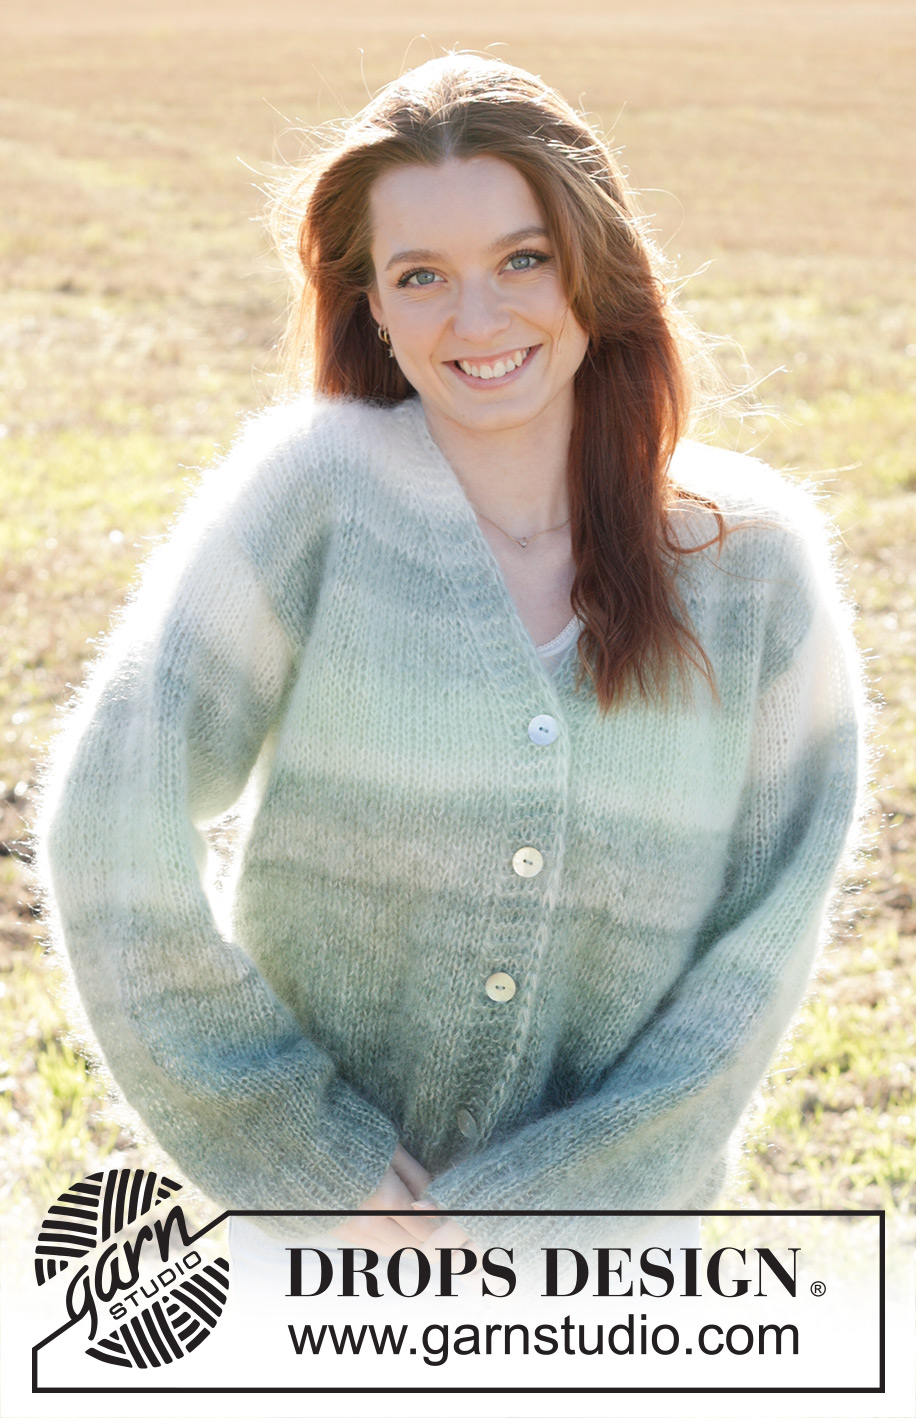
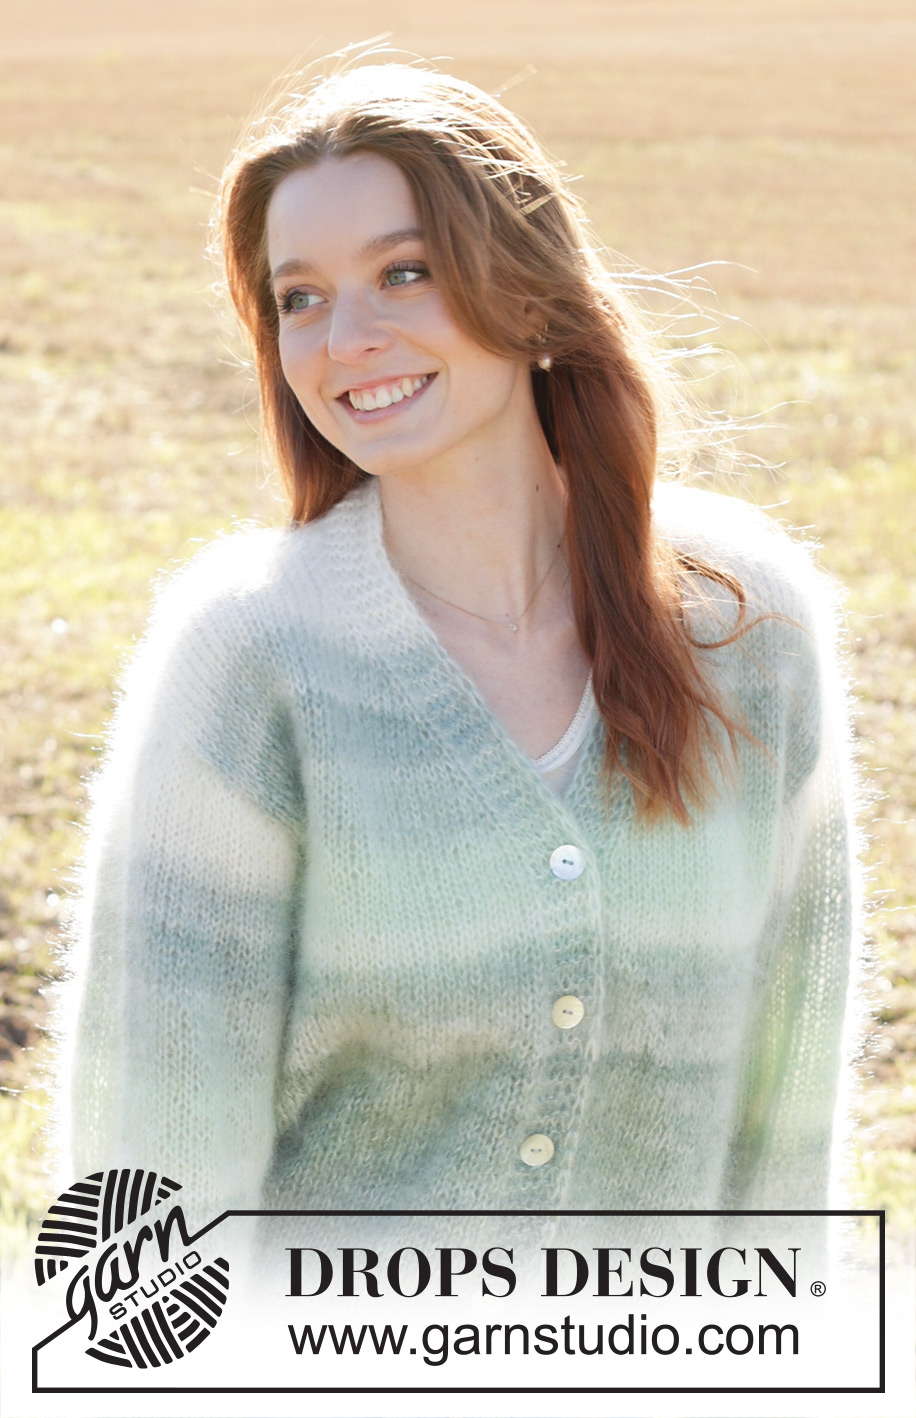
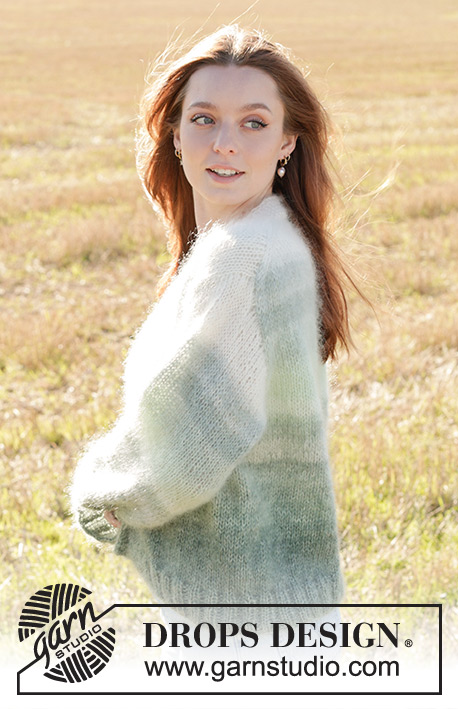
Knitted oversized jacket in DROPS Kid-Silk. Piece is knitted top down in stocking stitch with European shoulder / diagonal shoulder, stripes, V-neck and I-Cord. Size XS – XXL.
DROPS 249-14 |
|||||||
|
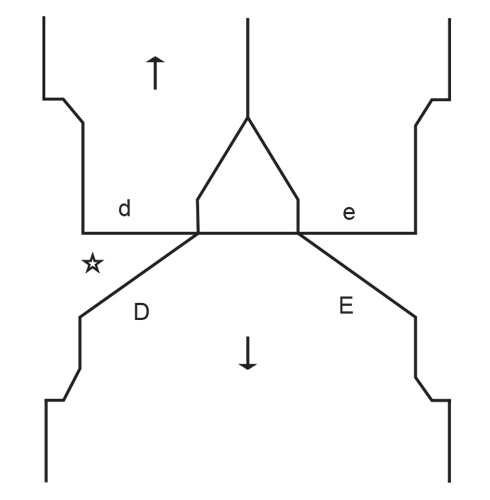
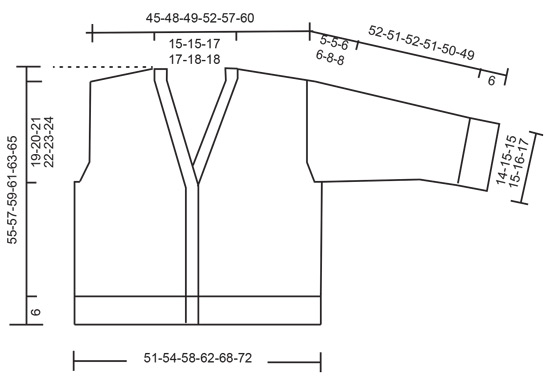
---------------------------------------------------------- EXPLANATION FOR THE PATTERN: ---------------------------------------------------------- GARTER STITCH (back and forth): Knit all rows. 1 ridge vertically = knit 2 rows. INCREASE TIP-1: INCREASE 1 STITCH TOWARDS THE LEFT - from RIGHT SIDE: Use left needle to pick up yarn between 2 stitches from row below, pick up yarn from the front and knit in the stitch loop that is on the back of the needle. INCREASE 1 STITCH TOWARDS THE RIGHT - from RIGHT SIDE: Use left needle to pick up yarn between 2 stitches from row below, pick up yarn from the back and knit in the stitch loop that is on the front side of the needle. INCREASE TIP-2: INCREASE 1 STITCH TOWARDS THE RIGHT - from WRONG SIDE: Use left needle to pick up yarn between 2 stitches from row below, pick up yarn from the back and purl in the stitch loop that is on the front side of the needle. INCREASE 1 STITCH TOWARDS THE LEFT - from WRONG SIDE: Use left needle to pick up yarn between 2 stitches from row below, pick up yarn from the front and purl in the stitch loop that is on the back side of the needle. LEFT BAND WITH I-CORD: RIGHT SIDE: Slip 1 stitch purlwise with strand in front of piece, knit 1 and work 5 stitches in garter stitch. WRONG SIDE: 5 stitches in garter stitch, slip 1 stitch purlwise with strand in front of piece, knit 1. RIGHT BAND WITH I-CORD: RIGHT SIDE: Work 5 stitches in garter stitch, slip 1 stitch purlwise with strand in front of piece, knit 1. WRONG SIDE: Slip 1 stitch purlwise with strand in front of piece, knit 1, work 5 stitches in garter stitch. STRIPES: Then work stripes as follows: 16-20-20-24-26-30 rows on back piece / 14-16-16-18-22-24 rows on front pieces / 12 rows on sleeves with 4 strands colour off white. 2 rows with 3 strands colour off white + 1 strand colour soft mint 4 rows with 3 strands colour soft mint + 1 strand colour off white 2 rows with 2 strands colour off white + 2 strands colour soft mint 2 rows with 1 strand colour off white + 2 strands colour soft mint + 1 strand colour sage green 4 rows with 4 strands colour soft mint 2 rows with 1 strand colour pistachio ice cream + 2 strands colour soft mint + 1 strand colour off white 6 rows with 2 strands colour pistachio ice cream + 2 strands colour soft mint 2 rows with 1 strand colour soft mint + 3 strands colour pistachio ice cream 6 rows with 4 strands colour pistachio ice cream 4 rows with 2 strands colour off white + 2 strands colour pistachio ice cream 2 rows with 3 strands colour pistachio ice cream + 1 strand colour sage green 4 rows with 1 colour sage green + 1 strand colour off white + 1 strand colour pistachio ice cream + 1 strand colour soft mint 6 rows with 3 strands colour off white + 1 strand colour sage green 2 rows with 2 strands colour sage green + 1 strand colour off white + 1 strand colour soft mint 4 rows with 1 strand colour sage green + 1 strand colour off white + 1 strand colour pistachio ice cream + 1 strand colour soft mint 4 rows with 2 strands colour sage green + 1 strand colour off white + 1 strand colour pistachio ice cream 4 rows with 2 strands colour sage green + 2 strands colour pistachio ice cream 4 rows with 3 strands colour sage green + 1 strand colour pistachio ice cream Work until finished measurements with 4 strands colour sage green BUTTONHOLES: Decrease for buttonholes on right band (when garment is worn). Decrease from right side when 4 stitches remain on row as follows: Make 1 yarn over, knit 2 together, slip 1 stitch purlwise with strand in front of piece, knit 1. On next row (wrong side) knit the yarn over to make a hole. Decrease for first buttonhole 1 cm after last increase for V-neck, then decrease for the next 3 buttonholes approx. 8½-9-9-10-9½-10 cm apart. Decrease for last buttonhole in transition between stocking stich and rib. DECREASE TIP (applies to mid under sleeves): Decrease 1 stitch on each side of marker thread as follows: Work until 3 stitches remain before marker thread and knit 2 together, knit 2 (marker thread is between these 2 stitches), slip 1 stitch knitwise, knit 1, pass slipped stitch over stitch worked. ---------------------------------------------------------- START THE PIECE HERE: ---------------------------------------------------------- JACKET - SHORT OVERVIEW OF THE PIECE: In this pattern long and short needles have been used, begin with fitting length and switch as needed. Begin by casting on stitches in the back of neck. Then work back piece downwards while at the same time increasing in each side of piece until number of stitches for shoulder width is reached. Back piece has a slight diagonal shoulder. Then work down to armholes. Now put back piece aside and work the front pieces. Begin front pieces by working a loose band then picking up stitches along one shoulder from back piece. Work downwards to armhole while at the same time increasing towards the neck. Repeat on the other shoulder. At the armholes slip front piece and back piece on to same circular needle, and work the body downwards back and forth on circular needle. Pick up stitches for sleeves around the armholes. First work back and forth with short rows to form a sleeve cap. Then work sleeves downwards in the round on needle. Sew the loose bands to cast-on edge at the back of neck. BACK PIECE: Cast on 22-22-24-24-26-26 stitches on circular needle size 7 mm with 4 strands in colour off white. Purl 1 row from wrong side. Then work STRIPES - read explanation above. Read INCREASE TIP-1 and work next row from right side as follows: Knit 3, increase towards the left, knit until 3 stitches remain, increase towards the right, knit 3. Read INCREASE TIP-2 and work next row from wrong side as follows: Purl 3, increase towards the right, purl until 3 stitches remain, increase towards the left, purl 3. Continue like this and increase the same way from both right side and wrong side 18-20-20-22-24-26 times in total. After last increase there are 58-62-64-68-74-78 stitches on needle. Insert 1 marker in the side. Now measure piece from here! Work stocking stitch back and forth until piece measures 11-12-12-13-13-14 cm, measured along the edge of armhole. REMEMBER THE KNITTING TENSION! Work next row as follows from right side: Knit 3, increase towards the left, work until 3 stitches remain, increase towards the right, knit 3 – remember INCREASE TIP-1. Increase like this on every row from right side 2-2-3-3-3-3 times in total = 62-66-70-74-80-84 stitches. Work until piece measures 14-15-16-17-17-18 cm, measured along armhole. Back piece measures approx. 25-28-29-31-32-34 cm in total from cast-on edge, finish with a row from right side. Cut the yarn, slip stitches on a thread or stitch holder, and work bands and front pieces as explained below. LEFT BAND: Cast on 7 stitches on circular needle size 7 mm with 4 strands in colour off white. Work LEFT BAND WITH I-CORD - read explanation above. Continue until band measures 8-8-9-9-9-9 cm, finish with a row from wrong side, then continue as explained below left front piece. LEFT FRONT PIECE: Work from right side over the 7 band stitches, then pick up 18-20-20-22-24-26 stitches inside outermost stitch along left shoulder on back piece (i.e. pick up 1 stitch in every row from edge at the top of back piece, see D on chart) = 25-27-27-29-31-33 stitches. All length measurements on front piece are done from here. Work stocking stitch with 7 band stitches towards mid front and STRIPES - remember explanation above. When piece measures 7 cm, increase stitches towards the neck. Increase as follows from right side: Work 8 stitches, increase towards the left, work the rest of row - remember INCREASE TIP-1. Increase 1 stitch every other row 9 times in total, then on every 4th row 2-2-3-3-4-4 times in total. AT THE SAME TIME when piece measures 21-22-22-23-25-26 cm, work next row as follows from right side: 7 band stitches as before, work until 3 stitches remain, increase towards the right, knit 3 – remember INCREASE TIP-1. Increase like this on every row from right side 2-2-3-3-3-3 times in total = 38-40-42-44-47-49 stitches. Continue stocking stitch and band stitches as before until piece measures 24-25-26-27-29-30 cm, slip stitches on a thread or needle, make sure that last row worked is from right side, and to finish on same stripes as back piece. Fasten off. Then work right front piece as explained below. RIGHT BAND: Cast on 7 stitches on circular needle size 7 mm with 4 strands in colour off white. Work RIGHT BAND WITH I-CORD - read explanation above. Continue until band measures 9-9-10-10-11-11 cm, finish with a row from wrong side, then continue as explained below right front piece. Fasten off. RIGHT FRONT PIECE: Pick up 18-20-20-22-24-26 stitches with 4 strands in colour off white inside outermost stitch along right shoulder on back piece (i.e. pick up 1 stitch in every row from edge at the top of back piece, see E on chart), then work the 7 band stitches on to row = 25-27-27-29-31-33 stitches. All length measurements on front piece are done from here. Work stocking stitch with 7 band stitches towards mid front and stripes. When piece measures 7 cm, increase stitches towards the neck. Increase as follows from right side. Work until 8 stitches remain, increase towards the right, work 8 stitches as before – remember INCREASE TIP-1. Increase 1 stitch every other row 9 times in total, then on every 4th row 2-2-3-3-4-4 times in total. Decrease for BUTTONHOLES - read explanation above. AT THE SAME TIME when piece measures 21-22-22-23-25-26 cm, work next row as follows from right side: Work 3 stitches, increase towards the left, work the rest of row - remember INCREASE TIP-1.Increase like this on every row from right side 2-2-3-3-3-3 times in total = 38-40-42-44-47-49 stitches. Continue stocking stitch and band stitches as before until piece measures 24-25-26-27-29-30 cm, make sure that last row worked is from right side, and to finish on same stripes as back piece and left front piece. Work next row as follows – from wrong side: Work over the 38-40-42-44-47-49 stitches from right front piece, cast on 4-4-6-6-8-10 new stitches at the end of this row, work from wrong side over the 62-66-70-74-80-84 stitches on back piece, cast on 4-4-6-6-8-10 new stitches, work over the 38-40-42-44-47-49 stitches from left front piece. BODY: = 146-154-166-174-190-202 stitches. Continue back and forth with stocking stitch and stripes. Work until piece measures 49-51-53-55-57-59 cm, measured from where stitches were picked up for front pieces. Work 1 row from right side while increasing 22-22-22-26-26-30 stitches evenly (do not increase over bands) = 168-176-188-200-216-232 stitches. Switch to circular needle size 5 mm. Work rib as follows – from wrong side: 7 band stitches as before, * knit 2, purl 2 *, repeat from *-* until 9 stitches remain, purl 2 and 7 band stitches as before. Continue rib like this for 6 cm. Cast off. Jacket measures approx. 55-57-59-61-63-65 cm, measured from the top point on shoulder. SLEEVES: Place piece flat and insert 1 marker at the top of armhole (NOTE! It is not where stitches were picked up for front piece but approx. 5-6 cm down on front piece = mid on top of shoulder). Use circular needle size 7 mm and 4 strands in colour off white and work STRIPES - remember explanation above, begin in the middle of the new stitches cast on under sleeve, and pick up 56-58-62-66-70-74 stitches around the armhole - adjust to pick up same number of stitches on each side of marker along armhole. Now work stocking stitch back and forth with short rows over sleeve cap, this is done to get a better shape on sleeve. Begin mid under sleeve. 1st row (right side): work 7-7-7-8-8-9 stitches past marker, turn 2nd row (wrong side): work 7-7-7-8-8-9 stitches past marker, turn. 3rd row (right side): 6-6-5-5-4-4 stitches past where the previous turn was, turn 4th row (wrong side): work 6-6-5-5-4-4 stitches past where the previous turn was, turn Repeat 3rd and 4th row until 25-25-27-28-28-29 stitches have been worked past marker mid on top of sleeve (4-4-5-5-6-6 turn have been done in each side). Work from right side until beginning of round (mid under sleeve). Insert 1 marker thread here, this is used when decreasing stitches under sleeve. Move marker thread upwards when working. Continue working in the round in stocking stitch over all stitches. When sleeve measures 7-7-8-8-9-10 cm from where stitches were picked up (all length measurements are done mid on top of sleeve), decrease 2 stitches mid under sleeve - read DECREASE TIP. Decrease every other round 2-2-3-3-4-4 times, then decrease every 4½-4-4-3-2½-2-1½ cm 8-8-8-10-10-11 times, 10-11-11-13-14-15 times in total = 36-38-40-40-42-44 stitches. Continue to work until sleeve measures 46-45-46-45-44-43 cm. 6 cm remain until finished measurements. Try the jacket and work to desired length before rib. Knit 1 round while increasing 8-6-8-8-10-8 stitches evenly = 44-44-48-48-52-52 stitches. Switch to double pointed needles size 5.5 mm. Work rib (knit 2/purl 2) for 6 cm. Cast off. Sleeve measures approx. 52-51-52-51-50-49 cm. ASSEMBLY: Sew buttons on to left front piece. Sew the loose bands together mid back, and sew on to cast-on edge at the back of neck. |
|||||||
Diagram explanations |
|||||||
|
|||||||
 |
|||||||
 |
|||||||
Have you finished this pattern?Tag your pictures with #dropspattern #irishmorningcardigan or submit them to the #dropsfan gallery. Do you need help with this pattern?You'll find 40 tutorial videos, a Comments/Questions area and more by visiting the pattern on garnstudio.com. © 1982-2026 DROPS Design A/S. We reserve all rights. This document, including all its sub-sections, has copyrights. Read more about what you can do with our patterns at the bottom of each pattern on our site. |
|||||||


With over 40 years in knitting and crochet design, DROPS Design offers one of the most extensive collections of free patterns on the internet - translated to 17 languages. As of today we count 324 catalogues and 12290 patterns translated into English (UK/cm).
We work hard to bring you the best knitting and crochet have to offer, inspiration and advice as well as great quality yarns at incredible prices! Would you like to use our patterns for other than personal use? You can read what you are allowed to do in the Copyright text at the bottom of all our patterns. Happy crafting!
Post a comment to pattern DROPS 249-14
We would love to hear what you have to say about this pattern!
If you want to leave a question, please make sure you select the correct category in the form below, to speed up the answering process. Required fields are marked *.